Zirco Mesa: Difference between revisions
mNo edit summary |
mNo edit summary |
||
| Line 2: | Line 2: | ||
| image = [[File:Zirco-Mesa.jpg|400px]] | | image = [[File:Zirco-Mesa.jpg|400px]] | ||
| caption = | | caption = | ||
| game = ''[[The Legend of Zelda: Breath of the Wild|Breath of the Wild]]'' | | game = ''[[The Legend of Zelda: Breath of the Wild|Breath of the Wild]]''<br/>''[[The Legend of Zelda: Tears of the Kingdom|Tears of the Kingdom]]'' | ||
| enemies = | | enemies = | ||
| inhab = | | inhab = | ||
| Line 12: | Line 12: | ||
}} | }} | ||
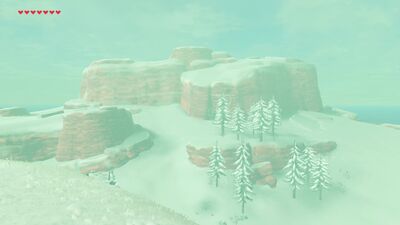
The '''Zirco Mesa''' is a location in ''[[The Legend of Zelda: Breath of the Wild|Breath of the Wild]]''. | The '''Zirco Mesa''' is a location in ''[[The Legend of Zelda: Breath of the Wild|Breath of the Wild]]'' and ''[[The Legend of Zelda: Tears of the Kingdom|Tears of the Kingdom]]''. | ||
==''Breath of the Wild''== | ==''Breath of the Wild''== | ||
| Line 34: | Line 34: | ||
===Animals=== | ===Animals=== | ||
<gallery mode=nolines> | |||
File:Cold-footed-wolf.jpg|[[Cold-Footed Wolf]] | |||
File:Mountain-doe.jpg|[[Mountain Doe]] | |||
File:Mountain-goat.jpg|[[Mountain Goat]] | |||
</gallery> | |||
===Enemies=== | ===Enemies=== | ||
<gallery mode=nolines> | |||
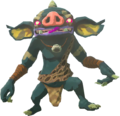
File:Blue-Bokoblin-Model.png|[[Blue Bokoblin]] | |||
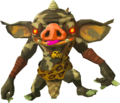
File:Black-Bokoblin-Model.png|[[Black Bokoblin]] | |||
File:Ice-keese.jpg|[[Ice Keese]] | |||
File:Ice-Breath-Lizalfos.png|[[Ice-Breath Lizalfos]] | |||
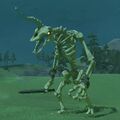
File:Stalmoblin.jpg|[[Stalmoblin]] | |||
File:Treasure-octorok.jpg|[[Treasure Octorok]] | |||
</gallery> | |||
===Materials=== | ===Materials=== | ||
<gallery mode=nolines> | |||
File:Chillshroom.png|[[Chillshroom]] | |||
File:Rushroom.png|[[Rushroom]] | |||
</gallery> | |||
| Line 65: | Line 65: | ||
{{Cat|Breath of the Wild Locations}} | {{Cat|Breath of the Wild Gerudo Locations}} | ||
{{cat|Tears of the Kingdom Gerudo Locations}} | |||
Revision as of 17:04, June 22, 2023
The Zirco Mesa is a location in Breath of the Wild and Tears of the Kingdom.
Breath of the Wild
The Zirco Mesa is one of the higher elevations in the snow region of the Gerudo Highlands. As with most of the region, the temperature is bitterly cold, requiring Link to wear armor with Cold Resistance, such as the Snowquill Set.
Just northwest of the Mesa, there is a fairly large enemy base that has some Blue Bokoblin, Black Bokoblin, and Ice-Breath Lizalfos. There is a wooden treasure chest at the top of the camp that contains ten Arrows. The camp itself looks down to the west, as there is a gradual slope, leading up to the Zirco Mesa. Just to the east of the camp, there is a large bridge that connects the Zirco Mesa with the Laparoh Mesa to the north.
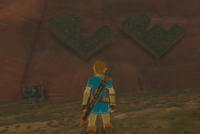
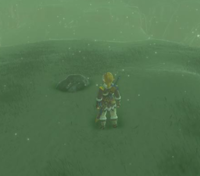
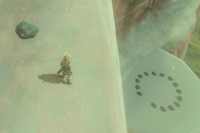
On the highest plateau on the mesa, there is a small rock that Link can pickup to find a Korok. A number of other Koroks can be found on the outskirts of the area, down the sides of the cliffs of the mountain. A block puzzle can be found way down the cliff to the southeast. A bit northeast of the Mesa, on the lower elevation, the is a circle of rocks with one nearby rock missing. Similarly, there is another circle of rocks on a lower elevation just southwest of the Zirco Mesa.
Just northwest of the Mesa on the lower elevation, there is a bombable wall that leads to a cave beneath the Mesa. This area is littered with Ice Keese and has a number of Luminous Stone Deposits. A Dragonbone Moblin Club can be found sitting on the higher ledge within the cave.
There are a handful of treasure chests to be found in the region, with a variety of goods.
- Arrows ×10 - In a wooden chest at the top of the enemy base, northwest of the Mesa.
- Fire Arrows ×10 - Near the trees, northwest of the Mesa.
- Shock Arrows ×5 - In a buried treasure chest at the north end of the Mesa.
- Amber - Right near the center of the Mesa.
- Moonlight Scimitar - Near some Treasure Octoroks at the southeast part of the Mesa.
- Fire Arrows - In a chest at the south end of the Mesa.
- Arrows ×5 - Southeast of the Mesa, on a slightly lower platform.
Animals
Enemies
Materials
Nearby Korok Seeds
Solve the block puzzle.
Pick up the rock.
Complete the rock circle.


