Great Cliffs: Difference between revisions
m (Changed "right" to "east") |
No edit summary |
||
| (3 intermediate revisions by 2 users not shown) | |||
| Line 1: | Line 1: | ||
{{Infobox|location | {{Infobox|location | ||
| image = [[File:Great-Cliffs.jpg|400px]] | | image = [[File:Great-Cliffs.jpg|400px]] | ||
| game = ''[[The Legend of Zelda: Breath of the Wild|Breath of the Wild]]'' | | caption = | ||
| inhab | | game = ''[[The Legend of Zelda: Breath of the Wild|Breath of the Wild]]''<br/>''[[The Legend of Zelda: Tears of the Kingdom|Tears of the Kingdom]]'' | ||
| enemies = | |||
| inhab = | |||
| pointsint = | | pointsint = | ||
| item | | location = | ||
| item = | |||
| natseason = | | natseason = | ||
| related = [[Birida Lookout]]<br/>[[Gerudo Desert Gateway]]<br/>[[Kara Kara Bazaar]]<br/>[[North Icehouse]]<br/>[[Gerudo Desert (Breath of the Wild)|Gerudo Desert]] | | related = [[Birida Lookout]]<br/>[[Gerudo Desert Gateway]]<br/>[[Kara Kara Bazaar]]<br/>[[North Icehouse]]<br/>[[Gerudo Desert (Breath of the Wild)|Gerudo Desert]] | ||
}} | }} | ||
The '''Great Cliffs''' is a location found in ''[[The Legend of Zelda: Breath of the Wild|Breath of the Wild]]''. | The '''Great Cliffs''' is a location found in ''[[The Legend of Zelda: Breath of the Wild|Breath of the Wild]]'' and ''[[The Legend of Zelda: Tears of the Kingdom|Tears of the Kingdom]]''. | ||
== | ==''Breath of the Wild''== | ||
The Great Cliffs are a region found at the northeast end of the [[Gerudo Desert (Breath of the Wild)|Gerudo Desert]]. The area is easily identified by a perpetual sandstorm, bringing visibility close to zero and making it impossible for Link to view his map. However, during the hours of 9pm and 4am, the sandstorm subsides, making it more possible to navigate the region. After Link has completed the [[Dako Tah Shrine]], the sandstorm will subside, allowing Link to travel the area freely, day or night. | The Great Cliffs are a region found at the northeast end of the [[Gerudo Desert (Breath of the Wild)|Gerudo Desert]]. The area is easily identified by a perpetual sandstorm, bringing visibility close to zero and making it impossible for Link to view his map. However, during the hours of 9pm and 4am, the sandstorm subsides, making it more possible to navigate the region. After Link has completed the [[Dako Tah Shrine]], the sandstorm will subside, allowing Link to travel the area freely, day or night. | ||
| Line 18: | Line 21: | ||
To the northeast of the Great Cliffs, there is a path in the sand that passes in between the higher cliffs on the sides. This eventually leads to another treasure chest which contains a [[Diamond]]. | To the northeast of the Great Cliffs, there is a path in the sand that passes in between the higher cliffs on the sides. This eventually leads to another treasure chest which contains a [[Diamond]]. | ||
==The Eye of the Sandstorm== | ===The Eye of the Sandstorm=== | ||
{{main|The Eye of the Sandstorm}} | {{main|The Eye of the Sandstorm}} | ||
After speaking with [[Nobiro]] at the [[Kara Kara Bazaar]], he mentions that there is a treasure hidden in the Great Cliffs, but since the sandstorm is always around, he cannot seem to explore. This will begin [[The Eye of the Sandstorm]] shrine quest. Nobiro has heard rumors that the sandstorm subsides at some point. At nighttime Link can freely explore the Great Cliffs and he will find the Dako Tah Shrine. The shrine is the treasure that Nobiro had heard about and once Link has activated the pedestal, the [[Shrine Quest]] will be complete. | After speaking with [[Nobiro]] at the [[Kara Kara Bazaar]], he mentions that there is a treasure hidden in the Great Cliffs, but since the sandstorm is always around, he cannot seem to explore. This will begin [[The Eye of the Sandstorm]] shrine quest. Nobiro has heard rumors that the sandstorm subsides at some point. At nighttime Link can freely explore the Great Cliffs and he will find the Dako Tah Shrine. The shrine is the treasure that Nobiro had heard about and once Link has activated the pedestal, the [[Shrine Quest]] will be complete. | ||
==Animals== | ===Animals=== | ||
<gallery mode=nolines> | |||
File:Pink-heron.jpg|[[Pink Heron]] | |||
File:Sand-seal.jpg|[[Sand Seal]] | |||
File:Wasteland-coyote.jpg|[[Wasteland Coyote]] | |||
</gallery> | |||
==Enemies== | ===Enemies=== | ||
<gallery mode=nolines> | |||
File:Green-Lizalfos.png|[[Lizalfos]] | |||
File:Blue-Lizalfos.png|[[Blue Lizalfos]] | |||
File:Black-Lizalfos.png|[[Black Lizalfos]] | |||
File:Electric-Lizalfos.png|[[Electric Lizalfos]] | |||
File:Blue-Moblin.png|[[Blue Moblin]] | |||
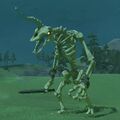
File:Stalmoblin.jpg|[[Stalmoblin]] | |||
</gallery> | |||
==Materials== | ===Materials=== | ||
<gallery mode=nolines> | |||
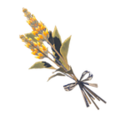
File:Electric_Safflina.png|[[Electric Safflina]] | |||
File:Rushroom.png|[[Rushroom]] | |||
File:Warm_Safflina.png|[[Warm Safflina]] | |||
File:Zapshroom.png|[[Zapshroom]] | |||
</gallery> | |||
==Nearby Korok Seeds== | ===Nearby Korok Seeds=== | ||
<section begin=Seed039summary />[[File:Korok039.png|200px|thumb|left|Solve the Magnesis block puzzle.]]<section end=Seed039summary />Solve the Magnesis block puzzle.{{Korok Seed|Seed039}}{{Clear|left}} | <section begin=Seed039summary />[[File:Korok039.png|200px|thumb|left|Solve the Magnesis block puzzle.]]<section end=Seed039summary />Solve the Magnesis block puzzle.{{Korok Seed|Seed039}}{{Clear|left}} | ||
<section begin=Seed601summary />[[File:Korok601.png|200px|thumb|left|This Magnesis puzzle is more spread out than most. Solution is on the west wall, puzzle on the east, and block's in the middle.]]<section end=Seed601summary />This Magnesis puzzle is spread out. The solution's on the west wall, puzzle's on the east, and the block's in the middle. In the picture, the solid red spot is where the block goes.{{Korok Seed|Seed601}}{{Clear|left}} | <section begin=Seed601summary />[[File:Korok601.png|200px|thumb|left|This Magnesis puzzle is more spread out than most. Solution is on the west wall, puzzle on the east, and block's in the middle.]]<section end=Seed601summary />This Magnesis puzzle is spread out. The solution's on the west wall, puzzle's on the east, and the block's in the middle. In the picture, the solid red spot is where the block goes.{{Korok Seed|Seed601}}{{Clear|left}} | ||
{{Cat|Breath of the Wild Locations}} | ==''Tears of the Kingdom''== | ||
{{TotK-Stub|section}} | |||
===Korok Seeds=== | |||
*At the far north end of the great cliffs, on the ground level, there is a block puzzle. Place the pieces in the correct location to get the [[Korok Seed]]. | |||
{{Cat|Breath of the Wild Gerudo Locations}} | |||
{{cat|Tears of the Kingdom Gerudo Locations}} | |||
Latest revision as of 16:58, January 29, 2024
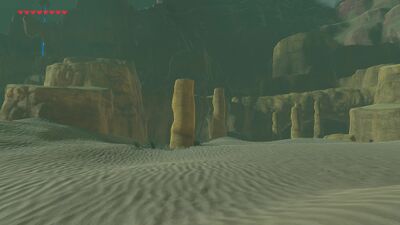
The Great Cliffs is a location found in Breath of the Wild and Tears of the Kingdom.
Breath of the Wild
The Great Cliffs are a region found at the northeast end of the Gerudo Desert. The area is easily identified by a perpetual sandstorm, bringing visibility close to zero and making it impossible for Link to view his map. However, during the hours of 9pm and 4am, the sandstorm subsides, making it more possible to navigate the region. After Link has completed the Dako Tah Shrine, the sandstorm will subside, allowing Link to travel the area freely, day or night.
At the east side of the cliffs there is an enemy camp with a series of Lizalfos and Keese. After defeating them all, a treasure chest will unlock containing a Gerudo Spear. A second treasure chest can be found just northwest of the shrine, on top of a thin, but very tall pillar. This chest contains ten Ice Arrows.
To the northeast of the Great Cliffs, there is a path in the sand that passes in between the higher cliffs on the sides. This eventually leads to another treasure chest which contains a Diamond.
The Eye of the Sandstorm
- Main article: The Eye of the Sandstorm
After speaking with Nobiro at the Kara Kara Bazaar, he mentions that there is a treasure hidden in the Great Cliffs, but since the sandstorm is always around, he cannot seem to explore. This will begin The Eye of the Sandstorm shrine quest. Nobiro has heard rumors that the sandstorm subsides at some point. At nighttime Link can freely explore the Great Cliffs and he will find the Dako Tah Shrine. The shrine is the treasure that Nobiro had heard about and once Link has activated the pedestal, the Shrine Quest will be complete.
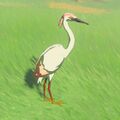
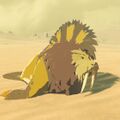
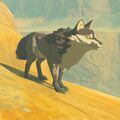
Animals
Enemies
Materials
Nearby Korok Seeds
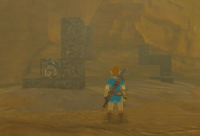
Solve the Magnesis block puzzle.
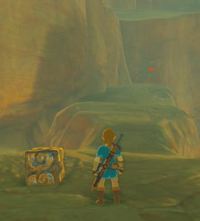
This Magnesis puzzle is spread out. The solution's on the west wall, puzzle's on the east, and the block's in the middle. In the picture, the solid red spot is where the block goes.
Tears of the Kingdom
| This Tears of the Kingdom section is a stub. You can help the Zelda Dungeon Wiki by expanding it. |
Korok Seeds
- At the far north end of the great cliffs, on the ground level, there is a block puzzle. Place the pieces in the correct location to get the Korok Seed.


