Gallery:Breath of the Wild: Difference between revisions
No edit summary |
m (→Enemies) |
||
| (8 intermediate revisions by one other user not shown) | |||
| Line 3: | Line 3: | ||
==Scene Artwork== | ==Scene Artwork== | ||
<gallery widths=200> | <gallery widths=200> | ||
File:BOTW Guide Cover.jpg | |||
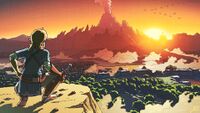
File:Link looking over BOTW Hyrule.jpg|Artwork used for US & Japanese covers | File:Link looking over BOTW Hyrule.jpg|Artwork used for US & Japanese covers | ||
File:Link looking back from BOTW Hyrule.jpg|Artwork used for European covers | File:Link looking back from BOTW Hyrule.jpg|Artwork used for European covers | ||
File: | File:View Across Hyrule - BotW key art.jpg|Background of left image, in isolation | ||
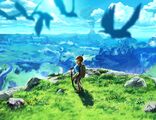
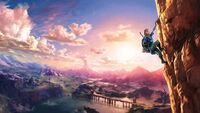
File:Link Climbing Gerudo Highlands - BOTW art.jpg | File:Link Climbing Gerudo Highlands - BOTW art.jpg | ||
File:BotW Edge Cover Official Illustration.png | |||
File:BotW Expansion Pass Key Art.png|Key art used for [[Breath of the Wild Expansion Pass|Expansion Pass]] promotion | |||
File:Link readied Zelda praying - BOTW art.jpg|Variant of the Expansion Pass art, used for pre-paid download cards | |||
File:Gold-lynel-artwork.jpg|Artwork used for DLC1: The Master Trials | File:Gold-lynel-artwork.jpg|Artwork used for DLC1: The Master Trials | ||
File:Champions-ballad.jpg|Artwork used for DLC2: The Champions' Ballad (Zelda version) | File:Champions-ballad.jpg|Artwork used for DLC2: The Champions' Ballad (Zelda version) | ||
File:Champions-Ballad Link group.png|Artwork used for DLC2: The Champions' Ballad (Link version) | File:Champions-Ballad Link group.png|Artwork used for DLC2: The Champions' Ballad (Link version) | ||
File:Master-cycle-2.jpg|Artwork used for DLC2: The Champions' Ballad | File:Master-cycle-2.jpg|Artwork used for DLC2: The Champions' Ballad | ||
File:BOTW Master Sword happybirthday Zelda - BotW art.jpg | |||
File:Champions Gathered - BOTW art.jpg | |||
File:Champions Artwork 2.png | |||
File:BOTW homage to TLOZ art.jpg | File:BOTW homage to TLOZ art.jpg | ||
File:BOTW The Adventure Begins.jpg | File:BOTW The Adventure Begins.jpg | ||
File:BOTW one-year anniversary art.jpg | File:BOTW one-year anniversary art.jpg | ||
File:Link has a pumpkin to climb - BOTW art.jpg | File:Link has a pumpkin to climb - BOTW art.jpg | ||
File:Links by an open fire - BOTW art.jpg | File:Links by an open fire - BOTW art.jpg | ||
File:Links on Valentine Day - BOTW art.jpg | File:Links on Valentine Day - BOTW art.jpg | ||
File:Links Snow Day - BOTW art.jpg | File:Links Snow Day - BOTW art.jpg | ||
File:BOTW Creating a Champion cover.jpg|[[The Legend of Zelda: Breath of the Wild - Creating a Champion|Creating a Champion]] cover | |||
</gallery> | </gallery> | ||
| Line 36: | Line 42: | ||
<gallery widths=160 heights=90> | <gallery widths=160 heights=90> | ||
File:E3 2016 BOTW background (2160p) 01.jpg|Link looking out over the [[Great Plateau]] immediately after leaving the [[Shrine of Resurrection]] | File:E3 2016 BOTW background (2160p) 01.jpg|Link looking out over the [[Great Plateau]] immediately after leaving the [[Shrine of Resurrection]] | ||
File:E3 2016 BOTW background (2160p) 02.jpg | File:E3 2016 BOTW background (2160p) 02.jpg|A similar angle, from the roof of the Shrine of Resurrection | ||
File:E3 2016 BOTW background (2160p) 03.jpg|Interior of [[Ja Baij Shrine]] (Bomb Trial) | File:E3 2016 BOTW background (2160p) 03.jpg|Interior of [[Ja Baij Shrine]] (Bomb Trial) | ||
File:E3 2016 BOTW background (2160p) 04.jpg|Exterior of [[Oman Au Shrine]] (Magnesis Trial) | File:E3 2016 BOTW background (2160p) 04.jpg|Exterior of [[Oman Au Shrine]] (Magnesis Trial) | ||
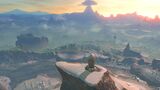
File:E3 2016 BOTW background (2160p) 05.jpg|[[Great Plateau Tower]] | File:E3 2016 BOTW background (2160p) 05.jpg|View past the [[Great Plateau Tower]], toward the [[Gerudo Highlands]] | ||
File:E3 2016 BOTW background (2160p) 06.jpg|On the north bank of the [[River of the Dead]] facing south, toward the general direction of [[Keh Namut Shrine]] | File:E3 2016 BOTW background (2160p) 06.jpg|On the north bank of the [[River of the Dead]] facing south, toward the general direction of [[Keh Namut Shrine]] | ||
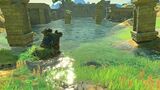
File:E3 2016 BOTW background (2160p) 07.jpg|Crumbled gateway between the [[Temple of Time (Breath of the Wild)|Temple of Time]] and the River of the Dead | File:E3 2016 BOTW background (2160p) 07.jpg|Crumbled gateway between the [[Temple of Time (Breath of the Wild)|Temple of Time]] and the River of the Dead | ||
File:E3 2016 BOTW background (2160p) 08.jpg|The buried [[Stone Talus]] in the [[Forest of Spirits]] clearing, daylight | File:E3 2016 BOTW background (2160p) 08.jpg|The buried [[Stone Talus]] in the [[Forest of Spirits]] clearing, daylight | ||
File:E3 2016 BOTW background (2160p) 09.jpg|The buried Stone Talus in the Forest of Spirits clearing, sunset | File:E3 2016 BOTW background (2160p) 09.jpg|The buried Stone Talus in the Forest of Spirits clearing, sunset | ||
File:E3 2016 BOTW background (2160p) 10.jpg | File:E3 2016 BOTW background (2160p) 10.jpg|A drowned [[Decayed Guardian]], just west of Great Plateau Tower | ||
File:E3 2016 BOTW background (2160p) 11.jpg | File:E3 2016 BOTW background (2160p) 11.jpg|Chest containing a pair of [[Hylian Trousers]] in the north-eastmost of the three ruined buildings immediately north of the Temple of Time. | ||
File:E3 2016 BOTW background (2160p) 12.jpg | File:E3 2016 BOTW background (2160p) 12.jpg|In the Forest of Spirits, looking toward the Shrine of Resurrection. | ||
File:E3 2016 BOTW background (2160p) 13.jpg | File:E3 2016 BOTW background (2160p) 13.jpg|Looking over [[Mount Hylia]] toward [[Death Mountain (Breath of the Wild)|Death Mountain]] | ||
</gallery> | |||
===Jan 2017=== | |||
<gallery widths=160 heights=90> | |||
File:TLOZBreathoftheWild_Presentation2017_scrn00.jpg | |||
File:TLOZBreathoftheWild_Presentation2017_scrn01.png | |||
File:TLOZBreathoftheWild_Presentation2017_scrn02.png | |||
File:TLOZBreathoftheWild_Presentation2017_scrn03.png | |||
File:TLOZBreathoftheWild_Presentation2017_scrn04.png | |||
File:TLOZBreathoftheWild_Presentation2017_scrn05.png | |||
File:TLOZBreathoftheWild_Presentation2017_scrn06.png | |||
File:TLOZBreathoftheWild_Presentation2017_scrn07.png | |||
File:TLOZBreathoftheWild_Presentation2017_scrn08.png | |||
File:TLOZBreathoftheWild_Presentation2017_scrn09.png | |||
File:TLOZBreathoftheWild_Presentation2017_scrn10.png | |||
File:TLOZBreathoftheWild_Presentation2017_scrn11.png | |||
File:TLOZBreathoftheWild_Presentation2017_scrn12.png | |||
File:TLOZBreathoftheWild_Presentation2017_scrn13.png | |||
File:TLOZBreathoftheWild_Presentation2017_scrn14.png | |||
File:TLOZBreathoftheWild_Presentation2017_scrn15.png | |||
File:TLOZBreathoftheWild_Presentation2017_scrn16.png | |||
File:TLOZBreathoftheWild_Presentation2017_scrn17.png | |||
File:TLOZBreathoftheWild_Presentation2017_scrn18.png | |||
File:TLOZBreathoftheWild_Presentation2017_scrn19.png | |||
File:TLOZBreathoftheWild_Presentation2017_scrn20.png | |||
File:TLOZBreathoftheWild_Presentation2017_scrn21.png | |||
File:TLOZBreathoftheWild_Presentation2017_scrn22.png | |||
File:TLOZBreathoftheWild_Presentation2017_scrn23.png | |||
File:TLOZBreathoftheWild_Presentation2017_scrn24.png | |||
File:TLOZBreathoftheWild_Presentation2017_scrn25.png | |||
File:TLOZBreathoftheWild_Presentation2017_scrn26.png | |||
File:TLOZBreathoftheWild_Presentation2017_scrn27.png | |||
File:TLOZBreathoftheWild_Presentation2017_scrn28.png | |||
File:TLOZBreathoftheWild_Presentation2017_scrn29.png | |||
File:TLOZBreathoftheWild_Presentation2017_scrn30.png | |||
File:TLOZBreathoftheWild_Presentation2017_scrn31.png | |||
File:TLOZBreathoftheWild_Presentation2017_scrn32.png | |||
File:TLOZBreathoftheWild_Presentation2017_scrn33.png | |||
File:TLOZBreathoftheWild_Presentation2017_scrn34.png | |||
File:TLOZBreathoftheWild_Presentation2017_scrn35.png | |||
File:TLOZBreathoftheWild_Presentation2017_scrn36.png | |||
File:TLOZBreathoftheWild_Presentation2017_scrn37.png | |||
File:TLOZBreathoftheWild_Presentation2017_scrn38.png | |||
File:TLOZBreathoftheWild_Presentation2017_scrn39.png | |||
File:TLOZBreathoftheWild_Presentation2017_scrn40.png | |||
File:TLOZBreathoftheWild_Presentation2017_scrn41.png | |||
</gallery> | |||
===May 2017=== | |||
Nintendo released images from "The Master Trials", the first DLC pack in the [[Breath of the Wild Expansion Pass]]: | |||
<gallery widths=160 heights=90> | |||
File:May2017_HardMode.jpg | |||
File:May2017_Hardmode_1.jpg | |||
File:May2017_Hardmode_2.jpg | |||
File:May2017_Heros_Path.jpg | |||
File:May2017_Travel_Medallion_1.jpg | |||
File:May2017_Travel_Medallion_2.jpg | |||
File:May2017_Travel_Medallion_3.jpg | |||
File:May2017_Trial_of_a_Sword_1.jpg | |||
File:May2017_Trial_of_a_Sword_3.jpg | |||
File:May2017_Trial_of_a_Sword_4.jpg | |||
</gallery> | |||
===The Game Awards 2017=== | |||
In conjunction with The Game Awards in December 2017, Nintendo released images from "The Champions' Ballad", the second and final DLC pack in the Breath of the Wild Expansion Pass: | |||
<gallery widths=160 heights=90> | |||
File:ZeldaBotW_DLC-Pack2_TGAs2017_SCRN01.png | |||
File:ZeldaBotW_DLC-Pack2_TGAs2017_SCRN02.png | |||
File:ZeldaBotW_DLC-Pack2_TGAs2017_SCRN03.png | |||
File:ZeldaBotW_DLC-Pack2_TGAs2017_SCRN04.png | |||
File:ZeldaBotW_DLC-Pack2_TGAs2017_SCRN05.png | |||
File:ZeldaBotW_DLC-Pack2_TGAs2017_SCRN06.png | |||
File:ZeldaBotW_DLC-Pack2_TGAs2017_SCRN07.png | |||
File:ZeldaBotW_DLC-Pack2_TGAs2017_SCRN08.png | |||
File:ZeldaBotW_DLC-Pack2_TGAs2017_SCRN09.png | |||
File:ZeldaBotW_DLC-Pack2_TGAs2017_SCRN10.png | |||
File:ZeldaBotW_DLC-Pack2_TGAs2017_SCRN11.png | |||
File:ZeldaBotW_DLC-Pack2_TGAs2017_SCRN12.png | |||
File:ZeldaBotW_DLC-Pack2_TGAs2017_SCRN13.png | |||
File:ZeldaBotW_DLC-Pack2_TGAs2017_SCRN14.png | |||
File:ZeldaBotW_DLC-Pack2_TGAs2017_SCRN15.png | |||
File:ZeldaBotW_DLC-Pack2_TGAs2017_SCRN16.png | |||
File:ZeldaBotW_DLC-Pack2_TGAs2017_SCRN17.png | |||
</gallery> | </gallery> | ||
| Line 55: | Line 144: | ||
File:Ancient-horse-armor.jpg | File:Ancient-horse-armor.jpg | ||
File:Blue-Concept-Art.png | File:Blue-Concept-Art.png | ||
File:BotW Link Concept Artwork.jpg | |||
File:Daruk - Concept Art.jpg | |||
File:Pre-Champion Daruk Concept Art.png | |||
File:Donkey - BOTW concept art.jpg | File:Donkey - BOTW concept art.jpg | ||
File:Ganon-armor.jpg | File:Ganon-armor.jpg | ||
| Line 64: | Line 156: | ||
File:Majora's Mask BOTW concept art.jpg | File:Majora's Mask BOTW concept art.jpg | ||
File:Midna's Helmet BOTW concept art.jpg | File:Midna's Helmet BOTW concept art.jpg | ||
File:Mipha - Concept Art.jpg | |||
File:Pre-Champion Mipha - Concept Art.png | |||
File:Mountain Buck - BOTW concept art.jpg | File:Mountain Buck - BOTW concept art.jpg | ||
File:Old-Man-Concept-Art.png | File:Old-Man-Concept-Art.png | ||
File:Phantom Armor BOTW concept art.jpg | File:Phantom Armor BOTW concept art.jpg | ||
File:Ravio-hood.jpg | File:Ravio-hood.jpg | ||
File:Revali - Concept Art.png | |||
File:Pre-Champion Revali - Concept Art.png | |||
File:Royal-guard.jpg | File:Royal-guard.jpg | ||
File:Shrine of Trials elevator - BOTW concept art.jpg | File:Shrine of Trials elevator - BOTW concept art.jpg | ||
File:Urbosa - Concept Art.png | |||
File:Pre-Champion Urbosa - Concept Art.png | |||
File:Warm Doublet concept art.jpg | File:Warm Doublet concept art.jpg | ||
File:Zant-helm.jpg | File:Zant-helm.jpg | ||
File:Zelda Concept Artwork.jpg | |||
File:Zelda's Formal Wear.png | |||
File:BotW Winter Wear Zelda.png | |||
</gallery> | </gallery> | ||
| Line 93: | Line 194: | ||
File:Calamity-Ganon-Art.png | File:Calamity-Ganon-Art.png | ||
File:BotW Bokoblin.png | File:BotW Bokoblin.png | ||
File:Bokoblin Icon.png | |||
File:BotW-Guardian.png | File:BotW-Guardian.png | ||
</gallery> | </gallery> | ||
<gallery showfilename=yes> | |||
</gallery> | |||
{{Galleries}} | {{Galleries}} | ||
{{cat|Breath of the Wild}} | {{cat|Breath of the Wild}} | ||
Latest revision as of 18:08, April 13, 2023
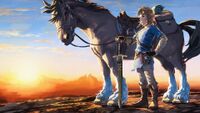
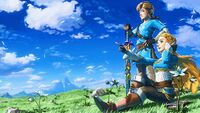
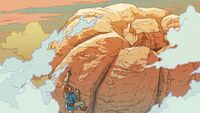
Below is a collection of official artwork and other media from Breath of the Wild
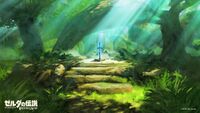
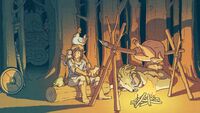
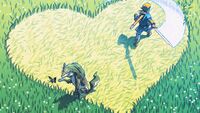
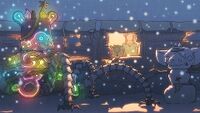
Scene Artwork

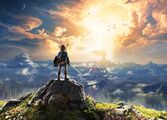
Artwork used for US & Japanese covers
Artwork used for European covers
Background of left image, in isolation
Key art used for Expansion Pass promotion

Variant of the Expansion Pass art, used for pre-paid download cards
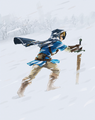
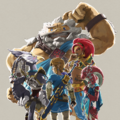
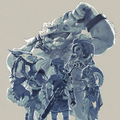
Artwork used for DLC1: The Master Trials
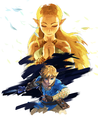
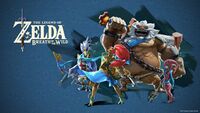
Artwork used for DLC2: The Champions' Ballad (Zelda version)
Artwork used for DLC2: The Champions' Ballad (Link version)

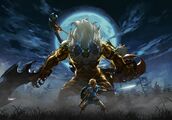
Artwork used for DLC2: The Champions' Ballad
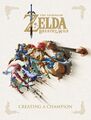
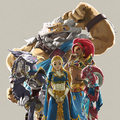
Creating a Champion cover


Press Kit images
E3 2014
_01.png)
_02.png)
_03.png)
_04.png)
E3 2016
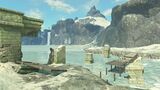
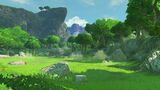
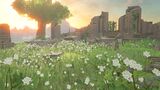
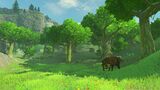
At E3 2016, Nintendo released thirteen UHD images of locations on the Great Plateau:
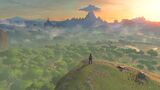
Link looking out over the Great Plateau immediately after leaving the Shrine of Resurrection
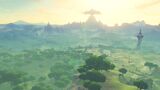
A similar angle, from the roof of the Shrine of Resurrection
Interior of Ja Baij Shrine (Bomb Trial)
Exterior of Oman Au Shrine (Magnesis Trial)
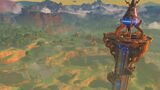
View past the Great Plateau Tower, toward the Gerudo Highlands
On the north bank of the River of the Dead facing south, toward the general direction of Keh Namut Shrine
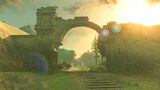
Crumbled gateway between the Temple of Time and the River of the Dead
The buried Stone Talus in the Forest of Spirits clearing, daylight

The buried Stone Talus in the Forest of Spirits clearing, sunset
A drowned Decayed Guardian, just west of Great Plateau Tower
Chest containing a pair of Hylian Trousers in the north-eastmost of the three ruined buildings immediately north of the Temple of Time.
In the Forest of Spirits, looking toward the Shrine of Resurrection.
Looking over Mount Hylia toward Death Mountain
_01.jpg)
_02.jpg)
_03.jpg)
_04.jpg)


_07.jpg)
_08.jpg)
_09.jpg)
_10.jpg)
_11.jpg)
_12.jpg)
_13.jpg)
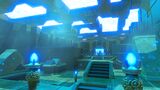
Jan 2017


May 2017
Nintendo released images from "The Master Trials", the first DLC pack in the Breath of the Wild Expansion Pass:


The Game Awards 2017
In conjunction with The Game Awards in December 2017, Nintendo released images from "The Champions' Ballad", the second and final DLC pack in the Breath of the Wild Expansion Pass:


Concept art
- See also: Gallery:Breath of the Wild Armor


Characters
- Main article: Gallery:Breath of the Wild Characters


Enemies
- Main article: Gallery:Breath of the Wild Enemies


