Lanayru Bay: Difference between revisions
mNo edit summary |
mNo edit summary |
||
| Line 2: | Line 2: | ||
| image = [[File:Lanayru Bay - BOTW Wii U.jpg|400px]] | | image = [[File:Lanayru Bay - BOTW Wii U.jpg|400px]] | ||
| caption = | | caption = | ||
| game = ''[[The Legend of Zelda: Breath of the Wild|Breath of the Wild]]'' | | game = ''[[The Legend of Zelda: Breath of the Wild|Breath of the Wild]]''<br/>''[[The Legend of Zelda: Tears of the Kingdom|Tears of the Kingdom]]'' | ||
| inhab = | | inhab = | ||
| pointsint = | | pointsint = | ||
| Line 10: | Line 10: | ||
| related = [[Trotter's Downfall]]<br/>[[Samasa Plain]]<br/>[[Brynna Plain]]<br/>[[Horon Lagoon]]<br/>[[Talus Plateau]]<br/>[[Lodrum Headland]]<br/>[[Tarm Point]]<br/>[[Wintre Island]]<br/>[[Mount Lanayru]] | | related = [[Trotter's Downfall]]<br/>[[Samasa Plain]]<br/>[[Brynna Plain]]<br/>[[Horon Lagoon]]<br/>[[Talus Plateau]]<br/>[[Lodrum Headland]]<br/>[[Tarm Point]]<br/>[[Wintre Island]]<br/>[[Mount Lanayru]] | ||
}} | }} | ||
'''Lanayru Bay''' is a location from ''[[The Legend of Zelda: Breath of the Wild|Breath of the Wild]]''. | '''Lanayru Bay''' is a location from ''[[The Legend of Zelda: Breath of the Wild|Breath of the Wild]]'' and ''[[The Legend of Zelda: Tears of the Kingdom|Tears of the Kingdom]]''. | ||
==''Breath of the Wild''== | ==''Breath of the Wild''== | ||
| Line 20: | Line 20: | ||
===Enemies=== | ===Enemies=== | ||
<gallery mode=nolines> | |||
File:Blue-Lizalfos.png|[[Blue Lizalfos]] | |||
File:Water-Octorok.png|[[Water Octorok]] | |||
</gallery> | |||
===Materials=== | ===Materials=== | ||
<gallery mode=nolines> | |||
File:Armored_Porgy.png|[[Armored Porgy]] | |||
File:Mighty_Porgy.png|[[Mighty Porgy]] | |||
File:Hearty_Blueshell_Snail.png|[[Hearty Blueshell Snail]] | |||
File:Hot-footed-frog.png|[[Hot-Footed Frog]] | |||
</gallery> | |||
===Nearby Korok Seeds=== | ===Nearby Korok Seeds=== | ||
| Line 44: | Line 44: | ||
<section begin=Seed487summary />[[File:Korok487.png|200px|thumb|left|Pick up this rock.]]<section end=Seed487summary />Pick up the rock.{{Korok Seed|Seed487}}{{Clear|left}} | <section begin=Seed487summary />[[File:Korok487.png|200px|thumb|left|Pick up this rock.]]<section end=Seed487summary />Pick up the rock.{{Korok Seed|Seed487}}{{Clear|left}} | ||
{{Cat|Breath of the Wild Locations}} | {{Cat|Breath of the Wild Lanayru Locations}} | ||
{{cat|Tears of the Kingdom Lanayru Locations}} | |||
Revision as of 16:50, June 22, 2023
Lanayru Bay is a location from Breath of the Wild and Tears of the Kingdom.
Breath of the Wild
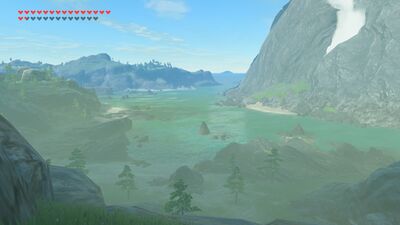
Lanayru Bay is a large body of water, found just north of Mount Lanayru. The Bay is situated just south of the Samasa Plain and Brynna Plain. Horon Lagoon sits to the north-east of the bay, between Brynna Plain and Talus Plateau. Wintre Island is in the middle of the mouth of the bay, just south of Tarm Point. The Lanayru Bay spills out into the larger Lanayru Sea located to the east.
Near the center of the bay, there is a Raft that Link can use to travel across the water. There are two treasure chests underwater just south of the raft, containing a Purple Rupee and Silver Rupee. Just to the east of the raft there are two more treasure chests buried, these containing five Ice Arrows and a Ruby.
In the north part of the Bay, closer to the shortline leading to the Brynna Plain, there are two more treasure chests for Link to find. One contains a Purple Rupee and the other contains five Bomb Arrows.
Enemies
Materials
Nearby Korok Seeds
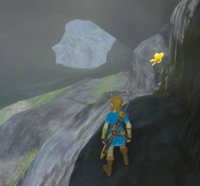
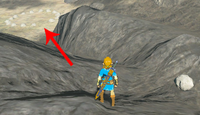
To the east is the first flower of the trail. Follow it through the tunnel to the west.
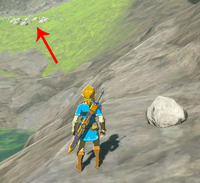
To the northwest is a rock. Use it to finish the circle.
The rock to complete the circle is a short distance away.
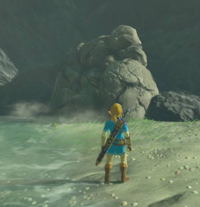
Blow up the boulders, pick up the rock under them.
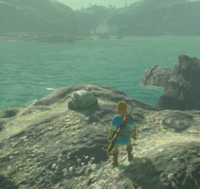
Pick up the rock.


