Kadokawa Shoten The Legend of Zelda Strategy Guide: Difference between revisions
Jump to navigation
Jump to search
Want an adless experience? Log in or Create an account.
No edit summary |
|||
| (7 intermediate revisions by 2 users not shown) | |||
| Line 1: | Line 1: | ||
{{Infobox| | {{Infobox|publication | ||
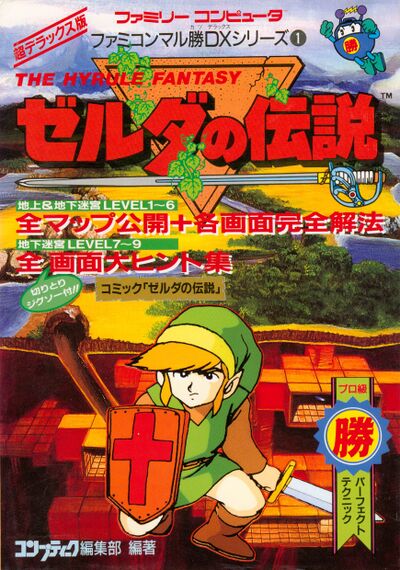
| name = | | name = Famicom Marukatsu DX series ❶: The Legend of Zelda | ||
| image = [[File:Kodakawa-Shoten-000-Cover.jpg|400px]] | | image = [[File:Kodakawa-Shoten-000-Cover.jpg|400px]] | ||
| type = [[Strategy Guides|Strategy Guide]] | | type = [[Strategy Guides|Strategy Guide]] | ||
| Line 26: | Line 26: | ||
| gallery = | | gallery = | ||
}} | }} | ||
'''''Famicom Marukatsu DX series ❶: The Legend of Zelda'''''{{ref|ファミコンマル勝DXシリーズ❶ ゼルダの伝説シリーズ}}, published by Kadokawa Shoten, is a guide to ''[[The Legend of Zelda]]'' for the [[Famicom Disk System]] | |||
==Features== | ==Features== | ||
*Includes an 11-page ''The Legend of Zelda'' " | *Includes an 11-page ''The Legend of Zelda'' "Backstory Manga", adapting the story from [[The Legend of Zelda Instruction Manual|the instruction manual]]. [[Link (The Legend of Zelda)|Link]], [[Zelda (The Legend of Zelda)|Zelda]] and [[Impa]] are all present, with Princess Zelda splitting the [[Triforce]] into eight fragments. | ||
*Appendices for the [[The Legend of Zelda Characters|characters]], [[The Legend of Zelda Enemies|enemies]], and [[The Legend of Zelda Items|items]] found within the game, including unique artwork for all of them. | *Appendices for the [[The Legend of Zelda Characters|characters]], [[The Legend of Zelda Enemies|enemies]], and [[The Legend of Zelda Items|items]] found within the game, including unique artwork for all of them. | ||
*Includes a complete, screen by screen guide of the | *Includes a complete, screen by screen guide of the Overworld, showcasing many of the secrets found. | ||
*Complete guide for the first 6 [[The Legend of Zelda Dungeons|dungeons]], including dungeon maps, and a full screen by screen guide. | *Complete guide for the first 6 [[The Legend of Zelda Dungeons|dungeons]], including dungeon maps, and a full screen by screen guide. | ||
*For dungeons 7-9, a smaller, more consolidated guide can be found, still including plenty of tips and screenshots, but in not as much detail as the earlier dungeons. | *For dungeons 7-9, a smaller, more consolidated guide can be found, still including plenty of tips and screenshots, but in not as much detail as the earlier dungeons. | ||
*No guide is provided for the [[Second Quest]]. | *No guide is provided for the [[Second Quest]]. | ||
==Scene Artwork== | |||
<gallery widths="200px" heights="200px"> | |||
File:Kodakawa-Shoten-Blue-Lynel.png | |||
File:Kodakawa-Shoten-Blue-Moblin.png | |||
File:Kodakawa-Shoten-Link-01.png | |||
File:Kodakawa-Shoten-Link-02.png | |||
File:Kodakawa-Shoten-Link-03.png | |||
File:Kodakawa-Shoten-Link-04.png | |||
File:Kodakawa-Shoten-Link-05.png | |||
File:Kodakawa-Shoten-Link-Armos.png | |||
File:Kodakawa-Shoten-Link-Blue-Ring.png | |||
File:Kodakawa-Shoten-Link-Bombs.png | |||
File:Kodakawa-Shoten-Link-Boulders.png | |||
File:Kodakawa-Shoten-Link-Bow-Arrow.png | |||
File:Kodakawa-Shoten-Link-Bubble.png | |||
File:Kodakawa-Shoten-Link-Clock.png | |||
File:Kodakawa-Shoten-Link-Compass.png | |||
File:Kodakawa-Shoten-Link-Dodongo.png | |||
File:Kodakawa-Shoten-Link-Drinking-Potion.png | |||
File:Kodakawa-Shoten-Link-Fairy.png | |||
File:Kodakawa-Shoten-Link-Gohma.png | |||
File:Kodakawa-Shoten-Link-Graveyard.png | |||
File:Kodakawa-Shoten-Link-Intro-1.png | |||
File:Kodakawa-Shoten-Link-Intro-2.png | |||
File:Kodakawa-Shoten-Link-Leevers.png | |||
File:Kodakawa-Shoten-Link-Like-Like.png | |||
File:Kodakawa-Shoten-Link-Lost-Woods.png | |||
File:Kodakawa-Shoten-Link-Magic-Book.png | |||
File:Kodakawa-Shoten-Link-Magic-Rod.png | |||
File:Kodakawa-Shoten-Link-Manhandla.png | |||
File:Kodakawa-Shoten-Link-Map-Compass.png | |||
File:Kodakawa-Shoten-Link-Riding-Raft.png | |||
File:Kodakawa-Shoten-Link-Rope.png | |||
File:Kodakawa-Shoten-Link-Rope-2.png | |||
File:Kodakawa-Shoten-Link-Triforce-1.png | |||
File:Kodakawa-Shoten-Link-Triforce-2.png | |||
File:Kodakawa-Shoten-Link-Vire.png | |||
File:Kodakawa-Shoten-Link-Wizzrobe.png | |||
File:Kodakawa-Shoten-Octoroks.png | |||
File:Kodakawa-Shoten-River-Zora.png | |||
File:Kodakawa-Shoten-Scene-01.png | |||
File:Kodakawa-Shoten-Scene-02.png | |||
File:Kodakawa-Shoten-Triforce-Pieces.png | |||
</gallery> | |||
==Scans== | ==Scans== | ||
| Line 88: | Line 134: | ||
File:Kodakawa-Shoten-049.jpg|<center>Page 049</center> | File:Kodakawa-Shoten-049.jpg|<center>Page 049</center> | ||
File:Kodakawa-Shoten-050.jpg|<center>Page 050</center> | File:Kodakawa-Shoten-050.jpg|<center>Page 050</center> | ||
File:Kodakawa-Shoten-051.jpg|<center>Page 051</center> | |||
File:Kodakawa-Shoten-052.jpg|<center>Page 052</center> | |||
File:Kodakawa-Shoten-053.jpg|<center>Page 053</center> | |||
File:Kodakawa-Shoten-054.jpg|<center>Page 054</center> | |||
File:Kodakawa-Shoten-055.jpg|<center>Page 055</center> | |||
File:Kodakawa-Shoten-056.jpg|<center>Page 056</center> | |||
File:Kodakawa-Shoten-057.jpg|<center>Page 057</center> | |||
File:Kodakawa-Shoten-058.jpg|<center>Page 058</center> | |||
File:Kodakawa-Shoten-059.jpg|<center>Page 059</center> | |||
File:Kodakawa-Shoten-060.jpg|<center>Page 060</center> | |||
File:Kodakawa-Shoten-061.jpg|<center>Page 061</center> | |||
File:Kodakawa-Shoten-062.jpg|<center>Page 062</center> | |||
File:Kodakawa-Shoten-063.jpg|<center>Page 063</center> | |||
File:Kodakawa-Shoten-064.jpg|<center>Page 064</center> | |||
File:Kodakawa-Shoten-065.jpg|<center>Page 065</center> | |||
File:Kodakawa-Shoten-066.jpg|<center>Page 066</center> | |||
File:Kodakawa-Shoten-067.jpg|<center>Page 067</center> | |||
File:Kodakawa-Shoten-068.jpg|<center>Page 068</center> | |||
File:Kodakawa-Shoten-069.jpg|<center>Page 069</center> | |||
File:Kodakawa-Shoten-070.jpg|<center>Page 070</center> | |||
File:Kodakawa-Shoten-071.jpg|<center>Page 071</center> | |||
File:Kodakawa-Shoten-072.jpg|<center>Page 072</center> | |||
File:Kodakawa-Shoten-073.jpg|<center>Page 073</center> | |||
File:Kodakawa-Shoten-074.jpg|<center>Page 074</center> | |||
File:Kodakawa-Shoten-075.jpg|<center>Page 075</center> | |||
File:Kodakawa-Shoten-076.jpg|<center>Page 076</center> | |||
File:Kodakawa-Shoten-077.jpg|<center>Page 077</center> | |||
File:Kodakawa-Shoten-078.jpg|<center>Page 078</center> | |||
File:Kodakawa-Shoten-079.jpg|<center>Page 079</center> | |||
File:Kodakawa-Shoten-080.jpg|<center>Page 080</center> | |||
File:Kodakawa-Shoten-081.jpg|<center>Page 081</center> | |||
File:Kodakawa-Shoten-082.jpg|<center>Page 082</center> | |||
File:Kodakawa-Shoten-083.jpg|<center>Page 083</center> | |||
File:Kodakawa-Shoten-084.jpg|<center>Page 084</center> | |||
File:Kodakawa-Shoten-085.jpg|<center>Page 085</center> | |||
File:Kodakawa-Shoten-086.jpg|<center>Page 086</center> | |||
File:Kodakawa-Shoten-087.jpg|<center>Page 087</center> | |||
File:Kodakawa-Shoten-088.jpg|<center>Page 088</center> | |||
File:Kodakawa-Shoten-089.jpg|<center>Page 089</center> | |||
File:Kodakawa-Shoten-090.jpg|<center>Page 090</center> | |||
File:Kodakawa-Shoten-091.jpg|<center>Page 091</center> | |||
File:Kodakawa-Shoten-092.jpg|<center>Page 092</center> | |||
File:Kodakawa-Shoten-093.jpg|<center>Page 093</center> | |||
File:Kodakawa-Shoten-094.jpg|<center>Page 094</center> | |||
File:Kodakawa-Shoten-095.jpg|<center>Page 095</center> | |||
File:Kodakawa-Shoten-096.jpg|<center>Page 096</center> | |||
File:Kodakawa-Shoten-097.jpg|<center>Page 097</center> | |||
File:Kodakawa-Shoten-098.jpg|<center>Page 098</center> | |||
File:Kodakawa-Shoten-099.jpg|<center>Page 099</center> | |||
File:Kodakawa-Shoten-100.jpg|<center>Page 100</center> | |||
File:Kodakawa-Shoten-101.jpg|<center>Page 101</center> | |||
File:Kodakawa-Shoten-102.jpg|<center>Page 102</center> | |||
File:Kodakawa-Shoten-103.jpg|<center>Page 103</center> | |||
File:Kodakawa-Shoten-104.jpg|<center>Page 104</center> | |||
File:Kodakawa-Shoten-105.jpg|<center>Page 105</center> | |||
File:Kodakawa-Shoten-106.jpg|<center>Page 106</center> | |||
File:Kodakawa-Shoten-107.jpg|<center>Page 107</center> | |||
File:Kodakawa-Shoten-108.jpg|<center>Page 108</center> | |||
File:Kodakawa-Shoten-109.jpg|<center>Page 109</center> | |||
File:Kodakawa-Shoten-110.jpg|<center>Page 110</center> | |||
File:Kodakawa-Shoten-111.jpg|<center>Page 111</center> | |||
File:Kodakawa-Shoten-112.jpg|<center>Page 112</center> | |||
File:Kodakawa-Shoten-113.jpg|<center>Page 113</center> | |||
File:Kodakawa-Shoten-114.jpg|<center>Page 114</center> | |||
File:Kodakawa-Shoten-115.jpg|<center>Page 115</center> | |||
File:Kodakawa-Shoten-116.jpg|<center>Page 116</center> | |||
File:Kodakawa-Shoten-117.jpg|<center>Page 117</center> | |||
File:Kodakawa-Shoten-118.jpg|<center>Page 118</center> | |||
File:Kodakawa-Shoten-119.jpg|<center>Page 119</center> | |||
File:Kodakawa-Shoten-120.jpg|<center>Page 120</center> | |||
File:Kodakawa-Shoten-121.jpg|<center>Page 121</center> | |||
File:Kodakawa-Shoten-122.jpg|<center>Page 122</center> | |||
File:Kodakawa-Shoten-123.jpg|<center>Page 123</center> | |||
File:Kodakawa-Shoten-124.jpg|<center>Page 124</center> | |||
File:Kodakawa-Shoten-125.jpg|<center>Page 125</center> | |||
File:Kodakawa-Shoten-126.jpg|<center>Page 126</center> | |||
File:Kodakawa-Shoten-127.jpg|<center>Page 127</center> | |||
File:Kodakawa-Shoten-128.jpg|<center>Page 128</center> | |||
File:Kodakawa-Shoten-129.jpg|<center>Page 129</center> | |||
File:Kodakawa-Shoten-130.jpg|<center>Page 130</center> | |||
File:Kodakawa-Shoten-131.jpg|<center>Page 131</center> | |||
File:Kodakawa-Shoten-132.jpg|<center>Page 132</center> | |||
File:Kodakawa-Shoten-133.jpg|<center>Page 133</center> | |||
File:Kodakawa-Shoten-134.jpg|<center>Page 134</center> | |||
File:Kodakawa-Shoten-135.jpg|<center>Page 135</center> | |||
File:Kodakawa-Shoten-136.jpg|<center>Page 136</center> | |||
File:Kodakawa-Shoten-137.jpg|<center>Page 137</center> | |||
File:Kodakawa-Shoten-138.jpg|<center>Page 138</center> | |||
File:Kodakawa-Shoten-139.jpg|<center>Page 139</center> | |||
File:Kodakawa-Shoten-140.jpg|<center>Page 140</center> | |||
File:Kodakawa-Shoten-141.jpg|<center>Page 141</center> | |||
File:Kodakawa-Shoten-142.jpg|<center>Page 142</center> | |||
File:Kodakawa-Shoten-143.jpg|<center>Page 143</center> | |||
File:Kodakawa-Shoten-144.jpg|<center>Page 144</center> | |||
File:Kodakawa-Shoten-145.jpg|<center>Page 145</center> | |||
File:Kodakawa-Shoten-146.jpg|<center>Page 146</center> | |||
File:Kodakawa-Shoten-147.jpg|<center>Page 147</center> | |||
File:Kodakawa-Shoten-148.jpg|<center>Page 148</center> | |||
File:Kodakawa-Shoten-149.jpg|<center>Page 149</center> | |||
File:Kodakawa-Shoten-150.jpg|<center>Page 150</center> | |||
File:Kodakawa-Shoten-151.jpg|<center>Page 151</center> | |||
File:Kodakawa-Shoten-152.jpg|<center>Page 152</center> | |||
File:Kodakawa-Shoten-153.jpg|<center>Page 153</center> | |||
File:Kodakawa-Shoten-154.jpg|<center>Page 154</center> | |||
File:Kodakawa-Shoten-155.jpg|<center>Page 155</center> | |||
File:Kodakawa-Shoten-156.jpg|<center>Page 156</center> | |||
File:Kodakawa-Shoten-157.jpg|<center>Page 157</center> | |||
File:Kodakawa-Shoten-158.jpg|<center>Page 158</center> | |||
File:Kodakawa-Shoten-159.jpg|<center>Page 159</center> | |||
File:Kodakawa-Shoten-160.jpg|<center>Page 160</center> | |||
File:Kodakawa-Shoten-161.jpg|<center>Page 161</center> | |||
File:Kodakawa-Shoten-162.jpg|<center>Page 162</center> | |||
File:Kodakawa-Shoten-163.jpg|<center>Page 163</center> | |||
File:Kodakawa-Shoten-164.jpg|<center>Page 164</center> | |||
File:Kodakawa-Shoten-165.jpg|<center>Page 165</center> | |||
File:Kodakawa-Shoten-166.jpg|<center>Page 166</center> | |||
File:Kodakawa-Shoten-167.jpg|<center>Page 167</center> | |||
File:Kodakawa-Shoten-168.jpg|<center>Page 168</center> | |||
File:Kodakawa-Shoten-169.jpg|<center>Page 169</center> | |||
File:Kodakawa-Shoten-170.jpg|<center>Page 170</center> | |||
File:Kodakawa-Shoten-171.jpg|<center>Page 171</center> | |||
File:Kodakawa-Shoten-172.jpg|<center>Page 172</center> | |||
File:Kodakawa-Shoten-173.jpg|<center>Page 173</center> | |||
File:Kodakawa-Shoten-174.jpg|<center>Page 174</center> | |||
File:Kodakawa-Shoten-175.jpg|<center>Page 175</center> | |||
File:Kodakawa-Shoten-176.jpg|<center>Page 176</center> | |||
File:Kodakawa-Shoten-177.jpg|<center>Page 177</center> | |||
File:Kodakawa-Shoten-178.jpg|<center>Page 178</center> | |||
File:Kodakawa-Shoten-179.jpg|<center>Page 179</center> | |||
File:Kodakawa-Shoten-180.jpg|<center>Page 180</center> | |||
File:Kodakawa-Shoten-181.jpg|<center>Page 181</center> | |||
File:Kodakawa-Shoten-182.jpg|<center>Page 182</center> | |||
File:Kodakawa-Shoten-183.jpg|<center>Page 183</center> | |||
File:Kodakawa-Shoten-184.jpg|<center>Page 184</center> | |||
File:Kodakawa-Shoten-187.jpg|<center>Page 187</center> | |||
File:Kodakawa-Shoten-188.jpg|<center>Page 188</center> | |||
File:Kodakawa-Shoten-190.jpg|<center>Page 190</center> | |||
File:Kodakawa-Shoten-191.jpg|<center>Page 191</center> | |||
File:Kodakawa-Shoten-192.jpg|<center>Page 192</center> | |||
File:Kodakawa-Shoten-193.jpg|<center>Page 193</center> | |||
File:Kodakawa-Shoten-194.jpg|<center>Page 194</center> | |||
File:Kodakawa-Shoten-195.jpg|<center>Page 195</center> | |||
</gallery> | </gallery> | ||
{{References}} | |||
{{Cat|Strategy Guides}} | {{Cat|Strategy Guides}} | ||
Latest revision as of 20:05, November 30, 2022
Famicom Marukatsu DX series ❶: The Legend of Zelda

Games | ||
Cost | ¥690 (yen) | |
Release Date |
| |
| Credits | ||
|---|---|---|
Publisher | Kadokawa Shoten | |
| Attributes | ||
Type | ||
Language | Japanese | |
Length | 189 Pages | |
ISBN | 4-04-707002-5 | |
Famicom Marukatsu DX series ❶: The Legend of Zelda[1], published by Kadokawa Shoten, is a guide to The Legend of Zelda for the Famicom Disk System
Features
- Includes an 11-page The Legend of Zelda "Backstory Manga", adapting the story from the instruction manual. Link, Zelda and Impa are all present, with Princess Zelda splitting the Triforce into eight fragments.
- Appendices for the characters, enemies, and items found within the game, including unique artwork for all of them.
- Includes a complete, screen by screen guide of the Overworld, showcasing many of the secrets found.
- Complete guide for the first 6 dungeons, including dungeon maps, and a full screen by screen guide.
- For dungeons 7-9, a smaller, more consolidated guide can be found, still including plenty of tips and screenshots, but in not as much detail as the earlier dungeons.
- No guide is provided for the Second Quest.
Scene Artwork


Scans
Cover 
Inside Cover 
Inside Flap 
Page 003 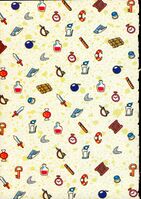
Page 004 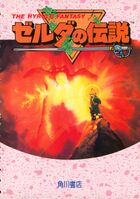
Page 005 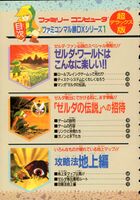
Page 006 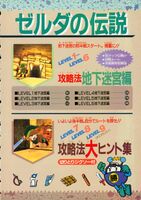
Page 007 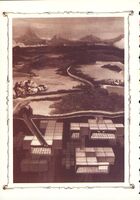
Page 008 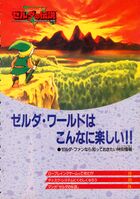
Page 009 
Page 010 
Page 011 
Page 012 
Page 013 
Page 014 
Page 015 
Page 016 
Page 017 
Page 018 
Page 019 
Page 020 
Page 021 
Page 022 
Page 023 
Page 024 
Page 025 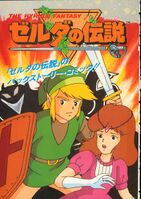
Page 026 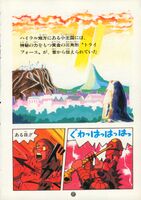
Page 027 
Page 028 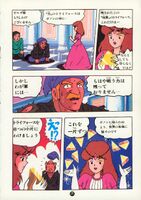
Page 029 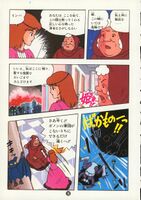
Page 030 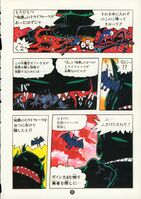
Page 031 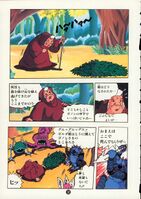
Page 032 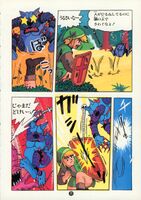
Page 033 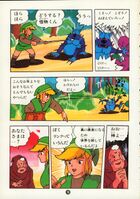
Page 034 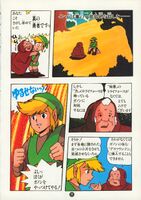
Page 035 
Page 036 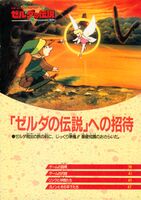
Page 037 
Page 038 
Page 039 
Page 040 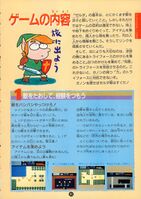
Page 041 
Page 042 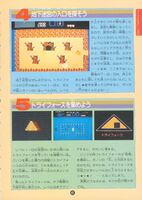
Page 043 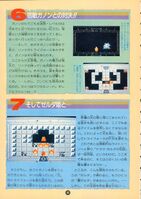
Page 044 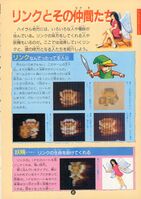
Page 045 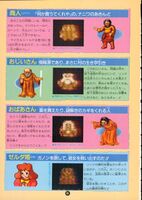
Page 046 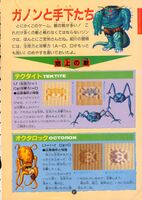
Page 047 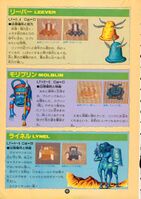
Page 048 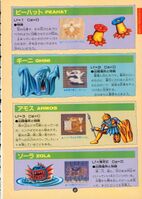
Page 049 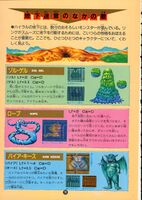
Page 050 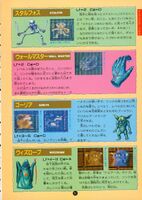
Page 051 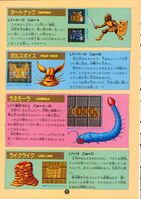
Page 052 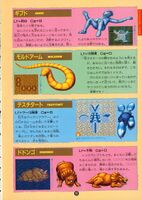
Page 053 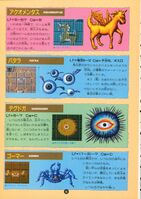
Page 054 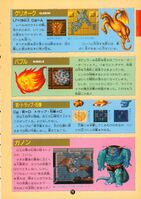
Page 055 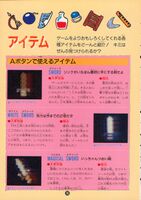
Page 056 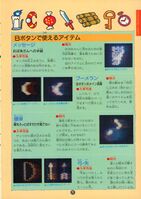
Page 057 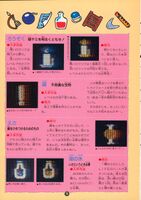
Page 058 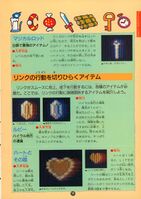
Page 059 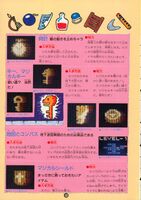
Page 060 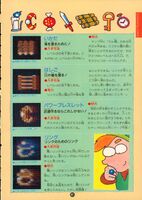
Page 061 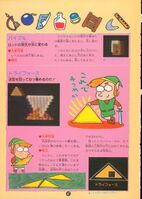
Page 062 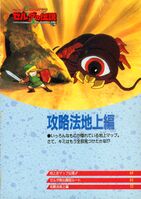
Page 063 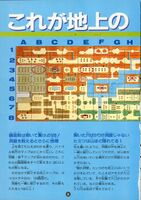
Page 064 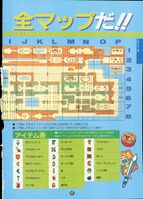
Page 065 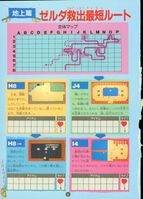
Page 066 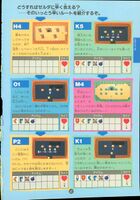
Page 067 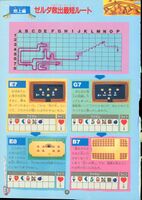
Page 068 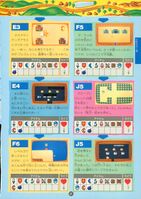
Page 069 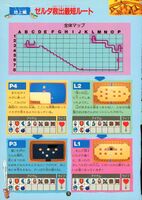
Page 070 
Page 071 
Page 072 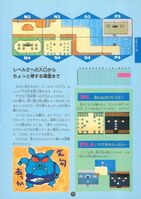
Page 073 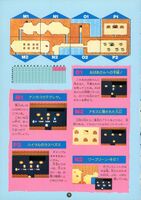
Page 074 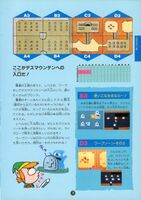
Page 075 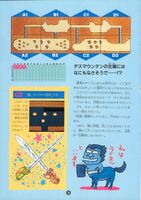
Page 076 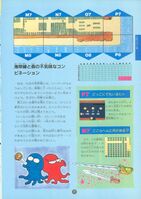
Page 077 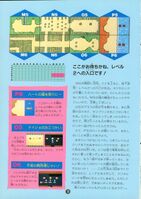
Page 078 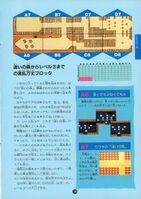
Page 079 
Page 080 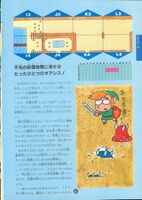
Page 081 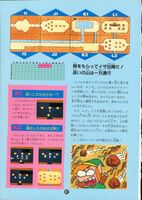
Page 082 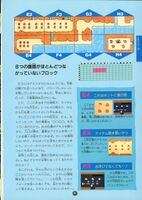
Page 083 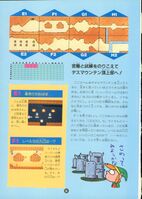
Page 084 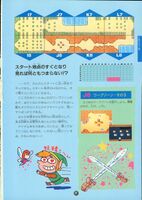
Page 085 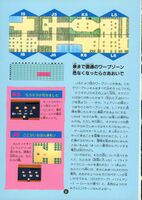
Page 086 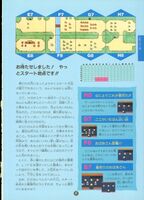
Page 087 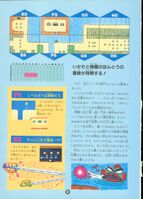
Page 088 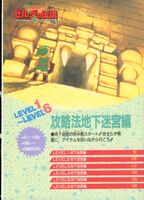
Page 089 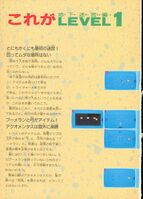
Page 090 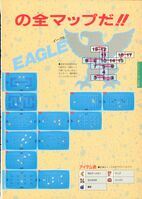
Page 091 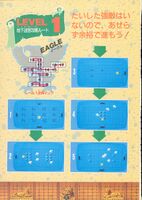
Page 092 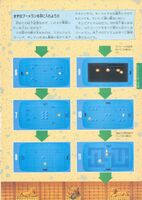
Page 093 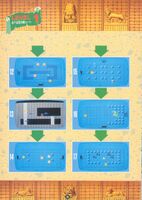
Page 094 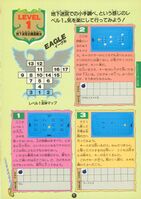
Page 095 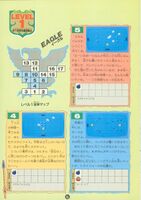
Page 096 
Page 097 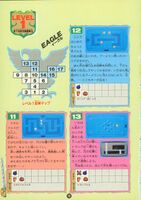
Page 098 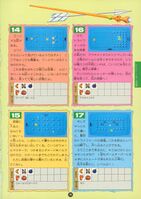
Page 099 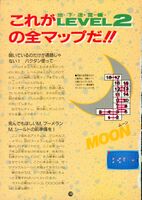
Page 100 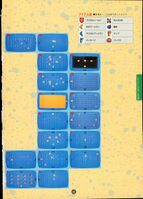
Page 101 
Page 102 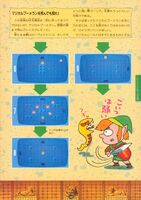
Page 103 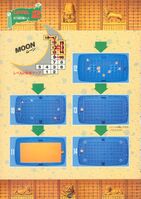
Page 104 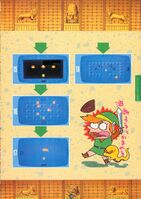
Page 105 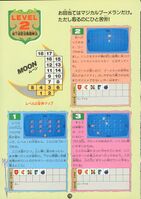
Page 106 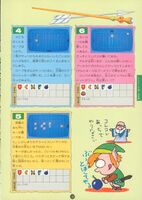
Page 107 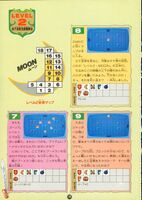
Page 108 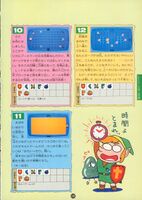
Page 109 
Page 110 
Page 111 
Page 112 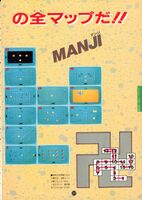
Page 113 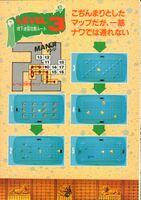
Page 114 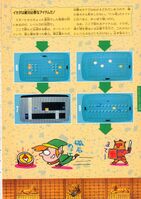
Page 115 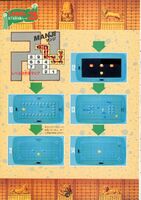
Page 116 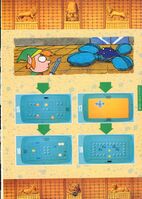
Page 117 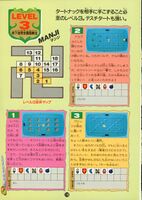
Page 118 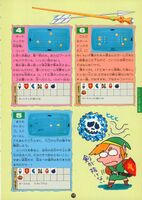
Page 119 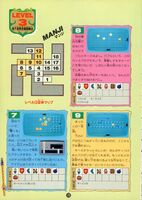
Page 120 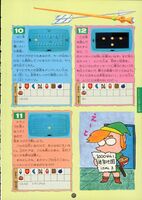
Page 121 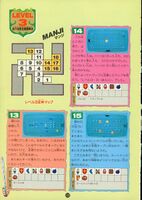
Page 122 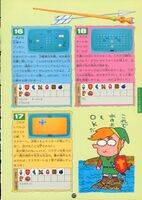
Page 123 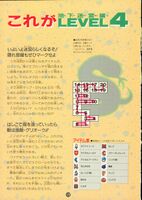
Page 124 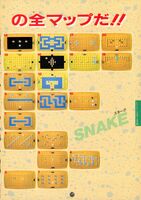
Page 125 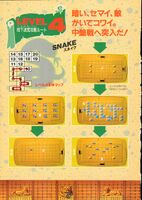
Page 126 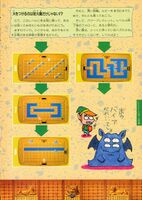
Page 127 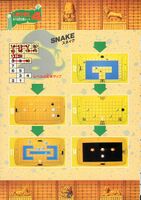
Page 128 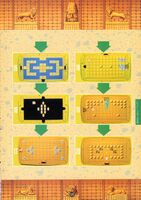
Page 129 
Page 130 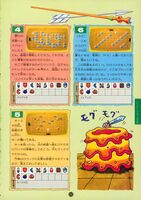
Page 131 
Page 132 
Page 133 
Page 134 
Page 135 
Page 136 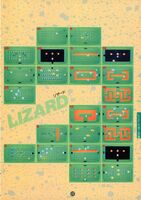
Page 137 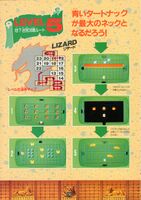
Page 138 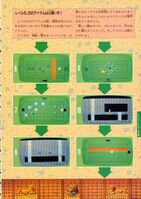
Page 139 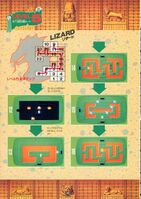
Page 140 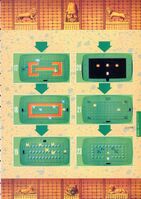
Page 141 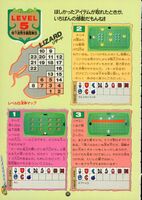
Page 142 
Page 143 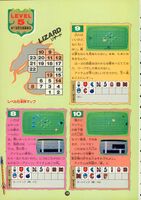
Page 144 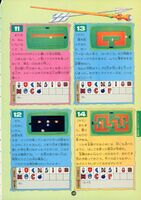
Page 145 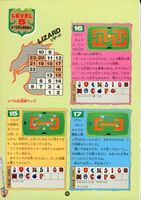
Page 146 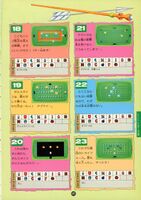
Page 147 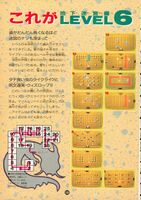
Page 148 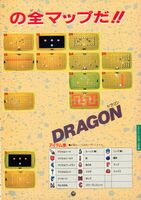
Page 149 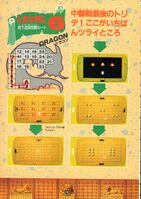
Page 150 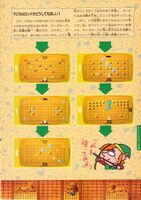
Page 151 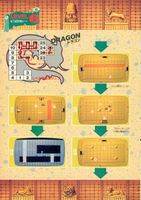
Page 152 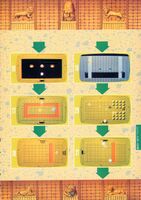
Page 153 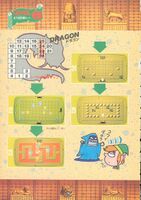
Page 154 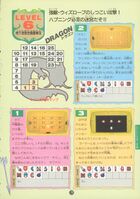
Page 155 
Page 156 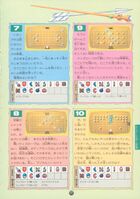
Page 157 
Page 158 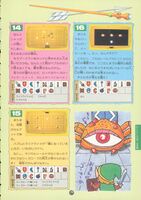
Page 159 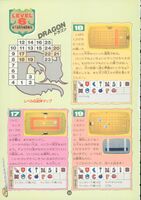
Page 160 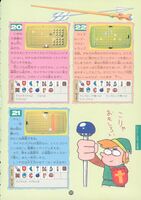
Page 161 
Page 162 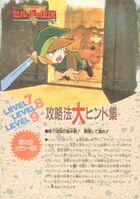
Page 163 
Page 164 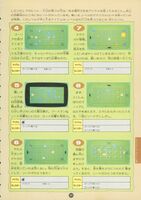
Page 165 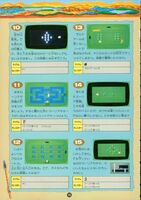
Page 166 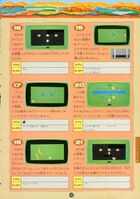
Page 167 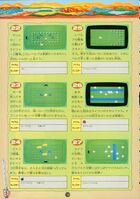
Page 168 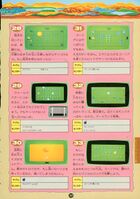
Page 169 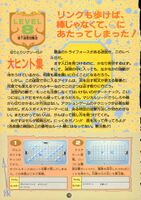
Page 170 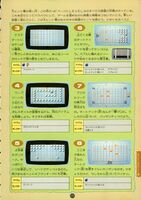
Page 171 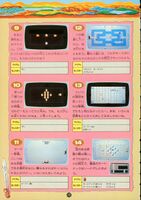
Page 172 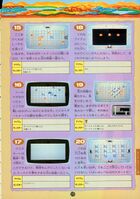
Page 173 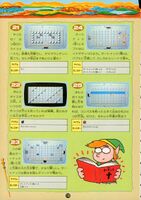
Page 174 
Page 175 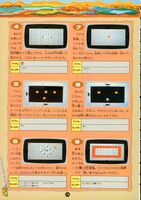
Page 176 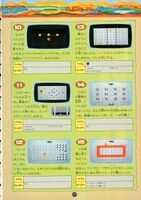
Page 177 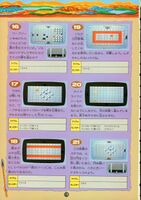
Page 178 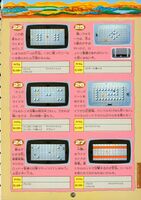
Page 179 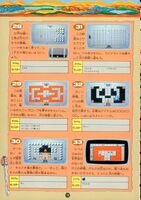
Page 180 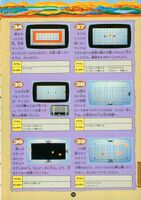
Page 181 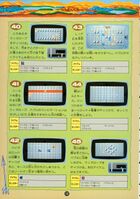
Page 182 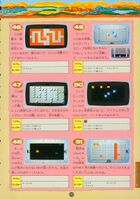
Page 183 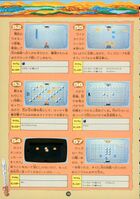
Page 184 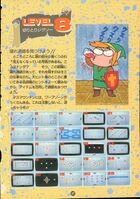
Page 187 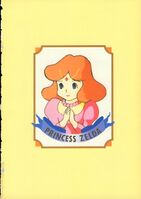
Page 188 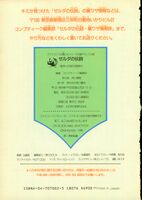
Page 190 
Page 191 
Page 192 
Page 193 
Page 194 
Page 195


References
- ↑ ファミコンマル勝DXシリーズ❶ ゼルダの伝説シリーズ