Gallery:Phantom Hourglass Items: Difference between revisions
Jump to navigation
Jump to search
Want an adless experience? Log in or Create an account.
No edit summary |
m (Convert to standard <gallery> so this can use the Media Viewer and better serve *as* a gallery) |
||
| (5 intermediate revisions by 2 users not shown) | |||
| Line 2: | Line 2: | ||
===Major Items and Equipment=== | ===Major Items and Equipment=== | ||
< | <gallery> | ||
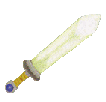
File:OshussSword.PH.gif|[[Oshus's_Sword|Oshus's Sword]] | |||
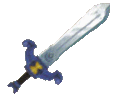
File:SwordBlade.PH.gif|[[Sword Blade]] | |||
File:PhantomSword.PH.gif|[[Phantom Sword]] | |||
File:Wooden-Shield.png|[[Wooden Shield]] | |||
File:PH-Boomerang.png|[[Boomerang]] | |||
File:PH-Bombs.png|[[Bomb]]s | |||
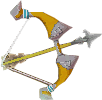
File:PH-Bow.png|[[Bow]] | |||
File:PH-Bombchu.png|[[Bombchu]]s | |||
File:Grappling-Hook.png|[[Grappling Hook]] | |||
File:PH-Hammer.png|[[Hammer]] | |||
File:PH-Shovel.png|[[Shovel]] | |||
File:Phantom-Hourglass.png|[[Phantom Hourglass]] | |||
File:Eddos-Cannon.png|[[Cannon]] | |||
File:Salvage-Arm.png|[[Salvage Arm]] | |||
File:Fishing-Rod.png|[[Fishing Rod]] | |||
</gallery> | |||
===Other Items=== | ===Other Items=== | ||
< | <gallery> | ||
File:Red-Potion-PH-ST.png|[[Red Potion]] | |||
File:Purple-Potion.png|[[Purple Potion]] | |||
File:Yellow-Potion.png|[[Yellow Potion]] | |||
File:Cyclone_Slate_PH.png|[[Cyclone Slate]] | |||
File:Sand-of-Hours.png|[[Sand of Hours]] | |||
File:Big_Catch_Lure.png|[[Big Catch Lure]] | |||
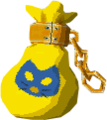
File:Bomb-Bag-1.png|[[Bomb_Bag|Bomb Bag #1]] | |||
File:Bomb-Bag-2.png|[[Bomb_Bag|Bomb Bag #2]] | |||
File:Bomb-Bag-3.png|[[Bomb_Bag|Bomb Bag #3]] | |||
File:Bombchu_Bag.png|[[Bombchu Bag]] | |||
File:Bombchu-Bag-Upgrade.png|[[Bombchu_Bag|Bombchu Bag Upgrade]] | |||
File:Quiver-Upgrade-1.png|[[Quiver|Quiver Upgrade #1]] | |||
File:Quiver-Upgrade-2.png|[[Quiver|Quiver Upgrade #2]] | |||
File:Round-Crystal.png|[[Round Crystal]] | |||
File:Square-Crystal.png|[[Square Crystal]] | |||
File:Triangle-Crystal.png|[[Triangle Crystal]] | |||
</gallery> | |||
===Collectibles and One-Off Items=== | ===Collectibles and One-Off Items=== | ||
< | <gallery> | ||
File:Aquanine.png|[[Aquanine]] | |||
File:Azurine.png|[[Azurine]] | |||
File:Crimsonine.png|[[Crimsonine]] | |||
File:Courage-gem.png|[[Courage Gem]] | |||
File:Power-gem.png|[[Power Gem]] | |||
File:Wisdom-gem.png|[[Wisdom Gem]] | |||
File:Sun-Key.png|[[Sun Key]] | |||
File:Ghost-Key.png|[[Ghost Key]] | |||
File:Kings-Key.png|[[King's Key]] | |||
File:Jolenes-Letter.png|[[Jolene's Letter]] | |||
File:Regal-Necklace.png|[[Regal Necklace]] | |||
File:Sea-Chart.png|[[Sea Chart]] | |||
File:PH-Treasure-Map.png|[[Treasure Map]] | |||
File:Keyph.png|[[Small Key]] | |||
File:BossKey.PH.gif|[[Boss Key]] | |||
File:Heartcontainerph.png|[[Heart Container]] | |||
File:PH-Freebie-Card.png|[[Freebie Card]] | |||
File:Compliment-Card.png|[[Compliment Card]] | |||
File:Complimentary-Card.png|[[Complimentary Card]] | |||
File:Prize-Postcard-Spirit-Tracks-2.png|[[Prize Postcard]] | |||
</gallery> | |||
===Trading Sequence=== | ===Trading Sequence=== | ||
< | <gallery> | ||
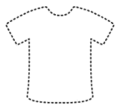
File:Heros-New-Clothes.png|[[Hero's New Clothes]] | |||
File:Kaleidoscope.png|[[Kaleidoscope]] | |||
File:Guard-Notebook.png|[[Guard Notebook]] | |||
File:Wood-Heart-Model.png|[[Wood Heart]] | |||
File:Swordsmans-Scroll.png|[[Swordsman's Scroll]] | |||
</gallery> | |||
==Treasure== | |||
===Game Models=== | |||
<gallery> | |||
File:Pink-Coral.png|[[Pink Coral]] | |||
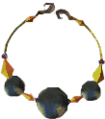
File:Dark-Pearl-Loop-Model.png|[[Dark Pearl Loop]] | |||
File:Goron-Amber.png|[[Goron Amber]] | |||
File:Helmaroc-Plume.png|[[Helmaroc Plume]] | |||
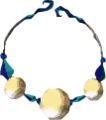
File:Pearl-Necklace-Model.png|[[Pearl Necklace]] | |||
File:Zora-Scale.png|[[Zora Scale (Phantom Hourglass)|Zora Scale]] | |||
File:RutoCrown.png|[[Ruto Crown]] | |||
File:Regal-Ring.png|[[Regal Ring]] | |||
</gallery> | |||
===Menu Sprites=== | |||
<gallery> | |||
File:Pink-Coral-Sprite.png|[[Pink Coral]] | |||
File:PH-Dark-Pearl-Loop-Sprite.png|[[Dark Pearl Loop]] | |||
File:PH-Goron-Amber-Sprite.png|[[Goron Amber]] | |||
File:Helmaroc-Plume-Sprite.png|[[Helmaroc Plume]] | |||
File:PH-Pearl-Necklace-Sprite.png|[[Pearl Necklace]] | |||
File:Zora-Scale-Sprite.png|[[Zora Scale (Phantom Hourglass)|Zora Scale]] | |||
File:PH-Ruto-Crown-Sprite.png|[[Ruto Crown]] | |||
File:PH-Regal-Ring-Sprite.png|[[Regal Ring]] | |||
</gallery> | |||
==Fish== | |||
< | <gallery> | ||
File:Skippyjack-Icon.png|[[Skippyjack]] | |||
File:Toona-Icon.png|[[Toona]] | |||
File:Loovar-Icon.png|[[Loovar]] | |||
File:Rusty-Swordfish-Icon.png|[[Rusty Swordfish]] | |||
File:Neptoona-Icon.png|[[Neptoona]] | |||
File:Stowfish-Icon.png|[[Stowfish]] | |||
</gallery> | |||
{{Galleries}} | {{Galleries}} | ||
{{cat|Phantom Hourglass Items| Gallery}} | |||
Latest revision as of 12:48, March 1, 2023
Below is a listing of all the items and equipment that appear in Phantom Hourglass.


