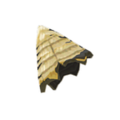
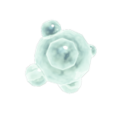
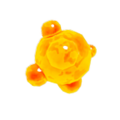
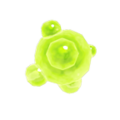
Gallery:Breath of the Wild Enemy Drops: Difference between revisions

From Zelda Dungeon Wiki
Jump to navigation Jump to search
Want an adless experience? Log in or Create an account.
(Created page with "==Enemy Drops== <center>{{Gallery}} {{Gallery/Box|file=Bokoblin Horn.png|link=Bokoblin Horn|caption=Bokoblin Horn}} {{Gallery/Box|file=Bokoblin Fang.png|link=Bokoblin Fang...")
 
m (Convert to standard <gallery> so this can use the Media Viewer and better serve *as* a gallery)
 
(3 intermediate revisions by 3 users not shown)
Line 1: Line 1:
Below is a listing of all enemy drops found in ''[[The Legend of Zelda: Breath of the Wild|Breath of the Wild]]''. All items listed here also appear in ''[[Hyrule Warriors: Age of Calamity|Age of Calamity]]'', with the exception of dragon parts.
==Enemy Drops==
==Enemy Drops==
<center>{{Gallery}}
<gallery>
{{Gallery/Box|file=Bokoblin Horn.png|link=Bokoblin Horn|caption=[[Bokoblin Horn]]}}
File:Bokoblin Horn.png|[[Bokoblin Horn]]
{{Gallery/Box|file=Bokoblin Fang.png|link=Bokoblin Fang|caption=[[Bokoblin Fang]]}}
File:Bokoblin Fang.png|[[Bokoblin Fang]]
{{Gallery/Box|file=Bokoblin Guts.png|link=Bokoblin Guts|caption=[[Bokoblin Guts]]}}
File:Bokoblin Guts.png|[[Bokoblin Guts]]
{{Gallery/Box|file=Moblin Horn.png|link=Moblin Horn|caption=[[Moblin Horn]]}}
File:Moblin Horn.png|[[Moblin Horn]]
{{Gallery/Box|file=Moblin Fang.png|link=Moblin Fang|caption=[[Moblin Fang]]}}
File:Moblin Fang.png|[[Moblin Fang]]
{{Gallery/Box|file=Moblin Guts.png|link=Moblin Guts|caption=[[Moblin Guts]]}}
File:Moblin Guts.png|[[Moblin Guts]]
{{Gallery/Box|file=Lizalfos-horn.png|link=Lizalfos Horn|caption=[[Lizalfos Horn]]}}
File:Lizalfos-horn.png|[[Lizalfos Horn]]
{{Gallery/Box|file=Lizalfos Talon.png|link=Lizalfos Talon|caption=[[Lizalfos Talon]]}}
File:Lizalfos Talon.png|[[Lizalfos Talon]]
{{Gallery/Box|file=Lizalfos Tail.png|link=Lizalfos Tail|caption=[[Lizalfos Tail]]}}
File:Lizalfos Tail.png|[[Lizalfos Tail]]
{{Gallery/Box|file=Icy Lizalfos Tail.png|link=Icy Lizalfos Tail|caption=[[Icy Lizalfos Tail]]}}
File:Icy Lizalfos Tail.png|[[Icy Lizalfos Tail]]
{{Gallery/Box|file=Red Lizalfos Tail.png|link=Red Lizalfos Tail|caption=[[Red Lizalfos Tail]]}}
File:Red Lizalfos Tail.png|[[Red Lizalfos Tail]]
{{Gallery/Box|file=Yellow Lizalfos Tail.png|link=Yellow Lizalfos Tail|caption=[[Yellow Lizalfos Tail]]}}
File:Yellow Lizalfos Tail.png|[[Yellow Lizalfos Tail]]
{{Gallery/Box|file=Lynel Horn.png|link=Lynel Horn|caption=[[Lynel Horn]]}}
File:Lynel Horn.png|[[Lynel Horn]]
{{Gallery/Box|file=Lynel Hoof.png|link=Lynel Hoof|caption=[[Lynel Hoof]]}}
File:Lynel Hoof.png|[[Lynel Hoof]]
{{Gallery/Box|file=Lynel Guts.png|link=Lynel Guts|caption=[[Lynel Guts]]}}
File:Lynel Guts.png|[[Lynel Guts]]
{{Gallery/Box|file=Chuchu Jelly.png|link=Chuchu Jelly|caption=[[Chuchu Jelly]]}}
File:Chuchu Jelly.png|[[Chuchu Jelly]]
{{Gallery/Box|file=White Chuchu Jelly.png|link=White Chuchu Jelly|caption=[[White Chuchu Jelly]]}}
File:White Chuchu Jelly.png|[[White Chuchu Jelly]]
{{Gallery/Box|file=Red Chuchu Jelly.png|link=Red Chuchu Jelly|caption=[[Red Chuchu Jelly]]}}
File:Red Chuchu Jelly.png|[[Red Chuchu Jelly]]
{{Gallery/Box|file=Yellow Chuchu Jelly.png|link=Yellow Chuchu Jelly|caption=[[Yellow Chuchu Jelly]]}}
File:Yellow Chuchu Jelly.png|[[Yellow Chuchu Jelly]]
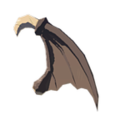
{{Gallery/Box|file=Keese Wing.png|link=Keese Wing|caption=[[Keese Wing]]}}
File:Keese Wing.png|[[Keese Wing]]
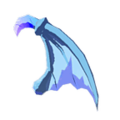
{{Gallery/Box|file=Ice Keese Wing.png|link=Ice Keese Wing|caption=[[Ice Keese Wing]]}}
File:Ice Keese Wing.png|[[Ice Keese Wing]]
{{Gallery/Box|file=Fire Keese Wing.png|link=Fire Keese Wing|caption=[[Fire Keese Wing]]}}
File:Fire Keese Wing.png|[[Fire Keese Wing]]
{{Gallery/Box|file=Electric Keese Wing.png|link=Electric Keese Wing|caption=[[Electric Keese Wing]]}}
File:Electric Keese Wing.png|[[Electric Keese Wing]]
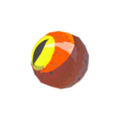
{{Gallery/Box|file=Keese Eyeball.png|link=Keese Eyeball|caption=[[Keese Eyeball]]}}
File:Keese Eyeball.png|[[Keese Eyeball]]
{{Gallery/Box|file=Octorok Tentacle.png|link=Octorok Tentacle|caption=[[Octorok Tentacle]]}}
File:Octorok Tentacle.png|[[Octorok Tentacle]]
{{Gallery/Box|file=Octorok Eyeball.png|link=Octorok Eyeball|caption=[[Octorok Eyeball]]}}
File:Octorok Eyeball.png|[[Octorok Eyeball]]
{{Gallery/Box|file=Octo Balloon.png|link=Octo Balloon|caption=[[Octo Balloon]]}}
File:Octo Balloon.png|[[Octo Balloon]]
{{Gallery/Box|file=Molduga Fin.png|link=Molduga Fin|caption=[[Molduga Fin]]}}
File:Molduga Fin.png|[[Molduga Fin]]
{{Gallery/Box|file=Molduga Guts.png|link=Molduga Guts|caption=[[Molduga Guts]]}}
File:Molduga Guts.png|[[Molduga Guts]]
{{Gallery/Box|file=Hinox Toenail.png|link=Hinox Toenail|caption=[[Hinox Toenail]]}}
File:Hinox Toenail.png|[[Hinox Toenail]]
{{Gallery/Box|file=Hinox Tooth.png|link=Hinox Tooth|caption=[[Hinox Tooth]]}}
File:Hinox Tooth.png|[[Hinox Tooth]]
{{Gallery/Box|file=Hinox Guts.png|link=Hinox Guts|caption=[[Hinox Guts]]}}
File:Hinox Guts.png|[[Hinox Guts]]
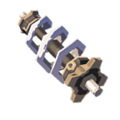
{{Gallery/Box|file=Ancient Screw.png|link=Ancient Screw|caption=[[Ancient Screw]]}}
File:Ancient Screw.png|[[Ancient Screw]]
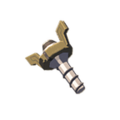
{{Gallery/Box|file=Ancient Spring.png|link=Ancient Spring|caption=[[Ancient Spring]]}}
File:Ancient Spring.png|[[Ancient Spring]]
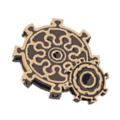
{{Gallery/Box|file=Ancient Gear.png|link=Ancient Gear|caption=[[Ancient Gear]]}}
File:Ancient Gear.png|[[Ancient Gear]]
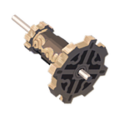
{{Gallery/Box|file=Ancient Shaft.png|link=Ancient Shaft|caption=[[Ancient Shaft]]}}
File:Ancient Shaft.png|[[Ancient Shaft]]
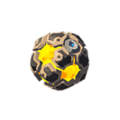
{{Gallery/Box|file=Ancient Core.png|link=Ancient Core|caption=[[Ancient Core]]}}
File:Ancient Core.png|[[Ancient Core]]
{{Gallery/Box|file=Giant Ancient Core.png|link=Giant Ancient Core|caption=[[Giant Ancient Core]]}}
File:Giant Ancient Core.png|[[Giant Ancient Core]]
{{Gallery/Box|file=Dinraal's Scale.png|link=Dinraal's Scale|caption=[[Dinraal's Scale]]}}
File:Dinraal's Scale.png|[[Dinraal's Scale]]
{{Gallery/Box|file=Naydra's Scale.png|link=Naydra's Scale|caption=[[Naydra's Scale]]}}
File:Naydra's Scale.png|[[Naydra's Scale]]
{{Gallery/Box|file=Farosh's Scale.png|link=Farosh's Scale|caption=[[Farosh's Scale]]}}
File:Farosh's Scale.png|[[Farosh's Scale]]
{{Gallery/Box|file=Dinraal's Claw.png|link=Dinraal's Claw|caption=[[Dinraal's Claw]]}}
File:Dinraal's Claw.png|[[Dinraal's Claw]]
{{Gallery/Box|file=Naydra's Claw.png|link=Naydra's Claw|caption=[[Naydra's Claw]]}}
File:Naydra's Claw.png|[[Naydra's Claw]]
{{Gallery/Box|file=Farosh's Claw.png|link=Farosh's Claw|caption=[[Farosh's Claw]]}}
File:Farosh's Claw.png|[[Farosh's Claw]]
{{Gallery/Box|file=Shard of Dinraal's Fang.png|link=Shard of Dinraal's Fang|caption=[[Shard of Dinraal's Fang]]}}
File:Shard of Dinraal's Fang.png|[[Shard of Dinraal's Fang]]
{{Gallery/Box|file=Shard of Naydra's Fang.png|link=Shard of Naydra's Fang|caption=[[Shard of Naydra's Fang]]}}
File:Shard of Naydra's Fang.png|[[Shard of Naydra's Fang]]
{{Gallery/Box|file=Shard of Farosh's Fang.png|link=Shard of Farosh's Fang|caption=[[Shard of Farosh's Fang]]}}
File:Shard of Farosh's Fang.png|[[Shard of Farosh's Fang]]
{{Gallery/Box|file=Shard of Dinraal's Horn.png|link=Shard of Dinraal's Horn|caption=[[Shard of Dinraal's Horn]]}}
File:Shard of Dinraal's Horn.png|[[Shard of Dinraal's Horn]]
{{Gallery/Box|file=Shard of Naydra's Horn.png|link=Shard of Naydra's Horn|caption=[[Shard of Naydra's Horn]]}}
File:Shard of Naydra's Horn.png|[[Shard of Naydra's Horn]]
{{Gallery/Box|file=Shard of Farosh's Horn.png|link=Shard of Farosh's Horn|caption=[[Shard of Farosh's Horn]]}}
File:Shard of Farosh's Horn.png|[[Shard of Farosh's Horn]]
{{Gallery/Bottom}}</center>
</gallery>
<noinclude>{{Galleries}}
{{cat|Breath of the Wild|Enemy Drops}}</noinclude>

Latest revision as of 12:41, March 1, 2023

Below is a listing of all enemy drops found in Breath of the Wild. All items listed here also appear in Age of Calamity, with the exception of dragon parts.

Enemy Drops