Breach of Demise: Difference between revisions
Jump to navigation
Jump to search
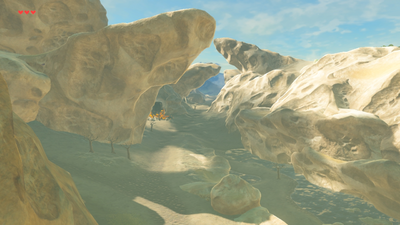
The Breach of Demise in Breath of the Wild
Want an adless experience? Log in or Create an account.
No edit summary |
mNo edit summary |
||
| Line 14: | Line 14: | ||
The '''Breach of Demise''' is a location in ''[[The Legend of Zelda: Breath of the Wild|Breath of the Wild]]'' and a stage in ''[[Hyrule Warriors: Age of Calamity]]''. It is a valley located just southeast of the [[Ridgeland Tower]] and directly west of the [[Carok Bridge]]. | The '''Breach of Demise''' is a location in ''[[The Legend of Zelda: Breath of the Wild|Breath of the Wild]]'' and a stage in ''[[Hyrule Warriors: Age of Calamity]]''. It is a valley located just southeast of the [[Ridgeland Tower]] and directly west of the [[Carok Bridge]]. | ||
==''Breath of the Wild''== | |||
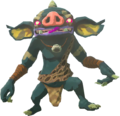
The Breach of Demise There are a trio of large skulls within the breach where there are enemy bases. This includes some [[Blue Bokoblin]] and the more dangerous [[Black Bokoblin]]. There are some [[Keese]] in the skull to the west, where there is also a treasure chest in the ground that contains a [[Silver Rupee]]. | The Breach of Demise There are a trio of large skulls within the breach where there are enemy bases. This includes some [[Blue Bokoblin]] and the more dangerous [[Black Bokoblin]]. There are some [[Keese]] in the skull to the west, where there is also a treasure chest in the ground that contains a [[Silver Rupee]]. | ||
Along the pathway, Link will encounter the [[Zalta Wa Shrine]], located just east of the fork in the road. | Along the pathway, Link will encounter the [[Zalta Wa Shrine]], located just east of the fork in the road. | ||
===Nearby Shrines=== | |||
* [[Zalta Wa Shrine]] | * [[Zalta Wa Shrine]] | ||
===Enemies=== | |||
{{Gallery}} | {{Gallery}} | ||
{{Gallery/Box|file=Blue-Bokoblin-Model.png|link=Blue_Bokoblin|caption=[[Blue Bokoblin]]}} | {{Gallery/Box|file=Blue-Bokoblin-Model.png|link=Blue_Bokoblin|caption=[[Blue Bokoblin]]}} | ||
| Line 31: | Line 30: | ||
{{Gallery/Bottom}} | {{Gallery/Bottom}} | ||
===Nearby Korok Seeds=== | |||
<section begin=Seed284summary />[[File:Korok284.png|200px|thumb|left|Stand on the seed platform found on the large cliff southwest of here (jutting out from the eastern cliff face), and then race to the ring before the time runs out.]]<section end=Seed284summary />The seed platform is to the southwest, on the same side of the canyon. Race to the ring.{{Korok Seed|Seed284}}{{Clear|left}} | <section begin=Seed284summary />[[File:Korok284.png|200px|thumb|left|Stand on the seed platform found on the large cliff southwest of here (jutting out from the eastern cliff face), and then race to the ring before the time runs out.]]<section end=Seed284summary />The seed platform is to the southwest, on the same side of the canyon. Race to the ring.{{Korok Seed|Seed284}}{{Clear|left}} | ||
==''Age of Calamity''== | |||
===Scenarios=== | |||
;Chapter 1 | ;Chapter 1 | ||
*[[Road to the Ancient Lab]] | *[[Road to the Ancient Lab]] | ||
Revision as of 12:20, October 25, 2021
Breach of Demise

The Breach of Demise in Breath of the Wild
Games | ||
Location | ||
Related | ||
The Breach of Demise is a location in Breath of the Wild and a stage in Hyrule Warriors: Age of Calamity. It is a valley located just southeast of the Ridgeland Tower and directly west of the Carok Bridge.
Breath of the Wild
The Breach of Demise There are a trio of large skulls within the breach where there are enemy bases. This includes some Blue Bokoblin and the more dangerous Black Bokoblin. There are some Keese in the skull to the west, where there is also a treasure chest in the ground that contains a Silver Rupee.
Along the pathway, Link will encounter the Zalta Wa Shrine, located just east of the fork in the road.
Nearby Shrines
Enemies


Nearby Korok Seeds

The seed platform is to the southwest, on the same side of the canyon. Race to the ring.
Age of Calamity
Scenarios
- Chapter 1