Ancient Sages: Difference between revisions
mNo edit summary |
m (Text replace - "\<ref>\{\{Cite\|([^}]*)}}\<\/ref>" to "{{Ref|$1}}") |
||
| Line 14: | Line 14: | ||
==First Encounter== | ==First Encounter== | ||
They are first encountered immediately after [[Link]] has defeated [[Stallord]], in the [[Mirror Chamber]]. They talk about how a "dark entity" lurks in the twilight, | They are first encountered immediately after [[Link]] has defeated [[Stallord]], in the [[Mirror Chamber]]. They talk about how a "dark entity" lurks in the twilight,{{Ref|TP|1703|Ancient Sages}} and proceed to explain who they are; ancient sages whom have guarded the [[Mirror of Twilight]] since ancient times at the command of the goddesses.{{Ref|TP|1705|Ancient Sages}} They continue by telling Link the Mirror of Twilight has been fragmented by [[Ganon|Ganondorf]].{{Ref|TP|1706|Ancient Sages}}{{Ref|TP|1707|Ancient Sages}}{{Ref|TP|1708|Ancient Sages}}{{Ref|TP|1709|Ancient Sages}} They then will reveal the history of Ganondorf; he was the leader of a band of thieves whom attempted to establish dominion over the [[Sacred Realm]],{{Ref|TP|1710|Ancient Sages}} but was subdued and brought to justice.{{Ref|TP|1713|Ancient Sages}} They will then show Link a scene from when they attempted to execute him; but failed, do to the fact he had been blessed with the chosen power of the gods.{{Ref|TP|1715|Ancient Sages}} They show a scene of Ganondorf killing one of the Ancient Sages, which according to the broken symbol was the Sage of Water. They conclude their speech by telling Link that each fragment lies hidden across [[Hyrule]],{{Ref|TP|1720|Ancient Sages}} and then tells Link the locations of each fragment.{{Ref|TP|1721|Ancient Sages}}{{Ref|TP|1722|Ancient Sages}}{{Ref|TP|1723|Ancient Sages}} | ||
==Second Encounter== | ==Second Encounter== | ||
The second encounter of the Ancient Sages comes once Link has collected the final [[Mirror Shard]] from the [[City in the Sky]]. Once Link has warped to the Mirror Chamber, the Sages will apologize to [[Midna]] for allowing Ganondorf to enter the [[Twilight Realm]], | The second encounter of the Ancient Sages comes once Link has collected the final [[Mirror Shard]] from the [[City in the Sky]]. Once Link has warped to the Mirror Chamber, the Sages will apologize to [[Midna]] for allowing Ganondorf to enter the [[Twilight Realm]],{{Ref|TP|1691|Ancient Sages}} and further revealing Midna's status, which is the ''Twilight Princess''{{Ref|TP|1692|Ancient Sages}} This will get a lengthy explanation from Midna, which starts with her being surprised the Sages knew.{{Ref|TP|1693|[[Midna]]}} She continues my saying that because she fled her people she is not qualified to forgive them.{{Ref|TP|1694|Midna}} She will show Link a scene of [[Zant]] placing a curse on her, changing her from her normal form to her current one. Also in this scene, she shows her placing the first part of the [[Fused Shadow]] on her head, along with a foul smile. She continues by explaining her motives in befriending Link; it was because in her world they believed the Hero would appear as a divine beast,{{Ref|TP|1695|Midna}} exactly as Link looked. She only cared about returning her world to normal.{{Ref|TP|1697|Midna}} She continues by telling Link that her motives changed once she saw the sacrifices Link and [[Princess Zelda|Zelda]] made.{{Ref|TP|1699|Midna}} She now understands that both worlds must be saved, not just hers.{{Ref|TP|1700|Midna}} She concludes by motivating Link to continue, not for her, but for Zelda and all of the Realm of Light.{{Ref|TP|1702|Midna}} The cutscene concludes with the Sages vanishing into thin air, which is also the last time they are seen. | ||
==Trivia== | ==Trivia== | ||
Revision as of 18:39, March 4, 2013
The Ancient Sages are a group of mystical characters found in Twilight Princess. There are of them; and each represents a different element, including Light, Forest, Fire, Water, Shadow, and Spirit.
First Encounter
They are first encountered immediately after Link has defeated Stallord, in the Mirror Chamber. They talk about how a "dark entity" lurks in the twilight,[1] and proceed to explain who they are; ancient sages whom have guarded the Mirror of Twilight since ancient times at the command of the goddesses.[2] They continue by telling Link the Mirror of Twilight has been fragmented by Ganondorf.[3][4][5][6] They then will reveal the history of Ganondorf; he was the leader of a band of thieves whom attempted to establish dominion over the Sacred Realm,[7] but was subdued and brought to justice.[8] They will then show Link a scene from when they attempted to execute him; but failed, do to the fact he had been blessed with the chosen power of the gods.[9] They show a scene of Ganondorf killing one of the Ancient Sages, which according to the broken symbol was the Sage of Water. They conclude their speech by telling Link that each fragment lies hidden across Hyrule,[10] and then tells Link the locations of each fragment.[11][12][13]
Second Encounter
The second encounter of the Ancient Sages comes once Link has collected the final Mirror Shard from the City in the Sky. Once Link has warped to the Mirror Chamber, the Sages will apologize to Midna for allowing Ganondorf to enter the Twilight Realm,[14] and further revealing Midna's status, which is the Twilight Princess[15] This will get a lengthy explanation from Midna, which starts with her being surprised the Sages knew.[16] She continues my saying that because she fled her people she is not qualified to forgive them.[17] She will show Link a scene of Zant placing a curse on her, changing her from her normal form to her current one. Also in this scene, she shows her placing the first part of the Fused Shadow on her head, along with a foul smile. She continues by explaining her motives in befriending Link; it was because in her world they believed the Hero would appear as a divine beast,[18] exactly as Link looked. She only cared about returning her world to normal.[19] She continues by telling Link that her motives changed once she saw the sacrifices Link and Zelda made.[20] She now understands that both worlds must be saved, not just hers.[21] She concludes by motivating Link to continue, not for her, but for Zelda and all of the Realm of Light.[22] The cutscene concludes with the Sages vanishing into thin air, which is also the last time they are seen.
Trivia
- The Ancient Sage that was killed by Ganondorf can be identified using the cracked symbol on its former pedestal. According to it, the Sage was the Sage of Water.
Gallery
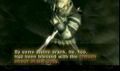
Ganondorf surviving the Sages execution
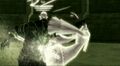
Ganondorf killing the Sage of Water with his bare hands

