Shadow Temple: Difference between revisions
m (Text replace - "{{Dungeon" to "{{Infobox|dungeon") |
m (walkthrough link added) |
||
| Line 13: | Line 13: | ||
{{ZD|[http://www.zeldadungeon.net/Zelda05-ocarina-of-time-walkthrough-12.php ''Ocarina of Time'' Walkthrough Chapter 12: Shadow Temple]}} | {{ZD|[http://www.zeldadungeon.net/Zelda05-ocarina-of-time-walkthrough-12.php ''Ocarina of Time'' Walkthrough Chapter 12: Shadow Temple]}} | ||
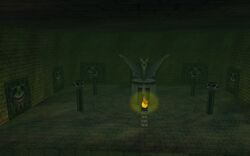
The '''Shadow Temple''' is the seventh [[Dungeon]] in ''[[The Legend of Zelda: Ocarina of Time|Ocarina of Time]]''. Along with the mini-dungeon [[Bottom of the Well]], it is considered one of the scariest dungeons, considering it is filled with invisible enemies, guillotines, scythes, etc., this tag makes sense. Before attempting this dungeon, [[Link]] must first travel back in time into the Bottom of the Well and retrieve the [[Lens of Truth]]. The Lens of Truth is an item that reveals items or objects that are invisible to the naked human eye, and is extremely helpful in this dungeon. Early on in the dungeon, Link faces [[Dead Hand]], and when defeated he receives the [[Hover Boots]]; another type of shoe that has special effects and is necessary to complete the game. After Link defeats the boss of this dungeon, [[Bongo Bongo]], he travels to the [[Chamber of the Sages]] where he meets [[Impa]], the newly awakened sage of Shadow. She adds her power to his and gives him the [[Shadow Medallion]]. The song used to warp to this dungeon is the [[Nocturne of Shadow]]. For detailed instructions on how to complete this dungeon, | The '''Shadow Temple''' is the seventh [[Dungeon]] in ''[[The Legend of Zelda: Ocarina of Time|Ocarina of Time]]''. Along with the mini-dungeon [[Bottom of the Well]], it is considered one of the scariest dungeons, considering it is filled with invisible enemies, guillotines, scythes, etc., this tag makes sense. Before attempting this dungeon, [[Link]] must first travel back in time into the Bottom of the Well and retrieve the [[Lens of Truth]]. The Lens of Truth is an item that reveals items or objects that are invisible to the naked human eye, and is extremely helpful in this dungeon. Early on in the dungeon, Link faces [[Dead Hand]], and when defeated he receives the [[Hover Boots]]; another type of shoe that has special effects and is necessary to complete the game. After Link defeats the boss of this dungeon, [[Bongo Bongo]], he travels to the [[Chamber of the Sages]] where he meets [[Impa]], the newly awakened sage of Shadow. She adds her power to his and gives him the [[Shadow Medallion]]. The song used to warp to this dungeon is the [[Nocturne of Shadow]]. For detailed instructions on how to complete this dungeon, please refer to the [http://www.zeldadungeon.net/Zelda05-ocarina-of-time-walkthrough-12.php Text Walkthrough]. | ||
{{MagicNavbox|Ocarina of Time|Dungeons}} | {{MagicNavbox|Ocarina of Time|Dungeons}} | ||
Revision as of 21:52, May 3, 2013
Games | ||
Boss | ||
Mini-bosses | ||
Items | ||
Rewards | ||
| Guides | ||
|---|---|---|
Walkthrough | ||

|
In-depth guide:
Ocarina of Time Walkthrough Chapter 12: Shadow Temple |
The Shadow Temple is the seventh Dungeon in Ocarina of Time. Along with the mini-dungeon Bottom of the Well, it is considered one of the scariest dungeons, considering it is filled with invisible enemies, guillotines, scythes, etc., this tag makes sense. Before attempting this dungeon, Link must first travel back in time into the Bottom of the Well and retrieve the Lens of Truth. The Lens of Truth is an item that reveals items or objects that are invisible to the naked human eye, and is extremely helpful in this dungeon. Early on in the dungeon, Link faces Dead Hand, and when defeated he receives the Hover Boots; another type of shoe that has special effects and is necessary to complete the game. After Link defeats the boss of this dungeon, Bongo Bongo, he travels to the Chamber of the Sages where he meets Impa, the newly awakened sage of Shadow. She adds her power to his and gives him the Shadow Medallion. The song used to warp to this dungeon is the Nocturne of Shadow. For detailed instructions on how to complete this dungeon, please refer to the Text Walkthrough.


