- Chapter 9 – Shadow Temple
- Chapter 10 – Spirit Temple
- Chapter 11 – Gerudo Training Grounds
- Chapter 12 – Ganon’s Castle
9.1 Shadow Temple
Inside, walk forward and longshot over the pit. Approach the face on the wall to be alerted that “The Shadow will yield only to the one with the eye of truth, handed down in Kakariko Village.” Turn on your Lens of Truth to see the face isn’t actually there, so just walk through. Approach the bird statue, and it’ll ask you to “Make my beak face the skull of truth. The alternative is descent into the deep darkness.” Turn on your Lens of Truth to see which skull is the only real one (the one nearest the entrance) and grab the slap to rotate the statue to face that one. Stopping on the wrong one will open the floor, causing you to fall and start over. Get it right and the gate at the end of the tongue opens. Using fire arrows, shoot the torches the hands are holding to make a translucent block appear.
Use the block to jump over, then continue down the long ramp. Destroy the beamos here. You can play the Song of Storms in the center of this room for a red fairy spirit, if you like. Otherwise, turn on your Lens of Truth and take the right path. Start claiming the Silver Rupees while dodging the scythes. (If one catches up to you, use your shield to duck underneath.) Collect them all and the gate in this room opens up. Go to it and kill the Skulltula to claim the dungeon map. Defeating all of the Skulltulas will open the door back where you came from.
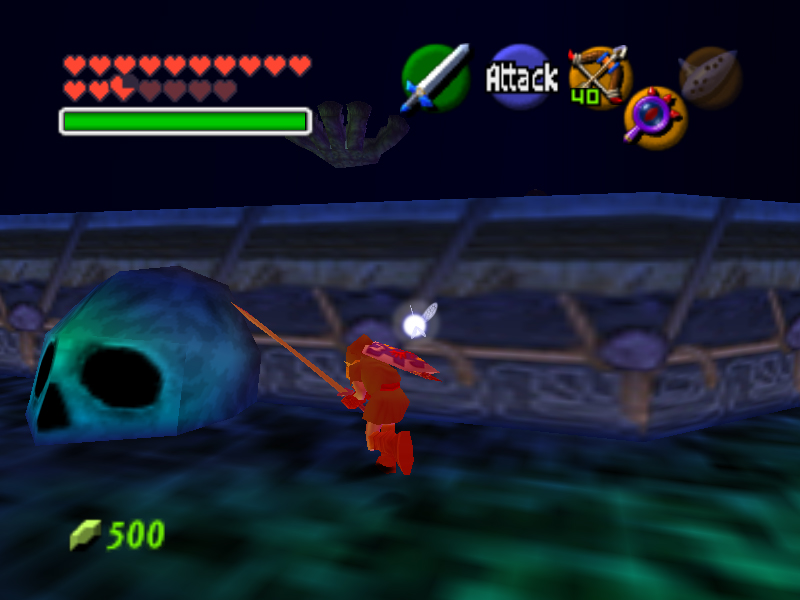
Head to the alcove with a face, and Navi will tell you that it holds the secret to a ship to the underworld. Run forward and you’ll fall, and you’re in a cage with nothing in it but a hole in the floor. Turning on your Lens of Truth will reveal a Skulltula and a chest which holds your first Small Key. Back to the beamos room, take the left path, which promptly seals shut behind you. In here, use Din’s Fire twice to defeat the two Gibdos (they drop magic potions so you can refill) and claim another small key.
Head back upstairs to the room you turned the bird statue in, and use the Lens again. You’ll see another face disappears to a destroyable wall, so blast your way in and use a Key on the door here. Approach the slightly creepy glowing-eye-skull wall to be informed that “one who gains the eye of truth will be able to see what is hidden in the darkness.” Turn on your Lens and see you can walk through the wall. Follow the right wall and take the first door to find yourself in a room filled with Redeads. Play the Sun’s Song if needed, and take them out your favorite way (spin attacks in the middle work great) to claim the Compass.
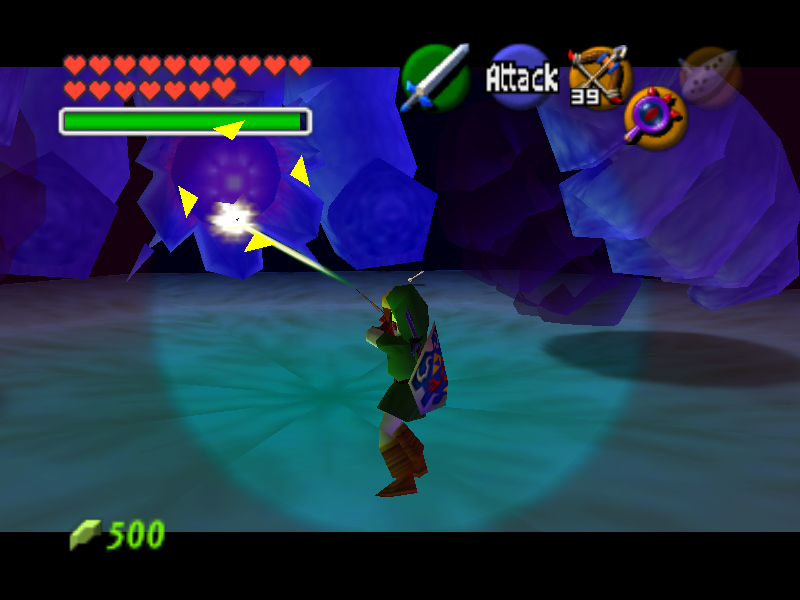
Head back, and follow the right wall (with the Lens) until you find a time block. Get close enough and play the Song of Time. In the next area, the path forward is blocked by some translucent blocks. The left wall holds three silver eyes. The left and right ones shoot fire at you, and can be shot with an arrow only when they open up. The the center can be shot any time to move the translucent blocks and allow you access to the next room. In there, you find yourself with another Dead Hand. Use the same tactics as you did in the Well and this will pose no problem to you. Defeating it earns you the Hover Boots.
With boots in hand, head back to the bird room, over the tongue, downstairs, once again to the Beamos Room. This time, bomb the east wall and use your second Small Key to gain access further underground. Down the ramp, turn the corner and destroy the Beamos. Avoid the sliders and the Skulltula, jump down and get the next Beamos. Time your runs between the guillotine blades, and stop before you get to the two Beamos. Shoot an arrow under the blade to the Bomb Flower twice to destroy them, and avoid the Red Bubble as you jump over.
Turn on your Lens and look left. Jump to the next platform and walk to the edge until you’re close enough to see the frozen eye. Take note of it, and continue on the platforms to the door on the southeast side of this large room. Here (keep your Lens on to avoid the spinning-reapers), shoot the Like Like with a Fire Arrow (one hit kill) and longshot the Keese off of the walls as you collect the Silver Rupee. In either corner you can play the song of time to collect the hearts and last Silver Rupee. When the gate opens, claim the chests inside (you need the Lens to see the second one) for a Blue Rupee and a Small Key.
Back in the big room, use Din’s fire or a Fire Arrow to activate the Eye Switch. Destroy the Beamos again, and jump down the translucent blocks. Destroy the Beamos here, and avoid the sliders as you collect the Silver Rupees. With the fifth one, a chest containing Arrows drops. Approach the gate and use a spin attack to hit the crystal switch. Continue through to see two spike traps rapidly falling and rising. The sign reads “Only one with the eye of truth will find the stone umbrella that protects against the rain of blades.”
Using your Lens, find the block in the right wall (next to the face on the ground). Drag it out, and push it until its blocking the “rain of blades” from both traps. The pots at the right contain hearts and/or items, so avoid the slider if you go for them. The cells on the left hold a Golden Skulltula. The cell on the right contains more arrows. Walk around the other side of the block and drag it (the same direction you were pushing it) until it stops.
Climb up top, and use the traps as stepping stones to the other side. The chest behind the fence contains a Blue Rupee, and the button switch releases another chest on the other side with a Small Key. The pots hide hearts if you need them. Jump down and back the way you came, take a left when you get to the translucent blocks towards the guillotine blade. The sign reads “Only one who has sacred feet can cross the valley of the dead” so equip your Hover Boots.
Turn on your Lens so you can see the platforms at time your run so you’ll avoid the blade. On the second platform, you need to time your run so you can build up momentum (remember, no friction), so you want to make it to the locked door just as the moving platform stops, giving you time to hover across. Through the locked door, kill both of the Redeads to claim a chest with a Blue Rupee. Keep using the Lens and collect all the Silver Rupees (besides the spikes, some of the targets and platforms are invisible) to open the west door.
Inside, one Stalfos will attack at the disk on the ground, and one will attack at the top of the steps. Defeat both to unlock the door and earn a chest with a Red Rupee. Back in the spike room, some translucent blocks have appeared. Longshot to the the center one, and use the Hover Boots to reach the north door, and open it with your Small Key. Use your Iron Boots to avoid being blown away. It’s the usual with the sliders and Skulltula, so slowly clunk yourself all the way to reach the door at the very end of the path.
Inside, play the Sun’s Song to both paralyze the Redeads and release a Red Fairy Spirit. Grab the fairy if you need it, and eliminate the Redeads. Din’s Fire is a good choice since it only takes two hits (you can get them all at once) and it can kill the Golden Skulltula, plus the Redeads are so kind to provide you with potions to refill your magic meter. Collect the token and check the face on the wall to be told “Those who have sacred feet should let the wind guide them. Then, they will be led to the hidden path.” Finally, the Lens reveals a hidden chest with a Small Key.
Back a room, use the Lens to line yourself up with the hidden door on the north wall. Switch to your Hover Boots, and when the fan starts blowing you make a run for it. You should make it no problem, so continue through. Play the Sun’s Song to freeze the two Gibdos here. Eliminating them will earn you a Blue Rupee. There are two destroyable piles of debris here, like in the well. One hides a Golden Skulltula and the other hides an invisible chest with arrows. Use your key on the locked door, and head to the left. Align the block with the stone path on the ground, and you open up a shortcut upstairs. Push/Pull the block all the way down the path until it clicks into place, and climb up, jumping onto the boat. (The scarecrow song will make Pierre appear, allowing you access to some hearts.)
Play Zelda’s Lullaby on the triforce to start the boat moving. With an eerie chime of the bells you’re off. Along the way, you’ll be ambushed by some Stalfos, but they shouldn’t pose you any trouble anymore. When you reach the end jump off to the left before you go down with the ship. Shoot the Bomb Flowers to fell the pillar. Cross, head to the time block to play the Song of Time to reveal an eye switch. Shooting it raises some targets, so Longshot to the top to grab a heart and press the button switch. Head back across to the now unbarred door and inside.
Use the Lens to work your way through the maze. Kill or avoid the enemies, and head through the west door. Here, climb the steps and use the bomb flowers much like we did in Dodongo’s Cavern so long ago. Throw them into the rotating skulls until they’re all gone. One will give you nothing, one will give you a ton of rupees (as if you need them) and one will give you a Small Key. Grab it and head back to the maze. Head to the south door and enter.
Use the Lens to find a shadow on the floor. Pick a bomb flower and place it on the shadow to uproot a Dead Hand. Fight him the usual way. When he retreats, repeat the process until he is defeated, and leaves you a chest with arrows for your troubles. Back to the maze room, use your Small Key on the north door. Use Din’s Fire (will create Fire Keese) or Fire Arrows to destroy the wood walls. Kill the keese, then open the chests. The large one (watch out for the invisible Skulltula) holds the Boss Key, and the small holds a Blue Rupee. Make your way back through the maze and take the improvised bridge or Longshot across the river.
On the east side, take aim towards the north side of the river next to the bridge to find a Golden Skulltula. Longshot it to claim it’s token. Finally, head through the final door towards the boss door. Locate the Golden Skulltula “floating” in space, then use the Lens and Hover Boots to reach it. Collect the token, then make it to the Boss Door. Use the key to continue through. Fall through the hole, landing on a large drum, to find yourself face to face… err…eye, with Bongo-Bongo.
Bongo Bongo can be one of the hardest bosses in the game. Even though he can be killed quickly if you know what to do, he’s all about timing and reacting quickly, which can be hard, especially the first time you face him. His attacks do quite a bit of damage, so it’s not hard to quickly lose all your life. A couple fairies are recommended for this battle.
Ironically enough, the entire battle is on a giant bongo drum, with two hands hitting it. It may seem as though you should use the Hover Boots, but they actually make it harder. The drum is floating in a sea of poison, so you’ll have to jump back on as quick as possible should you be cast off.
This boss attacks by using two hands with generic, predictable punching, etc. His fastest attack is the swiping move, which is hard to avoid sometimes. The best way is to simply hold R to duck when you’re not Z targeting. The other moves are generally easily avoided by simply rolling.

The object of the battle is to stun both hands, to make Bongo Bongo vulnerable. You can do this using the Longshot, the Megaton Hammer, the Fairy Bow, or simply one of your swords. Both of the first two listed… well… suck…It’s possible to attack the hands while they’re in the middle of attacking you, but some attacks are invulnerable, etc, so it’s easier to attack the stationary one. Here’s the two best methods I’ve found to attacking the hands:
Method 1: Stand far back so you can see both hands. Z target and shoot one hand. Dodge the other when it attacks, and if it’s next to you for a second (such as after slamming the ground) stab it with your sword. Otherwise, Z target that one, and shoot it when it goes back to its starting position before it attacks again.

Method 2: Wait for one hand to attack. Run straight for the other hand that’s not moving. Smack it. Quickly turn and move to where the opposing hand will return to (left or right). Smack it as soon as it comes back to its original position.

Both of those tricks work very well (I like the second method better). However you end up doing it, you can use the Lens of Truth to see Bongo Bongo. He’ll now open his eyes and rush towards you, with hands on either sides. Hit his open eye to stun him, with which you can use all of the weapons listed earlier. A regular sword slash is kinda fun, but hard to time… The best methods are to use the lens of truth, z-target, and quickly shoot an arrow. Alternatively, you can stand between fists and use a spin attack.

He can be a pretty intimidating boss, but if you use the tricks I have listed above, and especially if you have the Biggoron’s Sword, this guy can be over within one minute.
After he’s been defeated, he’ll boil down into a puddle of shadow goo like he was when he escaped the Well. Be sure to snag the Heart Container, then head for the blue portal. You’ll see the final sage, Impa of the Sheikah, who’ll reward you with the Shadow Medallion.
- Chapter 9 – Shadow Temple
- Chapter 10 – Spirit Temple
- Chapter 11 – Gerudo Training Grounds
- Chapter 12 – Ganon’s Castle
