Aquamentus (The Legend of Zelda): Difference between revisions
(Merged Info from Aquamentus) |
mNo edit summary |
||
| Line 1: | Line 1: | ||
{{Boss | {{Boss | ||
|name = Aquamentus | |name = Aquamentus | ||
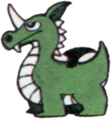
|image = [[File:Aquamentus-LoZ-Art.png|200px]]<br>''Artwork of Aquamentus from The Legend of Zelda'' | |image = [[File:Aquamentus-LoZ-Art.png|200px]]<br>''Artwork of Aquamentus from The Legend of Zelda'' | ||
|threat = 3 | |threat = 3 | ||
|attack = {{H|2}} Contact<br>{{H|2}} Fireball | |attack = {{H|2}} Contact<br>{{H|2}} Fireball | ||
|game = ''[[The Legend of Zelda]]'' | |game = ''[[The Legend of Zelda]]'' | ||
|dungeon = [[Level 1: The Eagle]]<br>[[Level 7: The Demon]] | |dungeon = [[Level 1: The Eagle]]<br>[[Level 7: The Demon]] | ||
|weapon = [[Sword]]<br>[[Bomb]]<br>[[Bow]]<br>[[Magical Rod]] | |weapon = [[Sword]]<br>[[Bomb]]<br>[[Bow]]<br>[[Magical Rod]] | ||
|reward = [[Heart Container]]<br>[[Triforce Shard]] | |reward = [[Heart Container]]<br>[[Triforce Shard]] | ||
}} | }} | ||
'''Aquamentus''' is a | '''Aquamentus''' is a [[Boss]] that is encountered in [[Level 1: The Eagle]] and [[Level 7: The Demon]] in ''[[The Legend of Zelda]]'', as the main boss in both dungeons. | ||
==Boss Strategy== | ==Boss Strategy== | ||
In The Eagle, Aquamentus is guarding the first [[Triforce Shard]], which [[Link]] needs. Aquamentus' main attack is to shoot three fireballs at Link at once, each going in a different direction. If one of these hits Link, it causes half a heart of damage. Also, making contact with Aquamentus will result in Link losing half a heart of health. The best method of attack against Aquamentus is to avoid the fireballs and attack its body when it's not shooting fireballs. At this stage of the game, it is possible to already have the [[White Sword]], which will kill Aqaumentus in three hits. [[Bomb]]s can also be used, as well as the [[Bow]] & [[Arrow]]. | In The Eagle, Aquamentus is guarding the first [[Triforce Shard]], which [[Link]] needs. Aquamentus' main attack is to shoot three fireballs at Link at once, each going in a different direction. If one of these hits Link, it causes half a heart of damage. Also, making contact with Aquamentus will result in Link losing half a heart of health. The best method of attack against Aquamentus is to avoid the fireballs and attack its body when it's not shooting fireballs. At this stage of the game, it is possible to already have the [[White Sword]], which will kill Aqaumentus in three hits. [[Bomb]]s can also be used, as well as the [[Bow]] & [[Arrow]]. | ||
In The Demon, Aquamentus makes its second appearance as the guardian of the seventh Triforce Shard. Interestingly, this version of Aqaumentus is the exact same as the previous version, meaning all its attacks damage the same, and it takes damage the same. If Link has collected the [[Magical Sword]] at this point, which is more than entirely possible, he is able to kill Aqaumentus with only two hits. It is unknown why [[Nintendo]] decided to place such an easy boss at the end of one of the harder dungeons in the game. After Link has defeated Aquamentus, he can collect the Triforce Shard. | In The Demon, Aquamentus makes its second appearance as the guardian of the seventh Triforce Shard. Interestingly, this version of Aqaumentus is the exact same as the previous version, meaning all of its attacks damage the same, and it takes damage the same. If Link has collected the [[Magical Sword]] at this point, which is more than entirely possible, he is able to kill Aqaumentus with only two hits. It is unknown why [[Nintendo]] decided to place such an easy boss at the end of one of the harder dungeons in the game. After Link has defeated Aquamentus, he can collect the Triforce Shard. | ||
==Trivia== | ==Trivia== | ||
| Line 26: | Line 25: | ||
File:Aquamentus-LoZ-Sprite.png|Aquamentus Sprite from ''[[The Legend of Zelda]]'' | File:Aquamentus-LoZ-Sprite.png|Aquamentus Sprite from ''[[The Legend of Zelda]]'' | ||
</gallery> | </gallery> | ||
{{Cat|The Legend of Zelda Bosses}} | {{Cat|The Legend of Zelda Bosses}} | ||
Revision as of 18:42, January 2, 2013
Aquamentus is a Boss that is encountered in Level 1: The Eagle and Level 7: The Demon in The Legend of Zelda, as the main boss in both dungeons.
Boss Strategy
In The Eagle, Aquamentus is guarding the first Triforce Shard, which Link needs. Aquamentus' main attack is to shoot three fireballs at Link at once, each going in a different direction. If one of these hits Link, it causes half a heart of damage. Also, making contact with Aquamentus will result in Link losing half a heart of health. The best method of attack against Aquamentus is to avoid the fireballs and attack its body when it's not shooting fireballs. At this stage of the game, it is possible to already have the White Sword, which will kill Aqaumentus in three hits. Bombs can also be used, as well as the Bow & Arrow.
In The Demon, Aquamentus makes its second appearance as the guardian of the seventh Triforce Shard. Interestingly, this version of Aqaumentus is the exact same as the previous version, meaning all of its attacks damage the same, and it takes damage the same. If Link has collected the Magical Sword at this point, which is more than entirely possible, he is able to kill Aqaumentus with only two hits. It is unknown why Nintendo decided to place such an easy boss at the end of one of the harder dungeons in the game. After Link has defeated Aquamentus, he can collect the Triforce Shard.
Trivia
- The two different appearances of Aquamentus in The Legend of Zelda have the exact same attack power and amount of damage required to defeat, even though they appear on different ends of the game, in the first and the seventh dungeon, respectively.
Gallery
Aquamentus Million Publishing Artwork from The Legend of Zelda

Aquamentus Sprite from The Legend of Zelda
