Speedrun:A Link to the Past/Any% (NMG, No S+Q)/Eastern Palace
Eastern Palace Overworld
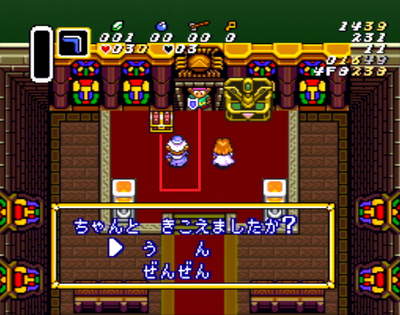
In this scene the Loyal Sage will give you info that leads to discovering the location of Sahasrahla. Since we already know he requires the Green Pendant from Eastern Palace, we can skip a step and head straight for the dungeon. Mash through this text with all 4 face buttons (A, B, X, and Y) and select the top option to say that you understand.
At this point it is very important to use only cardinal inputs (Up, Down, Left, and Right) to navigate to the chest. Using diagonal movement into the sage will cause you to get stuck until you change your input direction. After you have collected the Heart Container head for the South exit.
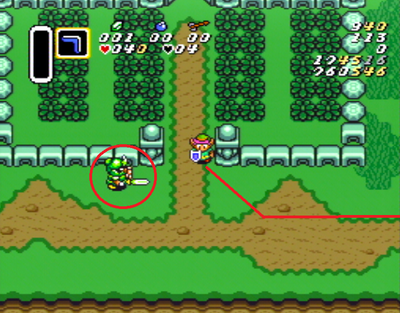
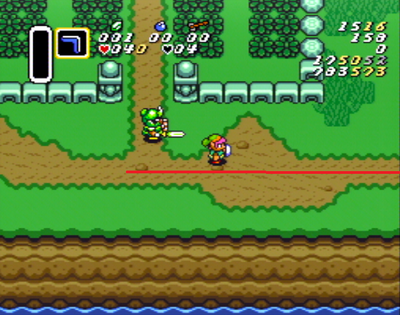
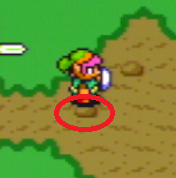
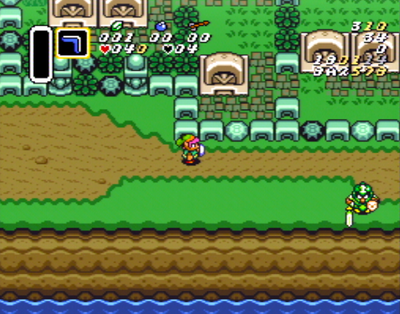
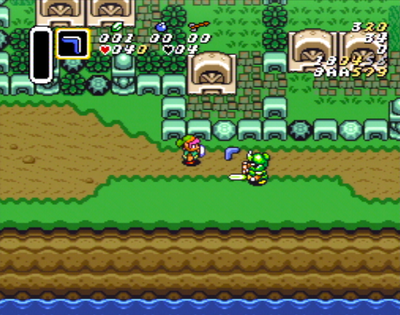
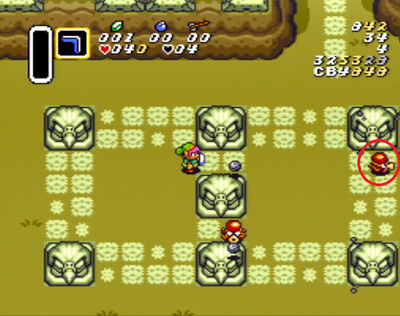
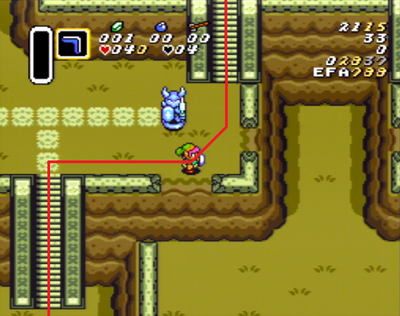
Hold Down as you exit the sanctuary and nudge to the Right as you pass the bottom of the gate. This Green Sword Soldier will chase you but he should never be a problem if you keep moving. One small optimization we do on this screen is to never go below this small pebble texture. If you exit this screen in the upper half the guard on the next screen will have a better movement pattern.
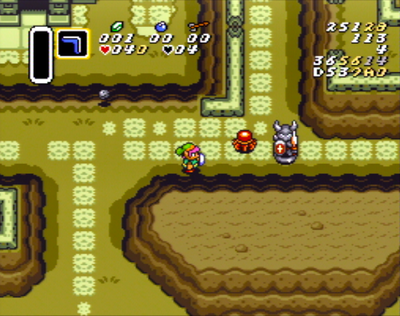
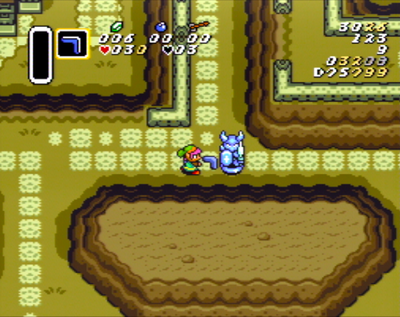
If you exited the previous screen high enough this guard will always be facing down. Stay as high as possible as you walk past the graveyard and you can simply ignore this guard. If he walks Left you'll need to use your Boomerang to get through.
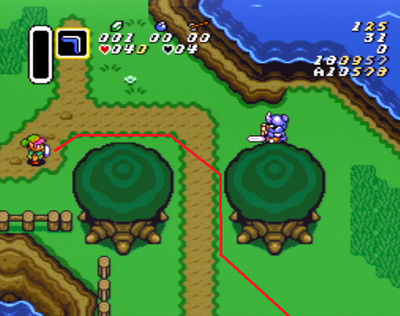
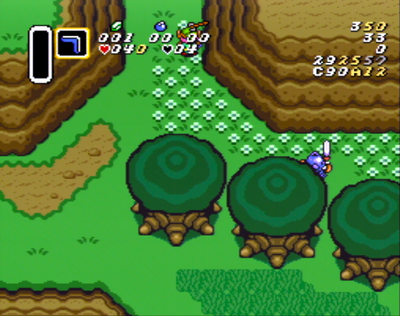
Nudge Up slightly to get above the tree, then you can just hold angle Down+Right the rest of the way.
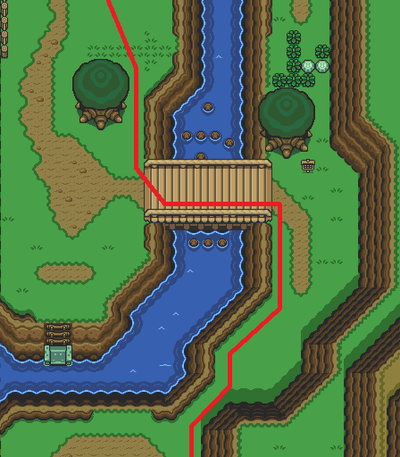
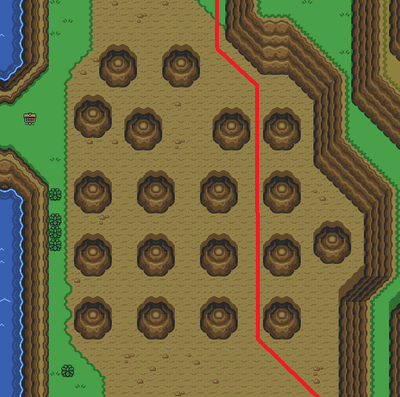
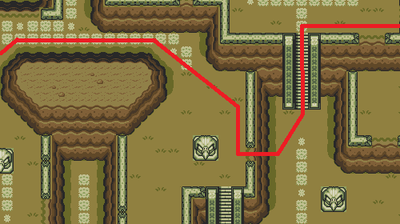
You can ignore all of the enemies on this screen if you just keep moving. Follow the path along the Right side of the tree and you can just hold angle Down+Right until you get to the other side of the bridge. Move Down until the slope starts going to the left and follow it all the way down to the South exit.
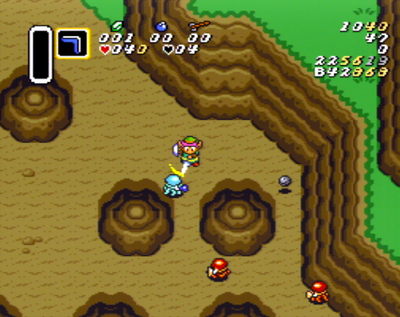
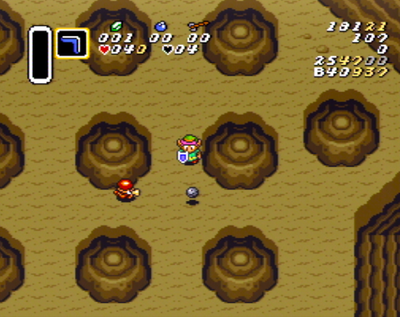
Ideally you can just follow the path exactly as shown but it rarely works out that way. Take your time as you move down. The most important thing here is to avoid taking damage as much as possible. You may need to slash a few enemies or delay your movement to wait for a rock to pass.
On these two screens we just exit to the Right. It's important to exit this second screen as far right as possible to line up with the stairs above.
This will be one of the more difficult screens we have encountered so far. Start by moving straight Up and then boomerang the Octorock as you pass under the gate.
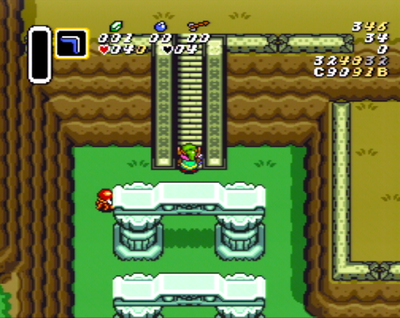
Now comes the time where we really need to talk about Pumping because it's about to become very important. We went over it briefly at the very start of the run for situations involving pumping against single walls, but this strategy becomes much more effective when you can use two walls at the same time like this staircase here. When moving North or West you can save time by mashing the D-Pad. In this example you want to hold Up and you can either wiggle your thumb or use your index and middle finger on your right hand to mash Left+Right as you climb.
Every time you change d-pad inputs like this it makes Link move a bit faster. You may not notice a difference at first but you will in the next example coming up later on this screen.
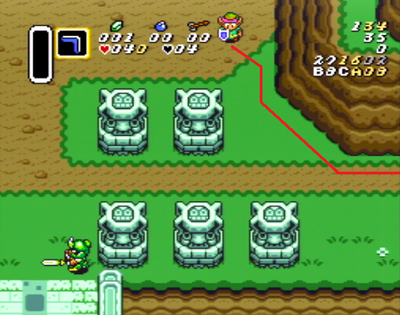
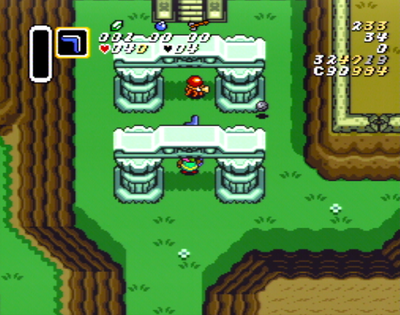
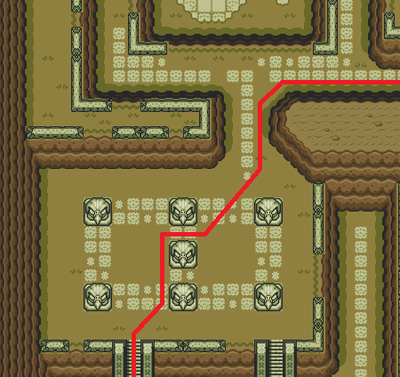
This is the path you want to follow as you pass by these eagle statues. There will usually be one octorock that sits in this spot to the right and fires rocks in all directions. You can block with your shield as you pass through the gap.
You may need to kill this octorock as well if it gets in your way. Stand about a tile away from the Armos Statue and stun it with the boomerang when it begins to move. Follow the path as shown.
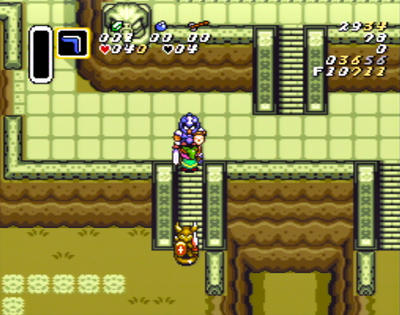
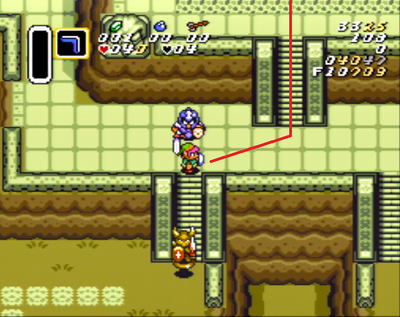
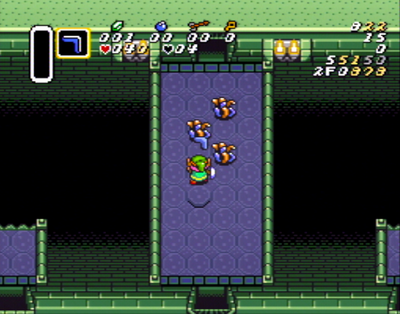
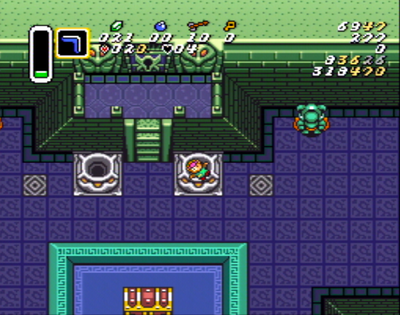
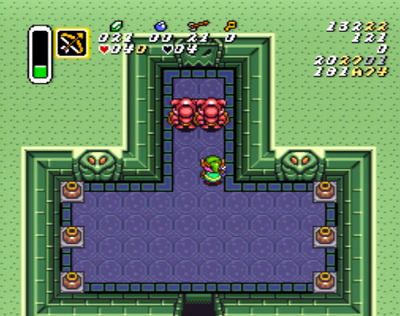
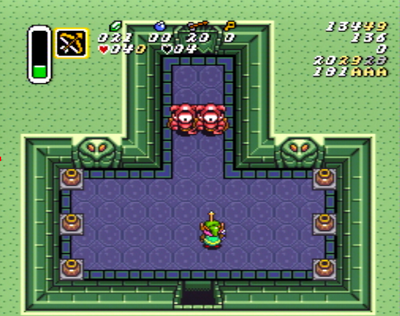
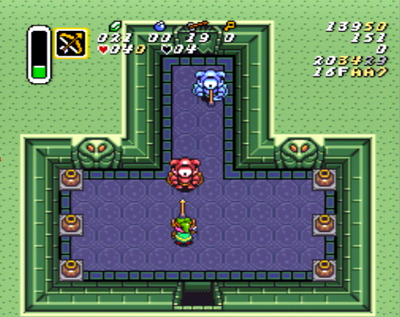
It's important to stay as low as possible until you start to pass this armos statue. If you scroll the screen Up too early, the Blue Sword Soldier will become visible on screen and start moving. If you just walk up the stairs normally without pumping like in the second image, there won't be enough time to get through safely. You can always stun him with the boomerang if this happens and keep on moving.
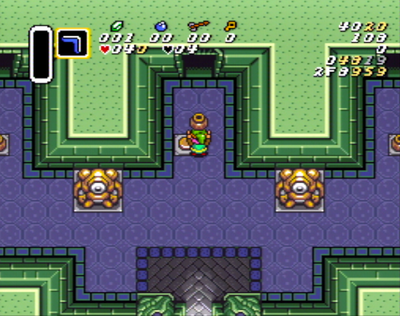
If you are able to pump quickly enough you'll find that there is a big enough gap to squeeze through! Don't forget to continue pumping against the stair walls as you enter the dungeon.
Unlocking the Bow
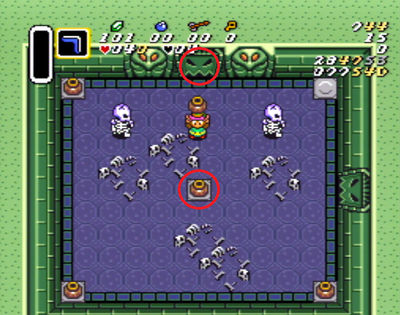
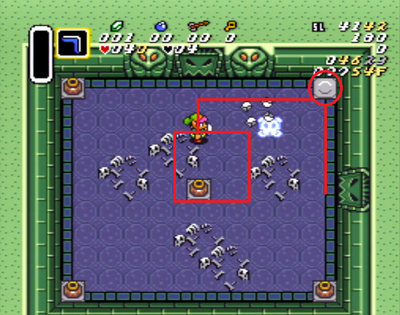
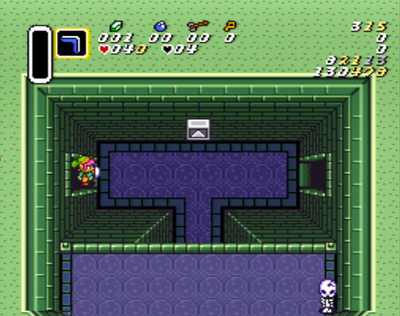
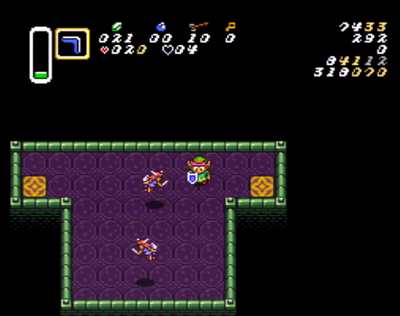
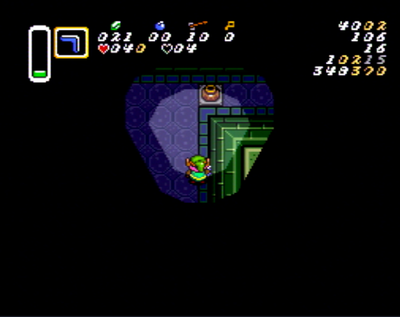
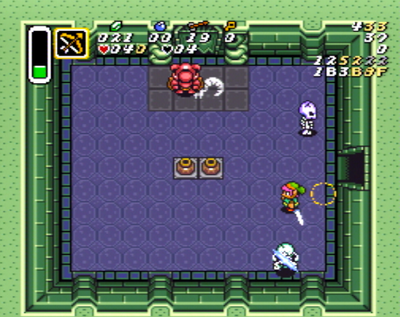
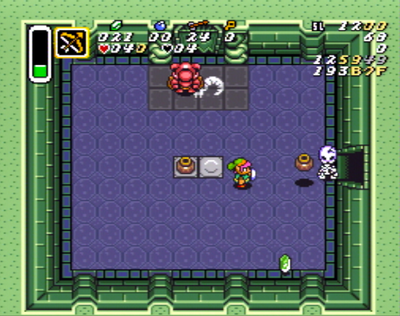
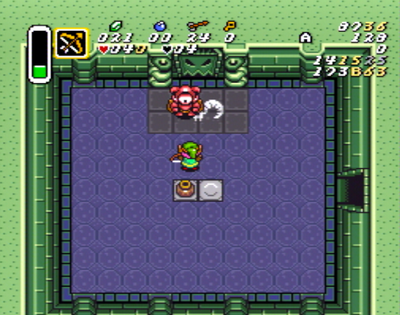
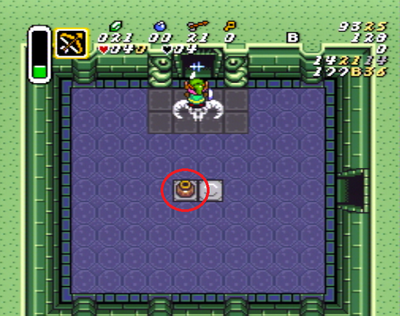
You only ever need to move Up in this room to grab the pot and activate this floor switch. The second image is just an example. Ideally you want to throw the pot right away because Link moves slower while holding it.
Move Left a bit out of this doorway to activate the switch and boomerang the Popo on the left as you pass through. You can walk through this enemy while it is stunned.
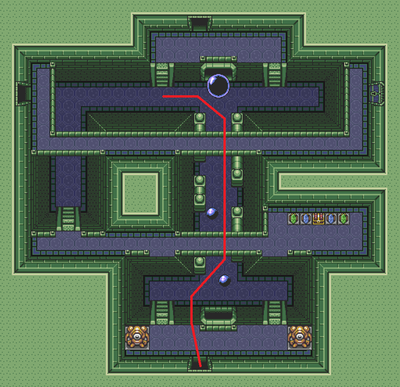
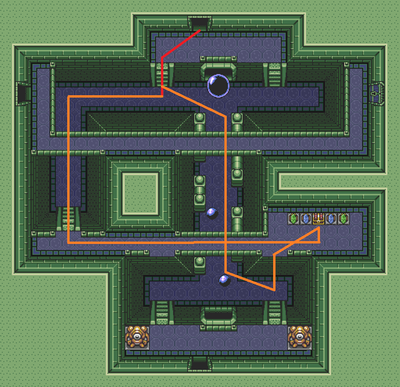
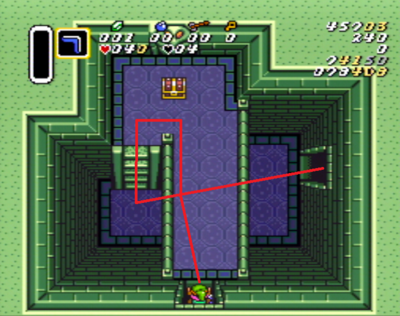
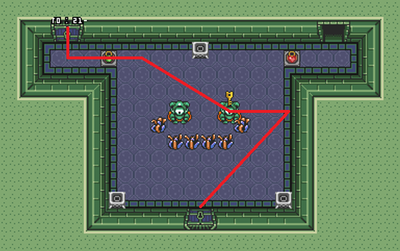
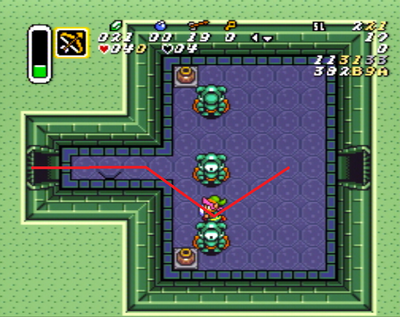
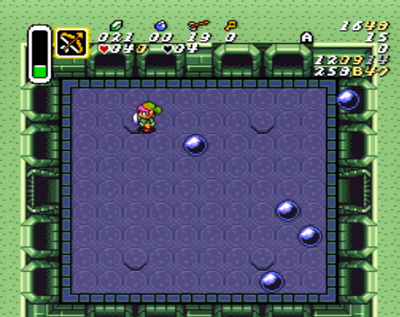
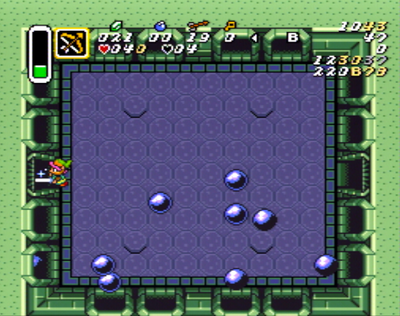
Follow the path in the first image and navigate around the cannonballs as needed. When you get to the stairs you have two options depending on if you'd like to purchase an extra Bottle from the Street Merchant later. This item is highly recommended for new players. Either skip it and follow the red path, or follow the orange path around to the 100 rupee chest and then make your way back through the cannonballs. You can make it to the top before the large cannonball comes if your movement is very efficient. Alternatively you can choose to backtrack down the stairs after getting the chest if you're concerned about taking more damage.
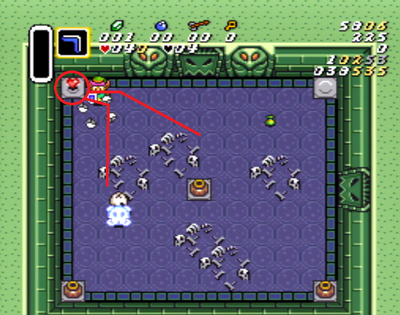
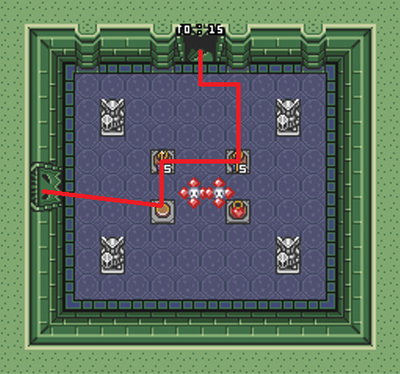
Move to the Left side of this large hub room and lift the bottom pot to reveal a Recovery Heart and a floor switch. Activate the switch and exit the left door.
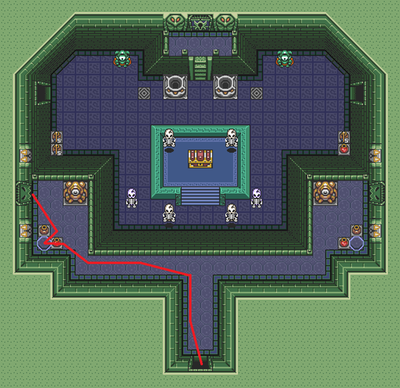
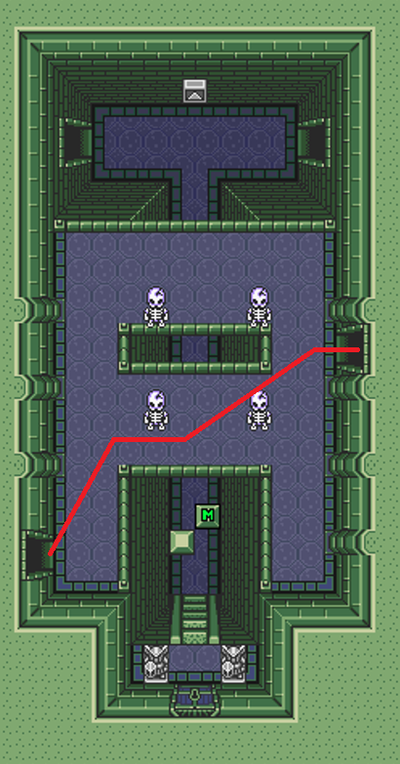
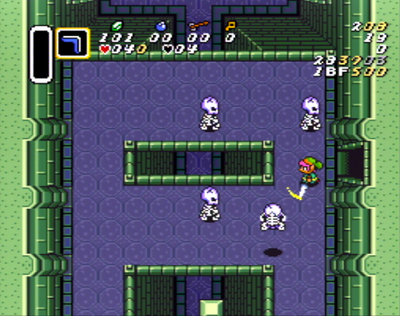
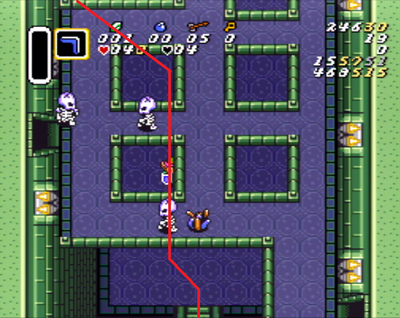
Navigate to the Bottom Left exit of this room. You may need to slash your sword as shown to scare the Stalfos out of your way.
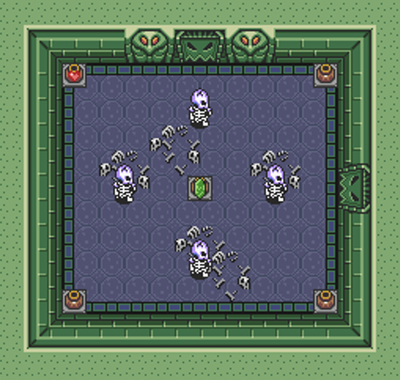
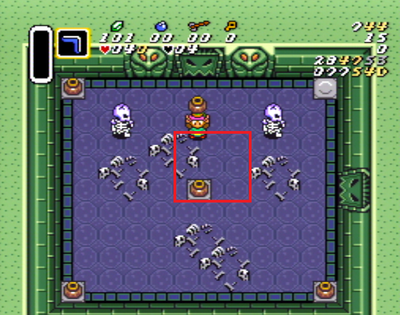
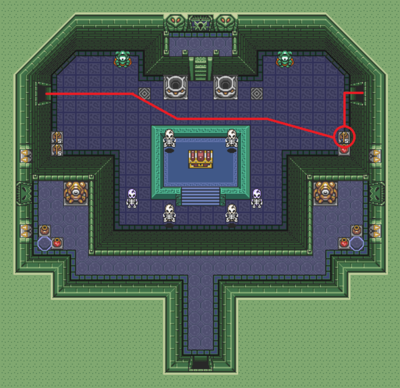
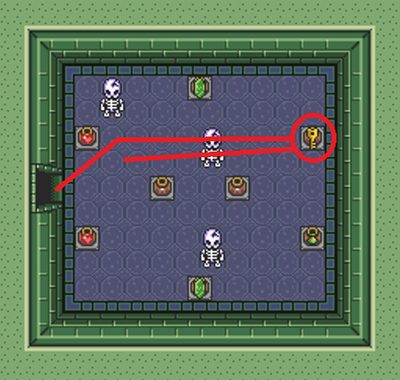
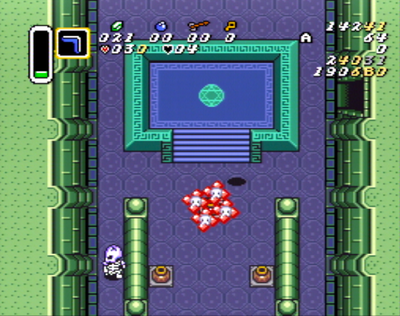
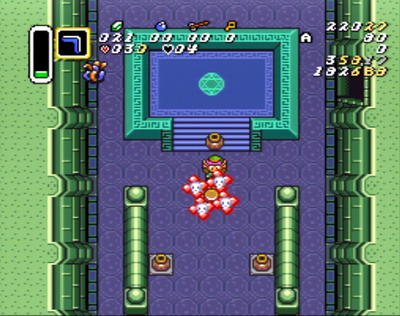
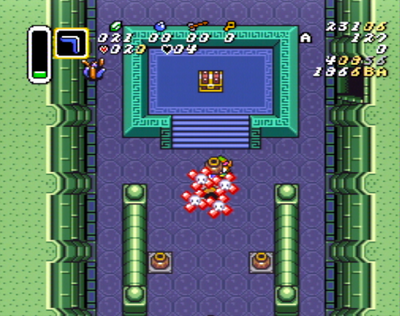
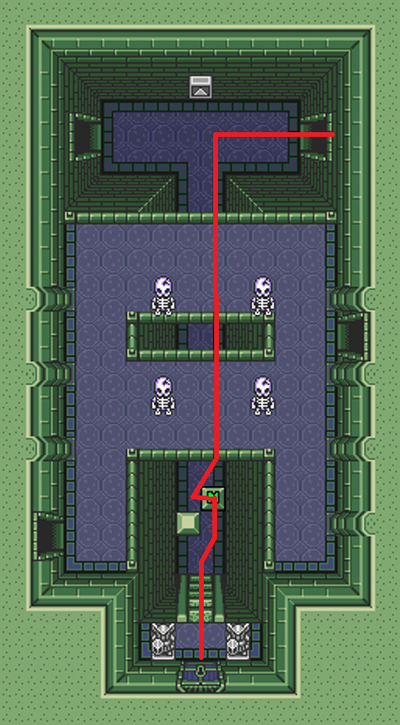
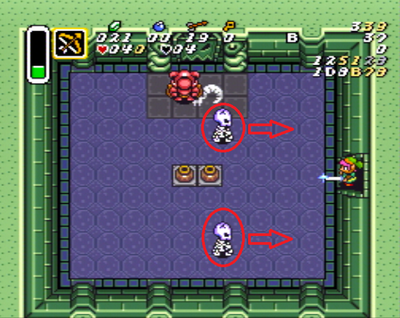
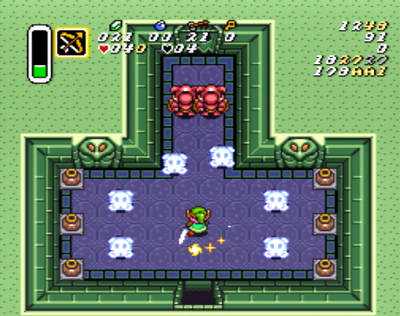
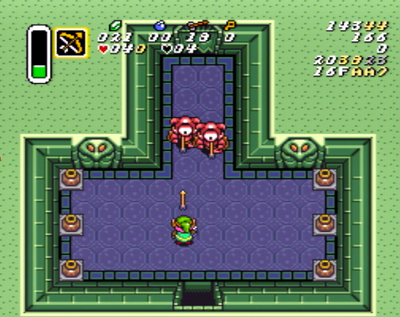
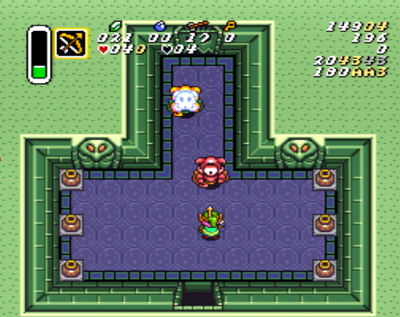
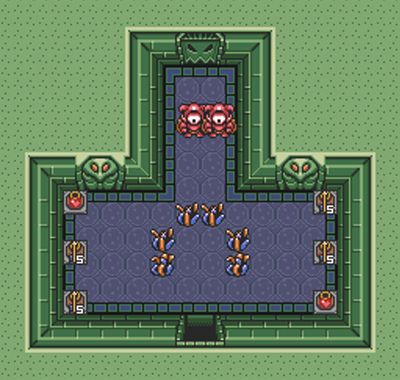
This is one of the most unique and interesting rooms in the game. This room has a proximity trigger that will cause four stalfos to spawn when you move into the center of the room. However if you navigate the room in just the right way you can trick the game into spawning two of the stalfos over the pot and the doorway which means they will never actually appear.
Follow the path up the right side of the room and grab the first pot. Carry the pot to the center of the room and move down far enough to activate the proximity trigger then immediately throw the pot to the Right. This will kill the first stalfos before it even appears on screen. Now move Up+Left to grab the other pot and throw it straight down as the other stalfos starts to spawn. If you did this movement correctly the door will open. It's possible to spawn a third stalfos if you aren't aligned with the door when you hit the proximity trigger. If this happens you can kill it quickly by using the pot in the center of the room.
It's also worth noting that you can choose to grab this recovery heart before you exit the room. Health is your most important resource in this particular dungeon and it pays to be extra cautious here.
Ignore this chest and keep on moving. We won't be needing the Compass today. Exit the next room to the Right.
Back in the hub room for the second time, the only thing we want to do is collect the 5 Arrows from this pot and exit on the Right side of the room. You may need to avoid the blue stalfos if he is hanging out near that part of the room. Don't forget the recovery heart in the lower pot if you don't have full health here.
Make sure Link is still visible under the overpass as you move down. This makes it much easier to nudge yourself into place as you approach the stairs at the bottom of the room.
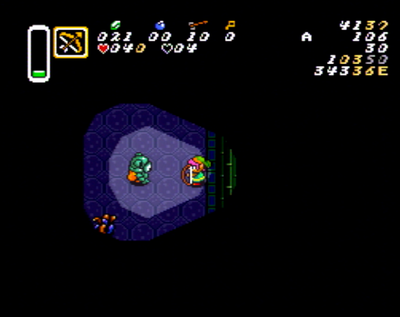
Here we have another short series of dark rooms. Hold Down+Right as you move down to align with the far right wall. You can continue holding this diagonal as you slash the popo and activate the floor switch. Once the switch is activated you can use cardinal inputs to move Up and Right to exit the room.
Move up until you are aligned on the tile with the pot above and grab the key pot on the right side of the room. Ideally you can navigate back without the stalfos giving you any trouble but you may need to slash or throw a pot at them if they get in the way. You also have the option to grab either of these recovery hearts on the way through if your health is low. It's very important to leave this room with as close to full health as possible.
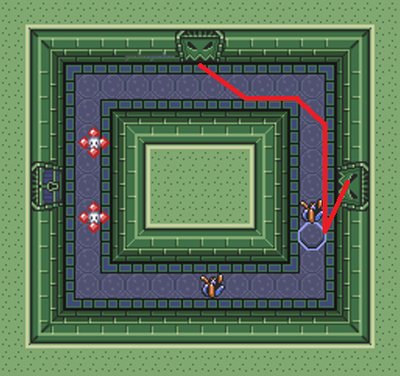
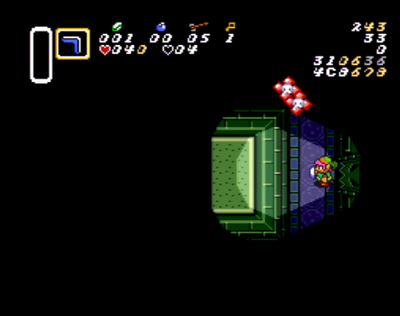
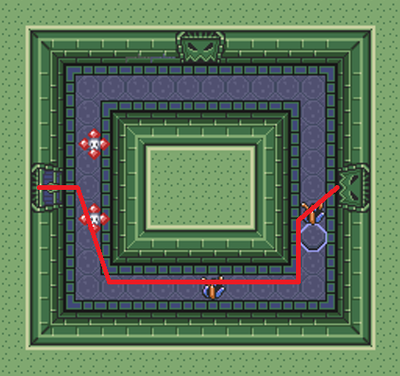
You'll need to move quickly in this room to avoid these two Anti-Fairies that are chasing you. Hold angle Down+Left to align with the left side wall. This will let you pass over the floor switch without hitting it again. Slash or boomerang the ropa as you make your way to the key door.
Since we are moving West along this bridge, you have the option to mash the Up input for the entire length of the room. This can save up to half of a second if you mash efficiently.
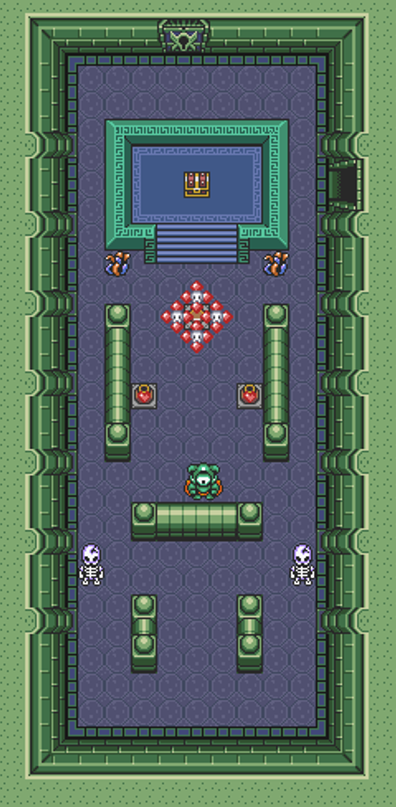
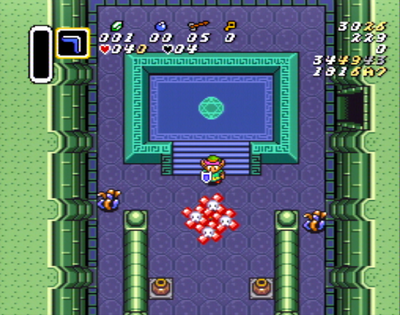
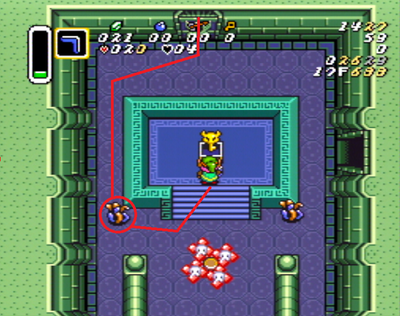
This room contains another very important speedrun strategy. Normally the game expects you to kill every enemy in the room to release the circle of anti-fairies guarding the switch in the center. Instead we can use a Damage Boost to pick up the pot while it is still guarded.
The most beginner friendly way to set up this trick is to start from the center of the stairs and face down. At this point you want to move straight Down and take damage from the circle of anti-fairies. After taking damage you will get knocked backwards. This is the damage boost part of the setup.
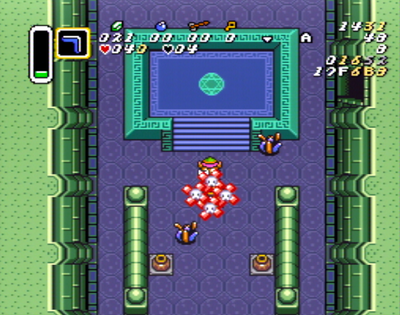
While taking damage, Link will have one full second of invulnerability known as i-frames It's very important to continue holding Down during this time. Link will get boosted back and possibly move to the Left or Right side of the stairs. You will need to react to this damage boost and use a Diagonal movement to get back to the center.
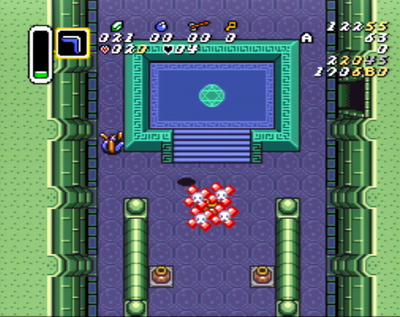
Use Link's i-frames to avoid getting knocked back while lifting the pot. If you continue to hold Down Link will take damage again and throw the pot. At this point you will get another one second of i-frames which you can use to step on the switch and make the Big Key chest appear. Keep in mind you may get boosted to the side again and will have to adjust in real time.
This damage boost setup will cost two hearts of damage. You can use the two pots below to recover up to two hearts if needed. It's possible that you either did not have enough health to start with, or you failed the setup and need more health to try a second time. You may even want them as an additional Safety after the switch is activated.
If this damage boost setup proves to be too difficult you still have the option of killing all of the enemies in the room normally.
One final note as you exit this room: because the door is slightly left of center it is Always faster to exit to the left even if you have to go through the Popo to do it.
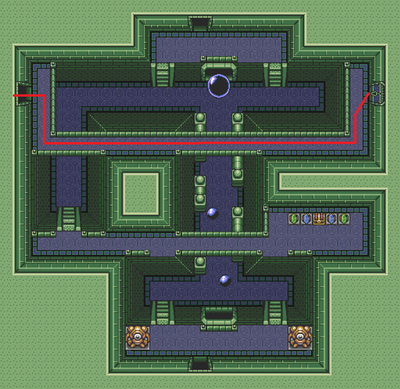
Push the Right block up and exit the door at the Top-Right corner of the room. You can mash Right on the d-pad as you move up to save some time here.
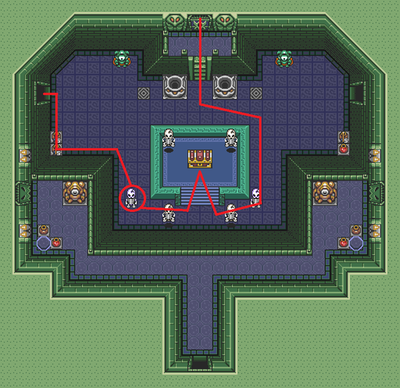
We're back in the hub room for the last time to finally grab the Bow. Collect the 10 arrows the pots on the left as you pass through. You may need to avoid the blue stalfos if he happens to be lurking in your path.
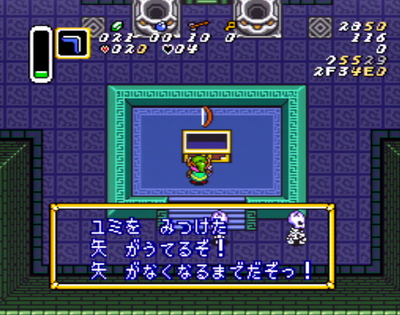
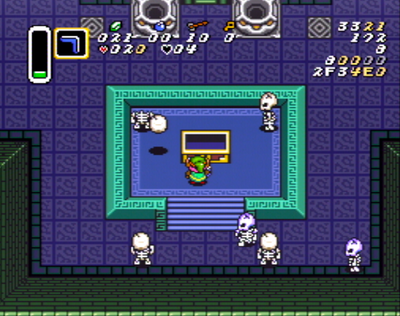
Once you have acquired the bow you'll have to decide which path to the door is safer. Both are equally fast so choose whichever one looks better. You'll have a second to decide as you clear the text box. After the text box has been cleared however, you'll encounter several gray stalfos. Move quickly to avoid being chased by the floating heads.
If you would like to recover the rest of your health before continuing on, you can drop down into one of these pots to find a hidden fairy room. Step onto the nearest orange tile when you're ready to get going again.
Back of Eastern
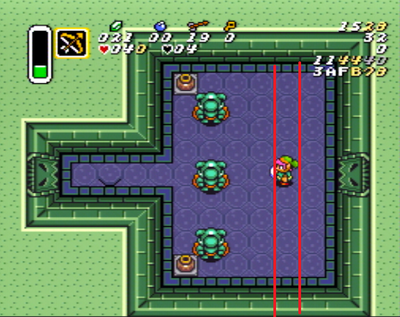
There are a few different ways to navigate this room but the basic idea is you want to clear out a few of the smaller enemies and then only wake up the Eyegore that is holding the Small Key.
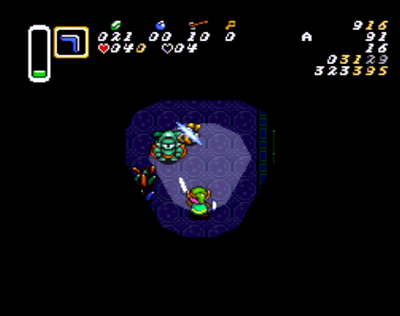
This is one of the easier methods I know of to learn this room. Hold angle Up+Right and slash when you get below these Popos. Continue holding the d-pad until you get all the way to the wall. Now we do what's known as a Menu Buffer. This just means we're using the pause menu to help time a sequence of inputs. Switch to the bow then turn Left to fire an arrow at the eyegore. You may find that you are running into the enemy if you hold the left button instead of just tapping it. If this is a problem you can try staying near the bottom of the room instead where you have more time to react.
After the eyegore is dead, collect the key as you move left to exit at the Top-Left corner of the room.
Follow this route to stock up on arrows and avoid the anti-fairies. You can collect the heart pot if you want but it isn't recommended. If you do go for this heart, start with the same arrow pot as before and go around the room clockwise.
Move left until you are on the second column of tiles, then hold angle Down+Left to step on the floor switch. During the door opening animation, you will have time to switch to an Up+Left diagonal and get to the door without the enemies bothering you.
Step on the Top-Left switch to open the door. The cannonball pattern is completely random so you may need to wait for them to pass before it is safe to continue on. Hold a sword charge as you exit the left door.
The two stalfos will move toward you when you enter the room. Move Down+Left and release your spin when the first one gets close.
At this point you will need to react to where the other stalfos is and throw a pot at it. Because of how the game handles altitude, you need to be slightly lower than him if you throw from the side as shown here. Make sure to collect the arrows in the right pot. You can grab the heart on the left if you need it.
Move above the pots and fire two arrows at the red eyegore, then exit the room with a charged sword.
Walk up and release your sword charge to kill all 6 Popos. Move to one side and walk up above the corner to wake up both of the eyegores. At this point you want to walk all the way back down to give yourself some space to fire arrows. You can choose to kill just the one eyegore, then wait for the other one to wake up a second time but I'll teach you the faster method just in case.
To kill both eyegores in one Cycle, move to the other side after the first arrow has been fired and shoot two more. At this point you should still have time to move back to the right and shoot one last arrow before the enemies get to you. If you find that they are running into you, you are probably either standing too high up or shooting your arrows too slowly. This will take some practice but it saves 6 seconds if you get it.
It's possible that the enemies haven't dropped enough arrows. You'll want to pay close attention to your health and ammo before continuing on because you'll need plenty of both for the upcoming boss fight. Collect some arrows if you have less than 20.
Boss: Armos Knights
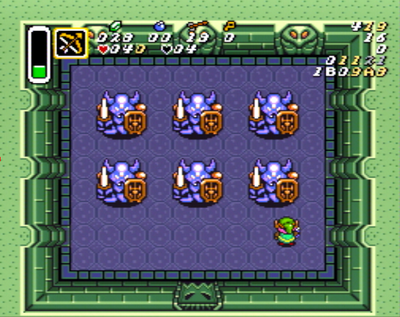
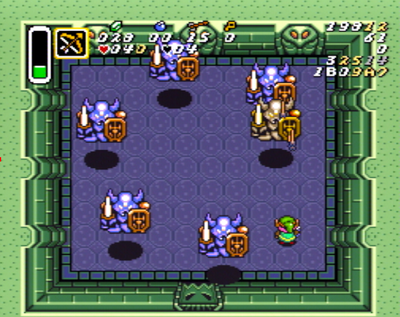
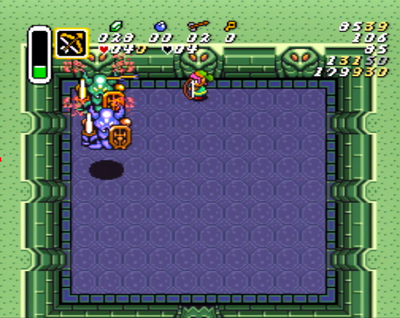
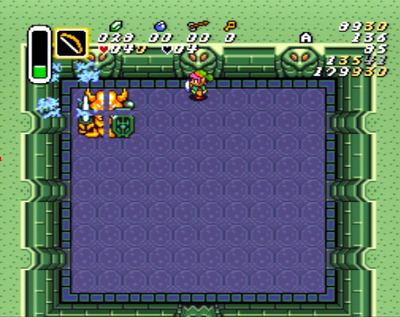
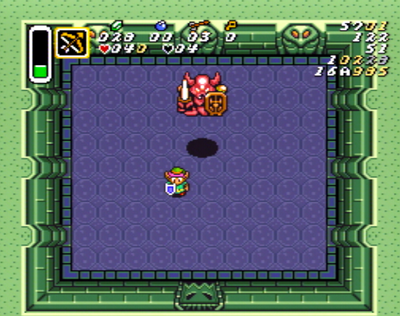
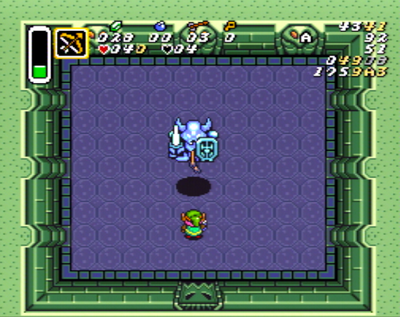
The Armos Knights require 3 arrows each to kill. When only one is remaining it will turn red and regain all of its health, then being to chase Link around the room. We can avoid this second Phase and save several seconds by making sure the final knight is killed before it has time to turn red. To do this Setup, begin by standing on this tile as shown.
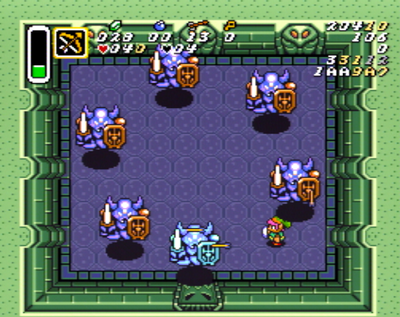
We're going to listen for a specific Audio Cue to know when to start firing arrows. You'll see the knights start to shake during the intro of the song. Right when the first beat of the main part of the song plays you want to fire three arrows Up. Tur Left and fire two more arrows. It's very important to leave this particular knight one arrow away from death.
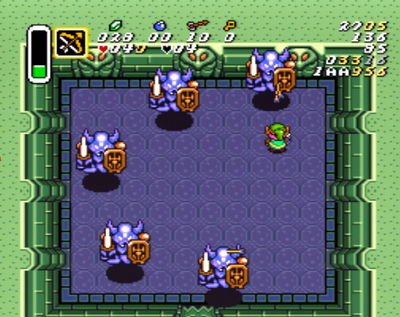
Quickly face Up again and make sure to continue hold the up input as you fire 3 more arrows. This will kill the two knights above you as you make your way to the top of the room. If you got the timing down, the remaining four knights will still be in their starting positions when you get to this position.
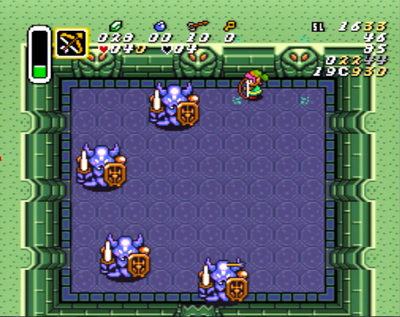
The knights will now start to rotate clockwise toward you. Start spamming arrows as you move Left to about the center of the room. Keep on firing until the last knight dies. If you did everything right you will skip the second phase. Collect your Heart Container and Pendant of Courage to exit the dungeon.
If you do end up getting stuck in phase 2, bait the red knight to the top of the room and fire arrows from below. This is much easier and safer than attacking from either side or from above.


