Scaldera: Difference between revisions
m (Improved Infobox Template) |
mNo edit summary |
||
| Line 2: | Line 2: | ||
|name = Scaldera | |name = Scaldera | ||
|image = [[File:Scaldera-SS-Art.jpg|200px]] | |image = [[File:Scaldera-SS-Art.jpg|200px]] | ||
|title = Pyroclastic Fiend | |title = Pyroclastic Fiend | ||
|game = ''[[The Legend of Zelda: Skyward Sword|Skyward Sword]]'' | |game = ''[[The Legend of Zelda: Skyward Sword|Skyward Sword]]'' | ||
|dungeon = [[Earth Temple (Skyward Sword)|Earth Temple]] | |dungeon = [[Earth Temple (Skyward Sword)|Earth Temple]] | ||
Revision as of 21:10, December 20, 2012
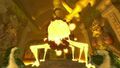
Pyroclastic Fiend Scaldera is the Boss of the second Dungeon in Skyward Sword, the Earth Temple. It is very similar in size and shape to a Mini-Boss from Spirit Tracks, the Rocktite.
Upon Link's entrance to the boss chamber, Ghirahim will welcome him for a high balcony. He starts by acknowledging he does not know Link's name; which he says is irrelevant because he is mad and needs someone to use it one.[1] He will then proceed to tell Link the story of why he is here, which revolves around him learning his minions had captured the spirit maiden, and thus he rushed over, only the learn that Impa had freed her.[2][3][4] Finally, he says he plans to introduce Link to a friend of his,[5] adding that this friend will only require a few moments to burn Link to a crisp.[6]
When the battle begins, Scaldera will fire fireballs in different directions and Link will need to run up the slope while dodging the fireballs. Then eventually Scaldera will chase after Link. We know from previous Game Informer updates that to defeat Scaldera you must throw bombs into its mouth, which will slowly chip away at its exoskeleton. This will reveal an eye beneath, which must be attacked with the sword to defeat him.
Boss Strategy
Phase 1
Immediately start running up the slope - you can't do anything to Scaldera while it's on fire. A little ways up, it should cool down, revealing its rocky carapace. Throw a bomb at it, and it will roll down the slope. Follow it down and prepare another bomb. As it opens its mouth in preparation for a fireball attack, throw in a bomb and its explosion will chip away some of the carapace, revealing an eye. Slash at it with your sword until he reignites. Repeat this process until it sustains enough damage to change its strategy to phase 2.
If you aren't fast enough with the second bomb and he launches his fireball attack, dash back and forth to avoid them. If you run all the way to the top, you can hide on the far left or right side of the circular platform where neither the fireballs nor Scaldera can reach. You can also pick up some hearts and bombs here.
Phase 2
Scaldera will raise its body high above the ground and rush up the slope past you. Once he reaches the top, he'll roll down and try to crush you. Stand to one side of the slope, and then dash to the other side before it hits you, and it'll roll past you down to the bottom. Here, it will prepare another fireball attack, so throw a bomb in its mouth and repeat the process from phase 1. The eye will move around this time, requiring more precise aiming of the sword.
Gallery
Scaldera in battle
