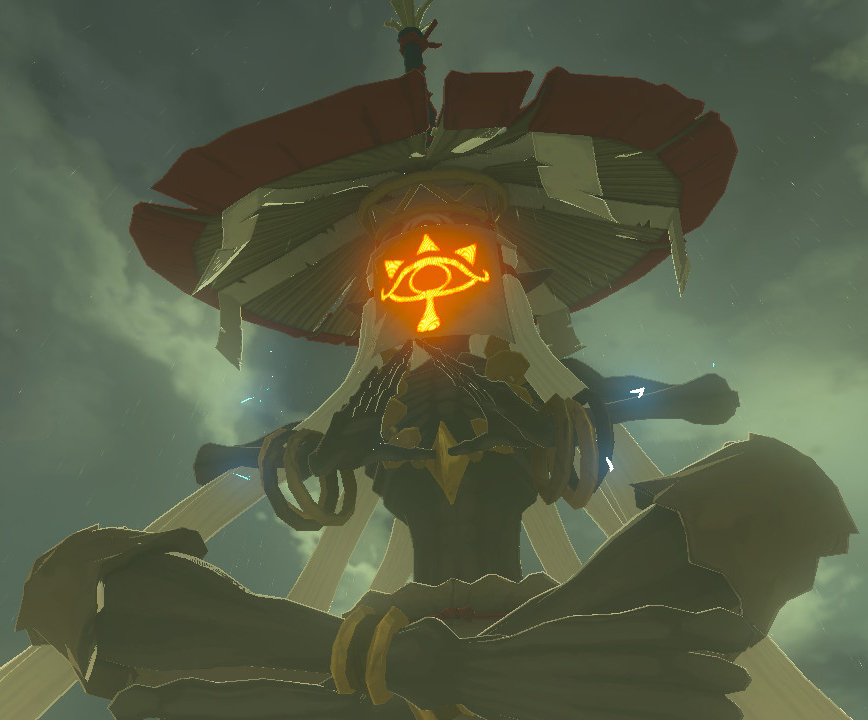
Monk Maz Koshia (Boss)
Title | The Divine Trial | |
Games | ||
Rewards | ||
Threat | ||
Effective | Master Sword | |
"The arbiter of worthiness for the hero who wishes to control a Divine Beast, following a revelation from the Goddess Hylia. As the last part of the final trial, the monk offers a challenge of ancient techniques."
Overview
Monk Maz Koshia is a Sheikah Monk featured in Breath of the Wild. They speak with Link on many occasions during The Champions' Ballad, giving guidance to him to complete the Divine Beast Tamer's Trial.
Maz Koshia also serves as the boss of the final Divine Beast, and has many phases. Upon defeat, they will bestow upon Link the Master Cycle Zero.
Boss Strategy
Phase 1
The fight starts out with Maz Koshia summoning rain to the battlefield. He has a variety of different attacks, including using elemental arrows (except Bomb and Ancient arrows). He can also dash towards Link and slash with his sword, which can be easily avoided. A Perfect Guard can be used here to stun him temporarily. He can also teleport away and spawn above Link, thrusting downwards, similar to Ghirahim in Skyward Sword. Another attack he makes is to create a column of wind from the ground which heads towards Link, identical to that performed by a Yiga Blademaster. This attack can be avoided by catching the updraft it creates, which can also be used to strike him mid-air with the bow. His final attack is to dash-teleport and strike Link, just like Thunderblight Ganon. This can be avoided by backing away, or by performing a Perfect Dodge to strike him with a Flurry Rush.
In summary, the best way to deal damage is by performing Perfect Guards or Dodges on his attacks, in addition to landing head-shots to stun him.
Phase 2
After around 20% of Maz Koshia's health is depleted, he will fly upwards and initiate his second phase: duplication. He will split into nine different, identical forms of himself, each attacking you at different times. The aim here is to find the real Monk, as when you slash at the fakes they simply vanish. Bombs can be used when they are grouped up to eliminate multiple monks at once, and the real one will not vanish when struck. Use this opportunity to get in lots of hits. As this phase draws to a close, they will line up and take turns to attack you, either by teleporting above and thrusting downwards, or by charging towards you. The same method applies, strike them all until you find the real one. Repeat until his health drops to half. Another method you could try is very peculiar: exposing the real monk with (a) Mighty Banana. As with the Yiga Clan and the remaining Sheikah, Maz Koshia loves Mighty Bananas. When all nine monks are surrounding you in a circle, open your inventory, pull out a Mighty Banana, and drop it on the ground. Doing so will result in all of the fake monks becoming stunned and the real Maz Koshia will run clumsily to the Mighty Banana. Upon reaching it, he will kneel down, pick it up, and eat it. He, and the other fake monks, will then return to normal and continue attacking you. If you have enough Mighty Bananas, feel free to continue using this method.
Phase 3
At the start of this phase, Maz Koshia will grow exponentially, and prove a much larger threat than before. He likes to summon eight metal, spiked balls, in a similar vein to Master Kohga. You can use Magnesis to grab them, and if you hold on to one until he has thrown them all, lightning will be attracted to it, and you can deal great damage to the monk with the ball. If you are successful in this, he will fall to the ground and be vulnerable to damage. Use a charged attack in conjunction with a two-handed weapon to deal maximum damage here. He can also tilt the battlefield and summon the spiky balls, so take care.
Phase 4
When he has taken enough damage, Maz Koshia will stand up and start walking towards you, still being a giant. He has two attacks: summon two mini monks to combat you, or fire a Guardian beam at you. The two mini monks will perform similar attacks to the first phase, such as using elemental arrows or striking you with their sword. It is important to take out the two monks quickly, as Maz Koshia likes to launch a beam while you are distracted. If he is preparing a beam and your surroundings are safe, target Maz Koshia and prepare to reflect the beam with a Perfect Guard. This can be fairly tricky, but keep your distance so you have maximum time to react. One thing to note in this phase is that he does not take damage from arrows, so save them.
After you have eliminated the monk, he will congratulate you and the battlefield will shift, and you will be presented with the Master Cycle Zero.


