Mo'a Keet Shrine: Difference between revisions
Christy989 (talk | contribs) No edit summary |
No edit summary |
||
| Line 1: | Line 1: | ||
{{Infobox|location | {{Infobox|location | ||
| image = [[File:Mo'aKeetShrine.jpg|258px]] | | image = [[File:Mo'aKeetShrine.jpg|258px]] | ||
| Line 20: | Line 19: | ||
==Metal Makes a Path== | ==Metal Makes a Path== | ||
Once you start the shrine, run to the far right on the lower level. Look up at the ceiling to find four destructible blocks. Shoot them with a [[Bomb Arrow]] to break the boulders, causing a treasure chest to fall down. Open it up to get a [[Ruby]]. Alternatively, if you don't have a bomb arrow, there is a metallic boulder later in the shrine that can be used to break this blocks. | |||
Run up to the nearby ramp and use [[Stasis]] on the boulder right when it falls down. This will allow Link enough time to run up the ramp and avoid the boulder. | |||
Turn to the right and you'll find a metallic boulder rolling down the ramp. Grab it with Magnesis when it comes nearby. You can carry it, or place it to the side, making sure it doesn't fall down into the abyss. Then run up the ramp and open the treasure chest to get a [[Royal Broadsword]] or a [[Knight's Broadsword]]. | |||
The last ramp leads up to the altar, but there are a series of boulders that are falling down at the same time. Link will need to use the large metallic block and push the boulders, as they start to roll down the ramp. Keep distance between Link and the metallic block to push all the boulders towards the altar. | |||
Once you are in the clear, run over to the altar to meet [[Mo'a Keet]] and get a [[Spirit Orb]]. | |||
==Gallery== | |||
<gallery widths="400px" heights="220px"> | |||
File:Moa-Keet-Shrine-1.jpg|<center>Shoot the blocks up above with a [[Bomb Arrow]].</center> | |||
File:Moa-Keet-Shrine-2.jpg|<center>Open the chest to get a [[Ruby]].</center> | |||
File:Moa-Keet-Shrine-3.jpg|<center>Use [[Stasis]] to prevent the block from rolling.</center> | |||
File:Moa-Keet-Shrine-4.jpg|<center>Grab the block using [[Magnesis]].</center> | |||
File:Moa-Keet-Shrine-5.jpg|<center>Reach the chest to get a broadsword.</center> | |||
File:Moa-Keet-Shrine-6.jpg|<center>Use the metallic block to push the other blocks back.</center> | |||
</gallery> | |||
{{Cat|Breath of the Wild Shrines}} | {{Cat|Breath of the Wild Shrines}} | ||
Revision as of 19:04, June 6, 2020

Games | ||
Inhabitants | ||
Items | ||
| Guides | ||
|---|---|---|
Walkthrough | ||
Mo'a Keet Shrine is one of the many Shrine of Trials from Breath of the Wild.
Requirements
Metal Makes a Path
Once you start the shrine, run to the far right on the lower level. Look up at the ceiling to find four destructible blocks. Shoot them with a Bomb Arrow to break the boulders, causing a treasure chest to fall down. Open it up to get a Ruby. Alternatively, if you don't have a bomb arrow, there is a metallic boulder later in the shrine that can be used to break this blocks.
Run up to the nearby ramp and use Stasis on the boulder right when it falls down. This will allow Link enough time to run up the ramp and avoid the boulder.
Turn to the right and you'll find a metallic boulder rolling down the ramp. Grab it with Magnesis when it comes nearby. You can carry it, or place it to the side, making sure it doesn't fall down into the abyss. Then run up the ramp and open the treasure chest to get a Royal Broadsword or a Knight's Broadsword.
The last ramp leads up to the altar, but there are a series of boulders that are falling down at the same time. Link will need to use the large metallic block and push the boulders, as they start to roll down the ramp. Keep distance between Link and the metallic block to push all the boulders towards the altar.
Once you are in the clear, run over to the altar to meet Mo'a Keet and get a Spirit Orb.
Gallery
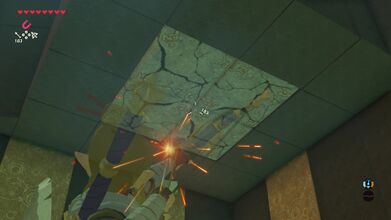
Shoot the blocks up above with a Bomb Arrow. 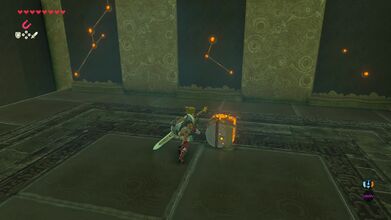
Open the chest to get a Ruby. 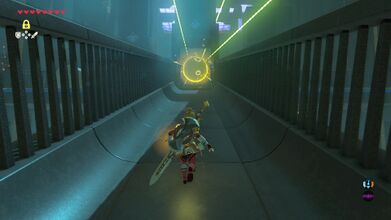
Use Stasis to prevent the block from rolling. 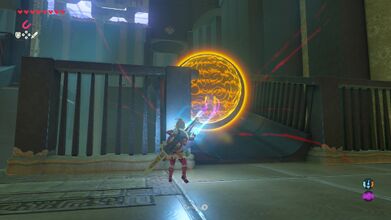
Grab the block using Magnesis. 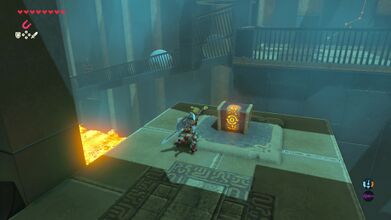
Reach the chest to get a broadsword. 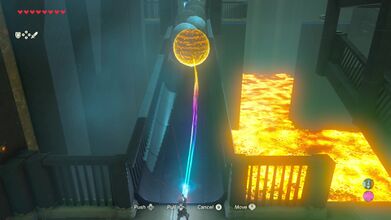
Use the metallic block to push the other blocks back.


