Gallery:Darknut: Difference between revisions
No edit summary |
|||
| Line 50: | Line 50: | ||
File:Darknut-Blue-LoZ-Art.png|Blue Darknut Artwork from [[Million Publications The Legend of Zelda Strategy Guide|Million Publications Guide]] | File:Darknut-Blue-LoZ-Art.png|Blue Darknut Artwork from [[Million Publications The Legend of Zelda Strategy Guide|Million Publications Guide]] | ||
File:Million-Publishing-Darknuts.png|Darknut Artwork from [[Million Publications The Legend of Zelda Strategy Guide|Million Publications Guide]] | File:Million-Publishing-Darknuts.png|Darknut Artwork from [[Million Publications The Legend of Zelda Strategy Guide|Million Publications Guide]] | ||
File:Shinsei-Publishing-Darknut-Red.png|Red Darknut Artwork from [[Shinsei Publishing The Legend of Zelda Strategy Guide|Shinsea Publishing Guide]] | File:Shinsei-Publishing-Darknut-Red.png|Red Darknut Artwork from [[Shinsei Publishing The Legend of Zelda Strategy Guide|Shinsea Publishing Guide]] | ||
File:Shinsei-Publishing-Darknut-Blue.png|Blue Darknut Artwork from [[Shinsei Publishing The Legend of Zelda Strategy Guide|Shinsea Publishing Guide]] | File:Shinsei-Publishing-Darknut-Blue.png|Blue Darknut Artwork from [[Shinsei Publishing The Legend of Zelda Strategy Guide|Shinsea Publishing Guide]] | ||
| Line 58: | Line 57: | ||
File:Keibunsha-Darknut.png|Artwork from [[Keibunsha The Legend of Zelda Strategy Guide (1994)|Keibunsha Guide]] | File:Keibunsha-Darknut.png|Artwork from [[Keibunsha The Legend of Zelda Strategy Guide (1994)|Keibunsha Guide]] | ||
File:Kodakawa-Shoten-Darknut.png|Artwork from [[Kadokawa Shoten The Legend of Zelda Strategy Guide|Kodokawa Shoten Guide]] | File:Kodakawa-Shoten-Darknut.png|Artwork from [[Kadokawa Shoten The Legend of Zelda Strategy Guide|Kodokawa Shoten Guide]] | ||
File:Darknut-Artwork-LoZ-Kodokawa-Shoten-Guide.png | |||
File:Soft-Bank-Darknut.png|Artwork from [[Soft Bank Beep The Legend of Zelda Strategy Guide|Soft Bank Beep Guide]] | File:Soft-Bank-Darknut.png|Artwork from [[Soft Bank Beep The Legend of Zelda Strategy Guide|Soft Bank Beep Guide]] | ||
File:Hyrule-Historia-Concept-Link-Fighting-Blue-Darknut.png|Concept Artwork from [[The Legend of Zelda: Hyrule Historia|Hyrule Historia]] | File:Hyrule-Historia-Concept-Link-Fighting-Blue-Darknut.png|Concept Artwork from [[The Legend of Zelda: Hyrule Historia|Hyrule Historia]] | ||
</gallery> | </gallery> | ||
Revision as of 12:59, November 27, 2021
| This article is a stub. You can help the Zelda Dungeon Wiki by expanding it. |
A gallery of official artwork, sprites, models, and screenshots focusing on Darknut.
Sprites and in-game models

Red Darknut from The Legend of Zelda

Blue Darknut from The Legend of Zelda

Darknut Sprite from Link's Awakening DX'

Red Darknut Sprite from Oracle of Seasons and Oracle of Ages

Blue Darknut Sprite from Oracle of Seasons and Oracle of Ages


Darknut Sprite from Four Swords

Darknut Sprite from The Minish Cap

Red Darknut Sprite from The Minish Cap
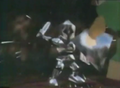
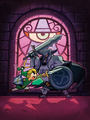
A Darknut before a battle in Twilight Princess


Darknut Sprite from The Faces of Evil and The Wand of Gamelon

.png)
.png)
.png)


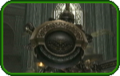
Cut
| This section describes cut content, game elements which were removed before the game was released. |
Darknut Model in beta version of Ocarina of Time

Improved Darknut Model in beta version of Ocarina of Time


Artwork
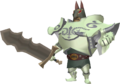
The Legend of Zelda

Artwork from the Instruction Booklet
Artwork from Art & Artifacts
Artwork from Futami Guide

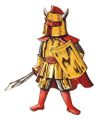
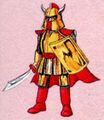
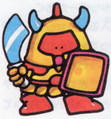
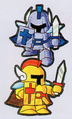
Red Darknut Artwork from Million Publications Guide

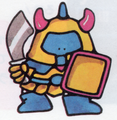
Blue Darknut Artwork from Million Publications Guide
Darknut Artwork from Million Publications Guide
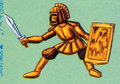
Red Darknut Artwork from Shinsea Publishing Guide
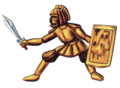
Blue Darknut Artwork from Shinsea Publishing Guide
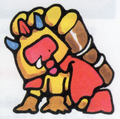
Darknut Carrying Raft Artwork from Shinsea Publishing Guide
Artwork from Jitsugyo no Nihon Sha Guide

Artwork from Dawn Publications Guide
Artwork from Keibunsha Guide
Artwork from Kodokawa Shoten Guide
Artwork from Soft Bank Beep Guide
Concept Artwork from Hyrule Historia


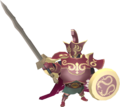
The Wind Waker
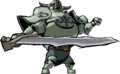
Darknut Artwork from The Wind Waker

The Minish Cap
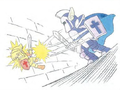
Link fighting a Red Darknut at the Palace of Winds
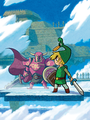
Link fighting a Black Knight at Dark Hyrule Castle


Twilight Princess
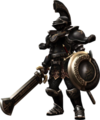
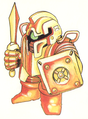
Darknut Artwork from Twilight Princess


