Lone Labyrinth: Difference between revisions
Jump to navigation
Jump to search
Want an adless experience? Log in or Create an account.
mNo edit summary |
mNo edit summary |
||
| Line 1: | Line 1: | ||
{{Stub}} | {{Stub}} | ||
{{Infobox|location | {{Infobox|location | ||
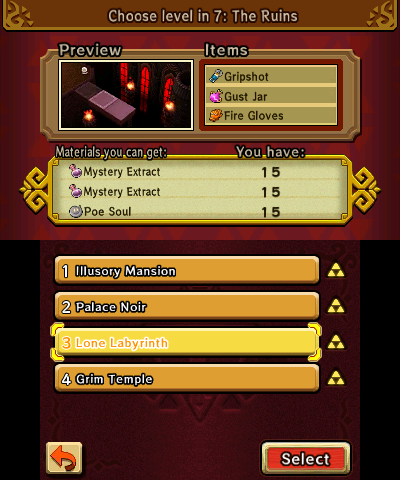
| image = | | image = [[File:TFH - 7 The Ruins - 3 Lone Labyrinth.png]] | ||
| caption | | caption = | ||
| game = ''[[The Legend of Zelda: Tri Force Heroes|Tri Force Heroes]]'' | | game = ''[[The Legend of Zelda: Tri Force Heroes|Tri Force Heroes]]'' | ||
| location = [[The Ruins]] | |||
| enemies = | | enemies = | ||
| item = | | item = [[Gripshot]]<br/>[[Gust Jar]]<br/>[[Fire Gloves]] | ||
| materials = [[Mystery Extract]]<br/>[[Poe Soul#Tri Force Heroes|Poe Soul]] | |||
}} | }} | ||
The '''Lone Labyrinth''' is the third level of [[The Ruins]] area of the [[Drablands]] in ''[[The Legend of Zelda: Tri Force Heroes|Tri Force Heroes]]''. | The '''Lone Labyrinth''' is the third level of [[The Ruins]] area of the [[Drablands]] in ''[[The Legend of Zelda: Tri Force Heroes|Tri Force Heroes]]''. | ||
{{ZD|[https://www.zeldadungeon.net/tri-force-heroes-walkthrough/the-ruins/#c7_3 7.3 – Lone Labyrinth]}} | {{ZD|[https://www.zeldadungeon.net/tri-force-heroes-walkthrough/the-ruins/#c7_3 7.3 – Lone Labyrinth]}} | ||
Revision as of 17:50, October 13, 2022
| This article is a stub. You can help the Zelda Dungeon Wiki by expanding it. |
Lone Labyrinth
Games | ||
Location | ||
Items | ||
Materials | ||
The Lone Labyrinth is the third level of The Ruins area of the Drablands in Tri Force Heroes.

|
In-depth guide:
7.3 – Lone Labyrinth |


