Hawa Koth Shrine: Difference between revisions
Jump to navigation
Jump to search
Want an adless experience? Log in or Create an account.
(Added: "Ancient Core, Gold Rupee, Sapphire" to items category) Tags: Mobile edit Mobile web edit |
No edit summary |
||
| Line 1: | Line 1: | ||
{{Infobox|location | {{Infobox|location | ||
| image = [[File:HawaKothShrine.jpg|258px]] | | image = [[File:HawaKothShrine.jpg|258px]] | ||
| Line 15: | Line 14: | ||
</includeonly><section end=summary /> | </includeonly><section end=summary /> | ||
'''Hawa Koth Shrine''' is one of the many [[Shrine of Trials]] from ''[[The Legend of Zelda: Breath of the Wild|Breath of the Wild]]''. | '''Hawa Koth Shrine''', also known as ''The Current Solution'', is one of the many [[Shrine of Trials]] from ''[[The Legend of Zelda: Breath of the Wild|Breath of the Wild]]''. | ||
==Requirements== | ==Requirements== | ||
| Line 21: | Line 20: | ||
==The Current Solution== | ==The Current Solution== | ||
*Use [[Magnesis]] to grab the two blocks and place them in between the electric charger and the light bulb. Place one of the blocks on each side, so that electricity flows and powers the light bulb, causing the gate to open. | |||
*Looking into the water on right and you'll find a treasure chest. Use Magnesis to pull it up and open it to get an [[Ancient Core]]. | |||
Ride up | *Grab the energy ball and unwrap it around the post. Pull the orb so that it charges up the light bulb. This will activate the nearby ramp. Ride it up to the higher platform. | ||
*Before dealing with the energy ball here, run up ahead and defeat the three [[Guardian Scout I]]s. Then return to the energy orb and grab it with Magnesis. Keep it in the air so that it doesn't hit any of the light bulbs. If any of the bulbs on the ground level get powered, it will twist the platform, causing Link to fall back. Walk all the way to the other side, near the closed gate. | |||
*If Link turns around, he'll see a light bulb on the higher wall. Use Magnesis to drop the energy orb here, causing a nearby wall to open up. Run through this passage and open the chest to get a [[Gold Rupee]]. Then grab the energy orb once against and place it on the pedestal near the closed gate. | |||
*Make your way through the passage to the right of the gate to find the next puzzle. The goal in this next puzzle is to line up all three light bulbs. First step on the switch and pull the metal block to the right side, so that it is only blocking the third column. Then step off the switch. The second column is off by one block. | |||
Move the cogwheel and | *In order to line it up properly. Use [[Stasis]] on the block in the 2nd column that is closest to the floor switch. While in Stasis, step on the floor switch. Then use Magnesis to pull the metal block so it cover the 2nd and 3rd columns. This will cause electricity to flow, opening the gate in the other side of the room. | ||
*Move the cogwheel and open the chest behind it to get a [[Sapphire]]. Then take the cogwheel back to the previous room and stick it on the wall, right above the closed gate. This will connect the three wheels, causing the gate to open. Run ahead to the altar and speak with [[Hawa Koth]] to get a [[Spirit Orb]]. | |||
==Gallery== | |||
<gallery widths="400px" heights="220px"> | |||
File:Hawa-Koth-01.jpg|<center>Use [[Magnesis]] to place the block near the electric charger.</center> | |||
File:Hawa-Koth-02.jpg|<center>The two blocks will cause electricity to flow.</center> | |||
File:Hawa-Koth-05.jpg|<center>Pull the treasure chest out of the water to get an [[Ancient Core]].</center> | |||
File:Hawa-Koth-03.jpg|<center>Unwrap the chain around the pillar.</center> | |||
File:Hawa-Koth-04.jpg|<center>Power the light bulb with the energy ball.</center> | |||
File:Hawa-Koth-06.jpg|<center>Run up ahead and defeat the [[Guardian Scout I]]s.</center> | |||
File:Hawa-Koth-07.jpg|<center>Carry the energy up high to avoid the light bulbs.</center> | |||
File:Hawa-Koth-08.jpg|<center>Place the orb on the bulb that is up against the wall.</center> | |||
File:Hawa-Koth-09.jpg|<center>Run through the passage that opens up to get a [[Gold Rupee]].</center> | |||
File:Hawa-Koth-10.jpg|<center>Place the energy orb on the pedestal, powering the nearby wheel.</center> | |||
File:Hawa-Koth-11.jpg|<center>First step on the switch and move the metal block, so it covers the 3rd column only.</center> | |||
File:Hawa-Koth-12.jpg|<center>Use [[Stasis]] on the block in the 2nd column, closest to the switch.</center> | |||
File:Hawa-Koth-13.jpg|<center>Step on the switch and move the metal block so it covers the 2nd and 3rd columns.</center> | |||
File:Hawa-Koth-14.jpg|<center>Step off the switch and electricity will now flow across all three bulbs.</center> | |||
File:Hawa-Koth-15.jpg|<center>Move the cogwheel with Magnesis and open the chest for a [[Sapphire]] gem.</center> | |||
File:Hawa-Koth-16.jpg|<center>Carry the cogwheel back to the previous room.</center> | |||
File:Hawa-Koth-17.jpg|<center>Place it on the wall to connect the three wheels.</center> | |||
</gallery> | |||
{{Cat|Breath of the Wild Shrines}} | {{Cat|Breath of the Wild Shrines}} | ||
Revision as of 23:54, July 30, 2020
Hawa Koth Shrine

Games | ||
Inhabitants | ||
Items | ||
| Guides | ||
|---|---|---|
Walkthrough | ||
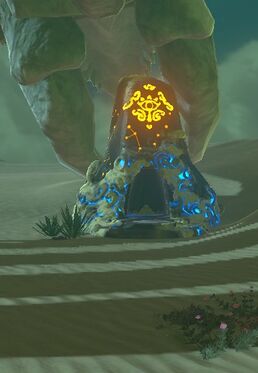
Hawa Koth Shrine, also known as The Current Solution, is one of the many Shrine of Trials from Breath of the Wild.
Requirements
The Current Solution
- Use Magnesis to grab the two blocks and place them in between the electric charger and the light bulb. Place one of the blocks on each side, so that electricity flows and powers the light bulb, causing the gate to open.
- Looking into the water on right and you'll find a treasure chest. Use Magnesis to pull it up and open it to get an Ancient Core.
- Grab the energy ball and unwrap it around the post. Pull the orb so that it charges up the light bulb. This will activate the nearby ramp. Ride it up to the higher platform.
- Before dealing with the energy ball here, run up ahead and defeat the three Guardian Scout Is. Then return to the energy orb and grab it with Magnesis. Keep it in the air so that it doesn't hit any of the light bulbs. If any of the bulbs on the ground level get powered, it will twist the platform, causing Link to fall back. Walk all the way to the other side, near the closed gate.
- If Link turns around, he'll see a light bulb on the higher wall. Use Magnesis to drop the energy orb here, causing a nearby wall to open up. Run through this passage and open the chest to get a Gold Rupee. Then grab the energy orb once against and place it on the pedestal near the closed gate.
- Make your way through the passage to the right of the gate to find the next puzzle. The goal in this next puzzle is to line up all three light bulbs. First step on the switch and pull the metal block to the right side, so that it is only blocking the third column. Then step off the switch. The second column is off by one block.
- In order to line it up properly. Use Stasis on the block in the 2nd column that is closest to the floor switch. While in Stasis, step on the floor switch. Then use Magnesis to pull the metal block so it cover the 2nd and 3rd columns. This will cause electricity to flow, opening the gate in the other side of the room.
- Move the cogwheel and open the chest behind it to get a Sapphire. Then take the cogwheel back to the previous room and stick it on the wall, right above the closed gate. This will connect the three wheels, causing the gate to open. Run ahead to the altar and speak with Hawa Koth to get a Spirit Orb.
Gallery
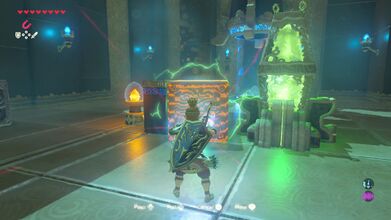
Use Magnesis to place the block near the electric charger. 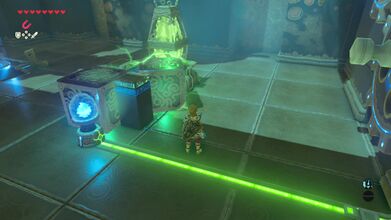
The two blocks will cause electricity to flow. 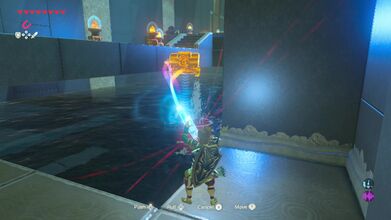
Pull the treasure chest out of the water to get an Ancient Core. 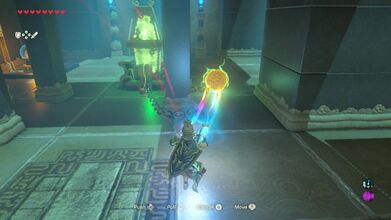
Unwrap the chain around the pillar. 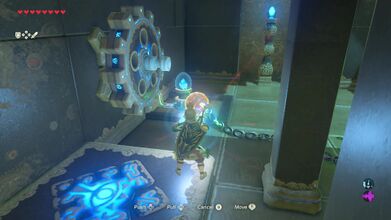
Power the light bulb with the energy ball. 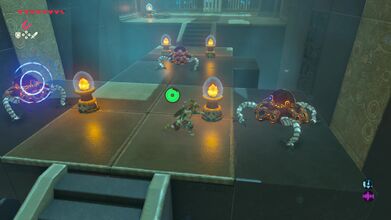
Run up ahead and defeat the Guardian Scout Is. 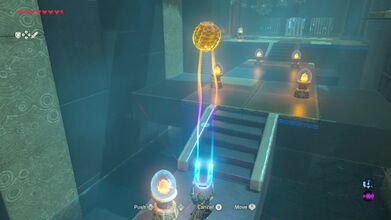
Carry the energy up high to avoid the light bulbs. 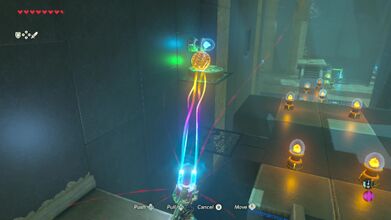
Place the orb on the bulb that is up against the wall. 
Run through the passage that opens up to get a Gold Rupee. 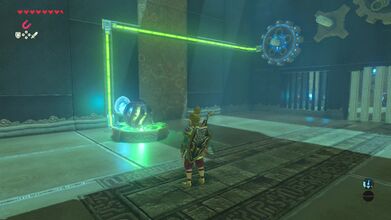
Place the energy orb on the pedestal, powering the nearby wheel. 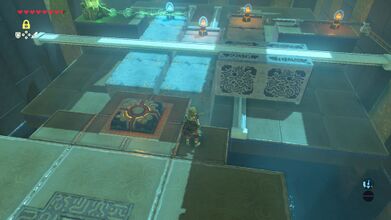
First step on the switch and move the metal block, so it covers the 3rd column only. 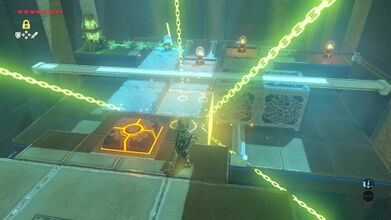
Use Stasis on the block in the 2nd column, closest to the switch. 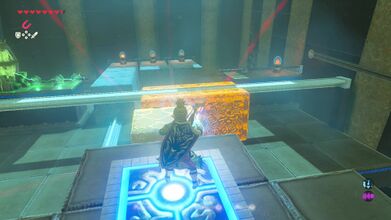
Step on the switch and move the metal block so it covers the 2nd and 3rd columns. 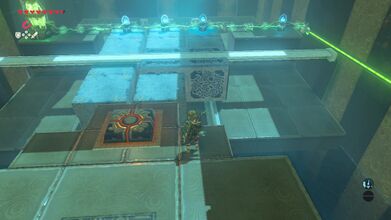
Step off the switch and electricity will now flow across all three bulbs. 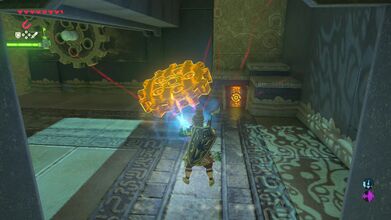
Move the cogwheel with Magnesis and open the chest for a Sapphire gem. 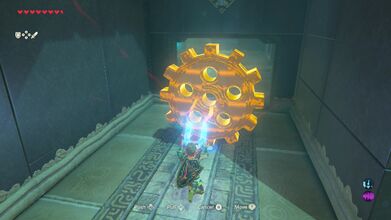
Carry the cogwheel back to the previous room. 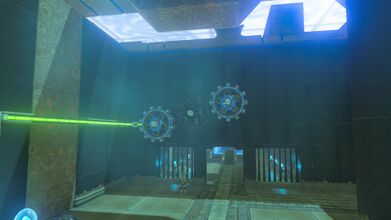
Place it on the wall to connect the three wheels.


