Mysterious Hut: Difference between revisions
Jump to navigation
Jump to search
Want an adless experience? Log in or Create an account.
(Created page with "{{Location |name = Mysterious Hut |image = |game = ''A Link to the Past'' |race = |inhab = |item = |enemies = [[R...") |
No edit summary |
||
| Line 1: | Line 1: | ||
{{Location | {{Location | ||
|name = Mysterious Hut | |name = Mysterious Hut | ||
|image = | |image = [[File:Mysterious-Hut.png]] | ||
|game = ''[[The Legend of Zelda: A Link to the Past|A Link to the Past]]'' | |game = ''[[The Legend of Zelda: A Link to the Past|A Link to the Past]]'' | ||
|race = | |race = | ||
| Line 20: | Line 20: | ||
*[[Arrows]] x5 | *[[Arrows]] x5 | ||
*[[Bomb]]s x4 | *[[Bomb]]s x4 | ||
==Gallery== | |||
<gallery> | |||
File:Mysterious-Hut-Open.png|Mysterious Hut after it has been blown open. | |||
File:Mysterious-Hut-Inside.png|Inside of the Mysterious Hut. | |||
</gallery> | |||
{{Cat|A Link to the Past Locations}} | {{Cat|A Link to the Past Locations}} | ||
Revision as of 01:07, November 1, 2012
The Mysterious Hut is a secret building at the southwest portion of Kakariko Village in A Link to the Past.
The small hut is located to the west of the Kakariko Village Shop. It initially appears as an odd shack with no apparent entrance. However, Link can place a bomb against the southern part of the building to blowup an entrance.
Inside, Link will find two enemy Rats along with eight pots. The items found within the hut are listed below. Each time Link re-enters the hut, the contents regenerate, so this is an easy way to fill up on Bombs and Arrows. Furthermore, the Rats will continuously respawn and they are usually good sources for Blue and Red Rupees.
Contents
Gallery
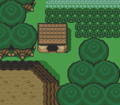
Mysterious Hut after it has been blown open.
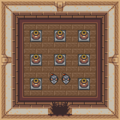
Inside of the Mysterious Hut.

