Mezza Lo Shrine: Difference between revisions
(removing shrine image from map summary) |
|||
| Line 47: | Line 47: | ||
And the final hit, detonate the bomb you left there from the beginning. That will move you a final time, and you can reach the altar for a [[Spirit Orb]]. | And the final hit, detonate the bomb you left there from the beginning. That will move you a final time, and you can reach the altar for a [[Spirit Orb]]. | ||
---- | |||
'''Alternative solution''' | |||
Use [[Magnesis]] to move the cube between platform with crystal and platform with chest. Use [[Paraglider]] to reach the cube, now use Magnesis to get the only one chest. Hit the crystal two times (block the laser by cube) to rotate the moving platform in front of the platform with crystal. Move the cube on the top of the moving platform. Use sprint and then Paraglider to get on the cube. Use Paraglider again to get on the platform with with gate to the altar. Use Magnesis to move the cube on platform with button on the right, that will open the gate, and you can reach the altar for a [[Spirit Orb]]. | |||
{{Cat|Breath of the Wild Shrines}} | {{Cat|Breath of the Wild Shrines}} | ||
Revision as of 22:58, June 18, 2017
| This article is a stub. You can help the Zelda Dungeon Wiki by expanding it. |
Games | ||
Inhabitants | ||
Items | ||
| Guides | ||
|---|---|---|
Walkthrough | ||
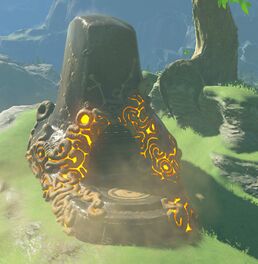
Mezza Lo Shrine is one of the many Shrine of Trials from Breath of the Wild.
Requirements
Shrine Quest: The Crowned Beast
Talk to Kass to begin the Shrine Quest.
Find a mountain buck in the area, mount it, and ride it to the pedestal next to Kass to complete the quest and unlock the shrine. This will be similar to mounting a wild horse although it may be harder in difficulty.
Ancient Trifecta
This shrine contains a shock crystal sort of behind you to your right as you enter. This shock crystal rotates a platform in the center of the room clockwise through four positions every time the crystal is hit.
To begin, hit the crystal 3 times or until it is aligned with the platform the crystal is on.
Place a bomb next to the crystal, get on the platform, and then detonate the bomb to ride the platform to the only chest.
On the platform directly across from the crystal is a switch. Use Magnesis to move the chest you just opened and put it on that switch. This will open a gate to the altar.
Return to the crystal, hit it 3 more times and the moving platform will be back at the crystal again. That's the end of the easy part.
You now have to hit the crystal 3 times, all while riding the moving platform around to the final platform.
To prepare, place a bomb next to the crystal, and look across the way where a laser is blocked by a metal cube. First, use Stasis on the laser emitter, and then quickly use magnesis to move the cube out of the way. Get on the moving platform before Stasis ends, and the laser will be hit #1, moving you once.
The second hit is easy: Shoot the crystal with an arrow. That will move you again.
And the final hit, detonate the bomb you left there from the beginning. That will move you a final time, and you can reach the altar for a Spirit Orb.
Alternative solution
Use Magnesis to move the cube between platform with crystal and platform with chest. Use Paraglider to reach the cube, now use Magnesis to get the only one chest. Hit the crystal two times (block the laser by cube) to rotate the moving platform in front of the platform with crystal. Move the cube on the top of the moving platform. Use sprint and then Paraglider to get on the cube. Use Paraglider again to get on the platform with with gate to the altar. Use Magnesis to move the cube on platform with button on the right, that will open the gate, and you can reach the altar for a Spirit Orb.


