Futabasha The Legend of Zelda Strategy Guide (1986): Difference between revisions
Jump to navigation
Jump to search
Want an adless experience? Log in or Create an account.
No edit summary |
m (Text replacement - "Infobox|product" to "Infobox|publication") |
||
| (7 intermediate revisions by one other user not shown) | |||
| Line 1: | Line 1: | ||
{{Infobox| | {{Infobox|publication | ||
|name = Futabasha The Legend of Zelda Strategy Guide | |name = Futabasha The Legend of Zelda Strategy Guide | ||
|image = [[File:Legend-of-Zelda-Futabasha.jpg|250px]] | |image = [[File:Legend-of-Zelda-Futabasha.jpg|250px]] | ||
| Line 33: | Line 33: | ||
*Dungeon segments are more in-depth than most guides, but the pages aren't as visually appealing. | *Dungeon segments are more in-depth than most guides, but the pages aren't as visually appealing. | ||
*The guide has 10 pages at the end for tips and tricks, including a short mention of the [[Second Quest]]. | *The guide has 10 pages at the end for tips and tricks, including a short mention of the [[Second Quest]]. | ||
==Artwork== | |||
===Bosses=== | |||
<gallery> | |||
File:Futabasha-1986-Aquamentus.png | |||
File:Futabasha-1986-Dodongo.png | |||
File:Futabasha-1986-Manhandla.png | |||
File:Futabasha-1986-Digdogger.png | |||
File:Futabasha-1986-Gohma.png | |||
</gallery> | |||
===Enemies=== | |||
<gallery> | |||
File:Futabasha-1986-Armos.png | |||
File:Futabasha-1986-Armos-2.png | |||
File:Futabasha-1986-Ghini.png | |||
File:Futabasha-1986-Goriya.png | |||
File:Futabasha-1986-Leever.png | |||
File:Futabasha-1986-Lynel.png | |||
File:Futabasha-1986-Moblin.png | |||
File:Futabasha-1986-Octorok.png | |||
File:Futabasha-1986-Peahat.png | |||
File:Futabasha-1986-Tektite.png | |||
File:Futabasha-1986-Zola.png | |||
</gallery> | |||
===Items=== | |||
<gallery> | |||
File:Futabasha-1986-Arrow.png | |||
File:Futabasha-1986-Bomb.png | |||
File:Futabasha-1986-Boomerang-Magical.png | |||
File:Futabasha-1986-Boomerang-Wooden.png | |||
File:Futabasha-1986-Bow.png | |||
File:Futabasha-1986-Bow-2.png | |||
File:Futabasha-1986-Candle-Bombs.png | |||
File:Futabasha-1986-Clock.png | |||
File:Futabasha-1986-Clock-2.png | |||
File:Futabasha-1986-Compass.png | |||
File:Futabasha-1986-Dungeon-Map.png | |||
File:Futabasha-1986-Enemy-Bait.png | |||
File:Futabasha-1986-Key.png | |||
File:Futabasha-1986-Magical-Key-2.png | |||
File:Futabasha-1986-Magic-Book.png | |||
File:Futabasha-1986-Magic-Wand.png | |||
File:Futabasha-1986-Power-Bracelet.png | |||
File:Futabasha-1986-Raft.png | |||
File:Futabasha-1986-Raft-2.png | |||
File:Futabasha-1986-Red-Candle-2.png | |||
File:Futabasha-1986-Red-Ring.png | |||
File:Futabasha-1986-Rupee.png | |||
File:Futabasha-1986-Rupee-Yellow.png | |||
File:Futabasha-1986-Rupee-Yellow-2.png | |||
File:Futabasha-1986-Shield.png | |||
File:Futabasha-1986-Silver-Arrows.png | |||
File:Futabasha-1986-Stepladder.png | |||
File:Futabasha-1986-Sword.png | |||
File:Futabasha-1986-Sword-Magical.png | |||
File:Futabasha-1986-Triforce-Piece-1.png | |||
File:Futabasha-1986-Triforce-Piece-2.png | |||
File:Futabasha-1986-Water-of-Life.png | |||
File:Futabasha-1986-Whistle.png | |||
</gallery> | |||
===Miscellaneous=== | |||
<gallery> | |||
File:Futabasha-1986-Link-Face.png | |||
File:Futabasha-1986-Link-Laugh.png | |||
File:Futabasha-1986-Link-Sword.png | |||
File:Futabasha-1986-Link-Triforce.png | |||
File:Futabasha-1986-Link-Walking.png | |||
File:Futabasha-1986-Link-Sword-Shield.png | |||
File:Futabasha-1986-Link-Sword-Smile.png | |||
File:Futabasha-1986-Link-Tektite.png | |||
File:Futabasha-1986-Link-Vire.png | |||
File:Futabasha-1986-Ending-Link-Ganon.png | |||
File:Futabasha-1986-Ending-Link-Triforce.png | |||
File:Futabasha-1986-Ending-Link-Zelda.png | |||
</gallery> | |||
==Scans== | ==Scans== | ||
<gallery> | <gallery widths="140px" heights="220px"> | ||
File:Futabasha-1986-000.jpg | File:Futabasha-1986-000.jpg | ||
File:Futabasha-1986-000a.jpg | File:Futabasha-1986-000a.jpg | ||
Revision as of 22:07, May 3, 2022
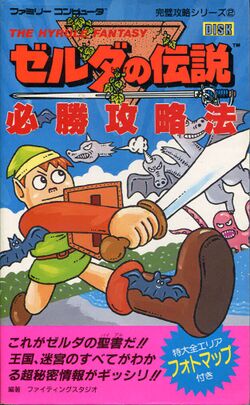
Futabasha The Legend of Zelda Strategy Guide

Games | ||
Cost | ¥400 (yen) | |
Release Date | May 22nd, 1986 | |
| Credits | ||
|---|---|---|
Publisher | Futabasha | |
| Attributes | ||
Type | ||
Language | Japanese | |
Length | 120 Pages | |
Size | 11 x 18 Centimeters | |
ISBN | 4-575-15041-X | |
UPC | 978457515041X | |
Features
- At 120 pages, it is one of the longer and more in-depth guides for the Legend of Zelda.
- Some exclusive artwork for the characters, enemies, and items but not all have art for them.
- A decent overworld map section that splits up the overworld into smaller sections, giving screen by screen analysis.
- Dungeon segments are more in-depth than most guides, but the pages aren't as visually appealing.
- The guide has 10 pages at the end for tips and tricks, including a short mention of the Second Quest.


