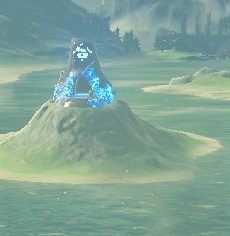
Sheh Rata Shrine: Difference between revisions
Thundersnow (talk | contribs) (added a missing step in this shrine puzzle) |
|||
| Line 22: | Line 22: | ||
As soon as you enter, drop to the ledge on the right to get a chest for an [[Opal]]. | As soon as you enter, drop to the ledge on the right to get a chest for an [[Opal]]. | ||
Go back up the ramp to the starting area. Turn the wheel, this will rotate the laser platform causing it to strike the switch and the water level will rise up. | |||
Using Cryonis, make a path to the switch on the right-side wall. Place a square bomb next to the switch, then make your way back to the starting area. | |||
Using Cryonis, make a path to the switch on the right-side wall. Place a bomb next to the switch, then make your way back to the starting area | |||
Next, turn the wheel again to rotate the laser platform again, and as soon as the platform starts moving, jump into the water and dash across. (you will use 1/2 a stamina wheel) | Next, turn the wheel again to rotate the laser platform again, and as soon as the platform starts moving, jump into the water and dash across before the water level lowers to the open doorway across from the entrance. (you will use 1/2 a stamina wheel) | ||
Once in the room across from the starting area, use Magnesis to place the barrel on the floor switch. | Once in the room across from the starting area, use Magnesis to place the barrel on the floor switch. | ||
Move into the altar room then detonate your bomb and the water will rise. | |||
Use Cryonis to create an ice pillar next to the chest in the altar room. | |||
Climb the pillar and get the [[Giant Boomerang]]. | |||
Go ahead and activate the altar and collect your [[Spirit Orb]]. | Go ahead and activate the altar and collect your [[Spirit Orb]]. | ||
Revision as of 20:18, May 17, 2020
| This article is a stub. You can help the Zelda Dungeon Wiki by expanding it. |
Games | ||
Inhabitants | ||
Items | ||
| Guides | ||
|---|---|---|
Walkthrough | ||
Sheh Rata Shrine is one of the many Shrine of Trials from Breath of the Wild.
Requirements
Speed of Light
As soon as you enter, drop to the ledge on the right to get a chest for an Opal.
Go back up the ramp to the starting area. Turn the wheel, this will rotate the laser platform causing it to strike the switch and the water level will rise up.
Using Cryonis, make a path to the switch on the right-side wall. Place a square bomb next to the switch, then make your way back to the starting area.
Next, turn the wheel again to rotate the laser platform again, and as soon as the platform starts moving, jump into the water and dash across before the water level lowers to the open doorway across from the entrance. (you will use 1/2 a stamina wheel)
Once in the room across from the starting area, use Magnesis to place the barrel on the floor switch. Move into the altar room then detonate your bomb and the water will rise. Use Cryonis to create an ice pillar next to the chest in the altar room. Climb the pillar and get the Giant Boomerang.
Go ahead and activate the altar and collect your Spirit Orb.


