Dila Maag Shrine: Difference between revisions
Molly O'Kami (talk | contribs) |
No edit summary |
||
| Line 1: | Line 1: | ||
{{Infobox|location | {{Infobox|location | ||
| image = [[File:DilaMaagShrine.jpg|258px]] | | image = [[File:DilaMaagShrine.jpg|258px]] | ||
| Line 21: | Line 20: | ||
==Requirements== | ==Requirements== | ||
{{ShrineQuest|The Desert Labyrinth}}{{Shrine}}{{Clear|left}} | {{ShrineQuest|The Desert Labyrinth}}{{Shrine}}{{Clear|left}} | ||
<section begin=The Desert Labyrinth /><includeonly> | <section begin=The Desert Labyrinth /><includeonly> | ||
{{MapLink|Dila Maag Shrine}}<br><br> | {{MapLink|Dila Maag Shrine}}<br><br> | ||
'''Requirements:''' None | '''Requirements:''' None | ||
</includeonly><section end=The Desert Labyrinth /> | </includeonly><section end=The Desert Labyrinth /> | ||
The map below shows a route which avoids all of the Malice goo | ==Shrine Quest: ''The Desert Labyrinth''== | ||
{{main|The Desert Labyrinth}} | |||
Enter the Labyrinth to start the quest. The map below shows a route which avoids all of the Malice goo, highlighted in dark blue. Dotted lines are tunnels. Light blue indicates a Malice-covered block above the corridor, which only poses a hazard if dropping in from above. | |||
A number of alternate routes are possible by either climbing over a wall or climbing sideways along a wall to cross a patch of Malice goo. Most of the maze can be skipped by climbing a wall and dropping down at the green line. | A number of alternate routes are possible by either climbing over a wall or climbing sideways along a wall to cross a patch of Malice goo. Most of the maze can be skipped by climbing a wall and dropping down at the green line. | ||
| Line 36: | Line 34: | ||
==Dila Maag's Blessing== | ==Dila Maag's Blessing== | ||
After all that effort, the shrine itself contains no challenges at all. Simply move forward, open the chest | After all that effort, the shrine itself contains no challenges at all. Simply move forward, open the chest to get the [[Barbarian Armor]]. Then speak with [[Dila Maag]] at the altar to get a [[Spirit Orb]]. | ||
{{Cat|Breath of the Wild Shrines}} | {{Cat|Breath of the Wild Shrines}} | ||
Revision as of 22:01, January 20, 2020
Games | ||
Inhabitants | ||
Items | ||
| Guides | ||
|---|---|---|
Walkthrough | ||
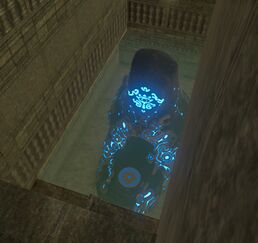
The Dila Maag Shrine is one of the many Shrine of Trials from Breath of the Wild.
Requirements
Shrine Quest: The Desert Labyrinth
- Main article: The Desert Labyrinth
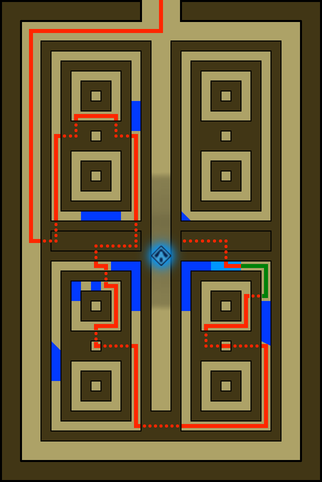
Enter the Labyrinth to start the quest. The map below shows a route which avoids all of the Malice goo, highlighted in dark blue. Dotted lines are tunnels. Light blue indicates a Malice-covered block above the corridor, which only poses a hazard if dropping in from above.
A number of alternate routes are possible by either climbing over a wall or climbing sideways along a wall to cross a patch of Malice goo. Most of the maze can be skipped by climbing a wall and dropping down at the green line.
Dila Maag's Blessing
After all that effort, the shrine itself contains no challenges at all. Simply move forward, open the chest to get the Barbarian Armor. Then speak with Dila Maag at the altar to get a Spirit Orb.


