This chapter covers the normal mode of the HD version of Twilight Princess for the Nintendo Wii U. If you are playing on the Nintendo Wii, check out the Lakebed Temple – Wii Version.
In this particular chapter, I label things as East or West a lot more. This is for the regular version of the game. If you are playing Hero Mode everything is reversed, so all references to East or West are opposite.
- Chapter 1 – Ordon Village
- Chapter 2 – The Twilight
- Chapter 3 – Faron Woods: Twilight
- Chapter 4 – Forest Temple
- Chapter 5 – Kakariko Village: Twilight
- Chapter 6 – Death Mountain
- Chapter 7 – Goron Mines
- Chapter 8 – Lanayru Province: Twilight
- Chapter 9 – Lake Hylia: Sidequests
- Chapter 10 – Lakebed Temple
- Chapter 11 – The Master Sword
- Chapter 12 – Gerudo Desert
- Chapter 13 – Arbiter’s Grounds
- Chapter 14 – Scaling Snowpeak
- Chapter 15 – Snowpeak Ruins
- Chapter 16 – Sacred Grove: Round Two
- Chapter 17 – Temple of Time
- Chapter 18 – In Search of the Sky
- Chapter 19 – City in the Sky
- Chapter 20 – Palace of Twilight
- Chapter 21 – Cave of Ordeals
- Chapter 22 – Hyrule Castle
10.1 Dungeon Map
Once you enter the Lakebed Temple, swim ahead down this narrow corridor. You’ll reach an enemy Shell Blade, along with an electrified Bari. Just swim right past all the enemies and eventually you will resurface in one of the opening rooms. Run around the room and find a pair of treasure chests, one containing some arrows, and another containing some water bombs.


Additionally, there are some Chu that drop from the ceiling. In particular the Red Chu are useful as you can capture Red Chu Jelly when you defeat them, and this serves as a red potion. If you’ve been following along with this walkthrough, at this point you’ll probably have two bottled fairies and some Yellow Chu Jelly; go ahead and keep these if so, or use your Yellow Chu Jelly if your lamp is near empty. Fairies are typically better than potions as they will be used automatically if you run out of life, and it’s good foresight to have at least one bottle of oil for your lamp so you’re never completely out. But it’s always good to have options too, and if you do have any bottles that are empty, now’s a good time to fill them up. Save at least one empty bottle if you have one, however, as there’s an even better Chu immediately in front of the exit to this room.
Run to the north end of the room and jump off the ledge to grab the lever hanging from the ceiling. This will cause the gate in front of the door to open, allowing you to pass. Just beyond the gate though, you’ll find a rare Blue Chu. Defeat it and you can scoop the Blue Chu Jelly into an empty bottle, which acts like a Blue Potion and will fill up all your hearts when you use it. Continue on to the next room.


In this room you’ll notice a bunch of stalactites hanging from the ceiling. Put together some Bomb Arrows and shoot down all the stalactites found in the room. While you can combine water bombs with arrows for Bomb Arrows in a pinch, it’s recommended to use regular bombs and save water bombs only for jobs that a regular bomb can’t handle. Make your way across the room and you’ll meet up with a number of enemy Helmasaur. Their shields prevent you from hitting them in the front, so you’ll have to side step them and then slash at their backside, or just avoid them.


At the other end of the room, to the right of the door, there is an area you can climb up. Do so and open the treasure chest to get some more Water Bombs. If you haven’t guessed already, you’ll be using a ton of bombs and arrows in this dungeon and fortunately, they are found all over the place. Continue onward to the next room.
Run across the bridge and you’ll meet up with an enemy Lizalfos. While this enemy does have a bit of health, regular sword slashes will do him in. Continue onward to the next room.


Here is the main central room in the dungeon that I will refer to as the Central Room. You will be returning here a number of times throughout your journey through this dungeon and this room can be a bit complicated. This room has multiple entrances, exits, levers, and moving parts, so it’s recommended to follow instructions carefully to make sure you don’t lose your place in this guide. To begin, run down the stairs and then run around to the left. Continue all the way to the south end of the room to find a treasure chest that contains some arrows.


The first room we want to access is the lower floor door at the East end of the room. In order to access it, we will need to spin the staircase around a couple of times. At the south end of the first floor, look towards the center of the room and there is a lever hanging. Jump to the lever and pull on it, causing the staircase to rotate. (Pulling any similar lever in this room will rotate the staircase to your position, the bottom of it to you if you’re on the bottom floor, the top of it to you if you’re on the top floor.)
Climb the staircase and run over to the east end of the room. The door here is locked, but if you continue down the path you’ll find Ooccoo inside the jar. As usual, you can use Ooccoo to quickly warp out of the dungeon if you need to.


Now run to the west side of the room on the second floor. Turn towards the center of the room and then jump and pull the lever to rotate the staircase. Climb down the staircase and then turn to the left. Here you will find a treasure chest that contains the Dungeon Map. We’re done with this room for now, but don’t worry, we’ll be back soon enough. Finally, head through the lower door at the east end of the room.


10.2 East Water Gate
Avoid the Helmasaur and run across the bridge to reach the next room. There are a pair of stalactites in this room, so use your Bomb Arrows to knock these two down to the ground. Now run down the ramp at the north side of the room. The center pillar has some vines that you can use to climb around to the other side of the room.


The stalactite that fell here is right above a water geyser that will occasionally raise the platform higher. Stay on this level however and jump across to open the treasure chest found here to get a small key. While there is still plenty to do in this room, we can’t do any of it just yet and we will be returning here later on. Jump back to the west side of the room and climb the vines. Go back through the door. Continue across the bridge to get to the large central room.


Now that we have a Small Key, we can enter the door at the East End of the room on the second floor. You don’t actually have to turn the staircase at all. Jump climb up, run around the room, and use the small key on the locked door. Avoid the Helmasaur here and continue onward to the next room.
Turn to the right and open the treasure chest here to get some water bombs. Now take the other path and you’ll see a pair of stalactites that you can knock down. Knock down the closer one and then jump up to the vines. Climb the vines to the higher ledge and then jump over to grab the lever, which will open the nearby gate.


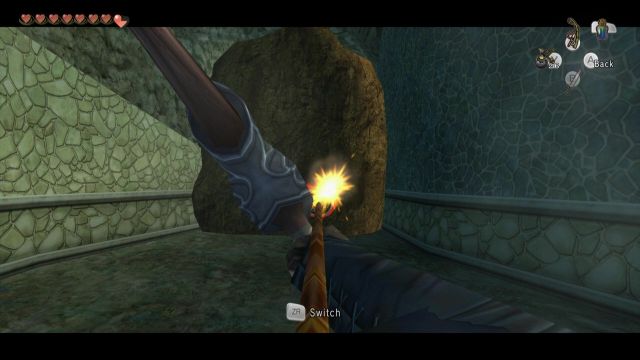
Continue ahead and use a bomb (or bomb arrow) to blow up the boulder that is in the way. Before progressing in that direction, turn to the south and enter the nearby door. Jump across the room and defeat the Lizalfos before heading through the door to the southeast. Defeat the nearby enemies and then open the treasure chest found here to get a small key. Backtrack to the previous room, jump across and head back through the door on the other end of the room.


Now turn to the east and blow up the boulder if you haven’t done so already. Run ahead and in this room you will find an enemy known as a Chu Worm. It will hide inside of its bubble and you cannot harm it with your sword. Use a bomb arrow to blow up the bubble and then finish off the worm with your sword. Use the small key we just got on the nearby locked door.

Turn to the left and you’ll see some vines. Jump over to the vines and climb up. You want to scale this circular ramp, fighting off the enemy Tektite that you see along the way. At the top of the ramp, open the treasure chest to collect some more water bombs. There is another, larger treasure chest ahead, but you can’t quite reach it just yet. Instead, climb one the ladders on the west side of the arch and then jump and pull the lever. This will cause the floodgate to open and water will start flowing.


Begin making your way down the ramp and you’ll quickly find that the water makes the ramp turn into a slide. At the bottom, you’ll also find that water has filled the room, now allowing you to reach the middle platform. From here, jump and grab the lever, opening another flood gate and allowing water to flow further through the dungeon.
The water flows through the door on the left side. If you follow this path, it leads to a waterwheel that you can now walk by, allowing you to get a Fairy and find a Blue Chu. However, to progress onward with the dungeon, take the door on the right side. Follow the pathway and head back through the door to the west. Continue across the bridge to return to the large central room.


The floodgates that we opened have allowed water to flow all the way to the central room here in the dungeon, raising the water level.
10.3 The Clawshot
We now want to head back to the east corridor once again, this time on the lower floor. Once again, you don’t need to spin the staircase at all. You can take the long way around the room, or drop off the ledge immediately in front of your entrance, landing on the staircase and turning around, to head through the lower door on the east side. Run across the bridge and continue onward to the next room.
Now that the water is flowing, the gears in the room are spinning. Jump over to the first moving platform and let it take you to the door at the north end of the room. Go through the door and around the corner you will find a treasure chest that contains a Small Key. There is a door in this room that you can head through, but it leads to a blockade and we cannot do anything just yet. Instead, return back to the room with the spinning platforms.


Jump over to the platform and allow it to take you to the door at the east end of the room. After passing through, use the small key we just got to unlock the door. Dive into the water and swim down this pathway. You will see some water shooting out from the side. If you use your Iron Boots and walk in that direction against the flow of the current, you’ll come across a treasure chest containing some water bombs. Additionally, in the direction with the flow of the current, you’ll find a second treasure chest, this one containing a red rupee.


Make your way further along the path and you’ll see a boulder on the ground. Use a water bomb to explode the boulder, allowing you to pass to the room ahead.
Continue swimming until you can resurface. The entryway will close behind you, leaving you trapped inside the room. If you walk around the room you’ll see some tiny enemies known as Toado that will fall from the ceiling. These tiny fish are easily defeated using your sword. Click the Right-Joystick to activate the first person camera and look up at the ceiling to spot the dungeon mini-boss, the Deku Toad.


After the Deku Toad comes crashing to the ground, it will release a ton of mini Toados. Use a couple spin attacks to defeat all of the fish and then turn your attention back to the Deku Toad. It will leap into the air and will come crashing down to the floor. You can easily tell where it is going to land by the shadow as it is falling. Dodge out of the way and the Deku Toad will crash into the ground, leaving its tongue exposed. Run over and deliver a number of sword slashes.


Once the Deku Toad recovers, it will stick its tongue out at you. Quickly equip the bomb arrows and shoot a bomb into its mouth. It will gobble it up and come crashing down to the floor. Once again slash away at its tongue to do some damage. Repeat this process until the Deku Toad has been defeated.


Once defeated, open up the treasure chest to get the dungeon item, the Clawshot. The item serves exactly like the Hookshot in many previous Zelda titles. You can grapple over to targets, enemies, or other objects, as well as pull items towards you.
Run to the south end of the room and you’ll see a target on the ceiling. Use the clawshot to grapple over to the target, and it will cause the nearby gate to open. Go through the next door, and then walk straight ahead to the next door to get back to the room with the rotating platforms.


You want to make your way back to the large central room of the dungeon. You can turn to the right and aim at the the red target on the wall to reach a higher ledge. From here you can aim at the red target on the ceiling near the door. Progress through the door, walk across the bridge, and head back to the central chamber.
OPTIONAL: It is extremely out of the way, but we can now get the treasure chest way back up near the floodgate at the east end of the dungeon that we couldn’t get before. (If you don’t want to, skip to the next section, 10.4.) You don’t need to spin the staircase at all, just climb the stairs, run around the room, and head through the door.
Walk across the bridge to reach the next room. Follow the northern corridor and continue east to the next room. Back in this large room, we need to climb our way all the way to the top of the circular ramp. However, if you walk normally, the flowing water will cause you to slide down. You’ll mostly be using your Iron Boots to walk up, but you can climb the inner ledge in places and walk up without your boots, and Clawshot over to spots in places (make sure you have your Iron Boots on when you Clawshot over though, and you can’t clawshot to the ones with torches.) It’s a long and arduous journey, but you can use a couple shortcuts to speed it up.


Just beyond the flowing water, there is a treasure chest that we previously couldn’t reach. Behind it there is a target that we can grapple over to. Do so and open the treasure to get the Miiverse Stamp of the Hylian Letter Y. Now return all the way back to the large central chamber.


10.4 West Water Gate; Compass
Back in the large central room, we now want to head through the door at the west end of the room on the lower floor. However, we will first need to turn the staircase. There are a number of ways you can reach the door at that end of the room, but the easiest way is to first run back down to the lower floor and at the north end of the room, there are some vines on the wall that you can Clawshot over to in order to get beyond the barrier.


At the west part of the room, on the lower floor, there is no lever that Link can jump to in order to turn the staircase. Instead, there is a target that you can Clawshot up to. Do just that and it will cause the staircase to turn. With the staircase now in this direction, it will cause the water to flow down the staircase and into the door at the lower west part of the room. Follow the water flow and head through to the next room.


With the water now flowing, the large water wheel is finally moving, allowing us to cross the bridge and head through to the next room.
Jump over to the stationary platform and look to the right. There is a treasure chest on the platform there and directly above, there is a red target. Clawshot over and then drop down to reach the treasure chest. Open it up to get some Water Bombs.


From there, look up at the pillar towards the north end of the room and you’ll see some vines. Clawshot over to the vines and then maneuver over to the safe platform. From here, look up and to the west and you’ll find another pillar with some vines. Clawshot over and finally turn to the northwest corner of the room. There is another set of vines along the wall. Clawshot over and then head through the door.


You’ll see some water geysers and if you look above, there is a stalactite above one of them. Use your bomb arrows to hit the stalactite, and it will land on the water geyser. Climb onto the platform that drops and the water will shoot you upwards. Jump over to the ledge and then over to the west side of the room.


The door at the west end of the room is on a higher ledge, but just above it, there is a target. Clawshot over and head through to the next room. Here you will find a familiar enemy in the form of a Chu Worm. Now that you have the Clawshot, you can save your Bomb Arrows by pulling the Chu Worm out of its bubble. Slash at it while it’s vulnerable to defeat it.


At the north end of the room, look up to the ceiling and there are some vines. Grapple over to them using your Clawshot and then drop down below. There are more vines at the south end of the room, so jump into the water and then climb up the vines.
This room is reminiscent to the east side of the room with the spiral ramp leading up to the top of the room. There are some breaks in the ground though, and in order to pass, you’ll need to Clawshot the targets that are across the gaps. Do just that and make your way up this seemingly endless ramp.


At the very top of the ramp, open up the treasure chest to get the only thing we ever seem to get in this dungeon, some more water bombs. There is another treasure chest ahead and you’ll need to Clawshot over to the target (which may require some careful positioning/aiming in order to get over the corner of the ledge). Do so and open the treasure chest to finally get the Compass. You’ll see that despite all the treasure chests we’ve gotten thus far, there are still quite a few more.


Jump and grab the lever, which will cause the west floodgate to open up. With the water now flowing, slide down the ramp to get below. There is another lever in the center of the room. Swim over to the platform and jump to grab it, causing another floodgate to open up.
Resurface at the east end of the room and once again look up towards the ceiling. Clawshot up to the vines to get across the barrier. With the water now flowing, take the door at the south end of the room.
10.5 The Big Key
There are a number of optional treasure chests here and this part of dungeon gets a bit complicated. Just take it slow and follow along and you’ll be just fine. At the south part of this room, follow the water flow and it leads to a small pond of water. Drop down below and use your Iron Boots. Underwater you will find a treasure chest that contains a red rupee. Resurface and head to the east, traveling under the water wheel. Open the door here and head to the large inner room.


First things first, jump over to the southeast corner of the room and head through the door, getting back to the outer corridor. Turn to the right and you’ll find a small treasure chest that contains a red rupee. On the other side of the room you can grapple up to a target to unlock the gate, but we aren’t quite done with this area. Go through the door to get back to the large inner room.


OPTIONAL: There are a pair of treasure chests that are both out of the way and will cause some backtracking, and you can skip this paragraph if you’d like. Grapple over to the northeast corner and open the treasure chest here to get a red rupee. Use the Clawshot to grapple over to the vines on the nearby pillar, and once again make your way towards the door at the northwest corner of the room. Back at the north side of this outer corridor, make your way eastward. With the water now flowing, the waterwheel here is moving, and it will allow you to sneak by. Here you will find a treasure chest containing some regular bombs, for once. Backtrack past the waterwheel and go through the door to get back to the inner room.


Back in the inner room, clawshot over to the vines on the pillar at the northwest part of the room. Then aim down at the pillar below and clawshot to the vines here. Basically going in the reverse order of this room from when we first entered it.


Now at the lower part of the room, look towards the west end of the room and you’ll see a door. That is our next destination but it can be a bit tricky to get there. Looking at the west door, if you look up you can see the rotating gear and there are targets. It’s a tough angle, but you can Clawshot over to one of the targets here, and then allow it to carry you over to the door ahead. Drop down and head through the door to the west.


This next room is an underwater maze and it is very easy to get a bit disoriented where you are. Jump into the water and sink down to the very bottom. At the north end of the map, there is an opening that you can swim through to head westward. Immediately on the other side of this wall, swim up one level and head south, and you should see a boulder on your right, underwater, that is blocking the pathway heading to the west. Because we are running extremely low on water bombs right now, there is a water bomb fish here that when attacked turns into a lit water bomb that you can use to blow up the boulder. If by some extremely rare happenstance you happen to have a surplus of water bombs at the moment, feel free to use one from your supply instead of this fish, if you really want to.


Swim through the opening that is created to get to the far west side of the room. Immediately resurface and you’ll find a treasure chest at the west end of the room. Open it up to get some water bombs. Whew! Now sink down to the bottom of the room and equip your Iron Boots. At the southwest corner of the room, there is another boulder that is blocking your way. Use a water bomb to blowup the boulder. Swim past the opening that is created and then resurface. Go through the door at the south end of the room.


Once you are inside, use your Clawshot to defeat the Chu Worm. Look at the ceiling and you will see a red target. Use your Clawshot to grab onto it and then lower yourself through the hole that has opened. Lower yourself to the platform here and open the treasure chest to get the Big Key.


Jump down into the water and head through the door. You now want to swim your way back through this room. Again, it is a bit of a maze. Follow the corridor and then head straight ahead through the next hole that is slightly up and to the right. Swim to the north end of the room and drop to the sea floor. Swim east and then resurface to head back through the door.


We now want to get back across these hanging platforms. To do so, aim at the red target above and grapple over with the Clawshot. Drop yourself off on a platform to the east. From here, you can then aim at the red target on the second rotating platform. Grapple over and then drop down to the platform that had a treasure chest. Clawshot over to the vines and then head back through the door to the east.
Continue across the bridge to get back to the large central room. With more water flower through the dungeon, the water level will once again rise here in this room.
10.6 Secret Heart Pieces
There are a few remaining treasure chests for us to collect and they are all optional. Use the Clawshot on the vines and make your way to the east side of the room on the lower level. Jump over to the lever and pull it, causing the staircase to turn and allowing water to floor eastward to the lower level. Continue through the door.


Walk across the bridge and head through the door. With the water level now raised, the bridge in this room will rise, now allowing you to access the south end of the room. Run over and defeat all the tektites in this area. Step on the floor switch to open the gate. While still standing on the floor switch, use your Clawshot to reach the target against the far wall. Open the treasure chest here to get Piece of Heart #19.


The gate will close behind you, but you can escape by using the Clawshot on the target on the ceiling. Return to the door at the west end of the room and make your way back to the Central Chamber.
There are two more treasure chests for us to collect here in this central room. The first is at the very top of the dungeon. Turn the staircase north/south so you can climb it, and then turn your attention towards the chandelier in the center of the room. Clawshot over to one of the targets and you’ll find a treasure chest here. Open it up to get Piece of Heart #20.


Drop down into the water below and there are two levels where you can stand up on. The higher level above the water surface has the locked door that can be opened with the big key. Just below that level, there is another circular platform that you can stand on using your Iron Boots. Walk around this area and open the treasure chest to get the Miiverse Stamp for the Hylian Letter K.


10.7 Twilit Aquatic: Morpheel
It’s now time to take on the dungeon boss. Jump into the water in the large central chamber. Swim to the center platform and use the Big Key on the locked door. Smash the pots in this room to get some recovery hearts and a fairy. Once you are ready, drop down the hole to take on the dungeon boss.


Use the Iron Boots and drop down to the sea floor and you will meet up with the Twilit Aquatic, Morpheel. During the first phase of the battle, Morpheel’s eye will appear in one of its tentacles and it will move around. While having your Iron Boots equipped, use the Clawshot to try and grab the eye. If you successfully pull the eye out, slash away with your sword.


Be careful during this phase as Morpheel will launch its tentacles out towards you. When it does this, quickly swipe your sword, causing the tentacle to retract. If the tentacle does grab Link, it will pull him into its mouth, gobbling him up and doing a full heart of damage. Repeatedly pull out the eye and slash away until this phase has been completed.


Morpheel will then bring its entire body out from underground and it will begin to swim around the room. This time its eye can be seen just above its head. Unequip the Iron Boots and start to swim around the room. You want to be careful not to swim directly in front of Morpheel’s mouth, as he will gobble you up. Instead, try to stay just above Morpheel and target its eye. Use the Clawshot to pull yourself over to Morpheel, and then deliver a number of sword slashes.


That is about all there is to this phase of the battle. Just keep your distance and try not to get directly in front of the boss’ mouth. Keep slashing at his eye until Morpheel has been defeated.
Morpheel will flutter around before crashing into the wall. The hole that is created causes the entire room to drain and the remains of Morpheel will makeup the final Fused Shadow piece. Grab the Heart Container that is left behind and then speak with Midna to warp out of the dungeon.


- Chapter 1 – Ordon Village
- Chapter 2 – The Twilight
- Chapter 3 – Faron Woods: Twilight
- Chapter 4 – Forest Temple
- Chapter 5 – Kakariko Village: Twilight
- Chapter 6 – Death Mountain
- Chapter 7 – Goron Mines
- Chapter 8 – Lanayru Province: Twilight
- Chapter 9 – Lake Hylia: Sidequests
- Chapter 10 – Lakebed Temple
- Chapter 11 – The Master Sword
- Chapter 12 – Gerudo Desert
- Chapter 13 – Arbiter’s Grounds
- Chapter 14 – Scaling Snowpeak
- Chapter 15 – Snowpeak Ruins
- Chapter 16 – Sacred Grove: Round Two
- Chapter 17 – Temple of Time
- Chapter 18 – In Search of the Sky
- Chapter 19 – City in the Sky
- Chapter 20 – Palace of Twilight
- Chapter 21 – Cave of Ordeals
- Chapter 22 – Hyrule Castle
