This chapter covers the normal mode of the HD version of Twilight Princess for the Nintendo Wii U. If you are playing on the Nintendo Wii, check out the Lake Hylia: Sidequests – Wii Version.
- Chapter 1 – Ordon Village
- Chapter 2 – The Twilight
- Chapter 3 – Faron Woods: Twilight
- Chapter 4 – Forest Temple
- Chapter 5 – Kakariko Village: Twilight
- Chapter 6 – Death Mountain
- Chapter 7 – Goron Mines
- Chapter 8 – Lanayru Province: Twilight
- Chapter 9 – Lake Hylia: Sidequests
- Chapter 10 – Lakebed Temple
- Chapter 11 – The Master Sword
- Chapter 12 – Gerudo Desert
- Chapter 13 – Arbiter’s Grounds
- Chapter 14 – Scaling Snowpeak
- Chapter 15 – Snowpeak Ruins
- Chapter 16 – Sacred Grove: Round Two
- Chapter 17 – Temple of Time
- Chapter 18 – In Search of the Sky
- Chapter 19 – City in the Sky
- Chapter 20 – Palace of Twilight
- Chapter 21 – Cave of Ordeals
- Chapter 22 – Hyrule Castle
9.1 Journey to Kakariko Village
There are a ton of optional things we can take care of now that we are in human form once again, but this section will cover the main quest first. To get started, we need to leave Lake Hylia and get back up to the higher elevation.
Once you gain control of Link, cross the bridges to your left until you see a building floating on the water. Cross more bridges to get over to it. Here you’ll find the clown-like character known as Fyer. Run over and speak to him to find that he offers canon rides at the cost of 10 rupees. Agree to do so and Link will step into the massive canon. Fyer will launch Link up to the top of Lake Hylia.


Go into the nearby house and climb down the ladder. Exit through the door to get back outside. You will be back in Hyrule Field, in the Great Bridge of Hylia region. Run ahead and follow the path to find some horse grass. Call over Epona and ride her back towards Castle Town. On the way, you will meet the Postman again, who will send you a couple letters, one of which highlights new attractions in the Lanayru region. We will cover these in just a bit.
Enter Castle Town and make your way to South Castle Town region. Walk over to Telma’s Bar, the area where we saw Ilia earlier. Link, now in human form, will reunite with Ilia, although something strange has happened. Ilia’s memory is gone. Nevertheless, the injured Prince Ralis still needs help and Telma suggests taking him to Kakariko Village. After the Hylian Guards refuse to offer any assistance, Telma and Ilia turn to Link.


After a cut-scene that shows Link, Telma, and Ilia looking over at the Great Bridge of Hylia and seeing King Bulblin, the trio will set the course for Kakariko Village. Throughout the journey Bulblin Archers will shoot at the wagon that Telma is guiding, and if they succeed, the wagon will light on fire. If this happens, use the Gale Boomerang and target the wagon. The boomerang will put out the flames.


Ride ahead and once you arrive at the bridge, you will be confronted by King Bulblin. This time he has a pair of massive shields, preventing you from being able to hit him with your sword. Ride forward and equip your bow. Shoot an arrow at King Bulblin and then be sure to avoid him as he runs by. Turn around and shoot a second arrow at King Bulblin, defeating him and collecting the gate keys in the process. Bomb arrows work, but they fly slower making it easier to miss, they don’t do any extra damage (still requires 2 hits), and they waste your bombs.


Ride onward and you’ll be met with a number of bulblin archers. They will likely set the wagon on fire, so use your boomerang to get rid of the flames. Ride ahead until you reach the gate. Jump off Epona and use the keys we just got to unlock the gate, allowing the wagon to ride into South Hyrule Field.


This area has Bulblin archers riding along on Bullbos, as well as Kargaroks flying around. In particular, some of the Kargaroks will drop bombs on the trail, causing Telma’s wagon to get set off course. When this happens, the wagon will have to circle back around much of South Hyrule Field. When you are near a fork in the road and you can see a Kargarok waiting to drop a bomb, hit the enemy with your Boomerang or with the Bow, preventing him from dropping a bomb. You’ll need to be pretty close to the wagon in order to be in range in time to target and land an attack. Successfully doing so will allow the carriage to continue onward to the Kakariko Gorge.


The Kakariko Gorge is very similar to South Hyrule Field. Once again defeat the Kargarok before it can drop a bomb, and it will cause the carriage to continue onward towards Kakariko Village. Use the gate key to open the door and then ride into Kakariko Village.


A lengthy cut-scene will take place, showing that Prince Ralis will be fine, as long as he rests. After chit-chatting with Renado and Colin, Link will appear back outside and will share some more words with Telma as well. Link will then see a vision of Queen Rutela.


Once you regain control of Link, follow Queen Rutela and she will guide you to the Graveyard. Follow her to the back of the graveyard where she will make a rock disappear, allowing you to crawl through. Swim over to the grave ahead and the Queen will tell you that this is the grave of King Zora. As a thanks for helping her son, she will give you a gift that is buried within the grave, the Zora Armor. While wearing this armor, Link can stay under water indefinitely, and it will allow Link to swim underwater. However, when wearing the armor, Link will take more damage from fire and ice attacks.


We are now just about ready to arrive to go to the next dungeon, the Lakebed Temple. However, we do need to change our bombs. If you read the letters from the Postman, you’ll know that Barnes Bombs now has a new type of bomb in stock. Run over to the Bomb Shop and walk up to the counter on the right, which is the buyback counter. Barnes will run over and it is here that Link can sell all the existing bombs he has. In order to purchase the newly in stock Water Bombs, Link will need to sell off all of his regular bombs. Do so and then head over to the other counter to purchase water bombs.


A Bomb Bag that can normally carry 30 bombs, only has the ability to carry 15 water bombs. However, later in this chapter we can optionally acquire a second and third bomb bag, so this won’t be a big problem.
Note: At this point, with the Zora Armor and Water Bombs, we can now enter the Lakebed Temple. However there are a TON of optional goodies for us to collect. To continue onward with the main quest, jump all the way to section 9.7 titled, Entering the Lakebed Temple.
9.2 Hyrule Field Goodies
Jump back on Epona and ride through South Hyrule Field to get back to the Great Bridge of Hylia portion of Hyrule Field. There are two Golden Bugs to acquire here in this area. Once you arrive back in the area, cross the small wooden bridge and then look up ahead on the wall to the left. It is a bit higher up and it will require Link to toss his boomerang. Do so and snatch up the Female Mantis.


The second golden bug is located at the north end of the bridge. The bug can be found along the north archway, inside the bridge. Use the Gale Boomerang to pull the bug over and collect the Male Mantis. This bug flies around quite a bit and it might change location, so just look around the area if you are having trouble finding it.


Continue onward, heading back in the direction of Castle Town. Along the path, you’ll find a fork in the road and one area is blocked off by boulders. That pathway connects the Great Bridge of Hylia region with North Hyrule Field. You can get some extra rupees from blowing up the boulders at both edges of this pathway, but there is nothing else we can do at this point. We will return here later once we get a new item.
Progress to the portion of Hyrule Field that is just west of Castle Town. If you used the Howling Stone earlier, a Golden Wolf will be found on the higher ledge, just north of the bridge that leads to Castle Town. Climb up and speak with the Golden Wolf to trigger a scene with the Hero’s Shade.
Just as before, prove that you’ve mastered the Shield Bash, and then the hero’s shade will teach you the next hidden skill, the Back Slice. To perform the Back Slice, target the enemy, and jump sideways twice, followed by pressing A after the roll to hit the enemy in the back. This will come in handy when we battle with enemies that have frontal armor.


Also in this portion of Hyrule Field, there are two more Golden Bugs. The first of which is located at the west part of the area, near the road that leads to the Great Bridge of Hylia portion of Hyrule Field. It is on a higher ledge just north of the road and it’s somewhat hard to see during the daytime. The bug can be seen floating around some flowers and if you walk close enough, you can target it with your boomerang. Pull it over to capture the Female Butterfly.


Its male counterpart can be found along the south portion of this area. Just follow the road and you’ll see another batch of flowers. The butterfly can be found floating around, so easily capture the Male Butterfly.


Jump back on Epona and travel to North Hyrule Field. Once you enter the area, follow the pathway straight ahead until the fork in the road. Once you do so, look straight ahead and there is a Golden Bug on the tree stump. Use the boomerang to grab the Male Stag Beetle.


Now journey to the north side of the area, climbing this mountainous region. At the fork in the road, you can climb even higher or stay lower. Stay along the lower path and continue until you reach an opening. If look around you’ll find a boulder that you can blow up. Leave the boulder for now, as we don’t have the necessary item to do anything inside the cave. However, glance just above it and you fill find the bug floating around. Use the Gale Boomerang to capture the Female Stag Beetle.


There is one more goody for us to collect here in North Hyrule Field. Jump into the water and head to the far south portion of the river, in the direction of Hyrule Castle. If you look down underwater, you’ll find a blocked off area and there is a treasure chest. Drop down with the Iron Boots and open the treasure chest to collect the Miiverse Stamp for Hylian Letter F.


9.3 Castle Town
Castle Town is a vibrant place with a lot of citizens walking around. Although you can enter a number of buildings and shops, and interact with a variety of characters, there are actually only a few notable things that we can do at the current time to work towards 100% completion.
Right when you enter Castle Town from the west, there is an older gentlemen at the top of the screen by the name of Charlo. He is taking donations “For the sake of peace in Hyrule”, and Link has the option of giving him 30 rupees, 50 rupees, or no rupees at all. Talk to him over and over again, continuously donating 50 rupees at a time until you have less than 50 rupees remaining. (To make sure rupees don’t get wasted, as well as to save time, only donate in amounts of 50, and ignore the 30 option.) We will eventually need to donate a full 1,000 rupees. Our current wallet doesn’t even hold 1,000 rupees, so you obviously don’t have enough, just yet.


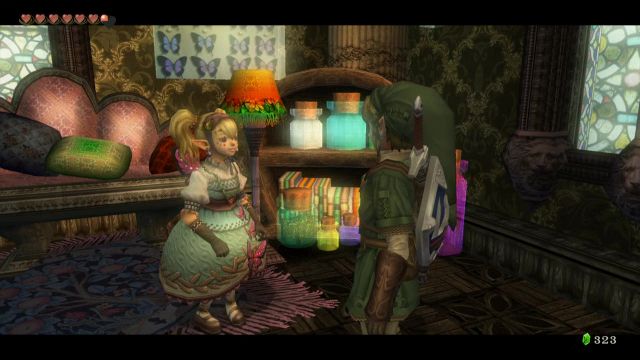
Take the pathway south of Charlo around the back alley and continue until you reach the alley connected to South Castle Town. Go ahead and enter this first building and you’ll find Agitha’s Castle. Agitha is a lover of bugs and this is where all those Golden Bugs will come into use. Speak with Agitha a couple times and she will ask if you have brought her any bugs. This will trigger the bug menu in your inventory to pop up. Give her any of the bugs that you caught thus far and she will reward you with the Big Wallet, which now allows you to carry 1,000 rupees.
Speak with Agitha again and begin giving her all of your bugs. For each Bug, she will reward you with 50 rupees. If you give her the second bug in a pair: say both the male and female butterfly, she will give you 50 rupees for the first bug, and 100 rupees for the second one. So for each pair, you’ll be able to get 150 rupees. If you’ve been following along, we’ve captured 16 of the 24 bugs thus far, so you should be able to fill your wallet to above 900 rupees. Don’t waste rupees by turning in a bug when your wallet can’t hold the reward, we can always turn in bugs later (although Agitha will gripe at you when you leave that you haven’t turned in every bug you have.)
Once you have given Agitha 12 of the bugs, she will reward you with the Agitha Stamp as part of the Miiverse Stamp Collection.


Leave Agitha’s Castle and return to Charlo. Continue to donate 50 rupees at a time until you have donated a full 1,000 rupees. Charlo doesn’t let you know how much you’ve donated, but automatically after 1,000 rupees have been donated, he will give you Piece of Heart #15, and you won’t be able to donate any more. If for some reason the 900 rupees from bugs plus whatever you had before you started turning in bugs wasn’t enough, go turn in another bug or two to get some more rupees to finish it off.
After you get that piece of heart, though, I would advise just holding onto any bugs you haven’t yet turned in for now, as we don’t want to fill up our wallet. You should keep at least a couple hundred rupees for mini-games, but we will be getting a bunch of rupees later in this chapter and we want to leave room for them in our wallet so they don’t go to waste. Plus, you can always come back and turn in a bug or two whenever you’re in a pinch.
On that note, there are actually two more Golden Bugs for us to collect at the moment and they are found just outside the south exit of Castle Town. Once you exit Castle Town to the south, cross the bridge and then climb down the steps on the right side. There are three trees planted here and the golden bug can be found right in the middle. This bug might fly around, so use your boomerang to capture the Female Ladybug.


Make your way to the east side of the area and you’ll see a large pillar in the grass. There are some flowers on the ground next to the pillar, and flying around you will find the Male Ladybug. Note, there are a number of enemy Guay in this area and if you defeat them all, some rupees will fall down for you to collect.


If you look at the south end of this area, there is a Goron that is standing in front of a bunch of rocks. He is in need of some Hot Spring Water so he can break through the rocks. We can’t do anything about it for now, but we will return here a bit later, so keep it in mind.


Additionally, just inside the south entrance to Castle Town, you will find a young Goron who talks about his father who can be found just east of Castle Town. If you leave Castle Town to the East and continue to the next area, you’ll find a Goron lying on the ground in front of the broken bridge. This Goron is in the Hot Spring Water business, but because of the broken bridge, he cannot reach Death Mountain. We will work on this quest a bit later on, too.
That’s it for the Castle Town region for right now, but you can run around and talk to the various citizens and explore the area if you like. Castle Town is a highly active and pretty city with a few hidden secrets for explorers that don’t relate to ‘completion’, so feel free to explore!
9.4 Zora's Domain
Exit Castle Town to the west and then call over Epona. Ride Epona to North Hyrule Field and climb the mountainous region to reach the northern most part of the map. Here you will find a boulder that is blocking the path ahead. Use a bomb to blow it up and head on through to find yourself at Zora’s Domain.


Don’t jump down into the water. Instead, follow the path ahead on the west side of the area and climb up. There are a pair of boulders that are blocking your path, so use bombs to blow them up. The second one is on more of an incline, so a bomb arrow is probably easier. This pathway leads to the top of Zora’s Domain, near the waterfall.


Alternatively, if you fall down to the center of Zora’s Domain, swim over to the waterfall and you’ll find a Zora swimming around. Speak to the Zora and say that you want to visit the Throne Room. The Zora will grab hold of Link and swim up the waterfall, dropping you off just to the side. Walk northward to reach the Throne Room.
Equip the Zora Armor and then jump in the water at the center of the room. Use your Iron Boots to sink down to the bottom of this area. That massive rock is still here and one of the Zoras can spot eyes through part of it. Use a Water Bomb to blowup the rock and out will come a Goron, who has been trapped inside the rock all this time (and apparently is enough of a rock himself that he has no need breathe). As a thanks for saving him, the Goron will reward you with a Bomb Bag. This bag will be filled with ordinary bombs, which is great as it will complement the existing bomb bag we have that is filled with water bombs.


While you are in this area, you can swim around and collect a handful of yellow rupees that are on the various ledges. Resurface and head back to the waterfall area of Zora’s Domain.
Make your way to the surface area at the east end of the map and climb up. You will find a golden bug in this location, so walk up and capture the Male Dragonfly. The Female Dragonfly isn’t actually in Zora’s Domain, but rather, further down in Zora’s River, and we will tackle that in just a bit.


On the west of Zora’s Domain, you will find that there is a pathway that leads to the Snowpeak region. There isn’t much to see at the moment there, but we will be traveling there in the not too distant future. Jump back in the water and swim southward towards the Upper Zora River.
9.5 Upper Zora's River
Once you arrive at Upper Zora’s River, look at the north end of the area and you’ll find a door that leads to the Fishing Hole. This area is a completely optional side quest that doesn’t have any real reward, outside of a piece of heart that is somewhat related. For the purpose of this guide, we are only covering the heart piece, but you are free to go all out with the fishing if you’d like.


Enter the building and speak with the owner of the Fishing Hole, Hena. For 20 rupees, you can go fishing on the pond. You will appear in a rowboat with Hena. Right away just row straight ahead and look at the ledge above to find a piece of heart just sitting right there. Row closer to the heart piece and then press B to pull out the fishing rod. Turn Link so the rod is directly facing the piece of heart and then toss the line. If you hit it exactly, the fishing rod will catch the heart piece. Reel it in to collect Piece of Heart #16. Talk to Hena to end the fishing game.


Exit Hena’s building, but before you exit the fishing hole completely however, head to the east side, where you should see a bridge with a sign in front of it. Fish to the right of this bridge (in the section away from the main fishing area) using your normal fishing pole. The very first catch should net you another Empty Bottle! And you have the pride of knowing you helped clean up the fishing hole. Awesome.


Return to Upper Zora’s River and run over to Iza, the woman found here. Just in the water beside her you will find a golden bug floating around. Use the boomerang to capture the Female Dragonfly.


Speak with Iza and then backup to find barriers surrounding you. A Twilight warp portal will appear with three shadow beasts dropping in. Hold the B button to perform a spin attack, so that you can hit and defeat multiple shadow beasts at a time.


After defeating the monsters, Iza will invite Link to step inside. Due to the boulders that are blocking the path ahead, she is unable to open her business. She will temporarily give Link a bomb bag, along with some arrows to create bomb arrows, and asks Link to blow up the boulder. Shoot the boulder twice with bomb arrows to destroy the boulder, allowing water to flow through.
Iza will tell you that there are more boulders blocking the way and Link will next appear on a rowboat. Controlling the rowboat is rather awkward and in general, my suggest would be to paddle as little as possible. This part basically acts as somewhat of a tutorial to using the rowboat, as it is nearly impossible to fail this mission. Allow the water to take you down much of Zora’s River, and once you reach a more open area, you’ll meet up with a Zora, who works as Iza’s part-time employee. Once you meet her, shoot two bomb arrows at the rock ahead and then continue onward.


The Zora will leave behind some rupees as she swims ahead, and you can collect them as a way of practicing your rowboat controls. Continue down the river until you reach the mouth of the river where you will appear back at Lake Hylia. As a thanks for helping clear the boulders, the Zora will allow you to keep the Bomb Bag, making it your 3rd bomb bag thus far.


With the river now free of boulders, this actually opens up a mini-game back at Upper Zora’s River. It is a bit out of the way as it does take awhile to get back up there, so you can skip this and do it later on in the adventure if you’d like. If so, we’ll meet you in the next section. Otherwise, if you want to go ahead and do it now, return to Fyer at the center of Lake Hylia and pay him 10 rupees to use his canon to shoot yourself up to the top of Lake Hylia. Exit the building and jump back on Epona.
Using Epona, ride from the Great Bridge of Hylia region to North Hyrule Field. Note, along the way, you can take the shortcut that directly links the two areas together. Travel to the north end of the map and head into Zora’s Domain. From there, jump into the water and swim down to Upper Zora’s River.
Enter Iza’s Boat Rental and speak with her to play a mini-game for 20 rupees. Link will again be in his rowboat heading down the river. As he goes down, there are several massive pots hung throughout the river. Link must use bomb arrows to break the pots. Each time Link hits a yellow pot, he gets one point, and he gets two points for hitting a red pot. However, if Link crashes into the wall or an object, he will lose a point.


In general, I would advise limiting the amount of rowing done. The boat for the most part will be guided by the natural river flow and minimal rowing needs to take place. In order to get the prize, Link will need to get at least 25 points.


After completing the mini-game, Link will appear back at Lake Hylia once again. If he has successfully scored at least 25 points, he will be rewarded with the Giant Bomb Bags. This will double the capacity of bombs that Link can carry for each of the bomb bags he has.
9.6 Lake Hylia
There are a few lingering things for us to do here in Lake Hylia. The first of which is to play Falbi’s Flight-by-Fowl mini-game. Run back over to Fyer and pay the 10 rupees to get shot up to the top of Lake Hylia. This time, instead of leaving the building, head down the ladder and head in the other direction to meet Falbi. Pay him 20 rupees to play and then grab a nearby Cucco. Basically, Link gets to leap off the ledge and fly down below while holding a Cucco.


There are rupees scattered around that Link can fly into, but none of them are worth it. Instead, down below you’ll see a platform with several different layers, along with a spinning platform at the very top. Each level has its own treasure chest, and you actually want to land on the second level, the highest one that doesn’t move. Doing so allows you to get the prize, and then jump down and get all the other prizes as well. If you land on the very top one that’s spinning, then after you open the chest, hang off the right side and wait until the next level is below you, then let go. That way you can still get all the rest of the prizes. You can play the game again to get free rupees at anytime.
Top Level – 100 Rupees
2nd Level – Piece of Heart #17
3rd Level – Miiverse Cucco Stamp
4th Level – Red Rupee
5th Level – Yellow Rupee


At the south central portion of Lake Hylia, there are a series of platforms. If you drop into the water and swim to the furthest south-central part, you’ll see a treasure chest. Use the Iron Boots to open it up and get the Miiverse Stamp of the Hylian Letter W.


There is one more cave for us to enter. Resurface at the land portion and make your way towards the southwest part of Lake Hylia on the upper ledges, until you find a ladder. Climb it and turn to your left. Tucked away in this corner is a boulder that can be destroyed. This reveals an entrance to the Lake Hylia Cavern. Much like the Kakariko Gorge Cavern, this is just a long series of caves with a wide assortment of enemies and goodies to collect. This one being significantly larger than the Kakariko Gorge Cavern.
You should enter the cave with some lantern oil. As you progress through the cave, you’ll come across a number of treasure chests to collect more bombs and arrows. Furthermore, you’ll regularly run into Yellow Chu. Defeat them whenever you see them and then scoop up some Yellow Chu Jelly. Fill up your lantern whenever you come across a Yellow Chu and then try to keep a bottle stocked with more Yellow Chu Jelly as well, just in case.


The path through the Lake Hylia Cavern is very linear. You travel down a corridor into an open room and then when you look around the room, there are either two or three boulders that you can blow up. I suggest blowing up every boulder you see, as it either has a treasure chest with goodies, or it leads further into the cavern. Since it is rather linear, as long as you blow up all the boulders, you won’t miss anything. Halfway along, and at the end, there is a dead end with light shining from the ceiling, stepping into this light will teleport you back to the entrance, so wait until you reach the end before you step into it.
For now, there are three main goodies for us to collect.
– Miiverse Stamp for Hylian Letter J – 5th Room
– Miiverse Stamp for Treasure Chest Stamp – 10th Room
– Piece of Heart #18 – 11th Room


In the 5th and 11th room, you must light the two torches in order to reveal the prize. In addition to the goodies above, there are also three Poe Souls, but we cannot defeat them yet, and we will return here later on. There are also a number of rupee treasure chests, and you should walk away from this cave with an additional 130+ rupees.
9.7 Entering the Lakebed Temple
It is now time to enter the next dungeon, the Lakebed Temple. If you glance at your map of Lake Hylia, you’ll see a large purple dot, right in the center of the Lake. This marks the entrance to the dungeon. Swim to this area and then sink down to the lake floor.
There are a few Zoras here and in particular the one at the south end of the area will sell you water bombs if you are short. You will need at least two water bombs to enter the dungeon. Walk to the north and place a water bomb on the ground floor where bubbles are rising from. Doing so will cause a water geyser to appear. Place a second bomb and it will be carried up to the boulder above, blowing up and revealing the entrance to the dungeon. Once you are ready, swim into the Lakebed Temple.


- Chapter 1 – Ordon Village
- Chapter 2 – The Twilight
- Chapter 3 – Faron Woods: Twilight
- Chapter 4 – Forest Temple
- Chapter 5 – Kakariko Village: Twilight
- Chapter 6 – Death Mountain
- Chapter 7 – Goron Mines
- Chapter 8 – Lanayru Province: Twilight
- Chapter 9 – Lake Hylia: Sidequests
- Chapter 10 – Lakebed Temple
- Chapter 11 – The Master Sword
- Chapter 12 – Gerudo Desert
- Chapter 13 – Arbiter’s Grounds
- Chapter 14 – Scaling Snowpeak
- Chapter 15 – Snowpeak Ruins
- Chapter 16 – Sacred Grove: Round Two
- Chapter 17 – Temple of Time
- Chapter 18 – In Search of the Sky
- Chapter 19 – City in the Sky
- Chapter 20 – Palace of Twilight
- Chapter 21 – Cave of Ordeals
- Chapter 22 – Hyrule Castle
