Sha Gehma Shrine: Difference between revisions
Jump to navigation
Jump to search
Want an adless experience? Log in or Create an account.
No edit summary |
Thortok2000 (talk | contribs) No edit summary |
||
| Line 11: | Line 11: | ||
}}<section begin=summary /><includeonly> | }}<section begin=summary /><includeonly> | ||
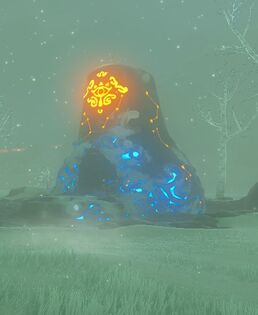
[[File:ShaGehmaShrine.jpg|200px|thumb|left|Shift and Lock]] | [[File:ShaGehmaShrine.jpg|200px|thumb|left|Shift and Lock]] | ||
'''Requirements:''' None<br> | |||
</includeonly><section end=summary /> | </includeonly><section end=summary /> | ||
'''Sha Gehma Shrine''' is one of the many [[Shrine of Trials]] from ''[[The Legend of Zelda: Breath of the Wild|Breath of the Wild]]''. | '''Sha Gehma Shrine''' is one of the many [[Shrine of Trials]] from ''[[The Legend of Zelda: Breath of the Wild|Breath of the Wild]]''. | ||
==Requirements== | |||
{{Shrine}}{{Clear|left}} | |||
== | ==Shift and Lock== | ||
The first chest is easy to open, just climb high enough and glide to where it sits on a pillar. | |||
For the other chest, raise the magnetic block up to above the moving platforms, and rest it on the platforms just long enough to switch to Stasis. Use Stasis on either the block or the platform holding it up to have enough time to open the second chest. Now make your way to the altar for your [[Spirit Orb]]. | |||
{{Cat|Breath of the Wild Shrines}} | {{Cat|Breath of the Wild Shrines}} | ||
Revision as of 21:16, April 22, 2017
| This article is a stub. You can help the Zelda Dungeon Wiki by expanding it. |
Sha Gehma Shrine

Games | ||
Inhabitants | ||
Items | ||
| Guides | ||
|---|---|---|
Walkthrough | ||
Sha Gehma Shrine is one of the many Shrine of Trials from Breath of the Wild.
Requirements
Shift and Lock
The first chest is easy to open, just climb high enough and glide to where it sits on a pillar.
For the other chest, raise the magnetic block up to above the moving platforms, and rest it on the platforms just long enough to switch to Stasis. Use Stasis on either the block or the platform holding it up to have enough time to open the second chest. Now make your way to the altar for your Spirit Orb.