Death Mountain Marker: Difference between revisions
No edit summary |
|||
| (10 intermediate revisions by the same user not shown) | |||
| Line 8: | Line 8: | ||
'''Death Mountain Markers''' are a series of sign posts found in ''[[The Legend of Zelda: Breath of the Wild|Breath of the Wild]]'' and ''[[The Legend of Zelda: Tears of the Kingdom|Tears of the Kingdom]]''. | '''Death Mountain Markers''' are a series of sign posts found in ''[[The Legend of Zelda: Breath of the Wild|Breath of the Wild]]'' and ''[[The Legend of Zelda: Tears of the Kingdom|Tears of the Kingdom]]''. | ||
==''Breath of the Wild''== | |||
==''Tears of the Kingdom''== | ==''Tears of the Kingdom''== | ||
Multiple | Multiple Death Mountain Markers can be found on the way to [[Goron City (Tears of the Kingdom)|Goron City]] and eventually to [[Death Mountain (Tears of the Kingdom)|Death Mountain]]. Some of the markers from ''Breath of the Wild'' are no longer found in ''Tears of the Kingdom''. | ||
====Marker #1==== | ====Marker #1==== | ||
| Line 21: | Line 23: | ||
*''Death Mountain Marker #2'' | *''Death Mountain Marker #2'' | ||
*''Goron City ahead'' | *''Goron City ahead'' | ||
====Marker #4==== | |||
Found north of the [[Southern Mine]], right where the path from the Soutern Mine and [[Goronbi River]] merge together. | |||
*''Death Mountain Marker #4'' | |||
*''This way to Goron City'' | |||
====Marker #7==== | |||
Found just south of the [[Stolock Bridge]] at the [[Goron Hot Springs]]. | |||
*''Death Mountain Marker #7'' | |||
*''The world-renowned, refreshing Goron Hot Springs!'' | |||
====Marker #8==== | |||
Found just west of the [[Bridge of Eldin (Breath of the Wild)|Bridge of Eldin]]. | |||
*''Death Mountain Marker #8'' | |||
*''Bridge of Eldin'' | |||
====Marker #9==== | |||
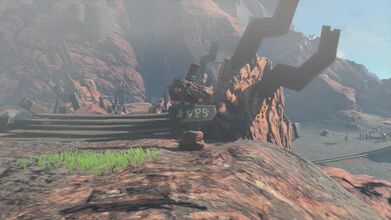
Found almost directly east of Death Mountain. | |||
*''Death Mountain Marker #9'' | |||
==Gallery== | ==Gallery== | ||
<gallery widths="400px" heights="220px"> | <gallery widths="400px" heights="220px"> | ||
File:TotK-Death-Mountain-Marker-1.jpg|Marker #1 - At the [[Maw of Death Mountain]] | |||
File:TotK-Death-Mountain-Marker-2.jpg|Marker #2 - North of [[Gero Pond]] and east of [[Medingo Pool]] | |||
File:TotK-Death-Mountain-Marker-4.jpg|Marker #4 - Between the [[Southern Mine]] and [[Goron City (Tears of the Kingdom)|Goron City]] | |||
File:TotK-Death-Mountain-Marker-7.jpg|Marker #7 - At the [[Goron Hot Springs]], just south of the [[Stolock Bridge]] | |||
File:TotK-Death-Mountain-Marker-8.jpg|Marker #8 - West of the [[Bridge of Eldin (Breath of the Wild)|Bridge of Eldin]] | |||
</gallery> | </gallery> | ||
Latest revision as of 15:29, April 2, 2024
Death Mountain Markers are a series of sign posts found in Breath of the Wild and Tears of the Kingdom.
Breath of the Wild
Tears of the Kingdom
Multiple Death Mountain Markers can be found on the way to Goron City and eventually to Death Mountain. Some of the markers from Breath of the Wild are no longer found in Tears of the Kingdom.
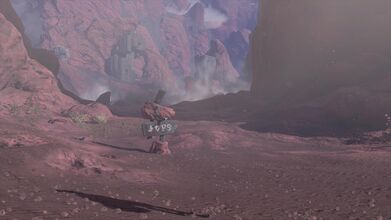
Marker #1
Found at the Maw of Death Mountain, just north of the Foothill Stable.
- Death Mountain Marker #1
- Climbing Path Trailhead
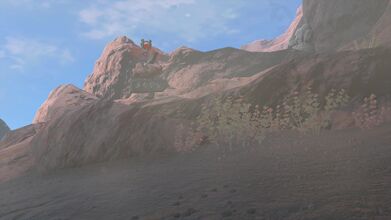
Marker #2
Found north of Gero Pond and east of Medingo Pool.
- Death Mountain Marker #2
- Goron City ahead
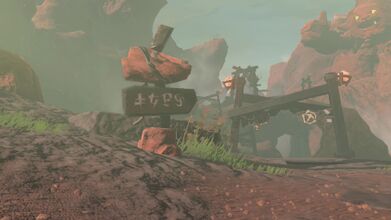
Marker #4
Found north of the Southern Mine, right where the path from the Soutern Mine and Goronbi River merge together.
- Death Mountain Marker #4
- This way to Goron City
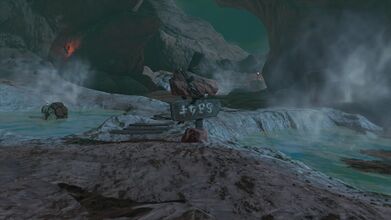
Marker #7
Found just south of the Stolock Bridge at the Goron Hot Springs.
- Death Mountain Marker #7
- The world-renowned, refreshing Goron Hot Springs!
Marker #8
Found just west of the Bridge of Eldin.
- Death Mountain Marker #8
- Bridge of Eldin
Marker #9
Found almost directly east of Death Mountain.
- Death Mountain Marker #9
Gallery
Marker #1 - At the Maw of Death Mountain
Marker #2 - North of Gero Pond and east of Medingo Pool
Marker #4 - Between the Southern Mine and Goron City
Marker #7 - At the Goron Hot Springs, just south of the Stolock Bridge
Marker #8 - West of the Bridge of Eldin


