Walkthrough:Water Temple (Tears of the Kingdom): Difference between revisions
Jump to navigation
Jump to search
Want an adless experience? Log in or Create an account.
No edit summary |
No edit summary |
||
| Line 17: | Line 17: | ||
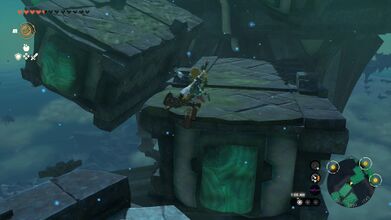
File:TotK-Water-Temple-Walkthrough-07.jpg|Attach a [[Hover Stone]] to the floodgate | File:TotK-Water-Temple-Walkthrough-07.jpg|Attach a [[Hover Stone]] to the floodgate | ||
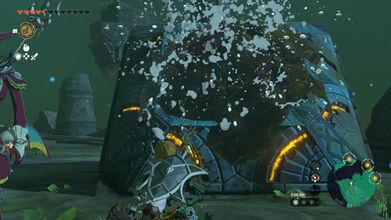
File:TotK-Water-Temple-Walkthrough-08.jpg|With the hover stone activated, raise the floodgate to clear the water | File:TotK-Water-Temple-Walkthrough-08.jpg|With the hover stone activated, raise the floodgate to clear the water | ||
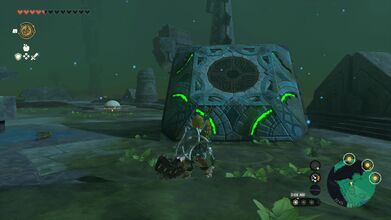
File:TotK-Water-Temple-Walkthrough-09.jpg|Place the Orb into the hole to open the | File:TotK-Water-Temple-Walkthrough-09.jpg|Place the Orb into the hole to open the gate | ||
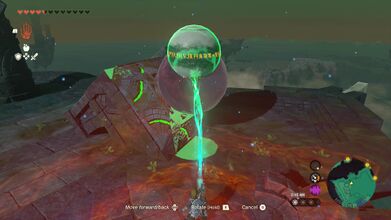
File:TotK-Water-Temple-Walkthrough-10.jpg|Use Sideon's Power of Water to activate the wheel | File:TotK-Water-Temple-Walkthrough-10.jpg|Use Sideon's Power of Water to activate the wheel | ||
</gallery> | |||
==Faucet - B1 - Central Platform== | |||
*The faucet can be found beneath the central platform in the area down below. The entrance is blocked by a wall of flames. Use Sidon's Power of Water to surround yourself with water and then walk through the flames. | |||
*On the other side of the flames, there is a Hover Stone nearby. Grab it and place it on the floor switch. Be sure to de-activate the hover stone so it lands on the ground, causing the flames to disappear. | |||
*At the far end of this room, there are numerous Hover Stones and an [[Orb]]. The goal is to grab the Orb and bring it back up to the higher ledge where you entered this room. The best way to go about this is to attach the orb to one of the hover stones and then use [[Ultrahand]] to move the hover stone. | |||
*Jumping can be a bit annoying here, so it is recommended to use the [[Paraglider]] whenever possible to control Link. All in all, Link can complete this task with just two hover stones, but using multiple ones will make the task easier. Depending on how much energy you have in your Energy Cell, you may have to perform this task much faster. | |||
*Once you have the orb on the higher ledge, grab one of the nearby hover stones and attach the orb to it. Be sure to activate the hover stone and use Ultrahand to grab it. Move it so that the orb fits right into the whole in the wall, opening the nearby gate. | |||
*Use Sidon's ability to splash water at the wheel and activate the facuet. | |||
<gallery widths="400px" heights="220px" perrow=2> | |||
</gallery> | </gallery> | ||
Revision as of 17:51, May 22, 2023
The Water Temple Walkthrough is a full guide to completing the Water Temple in Tears of the Kingdom. It includes a guide for the dungeon, including activating all four faucets, and defeating the dungeon boss, Mucktorok. The four faucets can be done in any order.
Faucet - 1F - West Side
- Make your way to the west side of the dungeon, using the gravity to jump across the gaps. You'll be confronted by three Soldier Constructs that are quite powerful. Be sure to get rid of them first to make this area much easier.
- At the northwest end of the platform, there is a device here that will create water bubbles. However, it is covered with Sludge. Use Sidon's Power of Water to clear some of the sludge. Some of it is a bit higher up so it may be easier to just throw a Splash Fruit to clear some of it.
- Use Ultrahand and grab the Orb that is in the nearby water. Grab it and place it in one of the bubbles that device is creating. The orb will be carried up to the higer area, with the bubble eventually popping and the orb settling here. Jump into a bubble and ride the bubble up to this higher area.
- On the east side of the platform, there is a giant floodgate. If Link lifts it up with Ultrahand, water well flow away from this part of the dungeon. However, the floodgate will immediately come crashing down. There a few nearby Hover Stones that Link can use. Grab one with Ultrahand and bring it towards the floodgate. Activate the Hover Stone and then attach it to the top of the floodgate. Use Ultrahand to pull the hover stone up, opening the floodgate. It will remain open as long as there are Energy Wells in Link's Energy Cell.
- With the Floodgate open, grab the Orb with Ultrahand and place it into the hole. This will cause a nearby gate to open. Run over to the open gate and Link will find a wheel on the inside. Use Sidon's Power of Water to shoot a blast of water at the wheel. The wheel will spin, activating one of the faucets.
Jump across the gaps to the west side of the dungeon

The device is covered in Sludge
Use a Splash Fruit to clear the sludge
The device will activate and create water bubbles
Place the Orb into one of the water bubbles

Ride a water bubble up to the higher area

Attach a Hover Stone to the floodgate
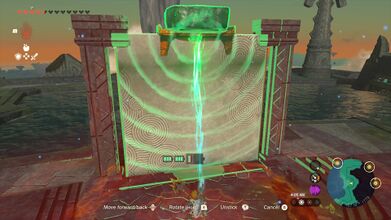
With the hover stone activated, raise the floodgate to clear the water
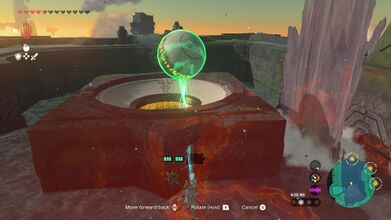
Place the Orb into the hole to open the gate
Use Sideon's Power of Water to activate the wheel


Faucet - B1 - Central Platform
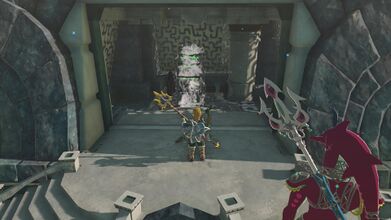
- The faucet can be found beneath the central platform in the area down below. The entrance is blocked by a wall of flames. Use Sidon's Power of Water to surround yourself with water and then walk through the flames.
- On the other side of the flames, there is a Hover Stone nearby. Grab it and place it on the floor switch. Be sure to de-activate the hover stone so it lands on the ground, causing the flames to disappear.
- At the far end of this room, there are numerous Hover Stones and an Orb. The goal is to grab the Orb and bring it back up to the higher ledge where you entered this room. The best way to go about this is to attach the orb to one of the hover stones and then use Ultrahand to move the hover stone.
- Jumping can be a bit annoying here, so it is recommended to use the Paraglider whenever possible to control Link. All in all, Link can complete this task with just two hover stones, but using multiple ones will make the task easier. Depending on how much energy you have in your Energy Cell, you may have to perform this task much faster.
- Once you have the orb on the higher ledge, grab one of the nearby hover stones and attach the orb to it. Be sure to activate the hover stone and use Ultrahand to grab it. Move it so that the orb fits right into the whole in the wall, opening the nearby gate.
- Use Sidon's ability to splash water at the wheel and activate the facuet.