Category:Age of Calamity Korok Screenshot Files: Difference between revisions
Jump to navigation
Jump to search
Want an adless experience? Log in or Create an account.
(Created page with "{{Cat|Age of Calamity Screenshot Files}}") |
(No difference)
|
Latest revision as of 01:47, November 24, 2020
Media in category "Age of Calamity Korok Screenshot Files"
The following 166 files are in this category, out of 166 total.
 Air-and-Lightning-01.jpg 1,920 × 1,080; 521 KB
 Air-and-Lightning-02.jpg 1,920 × 1,080; 507 KB
 Air-and-Lightning-03.jpg 1,920 × 1,080; 587 KB
 Air-and-Lightning-04.jpg 1,920 × 1,080; 476 KB
 Air-and-Lightning-05.jpg 1,920 × 1,080; 581 KB
 Air-and-Lightning-Map.png 874 × 700; 381 KB
 Akkala-Tower-01.jpg 1,920 × 1,080; 597 KB
 Akkala-Tower-02.jpg 1,920 × 1,080; 707 KB
 Akkala-Tower-03.jpg 1,920 × 1,080; 722 KB
 Akkala-Tower-04.jpg 1,920 × 1,080; 343 KB
 Akkala-Tower-05.jpg 1,920 × 1,080; 639 KB
 Akkala-Tower-Map.png 874 × 690; 373 KB
 All-Hyrule-United-01.jpg 1,920 × 1,080; 772 KB
 All-Hyrule-United-02.jpg 1,920 × 1,080; 752 KB
 All-Hyrule-United-03.jpg 1,920 × 1,080; 583 KB
 All-Hyrule-United-04.jpg 1,920 × 1,080; 679 KB
 All-Hyrule-United-05.jpg 1,920 × 1,080; 658 KB
 All-Hyrule-United-06.jpg 1,920 × 1,080; 662 KB
 All-Hyrule-United-Map.png 874 × 688; 462 KB
 Anti-Ice-Training-II-01.jpg 1,920 × 1,080; 319 KB
 Anti-Ice-Training-II-Map.png 874 × 692; 145 KB
 Calamity-Strikes-01.jpg 1,920 × 1,080; 442 KB
 Calamity-Strikes-02.jpg 1,920 × 1,080; 400 KB
 Calamity-Strikes-03.jpg 1,920 × 1,080; 385 KB
 Calamity-Strikes-04.jpg 1,920 × 1,080; 332 KB
 Calamity-Strikes-05.jpg 1,920 × 1,080; 312 KB
 Calamity-Strikes-06.jpg 1,920 × 1,080; 401 KB
 Calamity-Strikes-07.jpg 1,920 × 1,080; 404 KB
 Calamity-Strikes-Map-1.png 874 × 700; 264 KB
 Calamity-Strikes-Map-2.png 874 × 694; 277 KB
 Cross-the-Hebra-Mountains-01.jpg 1,920 × 1,080; 480 KB
 Cross-the-Hebra-Mountains-Map.png 874 × 714; 212 KB
 Daruk-the-Goron-Hero-01.jpg 1,920 × 1,080; 785 KB
 Daruk-the-Goron-Hero-02.jpg 1,920 × 1,080; 690 KB
 Daruk-the-Goron-Hero-03.jpg 1,920 × 1,080; 588 KB
 Daruk-the-Goron-Hero-04.jpg 1,920 × 1,080; 643 KB
 Daruk-the-Goron-Hero-05.jpg 1,920 × 1,080; 713 KB
 Daruk-the-Goron-Hero-06.jpg 1,920 × 1,080; 617 KB
 Daruk-the-Goron-Hero-07.jpg 1,920 × 1,080; 669 KB
 Daruk-the-Goron-Hero-08.jpg 1,920 × 1,080; 673 KB
 Daruk-the-Goron-Hero-Map.png 873 × 713; 345 KB
 Defend-Hyrule-Castle-01.jpg 1,920 × 1,080; 323 KB
 Defend-Hyrule-Castle-Map.png 874 × 699; 147 KB
 Defend-Zoras-Domain-01.jpg 1,920 × 1,080; 685 KB
 Defend-Zoras-Domain-Map.png 874 × 700; 250 KB
 Destroy-the-Yiga-Clan-01.jpg 1,920 × 1,080; 520 KB
 Destroy-the-Yiga-Clan-02.jpg 1,920 × 1,080; 381 KB
 Destroy-the-Yiga-Clan-03.jpg 1,920 × 1,080; 363 KB
 Destroy-the-Yiga-Clan-04.jpg 1,920 × 1,080; 396 KB
 Destroy-the-Yiga-Clan-05.jpg 1,920 × 1,080; 353 KB
 Destroy-the-Yiga-Clan-06.jpg 1,920 × 1,080; 339 KB
 Destroy-the-Yiga-Clan-07.jpg 1,920 × 1,080; 339 KB
 Destroy-the-Yiga-Clan-08.jpg 1,920 × 1,080; 392 KB
 Destroy-the-Yiga-Clan-Map.png 874 × 688; 244 KB
 Each-Step-Like-Thunder-01.jpg 1,920 × 1,080; 617 KB
 Each-Step-Like-Thunder-02.jpg 1,920 × 1,080; 557 KB
 Each-Step-Like-Thunder-03.jpg 1,920 × 1,080; 626 KB
 Each-Step-Like-Thunder-04.jpg 1,920 × 1,080; 561 KB
 Each-Step-Like-Thunder-Map.png 874 × 715; 409 KB
 Elemental-Uproar-01.jpg 1,920 × 1,080; 673 KB
 Elemental-Uproar-02.jpg 1,920 × 1,080; 607 KB
 Elemental-Uproar-Map.png 874 × 690; 301 KB
 Freeing-Korok-Forest-01.jpg 1,920 × 1,080; 519 KB
 Freeing-Korok-Forest-02.jpg 1,920 × 1,080; 454 KB
 Freeing-Korok-Forest-03.jpg 1,920 × 1,080; 426 KB
 Freeing-Korok-Forest-04.jpg 1,920 × 1,080; 550 KB
 Freeing-Korok-Forest-05.jpg 1,920 × 1,080; 504 KB
 Freeing-Korok-Forest-06.jpg 1,920 × 1,080; 358 KB
 Freeing-Korok-Forest-07.jpg 1,920 × 1,080; 535 KB
 Freeing-Korok-Forest-08.jpg 1,920 × 1,080; 492 KB
 Freeing-Korok-Forest-09.jpg 1,920 × 1,080; 402 KB
 Freeing-Korok-Forest-10.jpg 1,920 × 1,080; 464 KB
 Freeing-Korok-Forest-Map.png 874 × 706; 433 KB
 Hair-Width-Trial-Expert-Plus-01.jpg 1,920 × 1,080; 682 KB
 Hair-Width-Trial-Expert-Plus-Map.png 874 × 700; 256 KB
 Hunting-Partners-01.jpg 1,920 × 1,080; 509 KB
 Hunting-Partners-Map.png 874 × 709; 263 KB
 Innkeepers-Request-01.jpg 1,920 × 1,080; 613 KB
 Innkeepers-Request-Map.png 874 × 693; 233 KB
 Mipha-the-Zora-Princess-01.jpg 1,920 × 1,080; 409 KB
 Mipha-the-Zora-Princess-02.jpg 1,920 × 1,080; 542 KB
 Mipha-the-Zora-Princess-03.jpg 1,920 × 1,080; 456 KB
 Mipha-the-Zora-Princess-04.jpg 1,920 × 1,080; 463 KB
 Mipha-the-Zora-Princess-Map.png 874 × 710; 352 KB
 Miphas-Training-01.jpg 1,920 × 1,080; 487 KB
 Miphas-Training-Map.png 874 × 698; 222 KB
 Polishing-His-Technique-01.jpg 1,920 × 1,080; 617 KB
 Polishing-His-Technique-Map.png 874 × 694; 271 KB
 Relentless-as-a-Waterfall-01.jpg 1,920 × 1,080; 583 KB
 Relentless-as-a-Waterfall-02.jpg 1,920 × 1,080; 624 KB
 Relentless-as-a-Waterfall-03.jpg 1,920 × 1,080; 430 KB
 Relentless-as-a-Waterfall-04.jpg 1,920 × 1,080; 376 KB
 Relentless-as-a-Waterfall-05.jpg 1,920 × 1,080; 434 KB
 Relentless-as-a-Waterfall-06.jpg 1,920 × 1,080; 523 KB
 Relentless-as-a-Waterfall-Map.png 874 × 689; 380 KB
 Revali-the-Rito-Warrior-01.jpg 1,920 × 1,080; 397 KB
 Revali-the-Rito-Warrior-02.jpg 1,920 × 1,080; 368 KB
 Revali-the-Rito-Warrior-03.jpg 1,920 × 1,080; 524 KB
 Revali-the-Rito-Warrior-04.jpg 1,920 × 1,080; 365 KB
 Revali-the-Rito-Warrior-05.jpg 1,920 × 1,080; 539 KB
 Revali-the-Rito-Warrior-06.jpg 1,920 × 1,080; 404 KB
 Revali-the-Rito-Warrior-07.jpg 1,920 × 1,080; 376 KB
 Revali-the-Rito-Warrior-08.jpg 1,920 × 1,080; 355 KB
 Revali-the-Rito-Warrior-Map.png 874 × 715; 298 KB
 Road-to-the-Ancient-Lab-01.jpg 1,920 × 1,080; 515 KB
 Road-to-the-Ancient-Lab-02.jpg 1,920 × 1,080; 620 KB
 Road-to-the-Ancient-Lab-03.jpg 1,920 × 1,080; 559 KB
 Road-to-the-Ancient-Lab-04.jpg 1,920 × 1,080; 529 KB
 Road-to-the-Ancient-Lab-05.jpg 1,920 × 1,080; 546 KB
 Road-to-the-Ancient-Lab-06.jpg 1,920 × 1,080; 540 KB
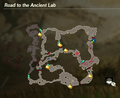 Road-to-the-Ancient-Lab-Map.png 874 × 715; 381 KB
 The-Battle-of-Hyrule-Field-Korok-01.jpg 1,920 × 1,080; 732 KB
 The-Battle-of-Hyrule-Field-Korok-02.jpg 1,920 × 1,080; 762 KB
 The-Battle-of-Hyrule-Field-Korok-03.jpg 1,920 × 1,080; 665 KB
 The-Battle-of-Hyrule-Field-Korok-04.jpg 1,920 × 1,080; 792 KB
 The-Battle-of-Hyrule-Field-Korok-05.jpg 1,920 × 1,080; 760 KB
 The-Battle-of-Hyrule-Field-Korok-06.jpg 1,920 × 1,080; 435 KB
 The-Battle-of-Hyrule-Field-Korok-07.jpg 1,920 × 1,080; 646 KB
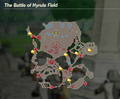 The-Battle-of-Hyrule-Field-Map.png 874 × 723; 445 KB
 The-Future-of-Hyrule-01.jpg 1,920 × 1,080; 546 KB
 The-Future-of-Hyrule-02.jpg 1,920 × 1,080; 516 KB
 The-Future-of-Hyrule-03.jpg 1,920 × 1,080; 460 KB
 The-Future-of-Hyrule-Map.png 874 × 705; 272 KB
 The-Great-Plateau-01.jpg 1,920 × 1,080; 795 KB
 The-Great-Plateau-02.jpg 1,920 × 1,080; 774 KB
 The-Great-Plateau-03.jpg 1,920 × 1,080; 588 KB
 The-Great-Plateau-04.jpg 1,920 × 1,080; 779 KB
 The-Great-Plateau-05.jpg 1,920 × 1,080; 572 KB
 The-Great-Plateau-06.jpg 1,920 × 1,080; 571 KB
 The-Great-Plateau-07.jpg 1,920 × 1,080; 728 KB
 The-Great-Plateau-Map.png 874 × 710; 415 KB
 The-Road-Home-Besieged-01.jpg 1,920 × 1,080; 683 KB
 The-Road-Home-Besieged-02.jpg 1,920 × 1,080; 669 KB
 The-Road-Home-Besieged-03.jpg 1,920 × 1,080; 735 KB
 The-Road-Home-Besieged-Map.png 762 × 600; 439 KB
 The-Yiga-Clan-Attacks-01.jpg 1,920 × 1,080; 727 KB
 The-Yiga-Clan-Attacks-02.jpg 1,920 × 1,080; 674 KB
 The-Yiga-Clan-Attacks-03.jpg 1,920 × 1,080; 637 KB
 The-Yiga-Clan-Attacks-04.jpg 1,920 × 1,080; 527 KB
 The-Yiga-Clan-Attacks-05.jpg 1,920 × 1,080; 623 KB
 The-Yiga-Clan-Attacks-06.jpg 1,920 × 1,080; 591 KB
 The-Yiga-Clan-Attacks-07.jpg 1,920 × 1,080; 718 KB
 The-Yiga-Clan-Attacks-08.jpg 1,920 × 1,080; 706 KB
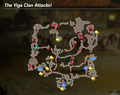 The-Yiga-Clan-Attacks-Map.png 874 × 689; 447 KB
 Urbosa-the-Gerudo-Chief-01.jpg 1,920 × 1,080; 521 KB
 Urbosa-the-Gerudo-Chief-02.jpg 1,920 × 1,080; 512 KB
 Urbosa-the-Gerudo-Chief-03.jpg 1,920 × 1,080; 498 KB
 Urbosa-the-Gerudo-Chief-04.jpg 1,920 × 1,080; 438 KB
 Urbosa-the-Gerudo-Chief-05.jpg 1,920 × 1,080; 464 KB
 Urbosa-the-Gerudo-Chief-06.jpg 1,920 × 1,080; 414 KB
 Urbosa-the-Gerudo-Chief-07.jpg 1,920 × 1,080; 514 KB
 Urbosa-the-Gerudo-Chief-08.jpg 1,920 × 1,080; 451 KB
 Urbosa-the-Gerudo-Chief-09.jpg 1,920 × 1,080; 534 KB
 Urbosa-the-Gerudo-Chief-Map.png 874 × 720; 323 KB
 Water-and-Fire-01.jpg 1,920 × 1,080; 470 KB
 Water-and-Fire-02.jpg 1,920 × 1,080; 679 KB
 Water-and-Fire-03.jpg 1,920 × 1,080; 691 KB
 Water-and-Fire-Map.png 874 × 703; 358 KB
 When-Courage-Fails-01.jpg 1,920 × 1,080; 539 KB
 When-Courage-Fails-02.jpg 1,920 × 1,080; 521 KB
 When-Courage-Fails-03.jpg 1,920 × 1,080; 519 KB
 When-Courage-Fails-04.jpg 1,920 × 1,080; 500 KB
 When-Courage-Fails-05.jpg 1,920 × 1,080; 566 KB
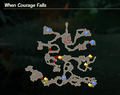 When-Courage-Fails-Map.png 874 × 693; 359 KB
 Winged-Escort-01.jpg 1,920 × 1,080; 415 KB
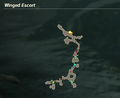 Winged-Escort-Map.png 874 × 711; 221 KB


