Gallery:Phantom Hourglass Treasure: Difference between revisions
Jump to navigation
Jump to search
Want an adless experience? Log in or Create an account.
No edit summary |
No edit summary |
||
| Line 1: | Line 1: | ||
Below is a listing of all of the Random Treasure that Link can collect in ''[[The Legend of Zelda: Phantom Hourglass|Phantom Hourglass]]''. | Below is a listing of all of the Random Treasure that Link can collect in ''[[The Legend of Zelda: Phantom Hourglass|Phantom Hourglass]]''. | ||
==Game Models== | |||
<center>{{Gallery}} | <center>{{Gallery}} | ||
{{Gallery/Box|file=Pink-Coral.png|link=Pink_Coral|caption=[[Pink Coral]]}} | |||
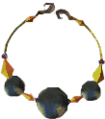
{{Gallery/Box|file=Dark-Pearl-Loop-Model.png|link=Dark_Pearl_Loop|caption=[[Dark Pearl Loop]]}} | |||
{{Gallery/Box|file=Goron-Amber.png|link=Goron_Amber|caption=[[Goron Amber]]}} | |||
{{Gallery/Box|file=Helmaroc-Plume.png|link=Helmaroc_Plume|caption=[[Helmaroc Plume]]}} | |||
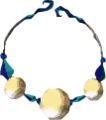
{{Gallery/Box|file=Pearl-Necklace-Model.png|link=Pearl_Necklace|caption=[[Pearl Necklace]]}} | |||
{{Gallery/Box|file=Zora-Scale.png|link=Zora Scale (Phantom Hourglass)|caption=[[Zora Scale (Phantom Hourglass)|Zora Scale]]}} | |||
{{Gallery/Box|file=Ruto-Crown-Model.png|link=Ruto_Crown|caption=[[Ruto Crown]]}} | |||
{{Gallery/Box|file=Regal-Ring.png|link=Regal_Ring|caption=[[Regal Ring]]}} | |||
{{Gallery/Bottom}}</center> | |||
==Menu Sprites== | |||
{{Gallery/Box|file=|link=Pink_Coral|caption=[[Pink Coral]]}} | {{Gallery/Box|file=|link=Pink_Coral|caption=[[Pink Coral]]}} | ||
{{Gallery/Box|file=|link=Dark_Pearl_Loop|caption=[[Dark Pearl Loop]]}} | {{Gallery/Box|file=|link=Dark_Pearl_Loop|caption=[[Dark Pearl Loop]]}} | ||
Revision as of 07:27, March 15, 2018
Below is a listing of all of the Random Treasure that Link can collect in Phantom Hourglass.