Gallery:A Link to the Past Enemies: Difference between revisions

From Zelda Dungeon Wiki
Jump to navigation Jump to search
Want an adless experience? Log in or Create an account.
No edit summary
m (Tarosu -> Taros)
 
(34 intermediate revisions by 6 users not shown)
Line 1: Line 1:
(THIS PAGE IS UNDER CONSTRUCTION. PLEASE DO NOT EDIT AT THIS TIME.)
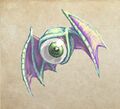
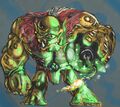
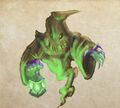
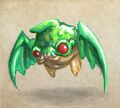
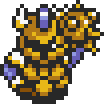
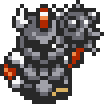
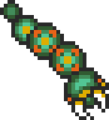
Listed below is a gallery of artwork and enemy sprites for the enemies and traps found throughout ''[[The Legend of Zelda: A Link to the Past|A Link to the Past]]''. The listing includes multiple variations of many of the enemies that appear. In rare cases, this includes enemies found exclusively within the [[Game Boy Advance]] re-release of ''A Link to the Past''.
 
In this complete Enemy Guide you'll find detailed descriptions of all of the enemies including their attacks, defense, speed, what threat they are to Link, and methods to defeat them. You can click on the enemy names or their pictures to get to their individual pages.
 
==Alex MegaCaveman's Artwork==
<gallery>
File:Babasu.jpg|[[Babusu]]
File:Buzz-Blob.jpg|[[Buzz Blob]]
File:Chasupa.jpg|[[Chasupa]]
File:Hinox.jpg|[[Hinox]]
File:Keese.jpg|[[Keese]]
File:Ku.jpg|[[Ku]]
File:Poe.jpg|[[Poe]]
File:Rat-Caveman.jpg|[[Rat]]
File:Slarok.jpg|[[Slarok]]
File:Green-Zirro.jpg|[[Zirro]]
</gallery>


==Enemy Sprites==
==Enemy Sprites==
<center>{{Gallery}}
<gallery>
{{Gallery/Box|file=AntiFairy.png|link=Anti-Fairy|tip=Anti-Fairy|caption=[[Anti-Fairy]]}}
File:AntiFairy.png|[[Anti-Fairy]]
{{Gallery/Box|file=Armos-Sprite-1.png|link=Armos|tip=Armos|caption=[[Armos]]}}
File:Armos-Sprite-1.png|[[Armos]]
{{Gallery/Box|file=Arrgi-Sprite-Alttp.png|link=Arrgi|tip=Arrgi|caption=[[Arrgi]]}}
File:Arrgi-Sprite-Alttp.png|[[Arrgi]]
{{Gallery/Box|file=Babasu-1.png|link=Babasu|tip=Babasu|caption=[[Babasu]]}}
File:Babusu-1.png|[[Babusu]]
{{Gallery/Box|file=Ball-1.png|link=Ball|tip=Ball|caption=[[Ball]]}}
File:Ball-1.png|[[Ball]]
{{Gallery/Box|file=Beamos-Sprite-1.png|link=Beamos|tip=Beamos|caption=[[Beamos]]}}
File:Beamos-Sprite-1.png|[[Beamos]]
{{Gallery/Box|file=Bee-2.png|link=Bee|tip=Bee|caption=[[Bee]]}}
File:Bee-2.png|[[Bee]]
{{Gallery/Box|file=Biri-4.png|link=Biri|tip=Biri|caption=[[Biri]]}}
File:Biri-4.png|[[Biri]]
{{Gallery/Box|file=Blade-Trap-1.png|link=Blade_Trap|caption=[[Blade Trap]]}}
File:Blade-Trap-1.png|[[Blade Trap]]
{{Gallery/Box|file=Archer.png|link=Archer|tip=Archer|caption=[[Archer|Blue Archer]]}}
File:Blazing-Bat-1.png|[[Blazing Bat]]
{{Gallery/Box|file=Blue-Bari-1.png|link=Bari_(A_Link_to_the_Past)|caption=[[Bari (A Link to the Past)|Blue Bari]]}}
File:Archer.png|[[Archer|Blue Archer]]
{{Gallery/Box|file=Blue-Debirando-1.png|link=Debirando|tip=Debirando|caption=[[Debirando|Blue Debirando]]}}
File:Blue-Bari-1.png|[[Bari (A Link to the Past)|Blue Bari]]
{{Gallery/Box|file=Blue-Hardhat-Beetle-1.png|link=Hardhat_Beetle|tip=Hardhat Beetle|caption=[[Hardhat Beetle|Blue Hardhat Beetle]]}}
File:Blue-Debirando-1.png|[[Debirando|Blue Debirando]]
{{Gallery/Box|file=Stalfos-ALTTP-Blue-2.png|link=Stalfos_(A_Link_to_the_Past)|caption=[[Stalfos (A Link to the Past)|Blue Stalfos]]}}
File:Blue-Hardhat-Beetle-1.png|[[Hardhat Beetle|Blue Hardhat Beetle]]
{{Gallery/Box|file=Blue-Sword-Soldier-Sprite.png|link=Sword_Soldier|caption=[[Sword Soldier|Blue Sword Soldier]]}}
File:Stalfos-ALTTP-Blue-2.png|[[Stalfos (A Link to the Past)|Blue Stalfos]]
{{Gallery/Box|file=Tarosu-Blue-1.png|link=Tarosu|tip=Tarosu|caption=[[Tarosu|Blue Tarosu]]}}
File:Blue-Sword-Soldier-Sprite.png|[[Sword Soldier|Blue Sword Soldier]]
{{Gallery/Box|file=Blue-Tektite-2.png|link=Tektite|tip=Tektite|caption=[[Tektite|Blue Tektite]]}}
File:Tarosu-Blue-1.png|[[Taros|Blue Taros]]
{{Gallery/Box|file=Blue-Zazakku-1.png|link=Zazakku|tip=Zazakku|caption=[[Zazakku|Blue Zazakku]]}}
File:Blue-Tektite-2.png|[[Tektite|Blue Tektite]]
{{Gallery/Box|file=Zirro-Purple-1.png|link=Zirro|tip=Zirro|caption=[[Zirro|Blue Zirro]]}}
File:Blue-Zazakku-1.png|[[Zazak|Blue Zazak]]
{{Gallery/Box|file=Bomb-Knight-Sprite.png|link=Bomb_Knight|tip=Bomb Soldier|caption=[[Bomb Knight]]}}
File:Zirro-Purple-1.png|[[Zirro|Blue Zirro]]
{{Gallery/Box|file=Bone-Cucco-3.png|link=Bone_Cucco|caption=[[Bone Cucco]]}}
File:Bomb-Knight-Sprite.png|[[Bomb Knight]]
{{Gallery/Box|file=Boulder-3.png|link=Boulder|tip=Boulder|caption=[[Boulder]]}}
File:Bone-Cucco-3.png|[[Bone Cucco]]
{{Gallery/Box|file=Bumper-Sprite.png|link=Bumper|tip=Bumper|caption=[[Bumper]]}}
File:Boulder-3.png|[[Boulder]]
{{Gallery/Box|file=Buzz-1.png|link=Buzz|tip=Buzz|caption=[[Buzz]]}}
File:Bumper-Sprite.png|[[Bumper]]
{{Gallery/Box|file=Buzz-Blob-2.png|link=Buzz_Blob|tip=Buzz Blob|caption=[[Buzz Blob]]}}
File:Buzz-1.png|[[Buzz]]
{{Gallery/Box|file=Chain-Chomp-1.png|link=Chain_Chomp|caption=[[Chain Chomp]]}}
File:Buzz-Blob-2.png|[[Buzz Blob]]
{{Gallery/Box|file=Chasupa-3.png|link=Chasupa|tip=Chasupa|caption=[[Chasupa]]}}
File:Chain-Chomp-1.png|[[Chain Chomp]]
{{Gallery/Box|file=Crow.png|link=Crow|tip=Crow|caption=[[Crow]]}}
File:Chasupa-3.png|[[Chasupa]]
{{Gallery/Box|file=Cucco-Sprite.png|link=Cucco|tip=Cucco|caption=[[Cucco]]}}
File:Crow.png|[[Crow]]
{{Gallery/Box|file=Cukeman-Sprite-1.png|link=Cukeman|tip=Cukeman|caption=[[Cukeman]]}}
File:Cucco-Sprite.png|[[Cucco]]
{{Gallery/Box|file=Deadrock-Sprite-2.png|link=Deadrock|tip=Deadrock|caption=[[Deadrock]]}}
File:Cukeman-Sprite-1.png|[[Cukeman]]
{{Gallery/Box|file=Fireball-Cannon.png|link=Fireball_Cannon|caption=[[Fireball Cannon]]}}
File:Deadrock-Sprite-2.png|[[Deadrock]]
{{Gallery/Box|file=Flying-Tile-2.png|link=Flying_Tile|caption=[[Flying Tile]]}}
File:Fireball-Cannon.png|[[Fireball Cannon]]
{{Gallery/Box|file=Freezor.png|link=Freezor|tip=Freezor|caption=[[Freezor]]}}
File:Flying-Tile-2.png|[[Flying Tile]]
{{Gallery/Box|file=Geldman-Sprite.png|link=Geldman|tip=Geldman|caption=[[Geldman]]}}
File:Freezor.png|[[Freezor]]
{{Gallery/Box|file=Giant-Ball.png|link=Ball|tip=Ball|caption=[[Ball|Giant Ball]]}}
File:Geldman-Sprite.png|[[Geldman]]
{{Gallery/Box|file=Giant-Blade-Trap.png|link=Blade_Trap|caption=[[Blade Trap|Giant Blade Trap]]}}
File:Giant-Ball.png|[[Ball|Giant Ball]]
{{Gallery/Box|file=Gibdo-1.png|link=Gibdo|tip=Gibdo|caption=[[Gibdo]]}}
File:Giant-Blade-Trap.png|[[Blade Trap|Giant Blade Trap]]
{{Gallery/Box|file=Gibo-1.png|link=Gibo|tip=Gibo|caption=[[Gibo]]}}
File:Gibdo-1.png|[[Gibdo]]
{{Gallery/Box|file=Ball-and-Chain-Trooper-Gold.png|link=Ball and Chain Trooper|caption=[[Ball and Chain Trooper|Gold Ball and Chain Trooper]]}}
File:Gibo-1.png|[[Gibo]]
{{Gallery/Box|file=BallAndChainTrooper.png|link=Ball and Chain Trooper|caption=[[Ball and Chain Trooper|Gray Ball and Chain Trooper]]}}
File:Good-Bee-2.png|[[Golden Bee]]
{{Gallery/Box|file=Stalfos-ALTTP-Yellow-1.png|link=Stalfos_(A_Link_to_the_Past)|caption=[[Stalfos (A Link to the Past)|Gray Stalfos]]}}
File:Ball-and-Chain-Trooper-Gold.png|[[Ball and Chain Soldier|Gold Ball and Chain Soldier]]
{{Gallery/Box|file=Green-Archer-Sprite-1.png|link=Archer|tip=Archer|caption=[[Archer|Green Archer]]}}
File:BallAndChainTrooper.png|[[Ball and Chain Soldier|Gray Ball and Chain Soldier]]
{{Gallery/Box|file=Eyegore.png|link=Eyegore|tip=Eyegore|caption=[[Eyegore|Green Eyegore]]}}
File:Stalfos-ALTTP-Yellow-1.png|[[Stalfos (A Link to the Past)|Gray Stalfos]]
{{Gallery/Box|file=Green-Goriya-1.png|link=Goriya_(A_Link_to_the_Past)|caption=[[Goriya (A Link to the Past)|Green Goriya]]}}
File:Green-Archer-Sprite-1.png|[[Archer|Green Archer]]
{{Gallery/Box|file=Kodondo-Green-1.png|link=Kodondo|tip=Kodondo|caption=[[Kodondo|Green Kodondo]]}}
File:Eyegore.png|[[Eyegore|Green Eyegore]]
{{Gallery/Box|file=Leever-Green-1.png|link=Leever|tip=Leever|caption=[[Leever|Green Leever]]}}
File:Green-Goriya-1.png|[[Goriya (A Link to the Past)|Green Goriya]]
{{Gallery/Box|file=Soldier-Sprite.png|link=Soldier_(Enemy)|caption=[[Soldier_(Enemy)|Green Soldier]]}}
File:Kodondo-Green-1.png|[[Kodongo|Green Kodongo]]
{{Gallery/Box|file=Green-Spear-Soldier.png|link=Spear_Soldier|caption=[[Spear Soldier|Green Spear Soldier]]}}
File:Leever-Green-1.png|[[Leever|Green Leever]]
{{Gallery/Box|file=Stalfos-ALTTP-Green-2.png|link=Stalfos_(A_Link_to_the_Past)|caption=[[Stalfos (A Link to the Past)|Green Stalfos]]}}
File:Soldier-Sprite.png|[[Soldier_(Enemy)|Green Soldier]]
{{Gallery/Box|file=Green-Sword-Soldier-Sprite.png|link=Sword_Soldier|caption=[[Sword Soldier|Green Sword Soldier]]}}
File:Green-Spear-Soldier.png|[[Spear Soldier|Green Spear Soldier]]
{{Gallery/Box|file=Zirro-Green-1.png|link=Zirro|tip=Zirro|caption=[[Zirro|Green Zirro]]}}
File:Stalfos-ALTTP-Green-2.png|[[Stalfos (A Link to the Past)|Green Stalfos]]
{{Gallery/Box|file=Zol-Green-1.png|link=Zol|tip=Zol|caption=[[Zol|Green Zol]]}}
File:Green-Sword-Soldier-Sprite.png|[[Sword Soldier|Green Sword Soldier]]
{{Gallery/Box|file=Zol-Turquoise-2.png|link=Zol|tip=Zol|caption=[[Zol|Green Zol]]}}
File:Zirro-Green-1.png|[[Zirro|Green Zirro]]
{{Gallery/Box|file=Guruguru-Bar.png|link=Guruguru_Bar|caption=[[Guruguru Bar]]}}
File:Zol-Green-1.png|[[Zol|Green Zol]]
{{Gallery/Box|file=Helmasaur-1.png|link=Helmasaur|caption=[[Helmasaur]]}}
File:Zol-Turquoise-2.png|[[Zol|Green Zol]]
{{Gallery/Box|file=Hinox-Sprite-1.png|link=Hinox|caption=[[Hinox]]}}
File:Guruguru-Bar.png|[[Guruguru Bar]]
{{Gallery/Box|file=Hoarder-Sprite-1.png|link=Hoarder|caption=[[Hoarder]]}}
File:Helmasaur-1.png|[[Helmasaur]]
{{Gallery/Box|file=Hokkubokku-2.png|link=Hokkubokku|caption=[[Hokkubokku]]}}
File:Hinox-Sprite-1.png|[[Hinox]]
{{Gallery/Box|file=Hover-1.png|link=Hover|caption=[[Hover]]}}
File:Hoarder-Sprite-1.png|[[Hoarder]]
{{Gallery/Box|file=Hyu-2.png|link=Hyu|caption=[[Hyu]]}}
File:Hoarder-Sprite-3.png|[[Hoarder]]
{{Gallery/Box|file=Keese-Sprite.png|link=Keese|caption=[[Keese]]}}
File:Hokkubokku-2.png|[[Hokkubokku]]
{{Gallery/Box|file=Ku-1.png|link=Ku|caption=[[Ku]]}}
File:Hover-1.png|[[Hover]]
{{Gallery/Box|file=Kyameron-2.png|link=Kyameron|caption=[[Kyameron]]}}
File:Hyu-2.png|[[Hyu]]
{{Gallery/Box|file=Kyune-1.png|link=Kyune|caption=[[Kyune]]}}
File:Keese-Sprite.png|[[Keese]]
{{Gallery/Box|file=Laser-Eye-1.png|link=Laser_Eye|caption=[[Laser Eye]]}}
File:Ku-1.png|[[Ku]]
{{Gallery/Box|file=Lynel-1.png|link=Lynel|caption=[[Lynel]]}}
File:Kyameron-2.png|[[Water Gibo]]
{{Gallery/Box|file=Medusa-Sprite.png|link=Medusa|caption=[[Medusa]]}}
File:Kyune-1.png|[[Kyune]]
{{Gallery/Box|file=Mini-Moldorm-1.png|link=Mini-Moldorm|caption=[[Mini-Moldorm]]}}
File:Laser-Eye-1.png|[[Laser Eye]]
{{Gallery/Box|file=Moblin-Sprite-1.png|link=Moblin|caption=[[Moblin]]}}
File:Like-Like-ALTTP.png|[[Like Like]]
{{Gallery/Box|file=Nuranuru-2.png|link=Nuranuru|caption=[[Nuranuru]]}}
File:Lynel-1.png|[[Lynel]]
{{Gallery/Box|file=Octoballoon-Sprite-1.png|link=Octoballoon|caption=[[Octoballoon]]}}
File:Medusa-Sprite.png|[[Medusa]]
{{Gallery/Box|file=Octorok-Sprite-3.png|link=Octorok|caption=[[Octorok]]}}
File:Mini-Moldorm-1.png|[[Mini-Moldorm]]
{{Gallery/Box|file=Stalfos-ALTTP-Orange-1.png|link=Stalfos_(A_Link_to_the_Past)|caption=[[Stalfos (A Link to the Past)|Orange Stalfos]]}}
File:Moblin-Sprite-1.png|[[Moblin]]
{{Gallery/Box|file=Pengator-4.png|link=Pengator|caption=[[Pengator]]}}
File:Mole-1.png|[[Mole]]
{{Gallery/Box|file=Pikit-1.png|link=Pikit|caption=[[Pikit]]}}
File:Octoballoon-Sprite-1.png|[[Octoballoon]]
{{Gallery/Box|file=Pikku-5.png|link=Pikku|caption=[[Pikku]]}}
File:Octorok-Sprite-3.png|[[Octorok]]
{{Gallery/Box|file=AquaBeetle.png|link=Pirogusu|caption=[[Pirogusu]]}}
File:Stalfos-ALTTP-Orange-1.png|[[Stalfos (A Link to the Past)|Orange Stalfos]]
{{Gallery/Box|file=Poe-Sprite-1.png|link=Poe|caption=[[Poe]]}}
File:Pengator-4.png|[[Pengator]]
{{Gallery/Box|file=Popo-1.png|link=Popo|caption=[[Popo]]}}
File:Pikit-1.png|[[Pikit]]
{{Gallery/Box|file=Leever-Purple-2.png|link=Purple|tip=Purple|caption=[[Leever|Purple Leever]]}}
File:Pikku-5.png|[[Pikku]]
{{Gallery/Box|file=Rabbit-Beam-2.png|link=Rabbit_Beam|caption=[[Rabbit Beam]]}}
File:AquaBeetle.png|[[Pirogusu]]
{{Gallery/Box|file=Rat-Sprite-3.png|link=Rat|caption=[[Rat]]}}
File:Poe-Sprite-1.png|[[Poe]]
{{Gallery/Box|file=Red-Bari-1.png|link=Bari_(A_Link_to_the_Past)|caption=[[Bari (A Link to the Past)|Red Bari]]}}
File:Popo-1.png|[[Popo]]
{{Gallery/Box|file=Red-Debirando-2.png|link=Debirando|tip=Debirando|caption=[[Debirando|Red Debirando]]}}
File:Leever-Purple-2.png|[[Leever|Purple Leever]]
{{Gallery/Box|file=Red-Eyegore-Sprite-2.png|link=Eyegore|tip=Eyegore|caption=[[Eyegore|Red Eyegore]]}}
File:Rabbit-Beam-2.png|[[Rabbit Beam]]
{{Gallery/Box|file=Red-Goriya-1.png|link=Goriya_(A_Link_to_the_Past)|caption=[[Goriya (A Link to the Past)|Red Goriya]]}}
File:Rat-Sprite-3.png|[[Rat]]
{{Gallery/Box|file=Red-Hardhat-Beetle-1.png|link=Hardhat_Beetle|tip=Hardhat Beetle|caption=[[Hardhat Beetle|Red Hardhat Beetle]]}}
File:Red-Bari-1.png|[[Bari (A Link to the Past)|Red Bari]]
{{Gallery/Box|file=Kodondo-Red-2.png|link=Kodondo|tip=Kodondo|caption=[[Kodondo|Red Kodondo]]}}
File:Red-Debirando-2.png|[[Debirando|Red Debirando]]
{{Gallery/Box|file=Red-Spear-Soldier-Sprite-1.png|link=Spear_Soldier|caption=[[Spear Soldier|Red Spear Soldier]]}}
File:Red-Eyegore-Sprite-2.png|[[Eyegore|Red Eyegore]]
{{Gallery/Box|file=Stalfos-ALTTP-Red-2.png|link=Stalfos_(A_Link_to_the_Past)|caption=[[Stalfos (A Link to the Past)|Red Stalfos]]}}
File:Red-Goriya-1.png|[[Goriya (A Link to the Past)|Red Goriya]]
{{Gallery/Box|file=Red-Tarosu-1.png|link=Tarosu|tip=Tarosu|caption=[[Tarosu|Red Tarosu]]}}
File:Red-Hardhat-Beetle-1.png|[[Hardhat Beetle|Red Hardhat Beetle]]
{{Gallery/Box|file=Tektite-Red-1.png|link=Tektite|tip=Tektite|caption=[[Tektite|Red Tektite]]}}
File:Kodondo-Red-2.png|[[Kodongo|Red Kodongo]]
{{Gallery/Box|file=Red-Zazakku-2.png|link=Zazakku|tip=Zazakku|caption=[[Zazakku|Red Zazakku]]}}
File:Red-Spear-Soldier-Sprite-1.png|[[Spear Soldier|Red Spear Soldier]]
{{Gallery/Box|file=Zol-Red-1.png|link=Zol|tip=Zol|caption=[[Zol|Red Zol]]}}
File:Stalfos-ALTTP-Red-2.png|[[Stalfos (A Link to the Past)|Red Stalfos]]
{{Gallery/Box|file=Zora-Sprite-1.png|link=River_Zora|caption=[[River Zora]]}}
File:Red-Tarosu-1.png|[[Taros|Red Taros]]
{{Gallery/Box|file=Ropa-Sprite-2.png|link=Ropa|caption=[[Ropa]]}}
File:Tektite-Red-1.png|[[Tektite|Red Tektite]]
{{Gallery/Box|file=Rope-Sprite-1.png|link=Rope|caption=[[Rope]]}}
File:Red-Zazakku-2.png|[[Zazak|Red Zazak]]
{{Gallery/Box|file=Sand-Crap-Sprite.png|link=Sand_Crab|caption=[[Sand Crab]]}}
File:Zol-Red-1.png|[[Zol|Red Zol]]
{{Gallery/Box|file=Slarok-1.png|link=Slarok|caption=[[Slarok]]}}
File:Zora-Sprite-1.png|[[River Zora]]
{{Gallery/Box|file=Snap-Dragon-2.png|link=Snap_Dragon|caption=[[Snap Dragon]]}}
File:Zora-Sprite-3.png|[[River Zora]]
{{Gallery/Box|file=SparkALttP.png|link=Spark|caption=[[Spark]]}}
File:Ropa-Sprite-2.png|[[Ropa]]
{{Gallery/Box|file=Spear-Knight-Sprite.png|link=Spear_Knight|caption=[[Spear Knight]]}}
File:Rope-Sprite-1.png|[[Rope]]
{{Gallery/Box|file=Spear-Soldier-Sprite-1.png|link=Spear_Throwing_Soldier|caption=[[Spear Throwing Soldier]]}}
File:Sand-Crab-Sprite.png|[[Sand Crab]]
{{Gallery/Box|file=Spiked-Roller-1.png|link=Spiked_Roller|caption=[[Spiked Roller]]}}
File:Slarok-1.png|[[Slarok]]
{{Gallery/Box|file=Stal-1.png|link=Stal|caption=[[Stal]]}}
File:Slime.png|[[Slime]]
{{Gallery/Box|file=Stalfos-Knight-2.png|link=Stalfos_Knight|caption=[[Stalfos Knight]]}}
File:Nuranuru-2.png|[[Sluggula]]
{{Gallery/Box|file=Stalrope-2.png|link=Stalrope|caption=[[Stalrope]]}}
File:Snap-Dragon-2.png|[[Snap Dragon]]
{{Gallery/Box|file=Swamola-3.png|link=Swamola|caption=[[Swamola]]}}
File:SparkALttP.png|[[Spark]]
{{Gallery/Box|file=Sword-Knight-Blue-1.png|link=Sword_Knight|caption=[[Sword Knight]]}}
File:Spear-Knight-Sprite.png|[[Spear Knight]]
{{Gallery/Box|file=Tendoru-Sprite-1.png|link=Tendoru|caption=[[Tendoru]]}}
File:Spear-Soldier-Sprite-1.png|[[Spear Throwing Soldier]]
{{Gallery/Box|file=Terrorpin.png|link=Terrorpin|caption=[[Terrorpin]]}}
File:Spiked-Roller-1.png|[[Spiked Roller]]
{{Gallery/Box|file=Thief-Enemy.png|link=Thief|caption=[[Thief]]}}
File:Stal-1.png|[[Stal]]
{{Gallery/Box|file=Toppo-Sprite-1.png|link=Toppo|caption=[[Toppo]]}}
File:Stalfos-Knight-2.png|[[Stalfos Knight]]
{{Gallery/Box|file=Wall-Turret-2.png|link=Wall_Turret|caption=[[Wall Turret]]}}
File:Stalrope-2.png|[[Stalrope]]
{{Gallery/Box|file=Winder.png|link=Winder|caption=[[Winder]]}}
File:Swamola-3.png|[[Swamola]]
{{Gallery/Box|file=Stalfos-ALTTP-Yellow-6.png|link=Stalfos_(A_Link_to_the_Past)|caption=[[Stalfos (A Link to the Past)|Yellow Stalfos]]}}
File:Sword-Knight-Blue-1.png|[[Sword Knight]]
{{Gallery/Box|file=Zol-Yellow-1.png|link=Zol|tip=Zol|caption=[[Zol|Yellow Zol]]}}
File:Terrorpin.png|[[Terrorpin]]
{{Gallery/Box|file=Zoro-1.png|link=Zoro|caption=[[Zoro]]}}
File:Thief-Enemy.png|[[Thief]]
{{Gallery/Bottom}}</center>
File:Toppo-Sprite-1.png|[[Toppo]]
File:Tendoru-Sprite-1.png|[[Vulture]]
File:Wall-Turret-2.png|[[Wall Turret]]
File:Wallmaster-2.png|[[Wallmaster]]
File:Winder.png|[[Winder]]
File:Wizzrobe-Sprite-ALTTP.png|[[Wizzrobe]]
File:Purple-Wizzrobe-3.png|[[Wizzrobe]]
File:Stalfos-ALTTP-Yellow-6.png|[[Stalfos (A Link to the Past)|Yellow Stalfos]]
File:Zol-Yellow-1.png|[[Zol|Yellow Zol]]
File:Zoro-1.png|[[Zoro]]
</gallery>


{{Galleries}}
{{Galleries}}
{{cat|A Link to the Past}}

Latest revision as of 14:40, December 5, 2023

Listed below is a gallery of artwork and enemy sprites for the enemies and traps found throughout A Link to the Past. The listing includes multiple variations of many of the enemies that appear. In rare cases, this includes enemies found exclusively within the Game Boy Advance re-release of A Link to the Past.

In this complete Enemy Guide you'll find detailed descriptions of all of the enemies including their attacks, defense, speed, what threat they are to Link, and methods to defeat them. You can click on the enemy names or their pictures to get to their individual pages.

Alex MegaCaveman's Artwork

Enemy Sprites