- Chapter 1 – First Three Days
- Chapter 2 – Southern Swamp
- Chapter 3 – Woodfall Temple
- Chapter 4 – Collection
- Chapter 5 – Snowhead
- Chapter 6 – Snowhead Temple
- Chapter 7 – Spring, Romani Ranch, Ikana Graveyard
- Chapter 8 – Great Bay & Zora Cape
- Chapter 9 – Great Bay Temple
- Chapter 10 – Ikana Canyon
- Chapter 11 – Well & Ikana Castle
- Chapter 12 – Stone Tower Temple
- Chapter 13 – The Moon
6.1 First Floor
Before you begin, it is highly recommended that you have time slowed (played the Song of Time backwards). As you go forward, you’ll encounter a new enemy called a White Boe. As cute as these things are, they intend on causing you harm. Put on the Goron Mask if you don’t have it on already and use a Goron Pound (A + B) to take care of them quickly. Fire Punch the ice stalagmites and Tatl will point out that the block is pretty darn heavy. Grab the block while using the Goron Mask and push it until it falls into the floor. Emerge into the second half of this room where a White Wolfos will appear. Kill it (from behind) if you’d like, or simply ignore it. There are three doors, but you can only enter the dark blue one (right) for now.


This room contains a new enemy called a Freezard, which you will simply want to avoid for now. Before you really pass through this room, you can collect two Stray Fairies. The first Stray Fairy can be seen in the pillar near the center of the room. Aim at it with an arrow and then use the Great Fairy Mask to draw it in.
The second Stray Fairy differs in the Nintendo 64 and 3DS version. In the 3DS version it can be seen at the east end of the room and you can shoot it with an arrow. Alternatively, if you don’t have arrows, you’ll be able to walk around to it shortly. In the Nintendo 64 version, the Stray Fairy can be found along the north end of the room. You can just drop down to the ground level and then use the Goron Mask so that you can walk over the lava. At the north end of the room, you can see the Stray Fairy underneath the platform. Shoot it with an arrow and snag it using the Great Fairy Mask.


If you fell down, climb the ladder to get back to the top of the room and check out the bridge. It has a little ramp on the end of it, indicating that you’ll have to use a Goron Roll. Stand on the icy patch just before the bridge itself so that there isn’t much friction, giving you enough space to charge up your roll. Roll across the platform to reach the other side. NOTE: In the Nintendo 64 version, the Freezards on the sides can freeze Goron Link, where as in the Nintendo 3DS, he can roll right by. The north end of this room also looks a tad different in the Nintendo 64 version, but nothing major has changed. Take off the Goron Mask and climb up the nearby stairs.


You’ll see a new enemy in this room called a Real Bombchu. Kill it, if you wish, by walking into it while using your Shield. You can also break the crates for extra rupees should you need them. Open the large chest to get the Dungeon Map, which will make navigation a bit easier. There are two Stray Fairies in this room, and you can get one right away, as it is floating around near the northwest part of the room. Snag it if you wish. Go back down the stairs, then jump across and enter the blue door to your right.


Welcome to the main room of the dungeon. As you can see, it’s huge, and yes, it’s a real pain to fall all the way down. Run across to the opposite side and enter the gold colored door.


Put on your Goron Mask and pull back on the two stones stacked on top of each other. This will reveal an alcove with a chest containing a Small Key. Score! Before you leave, there’s one more thing you can do. Push the two blocks all the way to the farthest edge of the snowy area. This will snap it on top of a floor switch that reveals a chest. This will help you get a Stray Fairy later on. Head back to the central room.


Head over to the frozen red door. Notice that it has a torch on either side of it. Stand next to one and shoot an arrow through it to melt the ice blocking the door, thus creating a shortcut! Alternatively, you can go back through the room with the Freezards. Once back in the Entrance chamber, use the Small Key to enter the cyan colored door.


There are two White Wolfos in this room that will only attack you if you get close, so it’s best to just ignore them. Open the large chest in the middle of the room to get the Compass. There are three Stray Fairies in this room, but as you can only get one at the moment, they will all be covered a bit later. Run to the opposite side of the room where you’ll find a cracked wall between two pillars. Use either Bombs or the Blast Mask in order to blow it up. Run up the stairs.


6.2 Second Floor
In this room, there are several pillars that stick out of the ground, but many of them are covered in large chunks of ice. If you look up at the ceiling, you’ll find several icicles/stalactites. There are two varieties: the kind you can shoot with your Bow to make them fall down and break things, and the smaller ones which try to kill you when you pass under them. Use your Hero’s Bow to pave the way by shooting the large stalactites, then start climbing.


You’ll see a patch of frosty snow on the wall to your right, seemingly clinging to nothing. That is a bit suspicious, huh? If you use the Lens of Truth, you’ll see there’s actually an alcove there with a chest inside! Either wear the Bunny Hood and jump to it or destroy the nearby ice chunk to get closer and jump to it regularly, then open the chest to get the fourth Stray Fairy.


Turn around and work your way to the opposite side of the room. Wear the Goron Mask and Fire Punch the snowy boulder to reveal a chest containing a Small Key. Drop down and enter the locked door.
In this room, jump down into the snowy area and use a Goron Pound to kill the White Boes. Put on the Great Fairy Mask, use the Lens of Truth and look straight up where you’ll find a bubble in the center of the ceiling. Shoot it with the Hero’s Bow and wait for the fifth Stray Fairy to come your way. Put on the Goron Mask and go back up to the upper level to solve this little puzzle. You must use the Goron Mask to pound (A + B) the big switches in the correct order:


- Pound the first yellow switch on the upper platform. This raises the one in the middle.
- Take off the Goron Mask and jump across to the other side. Pound the green switch.
- Run back to the middle and pound the yellow switch (thus unveiling the door again).
- Quickly take off the Goron Mask and climb on top of the green one, using it to jump to the other side and go through the door.


Goron Roll to the opposite side, where you’ll find some stairs that are blocked with ice (don’t worry, you’ll be able to do something about that soon). Turn to the right and roll across the snow drift in the corner. If you fall into the wooden canopy, just go back to the ladder and try again (hopefully you don’t fall ALL the way down). Break the snowballs here for goodies if you’d like, then Goron Roll to the west side. Smash these snowballs here, then enter the door to confront the first mini-boss of this dungeon.


There are four teleporting pads around the room which Wizrobe will use at random. As he is appearing, he’ll run away if you get too close. Once he is solid, he’ll do a little dance shortly before shooting you with a blast of magic that can freeze you. Try standing in the middle area of the room, a little closer to one of the pads in particular, and position yourself so you can see all of them at once. This way you can quickly attack him regardless of which direction he comes from.
There are a few methods of harming him. You can either attack him from afar using Bombs or shoot him with arrows. The latter is definitely a safe option, though it doesn’t do much damage. The other method is to get up close and slash him with your sword. This is a little difficult in your normal form (unless you have the Bunny Hood of course) but it is quite easy to do while wearing the Goron Mask. Simply hold in A while waiting for him to appear and once he’s solid, rush forward, let go of A and Fire Punch him, dealing a ton of damage.
Either way you choose, after you’ve done enough damage to him, he’ll create three identical illusions. When they appear, wait until you see which one is the most solid, then attack it. Also, if you have your mini-map on, (by pressing the L button) you’ll see the real one on your map marked with a red dot. It’s pretty straightforward really. Just discern which one is real, then use the same methods as before to defeat him.


Once he’s defeated, open the large chest to get the Fire Arrows. This nifty upgrade will allow you to explore much more of the dungeon.
6.3 Raising the Pillar
Your next goal is the basement (the lowest level in the dungeon). Using the Goron Mask, hold A and roll off the ledge to get to the bottom (and avoid taking damage). Here, you’ll find a new enemy called a Red Bubble, which you should just swerve around and ignore. Find the patch of lava that has a large floor switch in it and step on it (while wearing the Goron Mask obviously). This creates a large chest containing the sixth Stray Fairy.


Climb the stairs to get back to the first floor (where the colored doors are) and shoot a Fire Arrow at the green doors. Either of the green doors will take you to your destination, but the one to the west will make things a bit easier for you.
This large room has quite the drop if you fall down. If you do, simply use the flowers (with the Deku Mask) to get back up. Jump across the small platforms and be careful for the Freezards’ freezing breath. Either jump to them and kill them with Fire Punches or sword slashes, or simply shoot them from afar with Fire Arrows, which is much safer. Once all three of them are defeated, a chest will appear containing the seventh Stray Fairy.


Next, stand on one of the middle pillars and shoot the three torches with Fire Arrows. Alternatively, you could light one, then jump around (preferably using the Bunny Hood) with a Deku Stick, but that’s quite a bit more difficult. Once all three are lit, the central default-colored door in the middle of the room will open. Enter and use the Goron Mask to pound down the switch. This raises the stone pillar in the center of the main room up to the top floor, blocking off a lot of the bridges you’ve used thus far. Fortunately, now that you have the Fire Arrows, you don’t need those bridges anymore.


Return to the previous room and slash the jars to get your arrows and magic back up, then enter the green door on the west side of map. Back in the central room, enter the red door. Ignore the White Wolfos and enter the cyan door.
Kill the White Wolfos if you wish, then run over to the opposite side of the room. There’s a suspicious crate atop one of the pillars on either side. To smash it, you’ll need to use Bombs. Whip one out and toss it at the last moment so it blows up in mid air (and hopefully you don’t take damage). If you find this difficult, you can simply stand next to it and hold the Bomb above your head, letting it explode. Once the crate is destroyed, use the Great Fairy’s Mask to reel in the eighth Stray Fairy. Slash the jars if you wish for some more arrows and magic.


Use Fire Arrows to melt the two giant chunks of ice that encase the block and floor switch. Step on the switch to reveal a chest that’s just begging to be investigated. Look at your mini-map. Push the block UP, RIGHT, DOWN. From here, you can climb on top of it and reach the chest which holds the ninth Stray Fairy. Hop down and push the block LEFT, UP, LEFT to access the northern platform. Climb up and go through the door.


You remember this room, don’t you? If you have been following along, then the double blocks have been snapped into place in the far west side of the snow, creating a chest as well as a platform you can now jump across. Use the blocks to get to the other side where you’ll encounter another new enemy: Flying Jars. Simply hold up your Shield and let them smash against it, then go open the chest to get the tenth Stray Fairy. Return to the previous room.


6.4 Boss Key
Head back to the entrance room and enter the dark blue door, which leads you to the room with the three Freezards and the bridge you had to roll across. Now that you have the Fire Arrows, you can kill all of them and melt that chunk of ice. NOTE: In the Nintendo 64 version, once you defeat all three of them, a chest will appear on the ledge off to your left. However, in the 3DS version, that treasure chest is already there, just covered in ice. Open up the chest to get a Small Key. Go to the north end of the room and head up the stairway.


First of all, snag the Stray Fairy just to the right if you didn’t already. You can kill the Real Bombchu if you wish, but it doesn’t do anything. Stand on top of the platform in the middle of the room and shoot the Freezard on the upper ledge with a Fire Arrow. Once it’s defeated, shoot another Fire Arrow at the frozen Eye Switch just behind it. This will raise the platform temporarily.
Jump onto the upper ledge and go around. Face towards the center of the room and use the Lens of Truth to see invisible blocks floating in the air. Jump across them (without wearing the Bunny Hood) and follow them to an alcove in the southern wall that contains a chest with the eleventh Stray Fairy. Either hop back along the invisible blocks or jump onto the platform and shoot the Eye Switch with a regular arrow to raise the platform again. Go through the door.


This takes you to the room just across from where you fought Wizrobe earlier. Use the Goron Mask to roll along the snowdrift on your right (or hop down into the wooden catch-net and climb the ladder) and use Fire Arrows to melt the ice blocking the staircase. Take this to reach the next floor, and roll along the snowdrift to the right. You don’t have a net to catch you this time, so be cautious! Roll across to the lower platform and enter the locked door.


This room has a new enemy called an Eeno. It is best to use the Goron Mask, since a single Fire Punch will kill each one and your shield (R) will defend against all sides at once. Kill the bigger one, which splits into three smaller ones, then take them out one at a time. Once they’re all taken care of, put on the Great Fairy’s Mask and check out the snow that’s hanging from the invisible ledge. That’s where the next Stray Fairy is located. Use your Hero’s Bow to shoot at the center of the diamond shaped hole in the wall, which pops the bubble. Wait for the twelfth Stray Fairy to come your way. Melt the ice covering the stairs and go up yet again.


This room has not one, but TWO Dinofols. You fought them as a mini-boss in the last dungeon, and they’re already a regular enemy! Use the Goron Mask and you can either NOT Z target, Fire Punch them and roll away to escape their flames, OR… you could simply get close and use a Goron Pound (A + B) to kill them both instantly. Once they’re both defeated, collect the thirteenth and fourteenth Stray Fairies and exit through the door.


Why did the Cucco walk across the raised platform in the middle of the dungeon? To get to the mini-boss on the other side…! Okay, that was lame… Seriously though, do that.
NOTE: If you punched out some of the blue ice cylinders in the middle of the pillar already, you’ll have to punch out the rest and go through the snow boulder room, then use the Deku Flower at the very top of the dungeon to fly over to the mini-boss door.
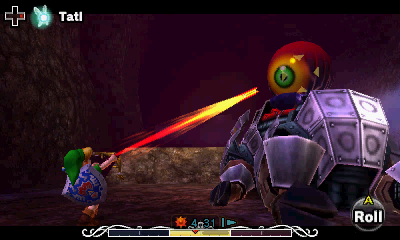
As soon as you enter, you’ll encounter a new- wait… Deja vu? This works the exact same as the last battle with Wizrobe. The only difference is that there are more teleporting pads and one of them is on top of a platform at one end of the room. He can be defeated using the exact same methods.
Simply watch your mini-map and as soon as the red dot appears, face towards it and either get your Bow ready or get fairly close using the Goron Mask. Once he appears, shoot or run forward and Fire Punch. Repeat.
That’s all there is to it. If he appears on the top platform it is best to use the Bow, as climbing up there takes a bit of time.


Once he’s defeated, slash the jars to stock up on magic and arrows, then enter the door to the north. Open the large chest here to get the Boss Key, then exit through the only other door.
6.5 Temple Boss
At this point, all that’s left to do is go to the boss door at the top of the dungeon, but how do you get there? You’ll notice that there’s a suspicious hallway that’s filled with giant snow boulders, but it’s blocked off by the pillar. There has to be some way to access it. Hmm… If you look at the central pillar itself, it has four cylinder discs that are a light blue color. This is because they are ice, and if you could get rid of them, perhaps you could reach that hall!
From the door you exited at the top, turn to the right, then hold down A and roll forward. You should easily land on the lower platform (and not take damage when you land) just one level down. Go down the stairs here. This will take you to the lower set of ice cylinders, so run forward (Tatl will have a hint for you at this point) and Fire Punch them both out. Groovy. Go back up the stairs. This upper set is just a tad lower than your current location. Roll across the snowdrift on your right, then punch out both of them. Roll clockwise again to get on the very top. The central pillar is now low enough that we can access this new area.


If you open up your map in your start menu, you’ll see there’s a chest remaining in the northwest corner of the central room on the second floor. This is the final Stray Fairy, and if you look at that location, you’ll see it’s a hidden alcove in the wall (it has snow dripping off the edge).
To get to it, it’s easiest to make your way to the top of the central pillar after you’ve punched out the ice cylinders. Walk to the north end of the room along the narrow platform and then face westward. Use the Lens of Truth and line yourself up so that directly ahead you can see the Deku Flower below. Use the Bunny Hood and leap down, holding forward and you should land right on top of the Deku Flower. Open the chest to get the fifteenth Stray Fairy. Whew! Use the Deku Flower to fly to the platform on your left and go up the stairs.


Once you have all of the ice cylinders punched out of the central pillar, it should be low enough that you can access the giant snow-boulder-filled area. Fire Punch your way through (or Goron Roll if you’re really ambitious) and go up the stairs to get to the fourth and final floor. The Boss Door is just on the other side, so simply roll across, smash the ice stalagmites to recover your magic, and enter.


Inside, you’ll find the dreaded demon the Gorons were afraid of is actually frozen. Sadly, you have no choice but to use a Fire Arrow to melt him, thus beginning this relatively easy battle. Couldn’t Link have just left him like that? You know… Already defeated? Punch him in the face and shatter him?
NOTE: Unlike the battle with Odolwa, this one is fairly similar for the Nintendo 3DS and the Nintendo 64 versions of the game. The big difference is the large eye that Goht has on its back in the 3DS version of the game. Where as in the Nintendo 64 version when Goht is stunned you can slash his body, in the 3DS version, you must hit the eye instead.
Quickly put on the Goron Mask and begin rolling after it in the doughnut shaped room. All you have to do is swerve back and forth as you follow it, restoring your magic with the green jars along the path that reappear, and hit Goht with your spikes.


While it IS possible to damage Goht by hitting its belly or legs, it’s hard to accomplish as well as dangerous, since he counter-attacks (and can potentially hit you with the boulders that spring from its hind legs). The better method is to use those speed-bumps you find along the way to jump up into the air. Roll alongside Goht until you get to one, then use it to fling yourself up onto his vulnerable back, which will stun it for several seconds.
At this point, it depends how Goht has fallen to the ground. If the eye is on the ground level, just go ahead and slash at it. If it is above Goht, than whip out your arrows and shoot the eye to deal some damage. NOTE: In the Nintendo 64 version, Goht will just be laying on the ground and you can Fire Punch the heck out of him, or if you’re lucky, you can use one of his legs to keep you next to him as you Roll into him for several seconds, dealing loads of damage very quickly.


The alternative method to harm him is to roll after him, take off the Goron Mask once you get close and use Fire Arrows to stun him. Run over with the Goron Mask quickly to do damage before he gets up. The only problem with this method is that if you get too far away, Goht will turn around and snipe you with electrical bolts, so it’s a little risky. There is one exception to this rule, and that is the entrance area (where there are more arrows in jars). By standing in the little slot by the door, Goht will not attack you. Simply wait for him to circle around and shoot him with Fire Arrows. This method is not very quick, but it’s effective if you’re having trouble with this boss.
All in all, he’s not a hard boss. As the battle progresses, he’ll start flinging more and more things your way, such as Bombs, and probably the most aggravating, stalactites that fall from the ceiling (which don’t hurt you, but you bonk into them, thus canceling your spiked roll). Just keep on the same way as usual, zigzagging to avoid his attacks and stunning him when you can to deal massive damage.


After Goht decides to bury himself (to return later in the game… just kidding…) go over and snag the Heart Container, extending your life energy by one whole heart – Yippee! Enter the glowing light to receive Goht’s Remains. You’ll then be taken to that misty world and once again meet up with the next of the Four Giants. It will reveal that they are guardians, though it doesn’t specify exactly how. Speaking with the townspeople of Clock Town actually reveals much more about them.
- Chapter 1 – First Three Days
- Chapter 2 – Southern Swamp
- Chapter 3 – Woodfall Temple
- Chapter 4 – Collection
- Chapter 5 – Snowhead
- Chapter 6 – Snowhead Temple
- Chapter 7 – Spring, Romani Ranch, Ikana Graveyard
- Chapter 8 – Great Bay & Zora Cape
- Chapter 9 – Great Bay Temple
- Chapter 10 – Ikana Canyon
- Chapter 11 – Well & Ikana Castle
- Chapter 12 – Stone Tower Temple
- Chapter 13 – The Moon
