- Chapter 1 – First Three Days
- Chapter 2 – Southern Swamp
- Chapter 3 – Woodfall Temple
- Chapter 4 – Collection
- Chapter 5 – Snowhead
- Chapter 6 – Snowhead Temple
- Chapter 7 – Spring, Romani Ranch, Ikana Graveyard
- Chapter 8 – Great Bay & Zora Cape
- Chapter 9 – Great Bay Temple
- Chapter 10 – Ikana Canyon
- Chapter 11 – Well & Ikana Castle
- Chapter 12 – Stone Tower Temple
- Chapter 13 – The Moon
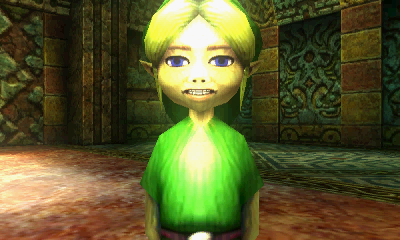
11.1 Gibdo Mask
As you run around Ikana Canyon, Tatl will alert you of the presence of Garo spirits, which you can then encounter by wearing the Garo Mask. Once you defeat them, they’ll give you interesting information about the area. One of them mentions that you can revive the river by going to the cave to the north. Time to investigate!
Inside, you’ll witness a short disturbing clip in which Sharp appears and plays his evil music, which is just painful to listen to! His brother, Flat, taught you the Song of Storms back in the Graveyard, which blows away curses, and asked you to use it on his evil brother. Do so now to make the purple cursing mist dissipate. You’ll then have the privilege of sitting through an extremely long cutscene in which the restored water flow causes the Music Box House to play it’s mummy-killing circus tune once more. Sharp will then tell you to seek out the King of Ikana Castle.


When you finally regain control, go ahead and leave. As you approach the Music Box House, you’ll see a little girl looking into the water. Once she sees you, she’ll run back into the house and lock it. You can stay a little back and wait for her to come out on her own, but you can also lay a Bomb or use the Blast Mask to make her come out early. Do so, then run inside the now unlocked door once she’s far enough away.


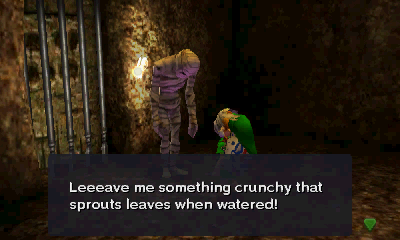
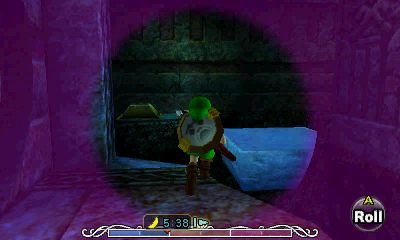
Inside, run down the stairs and around the corner. Suddenly, a half-mummified man jumps out of the cabinet! You can Z target him and ask Tatl for a clue. If you try to attack him, Pamela (the little girl) will rush in and kick you out, so you’ll have to come back again. When you’re done messing around, play the Song of Healing to restore him to normal and gain the next mask you need!


If you leave and come back in, Pamela’s Father will give you useful information about the Gibdos he’s been studying. He’ll also inform you that there’s a treasure guarded by the Gibdos in the well beneath Ikana. Sounds important!


11.2 Beneath the Well
The Well is a huge trading sequence to get your next item. You’ll need several bottles as well as the following items:
- 5 Magic Beans (or 1 Magic Bean in the 3DS version)
- 10 Deku Nuts (or 1 in the 3DS version)
- 10 Bombs
- Fish
- Milk
- Blue Potion (completely unnecessary and just leads to rupees)
- Powder Keg (Used shortly after completing the well. You can get it after the well, but if you get it now, it saves a trip to Clock Town)
First, warp to Clock Town. Go out the west or south exit, then go to the little pool between the sandy area to the west and Romani Ranch to the southwest. Sink down in this pool with the Zora Mask and open the chest for 20 Rupees. Swipe the nearby Fish into a Bottle.


Next, slash the bushes along the way and go to the hollowed out log between Clock Town and the entrance to the Southern Swamp area. Lay a Bomb (or use the Blast Mask) in the middle of it to reveal a hole. Inside, play Epona’s Song for one of the cows to get a free bottle of Milk. Get out of the hole and head towards the Astral Observatory, slashing bushes along the way to collect Rupees and items. If the guy is in the tree (first day only) then roll into it to get 40 rupees, otherwise, go make at least that much by slashing some more bushes.


Soar over to Southern Swamp, put on the Deku Mask and purchase 5 Magic Beans (or 1, if you are playing on the 3DS) from the Business Scrub just outside the Tourist Information building for 10 Rupees a piece. Next you can go to the transition area between this part of Southern Swamp and the Magic Hags’ Potion Shop where there is a Deku Baba and Minibaba, whom you can run back and forth killing repeatedly until you have 10 Deku Nuts. If you are playing on the 3DS, however, you’ll only need one Deku Nut. Alternatively, you can purchase them from the Trading Post in West Clock Town for 30 rupees.

If you would like Blue Potion, which is optional, warp to Ikana Canyon and enter the side area next to the water where there’s a Business Scrub selling it for 50 rupees. Alternatively, you can find a Magic Mushroom in the Woods of Mystery and give it to Kotake in the Magic Hags’ Potion Shop, but that’s a bit of a hassle. However, it is free.

You should also purchase a Powder Keg at this time. You don’t need it for the Well, but you will use it shortly after. If you purchase it now, it will save you a trip back to Clock Town.

Once you have all of these items, go to Ikana Canyon and (from the Owl Statue) work your way up the left ramps until you get to the very top. You’ll find a circle shape with a ladder leading down.

Make sure you brought the items listed above (except for the Blue Potion). You’ll be using the Gibdo Mask throughout this area to speak with Gibdos and give them items, thus unlocking doors. If you look at your map, your first objective is to get to the large room on the lower right side.
Give the Gibdo on your right (east) 5 Magic Beans (or just 1 Magic Bean in the 3DS version) and go through.

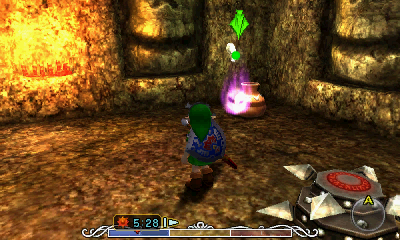
This room has Deku Sticks and Spring Water. It also contains a new enemy called a Wallmaster. Speak with the Gibdo farthest from where you entered (east). Give him 10 Deku Nuts (or 1 in the 3DS version) and go through.
Here, you can find Bugs as well as a new enemy, the Eye Switch. Go around the corner (north) and hand this Gibdo 10 Bombs (only 1 in the 3DS version). Go through.
Make your way to the center to make a Big Poe appear. Jump to avoid it, then shoot it in the back with an arrow. Repeat till it’s dead, then snag it in a Bottle.
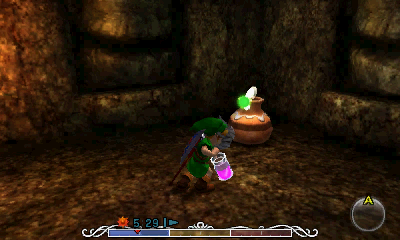
Look at your mini-map. Your next destination is the northeast corner (top right). From the Big Poe room, go back south and then west. From here, speak with the other Gibdo (north), who wants a Fish. After you’ve appeased his wild fetish, go through the door.
This room has Deku Nuts. Continue onward to the door straight ahead. Give him the Big Poe and go through.
Here there are Bugs on the left. Watch out for the two Wallmasters that attempt to steal you. Work your way to the far side of the room, timing your running bursts to avoid the spinning wooden death traps. At the end, give the final Gibdo a bottle of Milk.
In this last room, run ahead and light all the torches with your Fire Arrows (or Deku Sticks) to make a chest appear. Open it to get the Mirror Shield! Test it out by reflecting the light onto the Sun Face and Sun Block. Climb up the ladder that appears and exit out of this side of the well to emerge into Ikana Castle.


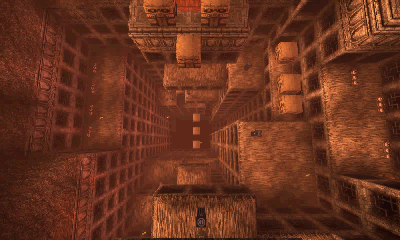
11.3 Ikana Castle
You’re probably intrigued by this new area, but you’ll need a Powder Keg before too long. You might as well get it now if you don’t have one already. Warp over to West Clock Town and speak with the Goron in the Bomb Shop to purchase a Powder Keg for 50 rupees.
There are actually two ways to get into Ikana Castle. One is the end of the Well area you just finished, and the other is a shortcut that only works after you have acquired the Mirror Shield. Now that you have it, you never have to return to the Well again!
From the Owl Statue in Ikana Canyon, run towards the castle gate (it’s white and red with pillars around it). Just to the left side of it is a hole in the stone wall. Enter to find the secret entrance. Turn left and hit the Crystal Switch to make the sunroof open up. Reflect the light onto the nearby Sun Block near the entrance to make it disappear. You can wear the Garo Mask around here to summon more Garos and learn interesting things about Ikana Castle if you wish. When you’re done playing around, go ahead and enter the castle itself.


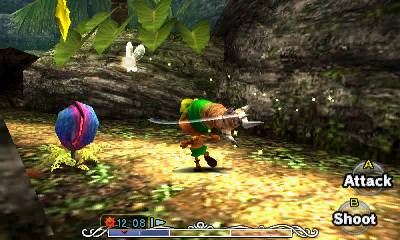
As you enter, you’ll find several ReDeads, a new enemy that will freeze you and probably do loads of damage if you’re not careful. If you wear the Garo’s Mask, Gibdo Mask or Captain’s Hat, they’ll only dance harmlessly, allowing you to slaughter them without a fight. There are two frozen eye switches on the pillars in this room. Melt the one on the left to open the left (north) door.

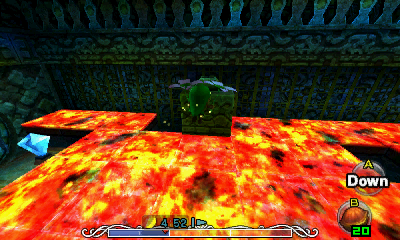
This room has a checkerboard floor with a flaming hot platform that rests atop the floor. If you touch the top of it or get squished under it, you’ll have to start the room over again. Hit the switches on either side of the room to lift the platform for a few short moments. Underneath the platform itself, there are a ton of Deku Flowers, which actually make this room a lot easier. Simply dive down into them with the Deku Mask, let the platform come down on top of you on purpose, then release to hit the platform, making it rise. NOTE: This room works a bit differently in the 3DS version of the game. Strategies for both versions will be listed.

Hit the switch and run out to the middle of the floor. Once you’re close to the skinny pillar, put on the Deku Mask and quickly dive into the flower on the orange tile (the closest one). Let the platform go all the way down and bonk it to rise it back up. Quickly dive back into the flower and fly to the pillar to press down the switch and open the door. Wait for the platform to go back down, then jump over to the door. You should easily get enough distance to make it. That wasn’t so bad, now was it?
Hit the switch and run to the Deku Flower. Put on the Deku Mask and dive into the flower. Now wait until the platform has fallen and then risen again. At this point, fly over to the floor switch quickly and remove the Deku Mask to press it down. This opens the door. Wait until the platform has risen once more, then jump down and enter the newly opened door.
This room has only a few platforms to keep you from falling into the bottomless pit below (which will respawn you at the beginning of the room). As you enter, turn off to the left to see a floor switch. You can either use the Deku Flower to reach it or use the Lens of Truth to see an invisible ice platform. Either way, get over there and press the switch down to open the next door. From here, you can either go left or right.

If you choose left (likely the easier option), simply shoot the Skulltulas with arrows and use the Lens of Truth to jump across the ice platform, then jump along the rest of the platforms to the door.
If you choose right, jump back on the ice platform to get back to the starting area. Kill the Skulltula, then use the Deku Flower to get to the platform on the right. From here, shoot either the middle or right Spike Mine to make them knock into the ones nearby, thus exploding. Use this flower to fly to the door.
In this hallway, you’ll find yourself alone with two Blue Bubbles. You can wear the Stone Mask to keep them from attacking you. If they do manage to touch you, you can play the Song of Storms to blow away the jinx they place on you. Defeat them if you wish, then head up the stairs and out the door.
Now you’re back outside (try not to fall down). First of all, kill the Guay (crows) using your Bow so they don’t bother you. Next, climb on top of the outer wall and walk along it going left. Jump down to the lower platform (above the entrance in the middle) with the flower on it. From here, fly to the floor switch and take off your mask to press it down. This will cause a big block to move, allowing light into one of the rooms that you have yet to visit.


At this point, you can hop back down and go through the entrance, but, if you’d like a Piece of Heart, follow along. Jump across to the other pillar and fly back to the central area (above the entrance). Use this flower to get back on top of the wall and go back left (the way you came from). From here, you’ll see two flaming pillars with Deku Flowers on them. Make sure the nearby Guay is dead, then shoot the nearby crystal switch with an arrow. Jump to the first platform and fly along the pillars before the fire gets back. If you’re fast enough, you can make it to the final pillar where you’ll find a Piece of Heart! Hop down and enter the castle again.


Back in the entrance area (wear the Garo Mask, Gibdo Mask or Captain’s Hat), kill the ReDeads and shoot a Fire Arrow at the frozen eye switch on the right to open the right (south) door.
Here, you’ll meet a new enemy called a Floormaster. Stand in the light and reflect it onto the spider-like foe to kill it easily, as well as the little ones that pop out afterwards. Next, reflect light onto the Sun Block to remove it. Harass the ReDeads (once again, wearing one of those masks) and finally go through the door.
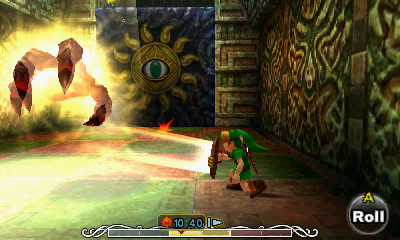

As you enter, you’ll immediately begin battling this mini-boss… again…
This guy is back, and he’s a little more pumped up than before (though you probably won’t notice the changes). He fights the exact same way, but now he has a flaming attack that bursts into several smaller fireballs once it makes contact, making his attacks somewhat harder to avoid. Also, he has more health than he did before, but that shouldn’t be a problem.


As always, sit back and watch out for the real one (which appears as a red dot on your mini-map). Shoot him with arrows or roll over with the Goron Mask and quickly Fire Punch him.
Once he’s been defeated, run through the door and immediately put on one of the scary masks to defeat the ReDeads easily. Go up the stairs and out the door to reemerge outside.
You’re back on the roof, this time in the enclosed area. Straight ahead is the hole you opened up earlier to let in the light. DO NOT JUMP IN! Instead, go around the corner to find a cracked circle shape in the roof. If you hunted down the Garo down below earlier, you would have found one that gave you a clue about this, explaining that you need a Powder Keg to blow it up. If you don’t have one yet, soar to West Clock Town and purchase one from the Goron (wear the Goron Mask) in the Bomb Shop for 50 rupees.
Anyway, lay the Powder Keg (and shoot it with an arrow) to let a resounding “boom” announce the way forward. Put on a scary mask and fall down the new hole.

Simply turn in a circle to reflect light onto the ReDeads here in the entrance, then reflect light onto the Sun Block straight ahead. Smash the jars nearby if you need goodies, then enter the next area. Slash the jars here for magic and arrows, then enter the door at long last to confront the boss.
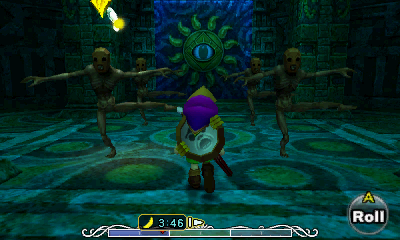
As you start the battle, the King of Ikana will send his lackeys after you and watch from the sidelines. If you try to harm the king, he’ll either counterattack or deflect it. At the beginning of the battle, the curtains will lower to shroud the room in darkness.
As soon as you gain control, immediately burn the two curtains blocking the windows using Fire Arrows to allow the light to come in. While standing in the light, the skeletons will avoid you at all cost. From there, shoot the other drapes.


These guys are obviously weak to the light, but most often you can’t reflect any onto them because they just guard against it with their shields. Instead, you have to run forward and use Z targeting and sword techniques to deal damage to them. Wait for a gap in their defenses and stab them quickly. Try and keep both of them in view so they don’t surround you. Alternatively, you can also try stunning them with either the Deku Mask (spinning with A) or Deku Nuts.
After just a few hits, they’ll fall to the ground. Quickly run back to the light and reflect it onto their bodies to finish them off.


NOTE: Another interesting fact about this battle is that you can use the Bremen Mask to briefly confuse them, making them parade around the room. You can do this to get behind them, quickly take off the mask and hit them.
After they’re defeated, you’ll have to battle the King himself. Quickly put on the Captain’s Hat for something amusing.
NOTE: If you wear the Captain’s Hat at some time before or during the battle, he’ll mistake you for Skull Keeta! After a moment, he’ll realize it’s only a mask, but it’s quite humorous.
This guy fights in a similar manner to his two minions, but he’s quite a bit harder. He has a wide variety of attacks that he can use fairly quickly and he’s also defending a majority of the time. Use Z targeting and your shield to get close. Obviously, the goal is to shine the light on him. It takes quite a few more hits to knock him to the floor though, and unlike the other two, it’s much easier to shine the light on him while he’s running around.


Wait until just after he slashes his sword and stab him to easily get some damage in. Another trick you can use is to put on the Deku Mask and spin into him with A to stun him, then quickly take off the Deku Mask and stab him. You can also use the Zora Mask to charge up the Double Cutters, then take off the Zora Mask while they’re heading towards him. Right after they stun him, you have the perfect opportunity to slash him with your sword.
He has a poison breath technique that takes a little while to perform. He’s vulnerable while doing this, but it’s hard to get close as well. Take this opportunity to either hit him quickly, before he can start breathing on you, or use the Zora Mask as mentioned above.
By far, the most frustrating part of this battle is his decapitation technique. He takes off his head, which then floats around the room. The body meanwhile becomes transparent and invincible and will continue chasing after you. The head will fly around for awhile and eventually zoom towards you, latching onto your head and nibbling away until the body comes and smacks you. The only way to avoid it is running circles around the room very quickly, either by using the Bunny Hood or rolling with the Goron Mask. Also, be warned that hanging out only in the light will taunt him to use this attack.


After several hits, he’ll fall on the floor alike his comrades. Quickly run over to the light and reflect it on his body to defeat him.
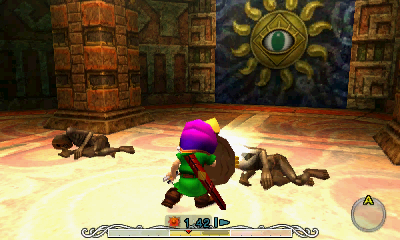
After he’s been defeated, his two guards will bicker at one another even thought they’ve lost their bodies. It’s very similar to the Twinrova argument from Ocarina of Time. The King will yell at them after a moment and thank you in the form of poetic nonsense. As you already knew, the cause of all of this is because the Skull Kid caused evil to enter the Stone Tower Temple, which is driving all of the dead spirits in Ikana to do these things. According to the King, not even all of his warriors combined would be able to stop it. The solution, of course, is a song. This new melody will allow you to make statues of yourself, useful for holding down switches. The Deku Mask form is actually too light to hold down anything, so you’ll never actually use it.

That’s all you have to do here. Unfortunately, you can’t use the Song of Soaring here. When you regain control, exit through the door, put on a scary mask if you wish and exit the castle.
11.4 Stone Tower
At long last, you’re ready to scale Stone Tower. In Ikana Canyon, simply follow the ramps to the far northern side and turn right to find the statue-like opening to the tower. It’s at the top right corner of your mini-map.

Your goal is obviously to climb to the top, which can be hindered by the rolling boulders that fall continuously. There’s also a new enemy here called a Beamos, which can be destroyed with Bombs or the Blast Mask. You can make the climb easier by simply wearing the Stone Mask to make them ignore you.
Throughout this area, you’ll be using the Elegy of Emptiness to create statues that hold down switches in particular orders so that you can proceed. You’ll have statues for your normal form as well as the Zora and Goron Masks. The Deku Mask isn’t heavy enough, so don’t bother with that one. NOTE: If you have created a statue with regular Link, and then later create a second statue with regular Link, this will cause the first statue to disappear. For each of the three puzzles ahead, there are three switches. Be sure to use Regular Link, Goron Link, and Zora Link one time each per puzzle.
To begin, jump across the floating blocks to get to the other side.


- Ignore this first switch and Hookshot up to the nearby ledge.
- Kill the Beamos (wear the Stone Mask) by throwing a Bomb at it. Stand on the switch here and create a statue.
- Hookshot to the ledge above and make a statue.
- Jump back down to the first switch you saw and make a statue. This will allow all three of the blocks ahead to make a bridge to the next area.
- Climb back up and jump across the blocks. When you get there, step on all three of the switches to lock the three blocks in place.


- Hookshot up to the next ledge. Ignore this switch for now and go up a level (middle). Use this one instead.
- Jump back down to the first ledge (after the three switches) and place a statue.
- Hookshot to the very top and make the final statue.
- Jump across the blocks to a new area and use the three switches here to lock these into place as well.


In this general area, there are some secret areas you can get to using the Scarecrow’s Song, but they all just lead to random jars and rupees. Hookshot up to the ledge on your right, then turn right again and stand between the target and the edge. Hookshot up to the next target and from this area, look for the final target you can grapple onto. At the end, you’ll come to a large platform with an Owl Statue that you should wake up with your sword.


At this point, you have the Owl Statue as well as the song for the area, so you’re finally ready to tackle the temple. Now would be an excellent time to put your rupees in the bank and play the Song of Time. You’ll need arrows, Bombs and a lot of magic in particular for this temple. You may want to bring at least one bottle of Green Potion, or if you’re feeling really ambitious, Chateau Romani, which can be purchased from the Milk Bar in Clock Town for 200 rupees. That stuff’ll give you infinite magic for the remainder of the three days so you don’t have to worry about it. Either way, fill your remaining bottles with Fairies. The best place to get them is next to the Owl Statue on Milk Road, since you can exit through the Gorman Racetrack and come back quickly.
When you’re finally ready, place statues on the switches here in this order: right, left, middle. This will line up the blocks and allow you to enter the Stone Tower Temple.
- Chapter 1 – First Three Days
- Chapter 2 – Southern Swamp
- Chapter 3 – Woodfall Temple
- Chapter 4 – Collection
- Chapter 5 – Snowhead
- Chapter 6 – Snowhead Temple
- Chapter 7 – Spring, Romani Ranch, Ikana Graveyard
- Chapter 8 – Great Bay & Zora Cape
- Chapter 9 – Great Bay Temple
- Chapter 10 – Ikana Canyon
- Chapter 11 – Well & Ikana Castle
- Chapter 12 – Stone Tower Temple
- Chapter 13 – The Moon
