- Chapter 1 – First Three Days
- Chapter 2 – Southern Swamp
- Chapter 3 – Woodfall Temple
- Chapter 4 – Collection
- Chapter 5 – Snowhead
- Chapter 6 – Snowhead Temple
- Chapter 7 – Spring, Romani Ranch, Ikana Graveyard
- Chapter 8 – Great Bay & Zora Cape
- Chapter 9 – Great Bay Temple
- Chapter 10 – Ikana Canyon
- Chapter 11 – Well & Ikana Castle
- Chapter 12 – Stone Tower Temple
- Chapter 13 – The Moon
13.1 Post-Temple Collection
Once Stone Tower has been cleansed, you’ll witness a short clip with orb thingies healing the land. Not much actually changes in Ikana, other than the sky returning to a “normal” pixilated form and the Gibdos around the Music Box House being gone. Woohoo!
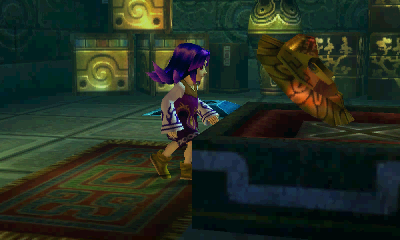
If you’ve collected the Stray Fairies in the temple, go to the house on the right side of the second level (between the entrance to Stone Tower and Ikana Castle). This is actually a Fairy Fountain. It’s a lot bigger on the inside apparently. Inside, the Great Fairy of Kindness will give you the last Fairy doohicky of the game: the Great Fairy’s Sword. This sucker is a little awkward to use, but does MASSIVE damage and will slay bosses in no time. It’s also nice to have for tougher enemies, such as Dodongos, Lizalfos, Iron Knuckles, etc. It has a somewhat strange swing angle though that makes it hard to hit things like Keese (bats) and Tektites (jumping spiders).
With that out of the way…there’s really nothing left to do out here after the temple has been completed. Put your remaining rupees in the bank and play the Song of Time.
13.2 Anju & Kafei Quest
The following section is an entirely optional side quest that leads to a ton of collectibles. You could have technically done it just after arriving in Ikana, but it’s best to save it until after Stone Tower so that it doesn’t break up the flow of things. If you are playing on the Nintendo 64, there’s a lot of waiting around involved for this, so as a result, take this opportunity to gather rupees while you’re waiting for events. Once you put 5000 rupees in the bank, you’ll be rewarded with a Piece of Heart, and now that you have Light Arrows, doing this becomes a very simple task.


Many enemies will drop a Purple Rupee (50) when killed with a Light Arrow. Some of the more efficient ones include: Guays (Ikana Canyon), Blue Bubbles and Eenos (Termina Field). This is one of the most efficient and safest ways to pad your wallet quickly and put them in the bank. Another excellent method is to go to Ikana Castle while wearing either the Garo Mask, Captain’s Hat or Gibdo Mask. In the first room, kill the four dancing ReDeads to net anywhere between 60 and 80 rupees. Keep leaving and re-entering for quick, safe rupees.
Many of the events of the Anju & Kafei Quest are completely optional. This guide will cover all of the events, specifying which ones are optional and which ones are required. From a story perspective, it’s nice to see the entire quest play out, including some of the challenges that each character is going through within their life.
- Epona’s Song
- Hookshot
- Garo Mask
- Romani Mask
- YOU MUST NOT SAVE THE OLD WOMAN ON THE FIRST NIGHT!
- If you are playing the Nintendo 64 version, be sure you have at least an hour or so of spare time as this is a time-consuming quest. Due to the changes to the Song of Double Time on the Nintendo 3DS, this will take a considerably shorter amount of time on the 3DS version.
- Day 1 – 10am to 12pm
- Location – Mayor’s Residence
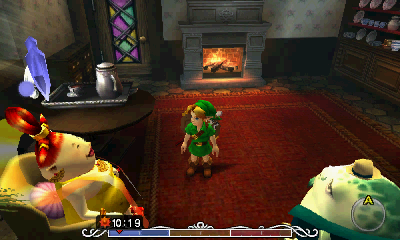
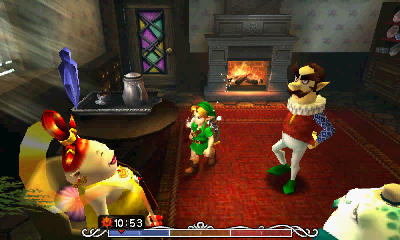
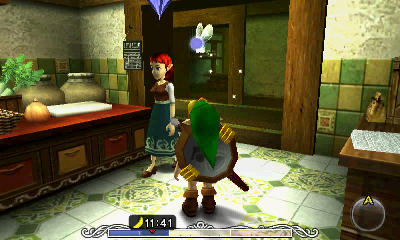
Go to the Mayor’s Residence in East Clock Town. Inside, enter the door on the right and speak with the large woman woman in the yellow dress, named Madame Aroma. She’s Kafei’s mother, and her son has recently gone missing. You are just so dashing and admirable that she hires you to find him, giving you Kafei’s Mask.
- Day 1 – 11am to 11:30am
- Location – Mayor’s Residence
In the Mayor’s Residence in East Clock Town, you can witness a conversation between Madame Aroma, Toto, and Gorman, the leader of the Gorman Traveling Troupe. Additionally, you can enter the back room and go behind the curtain to read Kafei’s Diary, in which he talk about his excitement over the wedding ceremony masks he and his betrothed (Anju) are making.

- Day 1 – 12pm to 12:15pm
- Location – Stock Pot Inn
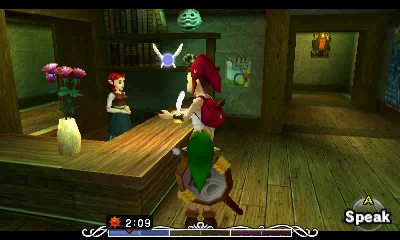
At the Stock Pot Inn, Anju makes lunch for her grandmother. You can witness a conversation in which her grandmother claims she’s already eaten and fakes being senile. In reality, she doesn’t want to eat Anju’s terrible cooking. To further prove this, you can also read Anju’s grandmother’s dairy, which is on the table.

- Day 1 – 2:10pm
- Location – Stock Pot Inn
At the Stock Pot Inn in East Clock Town, the Postman will deliver a letter to Anju, from Kafei.
- Day 1 – 1:50pm – 3:50pm
- Location – Stock Pot Inn
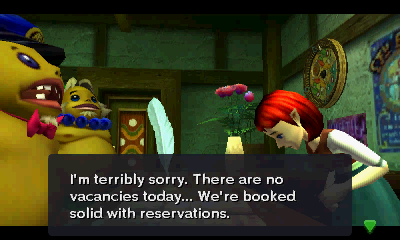
Technically this event is not totally required, but it does make things a bit easier. It also allows you to see a relevant cut-scene. After cooking for her grandmother, Anju will return to the counter. Wear the Goron Mask and speak to her anytime before 3:50pm. She will confuse you with a Goron of the same name and she will give you the Room Key. You now have access to the “Knife Chamber” which has a chest containing a silver rupee (100). Furthermore, you are now able to enter the Stock Pot Inn from the front door after hours. NOTE: You can enter the Stock Pot Inn at nighttime by using the Deku Flower just outside and entering the Inn from the second floor.

- Day 1 – 4:10pm
- Location – Stock Pot Inn
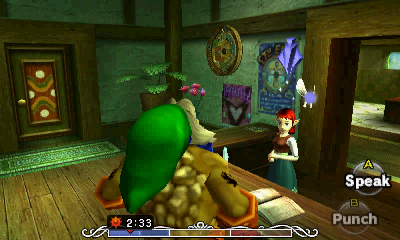
A Goron with your name will come to claim his reservation. You can witness his conversation with Anju at the Inn. Since you just claimed the reservation, the Goron will be relegated to sleeping outside. Poor guy. Although he does say it’s nice weather and doesn’t mind.

- Day 1 – 2:10pm – 8pm
- Location – Stock Pot Inn
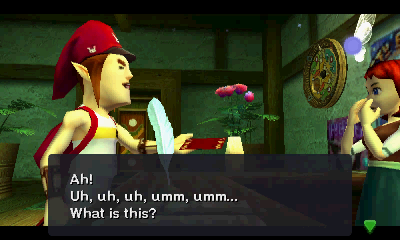
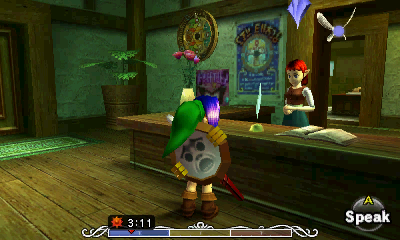
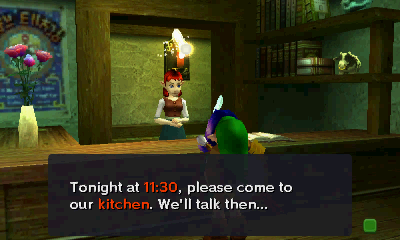
After the Postman delivers the letter from Kafei, speak with Anju while wearing Kafei’s Mask. She’ll ask you to meet her later that night in the kitchen.
- Night 1 – 12am – 6am
- Location – Stock Pot Inn
Meet with Anju in the kitchen of the Inn to get the Letter to Kafei. If you didn’t get the Room Key earlier, you can get into the Stock Pot Inn by using the Deku Flower outside and getting on top of the veranda to access the unlocked door.
WARNING!!!!! – In order for this quest to work, you must NOT give any letters to “???” inside the toilet in the Stock Pot Inn or stop Sakon in North Clock Town at 12:00 AM.

- Night 1 or Day 2 – 12am – 9am
- Location – Clock Town
Go to any mailbox in Clock Town and put the letter inside. The Postman will come pick it up when he does his rounds at 9am.


- Day 2 – 3:10pm – 3:50pm
- Location – Laundry Pool
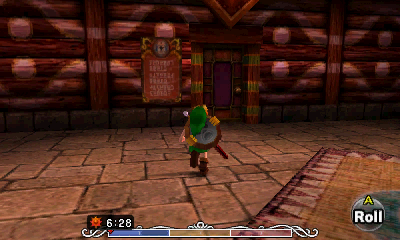
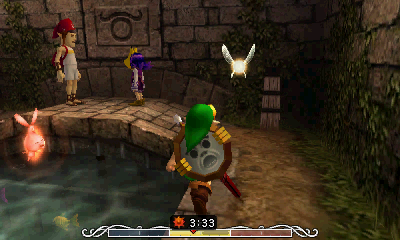
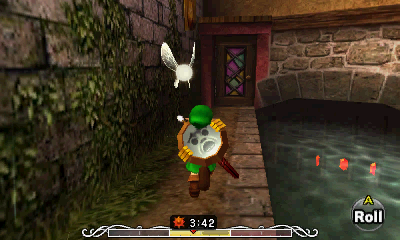
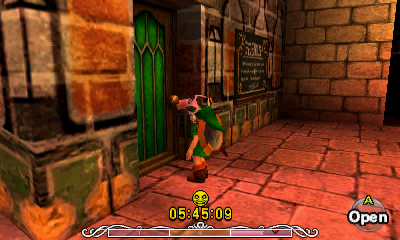
Go to the Laundry Pool in Clock Town and wait until 3pm. The Postman will come ring the bell to deliver the letter to Kafei. Kafei will come out of the house and collect the mail. While he’s distracted, run inside of his house and wait for him.
- Day 2 – 4:10pm – 6pm
- Location – Laundry Pool
Speak with Kafei inside his house to learn that he was transformed into a child by Skull Kid, then had his Sun Mask stolen from him by Sakon the Thief.
He’ll then give you the Pendant of Memories. If you talk to him again after this, he’ll let you stand on the crate and look through the spyglass into the Curiosity Shop (where he’s waiting to see the thief that stole his wedding mask).


- Day 2 or Day 3 – 10am – 7pm
- Location – Stock Pot Inn
After you exit Kafei’s Hideout, go back to the Inn and give the Pendant to Anju. Now that she has the Pendant, she will not flee Clock Town on the final night.


- Night 2 – 9:30pm – 11pm
- Location – Stock Pot Inn
If you stole the room reservation from the Goron and you also gave Anju the Pendant on the second day, you can go to your room upstairs and listen through the rundown wall. Anju is arguing with her mother about staying and waiting for Kafei.


- Night 2 – 12:30am – 1am
- Location – Curiosity Shop
Go to the Curiosity Shop on the second night to witness a short clip in which Sakon the Thief sells the Bomb Bags he stole. Since Kafei is able to see into the Curiosity Shop, he can see Sakon the Thief and is able to follow him to his hideout. This is also why you were are not suppose to save the Old Woman on the first night, otherwise Sakon will never come to the Curiosity Shop to sell the Bomb Bag and Kafei would never be able to locate Sakon’s Hideout.

- Day 3 – 1pm – 6pm (N64), 6am – 6pm (3DS)
- Location – Laundry Pool
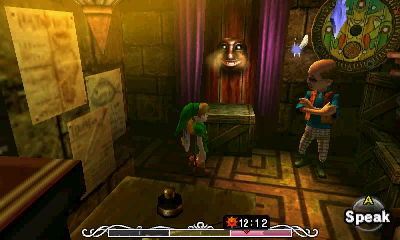
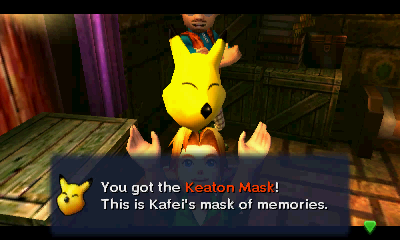
Go back to Kafei’s hideout at the Laundry Pool in Clock Town. Inside, you’ll find the Curiosity Shop Owner. Talk to him to get the Keaton Mask and to also get a Special Delivery to Mama.
- Night 3 – Just after 6pm
- Location – Ikana Canyon
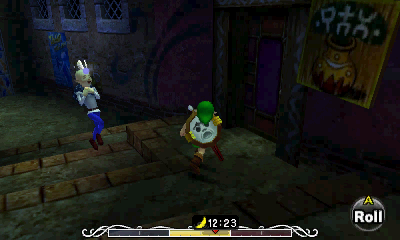
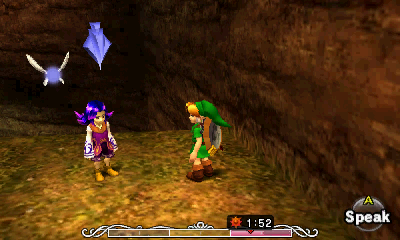
Warp to Ikana Canyon and head to the lower area. Go through the dark passage to find a small area. Kafei is hiding behind a rock, waiting for Sakon to appear. Hide with Kafei, then use the Song of Double Time to make it night. Sakon will then appear and slowly make his way towards the entrance. Stay behind the rock and DO NOT allow him to see you! Once the thief enters his hideout, Kafei will follow him inside. Once you gain control of Link, follow Kafei inside where you will work alongside him to get back his wedding ceremony mask.
Inside, you will play as both Link and Kafei. As Link you will kill enemies to open doors and as Kafei you will step on switches to change the conveyor belt speed and open doors.

- Link: Step on the blue switch.
- Kafei: Push a block onto blue switch.
- Link: Defeat the Deku Baba.
- Kafei: Avoid the red switches as it speeds up the conveyor belt. Step on the yellow switches to slow down the conveyor belts. Step on the Blue switch.
- Link: Defeat two Deku Babas.
- Kafei: Briefly step on the red block and push the large block so that it is sitting on the yellow block. Then push the adjacent block down onto the blue switch.
- Link: Defeat the Wolfos.
- Kafei: Pull the block out of your way if you need to in order to reach the door. Step on the switch.
- Link: Step on the switch.
At the end, Kafei will get back the Sun’s Mask. He will then run back to town. Soar over to Clock Town.


- Night 3 – After 6pm
- Location – Latte Milk Bar
Note: You don’t need to acquire the Sun’s Mask with Kafei to complete this part of the quest. Unfortunately you cannot do both this event and event #12 in the same cycle, so you will have to do the entire quest twice to get all of the items.
Go to the Latte Milk Bar in East Clock Town (next to the Inn, you’ll need the Romani Mask to enter). Speak to Madame Aroma while wearing Kafei’s Mask. Fork over the Special Delivery Letter to get the last Bottle.

- Night 3 – After 6pm
- Location – Post Office
Note: Unfortunately you cannot do both this event and event #11 in the same cycle, so you will have to do the entire quest twice to get all of the items.
Bring the letter to the Post Office in West Clock Town at 6pm (as opposed to helping Kafei in Ikana Canyon). Give it to the Postman and he’ll have to deliver it.
Follow him to the Latte Milk Bar. After a bit, he’ll come out and stand near the exit for a short moment before running away from town. Speak with him to get the Postman’s Hat.


- Night 3 – 4:30am
- Location – Stock Pot Inn
In the final hours, when there is only 1:30 left, return to the Stock Pot Inn.
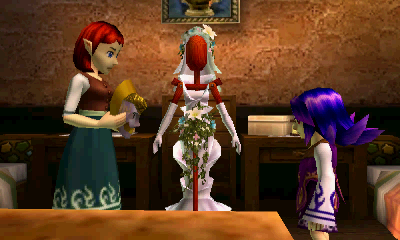
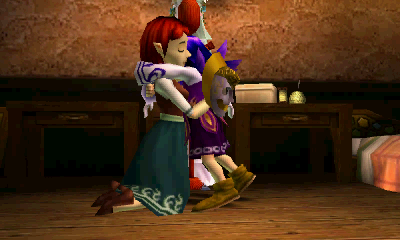
Enter the Employee’s Only Room (the door at the top of the stairs that’s otherwise always locked). If you previously gave Anju the Pendant of Memories, she will be waiting for Kafei.
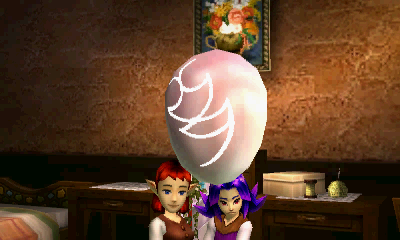
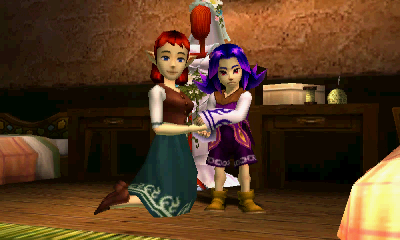
If you saved the Sun’s Mask with Kafei, he will appear at the Inn with just over an hour left. Anju and Kafei will combine their masks at long last. After the ceremony, they will give you the Couple’s Mask and wait to die together. So sad! Play the Song of Time.
The first time through, do all of the regular events, help Kafei in Sakon’s Hideout, then deliver the Letter To Mama yourself (event #11). After that, do the whole quest through just focusing on the letters. Once the man from the Curiosity Shop gives you the Letter To Mama the second time, instead of helping Kafei, just play the Song of Double Time to skip to the final night and enter the Post Office in West Clock Town to give it to the Postman. Play the Song of Time.
With all of that, you should have several new items and masks. You should also have completed the Bombers’ Notebook entries for the following characters:
- The Postman
- Madame Aroma
- Anju
- Kafei
- Man from Curiosity Shop
With all these goodies in hand, there are now have several Pieces of Heart available to you. First of all, you need to find a circle of bushes that come alive when you slash them. There are three and they’re in the following locations:
- North Clock Town
- Milk Road
- Mountain Village (spring only)
Out of those options, North Clock Town is the most convenient. Put on the Keaton Mask and slash up the bushes to summon a Keaton after a moment. It will explain that you didn’t fool it in the least, but it’s willing to play a little game with you. These creatures love quizzes, and this guy will give you several multiple choice questions. If you answer all of them correctly, you’ll be gifted with a Piece of Heart. Check out Zelda Dungeon’s Keaton Quiz page for a list of all the answers.


Next, put on the Postman’s Hat and check out any postbox here in town. The first time you do this, you will get a Piece of Heart.


Finally, head to East Clock Town and enter the Mayor’s Residence at 10am. Enter the door on your left and listen in on the conversation if you want. Mutoh, the leader of the construction efforts in town, wants the people to stay in town for the Carnival of Time. Captain Viscen wants to force everyone to flee because of the falling moon. Mayor Dotour is stuck in the middle and can’t decide what to do. Put on the Couple’s Mask and speak with anyone to end the argument. The Mayor decides that it should be each person’s own decision whether to flee or stay. After he kicks everyone out of the meeting, he’ll thank you by giving you a Piece of Heart.


13.3 Secret Shrine
If you were gathering rupees as was suggested in the last section, you probably filled up your bank sufficiently enough to get a Piece of Heart from the banker. If not, you should easily be able to collect that much now that you have Light Arrows.
In Ikana Canyon, go to the far north and kill Guays with Light Arrows. You’re best off Z-targeting them and circling around so they’re between you and the north wall, that way when you shoot them, they’ll hit the wall and you won’t have to run very far to collect the purple rupees. Simply run back and forth between the two northern Guay to make rupees quickly.
In Termina Field, you can run around with the Bunny Hood shooting the Blue Bubbles with Light Arrows to quickly rack up the dough. It’s a little faster than killing the Guays.
Either way you choose, deposit the rupees in the bank. Once you reach 5,000 rupees you’ll be gifted with a Piece of Heart.
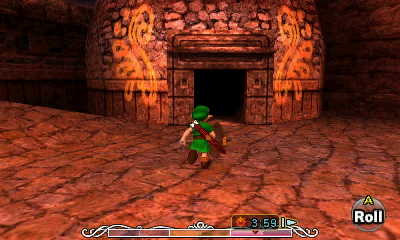
There’s a mini-dungeon you can enter that’s filled with mini-bosses and harder enemies. The catch is that you need 16+ Heart Containers in order to enter all of the rooms and complete it. If you’ve been following the walkthrough thus far, you should easily have that much. Otherwise, check out Zelda Dungeon’s Heart Piece Guide to find the ones you’re missing. To get there, soar to Ikana Canyon, put on the Zora Mask and jump in the water. Now swim upstream to find a hidden area and enter the door.

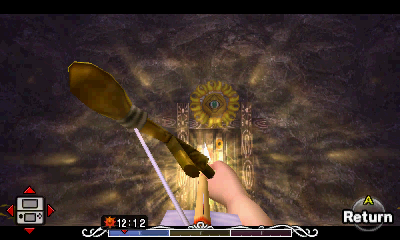
In this first room, you can fill up on supplies. You can plant a Magic Bean and play the Song of Storms (or use Fresh Spring Water) to get some rupees, but it’s honestly a waste of time, considering how quickly you can get them elsewhere. When you’re ready, shoot a Light Arrow into the Sun Crest above the door to open it.
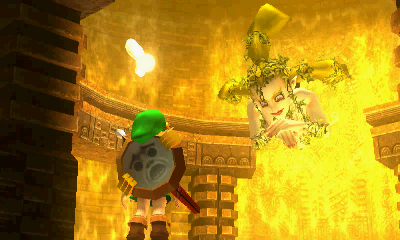
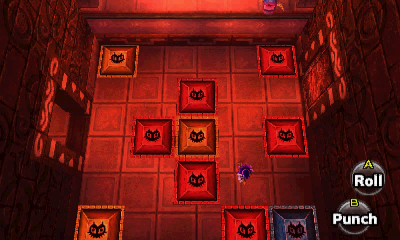
Oh no! It’s the creepy one-eyed fellow from earlier! Didn’t he say that his soul was healed when you slew all the Poe Sisters a while back? Anyway, he has one last challenge for you: slaughter all of the enemies in the four rooms for a prize. Simple enough, right? You’ll need a lot of arrows, and the Great Fairy’s Sword would be helpful as well. The rooms, from left to right are as follows:
A single hit with the Great Fairy Sword will kill them. Perhaps easier though is using the Goron Mask to perform a Goron Pound (A + B), which also kills them instantly. Open the chest they leave behind for 100 rupees.
LAME! They over-use this mini-boss way too much. It’s hard because you don’t have a map or compass this time around and there are pillars in the way to disrupt your view. Just watch carefully for the real one and roll over with the Goron Mask quickly to punch him. Otherwise just shoot him with arrows. Collect the 100 rupees and continue.


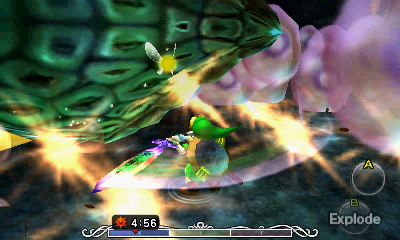
Look up at the ceiling to begin this battle. While this battle is pretty cool, it’s also lengthy and boring. The best tactics to use to remove the pink jellies is to either use Deku Nuts or the Bombs immediately followed by Blast Mask, which will instantly kill most of them right after they fall off. Finish off the eye with arrows afterwards and open the chest for 100 rupees.
Just like before, use your Shield and strafe to the left or right. Just after he attacks, run in and stab him, then immediately defend. When he teleports, run away, then come back and slash him. He’s pretty easy over all.


Once you’ve cleared all of the rooms, return to the middle to make the creepy guy disappear. He’ll leave behind a large chest containing a Piece of Heart. Wasn’t that fun?
13.4 The Moon
If you’ve been following the walkthrough thus far, you’ve done everything in the game! All of the side quests, the Bombers’ Notebook entries, the items and masks as well as the Pieces of Heart (except for the final four, which are still unavailable) have been completed/collected.
It’s time to tackle the final area of the game. To start off, pull 200 rupees out of the bank and head to East Clock Town. Play the Song of Double Time to get to the final night and use the Romani Mask to enter the Latte Milk Bar. Purchase one bottle of Chateau Romani and drink it immediately, since it gives you unlimited Magic for the remainder of that 3-day cycle (in which you will beat the game). This will leave you with six Bottles (or seven, if you are playing on the Nintendo 3DS) for Fairies. Soar over to Zora Cape and slash up the jars here. Swipe up a Fairy, then enter Zora Hall and return to make the jars appear again. Do this until your Bottles are full. Make sure you’re stocked up on arrows as well.


Once you’re all filled up, go back to Clock Town and wait by the Clock Tower until the eve of the Carnival of Time (12am). Now that you’re no longer stuck in Deku Scrub form, you can simply climb up the side of the Clock Tower entrance to get up to the platform. Wait until the last 6 hours for the stairs to appear, then climb up to confront the Skull Kid at long last.


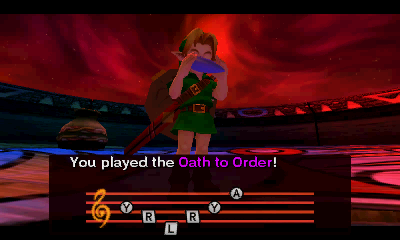
You’ll witness the familiar scene of the two fairies and Skull Kid chatting. Once it’s finished, play the Oath to Order to make the four Giants appear.
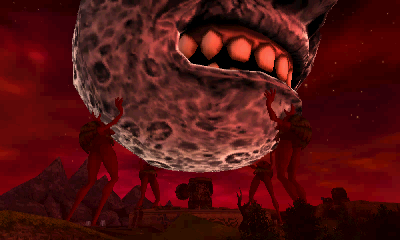
The Giants will manage to stop the moon and the Skull Kid will be knocked out. Tatl and Tael are reunited, but a strange twist of events makes things even worse. It turns out that the Skull Kid was being controlled by Majora’s Mask the entire time and that the mask itself is the real danger. It will then take a portal up to the moon, which it makes even stronger. The Giants can’t hold it much longer, and after a short argument, Link and Tatl will enter the portal themselves to stop the mask once and for all.

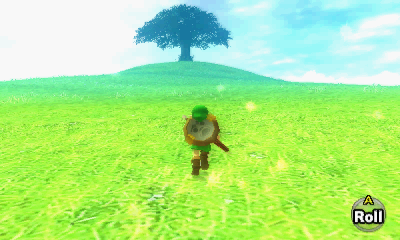
This is a very interesting area. Counter-intuitively, the moon is not a chaotic place at all, but rather a peaceful grassy field with a large tree in the center. You may feel uneasy at first, since the “world” still shakes, but don’t worry; time is paused here, so you don’t need to hurry or panic. This circular area is surrounded by invisible walls that clang when you strike them with your sword. Oops! When you’re done messing around, approach the giant tree.
There are five children here, four of which are wearing the bosses’ remains that you’ve collected thus far. The fifth child who sits in front of the tree dons Majora’s Mask itself! Interestingly, the children themselves look like younger versions of the Happy Mask Salesman. Is this hinting at something? Speaking to the child wearing Majora’s Mask will lead you to the final boss battle, but there are a few things you should do before that.
The other children will bring you to mini-dungeon areas containing Pieces of Heart. Completing all four of these areas can also net you the single most powerful mask in the game. Each child you talk to will ask you to give them some of your regular, non-transformation masks one at a time until you have none left. In order for this to be worth your while, you must have ALL of the 20 regular masks found in the game.
Additionally, in each of these mini-dungeons there are Gossip Stones that you can speak to using the Mask of Truth. Each of these stones will tell you the locations of the regular masks in the game, so you can use this process to determine where the masks are that you are missing. Alternatively, you could of course, simply use the Masks Guide here at Zelda Dungeon! Additionally, there is a Gossip Stones Quotes page that has a list of all of the quotes in the entire game, so you don’t have to search for them yourself if you don’t want to.
The first child asks for one mask. Fork it over to enter the Odolwa Dungeon, which requires the use of your Deku form.


Put on the Deku Mask and use the Deku Flowers to fly to the middle platforms that spin. You’ll have to fly at them as they’re coming towards you, then fly to the next platform. The second set of spinning flowers has another attachment that spins in the opposite direction and can knock you off if you don’t dive into the flower in time. The goal is to get to the Yellow Flower, which will allow you to fly further. Head to the northeast corner of the room where you can collect a Piece of Heart. Fly back to the Yellow Flower on the spinning platform and fly to the northwest corner this time.


Speak with the Odolwa Child again, who will demand another mask. Give him one, and then he’ll have a curious question for you before sending you back to the grassy field.
The second child wants two masks this time. After you’ve appeased his wild fetish, you’ll enter the Goht Dungeon, which requires the use of your Goron form.
This area looks very confusing at first, but as long as you follow the path, it’s pretty simple. Immediately stand between the jars and begin rolling. Don’t press the Analog Stick at all and you’ll bounce off the empty chests, which are placed perfectly so that you’ll make 90 degree turns. Eventually the pathway ends and you either have to stop rolling or turn. Technically, you can just turn, leap over a few more bridges and eventually reach the Piece of Heart, however, it is easier to stop at the turn. At this point, you can walk across the narrow platforms.


Special Tip: Once you reach the part of the area where you can walk around, you can immediately roll to the icy platform where the door is located. Inside you will find the Goht Child. However, if you enter this room, and then return to the previous room, it acts as a new starting point for the room. Thus, if you fall to the ground, you will then just appear back by this door. This makes the second half of the Goht room more tolerable, as any newcomer will certainly be falling down into holes quite a few times. It happens to just about everyone!
Follow this path all the way to the end to get a Piece of Heart.


To get to the child, go to the warp deal in the center of the area (where those curves in the road start). From the center of here, stand next to the colorful warp point and aim towards the icy platform in the distance. Roll in that direction and smash the icy stalagmites for more magic if you need it at this point.


Inside the small room, give the Goht Child two more masks and you’ll be asked another strange question.
The third child wants three masks and will take you to the Gyorg mini-dungeon, which is very straightforward.
NOTE: This mini-dungeon is a bit different in the Nintendo 64 and the Nintendo 3DS versions of the game. Both strategies are listed below.
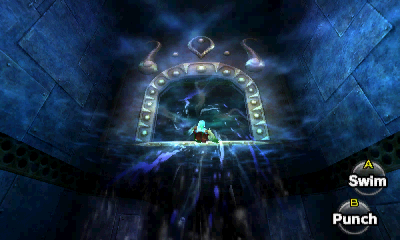
Simply put on the Zora Mask and dive into the water, which will come to several forks before you reach the end. If you choose wrong, you have to start over, and if you choose correctly, you’ll find the child. However, there is a Piece of Heart to be found here as well. This guide contains a map of the area so you can take the correct path.
To get the Piece of Heart, use any of these routes:
- <, <, >, < Left, Left, Right, Left
- <, >, <, < Left, Right, Left, Left
- >, <, <, < Right, Left, Left, Left
To find the child, any of these will do:
- <, <, >, > Left, Left, Right, Right
- <, >, <, > Left, Right, Left, Right
- >, <, <, > Right, Left, Left, Right
After giving this child three more masks, it will once again wonder aloud and ask you a rhetorical question.

In the 3DS version there are still six final exits, but it is arranged in a very different way. Furthermore, when you reach an exit, you’ll have to hold ‘R’ and jump out of the water to land on the platform ahead. The map will guide you accordingly, but just for clarification, here is how to get to the Piece of Heart and the Moon Child.


To get the Piece of Heart, use the following route:
- Left, Right, Middle
To find the Child, use the following route:
- Left, Right, Top


The fourth and final child wants four masks and will take you to the Twinmold mini-dungeon, filled with mini-bosses. If you have the Great Fairy Sword from the Great Fairy of Kindness, then you have this place in the palm of your hand. Try not to use many arrows, since you will need them for Majora.

In the first room is a Dinofols. You can kill it with a single strike of the Great Fairy’s Sword, or simply use the Goron Mask to perform a Goron Pound (A + B) right as it starts attacking. Either way will kill it instantly.
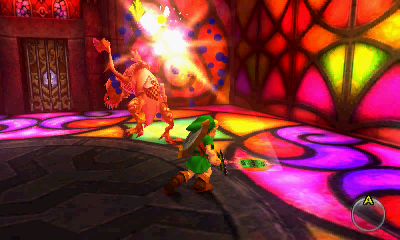
The third room has a Garo Master. Defend and strafe to the left or right, then strike it from behind. Defend again. After you’ve damaged it a bit, you can hit it with the Great Fairy’s Sword to end it quickly. Be warned though; you can’t defend while using that weapon. After he’s dead, run away or defend with your Shield against his explosion. Hookshot to the chest that appears (which contains some arrows) and go through the door.
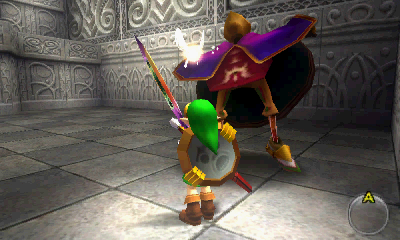

The fifth room has an Iron Knuckle. Stab it with the Great Fairy Sword, back up, repeat. Once its armor falls away, run away, then turn around and Z-target it. Stab it mercilessly to defeat it. Open the large chest that appears to get Bombchus. This is the first time you’re officially supposed to use them. Look at the wall on your right, which has a cracked portion part way up. Line yourself up with it while standing in the middle of the room and whip out a Bombchu. After about three and a half blinks, release it to blow up that portion of the wall, revealing an eye switch. Shoot it to make a ladder appear.
NOTE: If you run out of Bombchus, no worries. You can play the Song of Storms to the Gossip Stone to cause the cracks to break in this room, as well as the next room.


In the next small room, you’ll find a Piece of Heart. If you look upwards, you’ll see another cracked panel in the ceiling. Stand in the middle, aim towards either of the side walls and whip out a Bombchu. Wait for three blinks and release it to blow up the crack in the ceiling. Alternatively, you could throw a Bomb just before it explodes and it may just touch the ceiling. Shoot the frozen eye switch with a Fire Arrow to open the door.


The Twinmold Child demands four more masks, then asks you a slightly more disturbing question than any of the other children.
At long last, go speak with the child at the tree. Unlike the others, he doesn’t want to play hide and seek, but rather “good guys versus bad guys,” with you being the bad guy, naturally. If you have collected all 20 regular masks and given them to the other children, he will exclaim that you have no masks to play with and gives you the most powerful mask in the entire game: the Fierce Deity’s Mask! After that, the battle with the final boss of the game will commence.


13.5 Majora's Mask
Simply walk forward to begin the final battle. You’d better have Fairies and some way to restore magic. The main thing you’ll need for this battle is arrows. There are two jars near your starting location that have some, but they won’t come back, so make them count! Note: If you have the Fierce Deity Mask, you can ignore the strategies below. Simply Z- or L-target the boss and spam B to pummel him!
This battle is pretty straight forward: it’s a flying thing that’s invulnerable from the front. It has two attacks:
The first is to turn on its side and attempt to saw you in half. You can easily dodge or block it with your Shield, but you can also charge up a Spin Attack and release it as it’s passing over you to stun it.
The second attack is to shoot a flaming beam at you that can be reflected with your Shield. Although the beam itself does not damage the front of the mask, occasionally you can hit the backside as it’s turning, just when it finishes the attack.


In order to pummel this foe with your (Great Fairy) Sword, you’re going to have to stun it first. To do that you can do any of the following:
EASY: Use a Spin Attack when it’s trying to saw you in half.
HARD: Shoot it in the back with arrows. The best time to do this is when it’s spinning towards you, just after it passes and starts floating back up. Because it’s parallel to the ground, if you can get close, you should get a good shot (regular arrows) at its vulnerable underside.
VERY HARD: Throw/lay a Bomb/Bombchu at just the right time.
Part way through the battle, the Boss Remains on the walls come off and start flying around, shooting energy beams at you. These beams can be deflected, but it’s better to avoid them entirely. It’s best to kill off the masks as soon as possible, as they’ll stay for the next phases of this battle as well. Light Arrows work well, but reflecting Majora’s fiery attack onto them is the superior method, as it kills them instantly and conserves your arrows. You can also reflect this attack back at Majora himself (easiest to do when NOT Z-targeting).


After they’re gone, continue to kill Majora. If you have the Bunny Hood and the Great Fairy Sword, this will all be much easier.
Obviously, that alone would be too easy for the last boss. He’ll then float to the center of the room and grow skinny arms and legs.
This is by far the easiest form, as well as the strangest. It’s a good thing the rest of his forms aren’t this fast! The music playing in the background is extremely characteristic.
This freaky thing will run around at super sonic speed. Every once in awhile, it will stop and blast away at you. Simply hold still and use your Shield when this happens.


To hurt it, simply walk towards it, defending at all times. Once you get close, you can shoot it with any type of arrow to stun it, though that’s not really necessary since you can simply hit it with your sword. Once you knock it down, slash it to bits (with the Great Fairy Sword if you have it). Repeat.
After this wild form has been defeated, he will sprout tentacles, a head and some serious muscles.
This is by far the hardest form. This guy has long tentacles at the end of each arm that he uses to whip you in all sorts of ways. The best thing to do is try to keep your distance.
Most of your weapons are pretty useless against him as he easily avoids them. Wait until he’s taunting you or between whippings and shoot him with Light Arrows. Run in and slash away.
It’s also possible to just run up and slash him without using Light Arrows, but his attacks can sometimes go over or around your Shield if you’re close, or he’ll jump out of the way or kick you. Only do this if you’re out of arrows and have used the ones in the jars.


Once he’s taken a good amount of damage, he’ll start creating spiky, spinning tops that follow you around. They’re quite hard to avoid and they will easily get you from behind. When they stop spinning, they fall over and explode. Run along the walls, defending against the tops in order to get closer to Majora. Once you’re on the same side of the chamber as he is, Z target him and make a run for it, holding up your Shield to plow your way through the whip attacks and tops. Once you’re at a medium distance, shoot him with a Light Arrow if you can and run in for the kill.
After he finally dies, you’ll see a cool cinematic of Majora disintegrating. The Moon will then, at long last, disappear in a colorful orb that turns into a rainbow across the land. The townspeople can be seen cheering in the background outside Clock Town while the Giants take a breather.
13.6 Credits
So it turns out Skull Kid used to be friends with the Giants, and that’s what they were referring to when you met them after the temples. He realizes now that they never meant to lose their friendship with him and they had already forgiven him for all the wrong he’s done to the people of Termina. After he cries for a bit, the Giants will return to their respective temples.
After they go, he’ll ask to be Link’s friend as well. After sniffing him, he determines that Link smells just like “the kid who taught him the song in the woods” awhile back. In Ocarina of Time (the prequel to this game), you played Saria’s Song for an imp just like him and gave him the Skull Mask as part of a trading quest. Apparently, they’re one and the same, which also explains the nickname he uses for this whole game: Skull Kid!
The Happy Mask Salesman will then take Majora’s Mask with him, now that the evil spirit inside it has been destroyed. He rambles a bit about partings and says the masks that Link has acquired throughout his journeys contain “a good happiness.” Swell. As he leaves, he mysteriously fades away. Hmm…
Tatl tells Link to get lost and continue with his journey while they go celebrate at the Carnival of Time. What?! You played the whole game, have the whole “masks filled with happiness” thing and now Link is just leaving without having any fun? He risks his neck and saves the world and he doesn’t get to celebrate with everyone else? Link nods at her statement and rides off into the distance.
The credits will now officially start. What you see is determined by what you’ve completed in the game. If there’s a mask you haven’t gotten or a person from the Bombers’ Notebook you haven’t helped, that portion of the credits will be shown as black or it will display the mask you require. To get the full credits, you have to complete the whole game. If you need help, feel free to follow this walkthrough or use Zelda Dungeon’s Masks and Bombers’ Notebook guides.
Notice that when the Indigo-Go’s are playing in the Latte Milk Bar, Link’s right in there with them in his Zora form (as opposed to Mikau). Granted, the Zora guitarist is dead, but Link left… right?
Another interesting thing to note is the Deku Butler is seen crying in front of the “odd tree” that Tatl pointed out at the beginning of the game. She said that it “resembled you” in your Deku form. This means that the tree is actually the missing son the Deku Butler spoke of when you raced against him. He also mentioned that you greatly reminded him of his son, referring to your Deku form. So in reality, the Deku Mask contains the spirit of Deku Butler’s son, just as the Goron Mask contains Darmani’s spirit and the Zora Mask contains Mikau’s.
That’s the end of the game, my friend! Congratulations, I hope you enjoyed it!
- Chapter 1 – First Three Days
- Chapter 2 – Southern Swamp
- Chapter 3 – Woodfall Temple
- Chapter 4 – Collection
- Chapter 5 – Snowhead
- Chapter 6 – Snowhead Temple
- Chapter 7 – Spring, Romani Ranch, Ikana Graveyard
- Chapter 8 – Great Bay & Zora Cape
- Chapter 9 – Great Bay Temple
- Chapter 10 – Ikana Canyon
- Chapter 11 – Well & Ikana Castle
- Chapter 12 – Stone Tower Temple
- Chapter 13 – The Moon
