- Chapter 1 – First Three Days
- Chapter 2 – Southern Swamp
- Chapter 3 – Woodfall Temple
- Chapter 4 – Collection
- Chapter 5 – Snowhead
- Chapter 6 – Snowhead Temple
- Chapter 7 – Spring, Romani Ranch, Ikana Graveyard
- Chapter 8 – Great Bay & Zora Cape
- Chapter 9 – Great Bay Temple
- Chapter 10 – Ikana Canyon
- Chapter 11 – Well & Ikana Castle
- Chapter 12 – Stone Tower Temple
- Chapter 13 – The Moon
3.1 Dungeon Map
NOTE: There are slight differences for the locations of three Stray Fairies depending on whether you are playing the Nintendo 64 version or the Nintendo 3DS version of the game. The maps and the numbers on the maps are based on the Nintendo 64 version at this time. However, the text and screenshots showcase all of the 3DS Stray Fairies. The guide should help you collect all 15 Stray Fairies, regardless of which version you are playing.


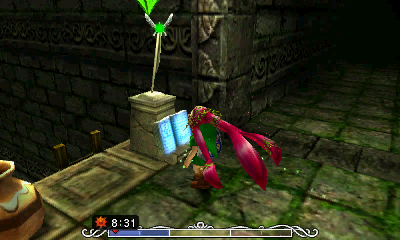
As soon as you enter, you can smash the nearby jar to find a Fairy. Swipe it into a bottle if you don’t have one already, since it may come in handy later. In the 3DS version there is also a feature save station where you can save your progress if you’d like. Straight ahead, you’ll see the first Stray Fairy. There are fifteen Stray Fairies scattered around the temple, and this guide will help you in collecting all of them as you progress through the dungeon. It is worth it to get all of them, as there is a great reward. To get this first one, you can either put on the Great Fairy’s Mask or use the Deku Mask and the nearby Deku Flower to fly into the Stray Fairy to collect it.

At this point, you’ll probably fall down into the lower portion of the room. There’s nothing of interest down here, but there is a new enemy called a Black Boe. These fuzzy little critters will appear in groups to attack you. They’re found in dark places and can be somewhat hard to see, but they also continually appear, so it’s not really worth it to attack them. Return to the south end of the room and climb the ladder to get back onto the first platform.
Put on the Deku Mask and use the Deku Flower on this platform, then aim towards the east (right). Fly to the second platform on which there is a large chest. Open it to find the second Stray Fairy. Fly to the next platform, then look forward to see two Skulltulas hanging from the ceiling. If you fly into their path, they’ll knock you down to the bottom of the room. With that in mind, fly between them (between the two grass patches) or around them, and land on the final platform. At this point, you can defeat them if you wish, or just head through the door.


As you enter, Tatl will exclaim that the water stinks like the poison in the swamp. This is just informing you that the water here is poisonous as well, so don’t make plans to go swimming anytime soon. Right next to you is a new variety of enemy called a Withered Deku Baba. You may want to kill it to get a Deku Stick, since we’ll need one relatively soon. Go down the ramp and you’ll find a regular Deku Baba, which, when defeated, will leave behind the third Stray Fairy.
Turn around to face the opposite side of the room and you’ll see a new enemy of sorts here called a Carnivorous Lily Pad. These things will gobble you up if you touch them in your Hylian Form, so only wear the Deku Mask when dealing with them. They act just like lily pads, so hop across them to get to the opposite side of the room. When you reach the door, instead of going through, turn off to the right to see a platform with several jars. Hop over and smash the jars to find the fourth Stray Fairy. Return to the door and enter.


For now, just hop across to the Deku Flower in the middle and use it to fly to the door on the opposite side.


As you enter, the door will shut behind you and you’ll have to defeat the three turtle enemies before you can leave. There’s two ways to defeat them at this point. The first is to put on the Deku Mask and dive into one of the nearby Deku Flowers. Wait for the Snapper to pass over you and release A to burst into their vulnerable belly. The second method is to use an explosion like a Bomb or the Blast Mask to flip them over, then slash away with your sword three times to defeat them. Once all three have been “done-in,” the door will open and a large chest will appear in the middle containing the Dungeon Map. That’s all there is to do here, so leave through the door.
3.2 Compass


Back in this room, hop down onto the platform with the Deku Flower and use it to fly to the area on your right with the gold-lined chest. Open it to get a Small Key, which you will use soon.
If you are playing the Nintendo 64 version of the game, look just to the left of this chest at the northwest corner of the room and you’ll see a beehive against the wall. Use the Deku Mask to shoot it with a bubble, knocking it down into the poison water, revealing the fifth Stray Fairy which was hidden inside. You can get it by either wearing the Great Fairy Mask or using the Deku Mask and simply jumping into the water (you’ll reappear without taking damage that way). With that, go back through the west door. NOTE: If you are playing the Nintendo 3DS version of the game, this Stray Fairy is still within this room, but it is on the higher level and is more accessible at a later point. This will be explained later.


Jump back across the Carnivorous Flowers, killing the Deku Baba again if you wish. If you don’t have a Deku Stick at this point, go up the ramp and kill the Withered Deku Baba to get at least one, then enter the locked door.


As you run forward, Tatl will give a brief explanation of how to move blocks. Grab this one (which has a Majora’s Mask symbol on it because…?) and push it forward to gain access to the rest of the bridge. Take the right path and follow it around to face off with a Skulltula, which will leave behind a Stray Fairy when defeated.


If you look at the torch here, you’ll see a few new enemies called Moths. These flying creatures will follow any flames, meaning if you light a Deku Stick, (as you’ll do in a moment) they’ll follow after you and hurt you. You can actually kill them by laying a Bomb down (they’ll fly over to it) or standing next to the torch and using the Blast Mask. Once you’ve killed them, continue along the bridge and push the block again so it’s blocking the door we entered from. Now we have a little torch puzzle, which will require us to use some Deku Sticks (which you can get in the previous room). Set them to a button and whip one out, then touch the nearby torch in the corner to light it. Quickly run to the far south part of the room and light the torch here, which will unbar the door. Slash your sword to stop using the Deku Stick (and make the Moths leave you alone if you didn’t kill them) and enter the door.


You’ll need to kill the two Dragonflies here, and you can do so by shooting bubbles at them in your Deku form, or you can lure them into attacking, dodge, then slash their tail with your sword. Either way, once they’re both defeated, a large chest will appear containing the Compass.


3.3 Hero's Bow


NOTE: If you are playing the Nintendo 64 version of the game, you may have seen a Stray Fairy underneath the block in the center of the room. While you could get it now, it becomes much easier at a later point in the dungeon. In the Nintendo 3DS version, this Stray Fairy does not exist at all, and instead, there is an additional Stray Fairy in a later room.
In the center of the room, look up and you’ll find a pair of beehives. Use a bubble to shoot down the beehive closer to the south end of the room and a Stray Fairy will appear. In the Nintendo 64 version, you will have to return to this room later and collect the beehive fairy, as it is easier to get then.


Before you do this next part, you should kill the Moths again. Light a Deku Stick and run forward, which will lure them over to this side of the room. Once they’re fairly close, slash your sword to stop using the Deku Stick. The Moths will then fly to the closest torch (the one on this side of the room). Toss a Bomb onto the floor or use the Blast Mask next to them to defeat them. Now, light a Deku Stick on this second torch (near the south door you just came out of) and run up the stairs to your left and light yet another torch. At this point, it is recommended that you slash your sword so you can get your bearings. You can jump across the platforms to slash some jars if you are in need of health.


If you have the Bunny Hood, it would be smart to put it on at this point. When you’re ready, light another Deku Stick and jump across the platforms, touching the spider web to the north and burning it. Slash your sword to stop using the Deku Stick, then kill the Deku Baba and Withered Deku Baba for extra goodies. Run up the stairs.

As you enter, the light will fade and you’ll find yourself surrounded by Boes. It is best to wear the Deku Mask and spin through the room to kill them all. There are four near the entrance, three near the middle, and two next to each of the three unlit torches in the corners of the room. After they’re all defeated, a large chest will appear to the south, which you can open to find the eighth Stray Fairy. Next, light a Deku Stick on the torch in the middle of the room and run around lighting the three unlit torches in the room. This will open the door to one side, so go through it.


In this room, there are tons of pits at the bottom that lead down to the main room if you fall down them. Obviously, you want to avoid them, however, next to them are patches of grass that you can slash to find Magic Jars (bubble ammo essentially). NOTE: At the northeast corner of the lower level, there is a Stray Fairy just floating around. This fairy is only available in the 3DS version of the game, as it replaces a Stray Fairy that was in the block-pushing room in the Nintendo 64 version.
The upper part of the room contains two platforms with Deku Flowers and some Dragonflies. Fly to the first platform, which simply goes back and forth, and try to kill the Dragonflies from here. It can be frustrating since they rarely come towards you here, but flying can be deadly since it will probably lead to lots of backtracking on your part. It is fine to waste a bunch of your magic on bubbles here simply to assure you aren’t taken down mid-air. NOTE: In the Nintendo 64 version, these platforms will always be moving, whereas in the Nintendo 3DS version, they will only start moving once Link has landed on them. Once the Dragonflies are defeated, fly to the second platform, which follows an “L” shape, then fly to the final platform and go down the stairs.


You’re back in the main, poison-filled room, but this time on an upper level. Run straight forward and step on the floor switch (without wearing the Deku Mask) to create some ladders, making a shortcut. Enter the door next to you (east).


NOTE: If you are playing the Nintendo 3DS version of the game, once you enter this room, now on the higher level, immediately turn around and look back at the door. You’ll find a beehive right nearby. Take it down it with a bubble and grab the Stray Fairy that appears. In the Nintendo 64 version, this beehive was on the wall on the lower floor of this room.


Run to the south and enter the door that’s begging to be investigated.

This new enemy is called a Dinofols, and it will occasionally slash at you with its sword, so defending with R is always a good idea. Get close and slash at it yourself, causing it to do one of two things: if it’s cornered, it’ll jump over your head and slash at you, or if it has room, it’ll jump back and breathe fire. The flames are fairly easy to avoid, but be warned: if you get burned in your Deku form, you’ll have to start the battle all over again! There are a few different ways to go about defeating a Dinofols.
Z- or L-target and get close. Wait for it to slash its sword, then hold forward on the Analog Stick and stab with B. Wait for it to stop breathing fire and repeat.
Z- or L-target and face it so that it has plenty of room behind it, walk right up to it while defending and stab with B once you’re very close. Run up to it immediately and stab it again before it can breathe fire. Repeat.
Spin right into it with A, stunning it. Tap the B button to blow a bubble. At this point, you can either try to stun it before it can breathe fire, or back up and do it again once it’s done.
Deku Nuts will stun it and you should have plenty of those at this point, so don’t hesitate to use them. You can lay Bombs down and lure it into them or simply wear the Blast Mask, hold R and explode right in front of it.


Once it’s defeated, open the large chest here to receive the Hero’s Bow and the Quiver. With those spiffy things in hand, return to the previous room.
3.4 Boss Key


If you look across to the other side, you’ll see another door that you still can’t reach. However, just below it is a strange, golden diamond shape with an eye on it. Shoot the eye switch with the Hero’s Bow to make the platform in the middle with the Deku Flower on it start rising up and down. Hop down onto one of the Carnivorous Flowers and hop onto the Deku Flower once it’s low. Dive into the flower and fly to the northern door once you get the chance.
As soon as you enter, you’ll immediately be faced with another Mini-Boss. Two in a row? Yes indeed!

When you first enter the room, Gekko will jump towards you and try to punch and kick you repeatedly. As long as you don’t sit still, this shouldn’t be a problem. Smack it it with your sword or shoot it with a few bubbles to move onto the next phase of the battle.
It yells out to summon a Snapper which it will then fight alongside. This is a slightly larger and hardier version of the Snapper than you have previously seen. Luckily, you can harm it the same way as the others, and you can use R to defend if you ever feel threatened. There are a few different options: you can use the Deku Mask to dive into the Deku Flowers throughout the room, popping out as the Snapper spins over you, you can throw Bombs at the two of them, or you can wear the Blast Mask and blow up while standing next to them.


Whichever you choose, this will cause Gekko to fall off and start climbing around the walls, stopping occasionally. Take off the Deku Mask if you’re still wearing it, face towards Gekko and use Z (or L) to lock on. Wait for it to stop moving and shoot it with an arrow, causing it to hop back on the Snapper. Repeat this process three times to defeat Gekko.


Once Gekko is defeated, it will revert back into a frog. You should remember this fact for a later quest. Go into the small room that is now open and get yourself the Boss Key. Smash the jars to recover some health, magic and arrows, then leave the room.
3.5 Cleansing the Poison
Fly over to the door on the second level to your right to return to the large room in the middle of the dungeon.
Climb up the ladder to get to the second level (if you aren’t there already) and stand next to the floor switch (which should already be pressed down). You’ll see that you can Z-target something in the middle of the wooden flower, causing Tatl’s button to flash. If you listen to her, she’ll point out that it is a torch. There’s also a lit torch in your line of sight. Hmm… Use the Hero’s Bow to aim at the shrine and shoot an arrow through the flames to light the torch on the wooden “shrine.” This will cause it to rise and become an odd contraption that cleanses the water of poison throughout the temple, meaning you can safely swim now. Sweet! It’ll then extend into a rotating platform, giving you another shortcut of sorts.


Go to the north end of the room and jump to the spinning wooden platform. Stand next to the torch in the middle and use your Hero’s Bow. Face towards the northwest corner of the room, where there is an unlit torch on a skinny platform. When you’re on the opposite side of the burning torch, shoot an arrow through it to light the torch in the far corner. This will open the door leading to the final area of the dungeon.

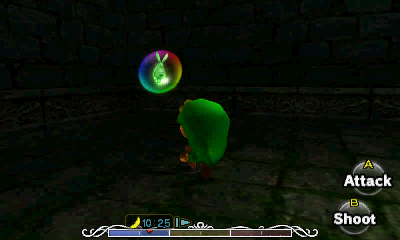
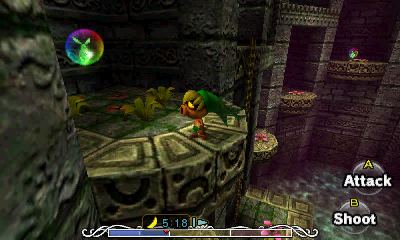
Before you move onward, there are several Stray Fairies you can collect. On the north side of this upper platform, you’ll find the tenth Stray Fairy trapped in a bubble. Touch it or slash it with your sword to release it, then collect it. Put on the Deku Mask and dive into the nearby Deku Flower. Aim to the west side of the room (where there is a torch) and fly over to that platform. Drop down onto this small area and take off the mask to press down the floor switch, causing a large chest to appear on the opposite side of the room containing the eleventh Stray Fairy.


NOTE: If you are playing the Nintendo 64 version, there are two Stray Fairies that have been skipped over. They will be covered now. Enter the west door (next to the Deku Baba). Push the block in the middle of the bridge forward, then use the Bow to look upwards. The platform just above the block has a beehive hanging from it. Shoot it down to reveal the a Stray Fairy. Run to the north side of the room (next to the torch and door leading to the Compass Room), then turn around and look under the bridge. Just under the block is the Stray Fairy trapped in a bubble. You can either shoot it with an arrow and wear the Great Fairy Mask or simply jump into the water and swim into it, now that the water is cleansed. With that, return to the previous room.


3.6 Temple Boss
Now that you have some goodies out of the way, return to the main room in the middle of the dungeon. At long last, enter the northern door that leads to the final area of the dungeon.


Before doing anything, it is recommended that you shoot the two Dragonflies in this room to prevent them from becoming a nuisance later on. Climb down the ladder and use the Deku Flower to get to the east (right) alcoves. Keep using the Deku Flowers to work your way up, collecting the twelfth and thirteenth Stray Fairies. Fly over to the west (left) side now and work your way up those alcoves as well, getting the fourteenth Stray Fairy. The final one is trapped within the flames in the middle, so shoot it with an arrow to release it, then either wear the Great Fairy’s Mask or fly into it to collect the fifteenth Stray Fairy.


You may want to fly to the middle alcove on the west (left) side, since it makes this next part a bit easier. From here, shoot the Crystal Switch on the far west (right) side of the room, temporarily making the flames disappear – they’ll come back in a moment, so be quick! Fly to the platform just ahead on your left, then fly across (potentially flying through the Stray Fairy if you didn’t collect it yet) and use the Deku Flower on the second pillar to get on top of the far east platform.
There are some rupees throughout this room, but getting them can be a bit of a hassle and requires some backtracking. Pick them up if you so please, then use the Deku Flower to fly to the large platform to the far north. Slash the bushes here to stock up on goodies, then once you’re ready, enter the boss door.


NOTE: This boss battle has drastic differences in the Nintendo 64 and the Nintendo 3DS version of the game. The Nintendo 64 strategy is listed first, whereas the Nintendo 3DS strategy is further below. It’s worth noting that while the Nintendo 64 version does present quite a challenge for a first dungeon boss, the Nintendo 3DS version is laughably easy.
Odolwa has a very large sword. As one might guess, he uses it often, and because of it’s long range, it makes it particularly hard to get close. Note that even when he’s not swinging it, you can still take damage if you come in contact with it. Whenever you see him prepare to slash his sword, try to quickly defend with R to deflect his attacks.


Obviously, you’ll need to get close to Odolwa in order to damage him. To do so, Z target him and shoot him with arrows. In general, he’ll defend with his shield, but if you do it while his guard is down (such as just before he attacks) or while he’s in a different stance (chanting or dancing), then you will stun him. Run in and slash him to deal damage.
After hitting him with your sword (or slashing your sword near him and missing), Odolwa will jump in the air and try to land behind you. If you have him Z-targeted, it makes it easier to keep track of him. When he lands, he will slash his sword if you are close or perform a rushing-forward attack if you are at a medium distance. Because this reaction is so predictable, you can do it on purpose to get him right where you want him! Slash near him to make him teleport, keep at a medium distance, strafe to the left or right, then use an arrow or Jump Attack to harm him, followed by yet another attack.
Odolwa has three different chants that he will perform, and each can make your life miserable. The rarest of his summons is boulders which don’t hit very often and are relatively harmless. The other two are a little more intense: Moths, which sounds like “Aw-law, aw-law!” and crab-beetle things which sounds like “Aw-ha-die, aw-ha-die!” The beetles can be killed to get Recovery Hearts, so you may want to let him summon those, but the Moths will follow you for awhile and deal damage. You can kill either by throwing a Bomb, which will attract the insects and explode, killing all of them at once. You can also use the Blast Mask and explode once they surround you, or use the Bomb Flowers that are against the walls. Alternatively, however, you can simply shoot Odolwa with the Hero’s Bow, since he is vulnerable while chanting. This will not only stop him from summoning, but stun him as well!


Odolwa has two other attacks: The first is to form a flaming wall around you, which keeps you from leaving for a while. This will also kill his summons if they touch it, but be very careful not to touch it in your Deku Form, or you’ll have to start the battle over again! The other attack he uses eventually is a spinning move that lasts for quite a while and is rather hard to avoid. Z-target him and defend with R to deflect it until it stops. If you can manage to back up far enough, you can shoot him while he’s spinning to stun him.
Remember, if you run low on arrows, slash the bushes against the walls for more. If you run out of Bombs or don’t have the Blast Mask, use the Bomb Flowers to kill Moths he sends after you.
There is a yellow Deku Flower in the middle of the room. It is possible to use it to harm Odolwa, but it’s very rare that he comes over it, so you should likely just avoid it (since you’ll get caught on it while Z-targeting – very annoying). While in Deku Form, you’re too short for the Moths, but you will also die and have to restart the battle if you touch (or get knocked into) Odolwa’s flaming wall. Because of this, using the Deku Mask is not recommended. You can, however, use A to spin into Odolwa and stun him (which is very effective).


Z-target him, get your Bow ready and move closer. When he raises his sword to strike you, shoot him with an arrow, which will stun him. Slash away with your sword. It’s actually very quick and very simple to harm him this way. If he teleports and jumps to the other side, simply strafe to either the left or right, then shoot him in the back after he rushes towards you (and misses), then slash him some more. Alternatively, you can use the Bunny Hood without Z-targeting in order to move very quickly.
When he summons things, either shoot him as soon as possible to stop him, or stay far back and wait for him to finish, then throw a Bomb and gather the recovery hearts that his summons leave behind. If you run low on arrows or Bombs, use the stuff on the sides of the walls. Just keep repeating these simple steps and after about 20 sword slashes, Odolwa will be defeated.


In the Nintendo 3DS version, the room is littered with Deku Flowers. Furthermore, the exterior of the room has small plants that can be slashed to acquire some Deku Nuts. The big difference in the 3DS version of the game is that Odolwa has a massive eye on the back of his head, indicating his weak point. Turn into Deku Link and use any of the nearby Deku Flowers. Launch yourself into the air and hover over Odolwa. Press R to see what is directly below you launch a Deku Nut while you are just above the boss’ head, which will stun the enemy and bring him to the ground.
Quickly switch out of Deku Link form and run over to the massive eye on the back of Odolwa’s head. Release a fury of sword slashes to deal some damage. That is about all there is to this battle. Just repeat this same process until Odolwa has been defeated.


Once he’s been defeated, he’ll disintegrate into blue flames and leave behind your first Heart Container. Pick it up to extend your life by a whole heart, then step into the blue light in the center to get Odolwa’s Remains. This has benefits in a little while, especially if you miss some things after completing the temple.
You’ll then be taken to a misty world in a perpetual bubble bath. The floating bubbles are called Shabom, though they aren’t an enemy like they were in Ocarina of Time. Link and Tatl will gaze around, noticing the Giant staring at them in the distance. The torso lacking fellow was apparently sealed within the mask of Odolwa, and now that it has been freed, it is willing to help you. You will then learn the Oath to Order from the Giant. This song doesn’t come into play until much later in the game, but with this new tune in hand, you’ll be sent on your merry way.


- Chapter 1 – First Three Days
- Chapter 2 – Southern Swamp
- Chapter 3 – Woodfall Temple
- Chapter 4 – Collection
- Chapter 5 – Snowhead
- Chapter 6 – Snowhead Temple
- Chapter 7 – Spring, Romani Ranch, Ikana Graveyard
- Chapter 8 – Great Bay & Zora Cape
- Chapter 9 – Great Bay Temple
- Chapter 10 – Ikana Canyon
- Chapter 11 – Well & Ikana Castle
- Chapter 12 – Stone Tower Temple
- Chapter 13 – The Moon
