- Chapter 1 – Zelda’s Rescue
- Chapter 2 – Eastern Palace
- Chapter 3 – Desert Palace
- Chapter 4 – Tower of Hera
- Chapter 5 – Hyrule Castle Tower
- Chapter 6 – Dark Palace
- Chapter 7 – Swamp Palace
- Chapter 8 – Skull Woods
- Chapter 9 – Gargoyle’s Domain
- Chapter 10 – Ice Palace
- Chapter 11 – Misery Mire
- Chapter 12 – Turtle Rock
- Chapter 13 – Ganon’s Tower
12.1 Overworld Goodies
With both the Ice Palace and Misery Mire now completed, there are a few goodies that you can now collect in the overworld. Your first destination is the Bomb Shop found within the Dark World, found where Link’s house was in the Light World. Travel to this location and enter the shop.


The Super Bomb is now available for purchase for 100 rupees, so go ahead and buy it. The large bomb will follow behind you as you walk. Link cannot jump off ledges or use the Pegasus Boots while the bomb is following him, as it will cause the bomb to begin to detonate.
Link will need to guide the Super Bomb to the Pyramid of Power, located in the center of the map. On the left side of the pyramid there is a large crack in the wall, and if Link drops the Super Bomb here, it will blow open a hole.


Enter the hole to find a secret fairy fountain. Toss in your Tempered Sword and state that you did drop the item. The fairy will reward you with the Golden Sword, the most powerful sword in the game. Furthermore, toss in your Arrows to get the Silver Arrows. Lastly, you can toss in an empty bottle and the fairy will return a bottle filled with Green Potion.


Return to the Light World and use the Flute to warp over to Death Mountain. From the warp point, travel eastward a screen to reach the broken bridge. Use the Hookshot to get across the gap and then head to the south end of this area, where you fill find a rock. Lift it and then walk into the warp portal leading to the Dark World.


There are two caves that Link can enter at the top-right part of this area. Enter the cave on the left and climb the staircase to the left. Walk down the pathway and fall down the hole. Push the block upward and climb back up the nearby staircase. This time, fall down the hole that is to the right.


Climb the steps on the right side and then fall down the hole at the bottom of the screen. Push the blocks out of the way to reach the treasure chests if you’d like, obtaining some bombs and extra rupees. Climb the steps to the left and follow the pathway out of the cave.


Back outside, lift the large rock and head down the steps. There are some extra rupees in this cave if you’d like to get them, but nothing of importance. At the top of the pathway, it appears like Link will just fall off a cliff, but there is a secret ledge. If Link uses the Ether Medallion, the pathway will be illuminated. Cross the gap and use a bomb against the northern wall.


In the next room you can bomb the wall above to reach a fairy fountain if you’d like, and then bomb the wall to the left to exit the cave.


Back outside, use the Magic Mirror to return to the Light World. On this island, Link will find a Piece of Heart. Grab it and then return to the Dark World.


12.2 Finding the Dungeon
In order to gain access to Turtle Rock, you will need to have the Quake Medallion. The Quake Medallion can be found at the Lake of Ill Omen, which is the Dark World counterpart of Zora’s Waterfall.
Return to Death Mountain and make your way up to the Tower of Hera. From there head eastward to get to the far northeast corner of the map. On this screen, grab the large rock and climb the steps. There are three stakes here, and Link will need to pound them in the proper order. The order is right, up, left. This will create a warp portal, so step in to get back to the Dark World.


Stand above the quake symbol and use the medallion. This will cause the entrance to Turtle Rock to reveal itself. Jump off the ledge and enter the dungeon.


12.3 Turtle Rock
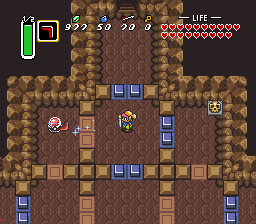
Lift the pots to fill up your magic and then use the Cane of Somaria on the question mark above, creating a movable platform. Step onto it and ride the platform northward, continuing onward to the next room.


Use the cane once again to create a platform and ride this around the room. Whenever you come to a point where the platform can change direction, hold the direction in which you’d like to go and the platform will move that way. Make your way to the northeast corner of the room and head right a screen.


Create a platform and ride it southward. There are four torches in this room and you’ll need to use the Fire Rod to light them all. However, you don’t want to light them right away, as they will go out after a period of time. You shouldn’t use the Fire Rod until you are at the inner-portion of the track. After all four torches are lit, quickly run to the door and head up a screen.


In this room you can stay against the walls to avoid getting hit by the rolling trap. Alternatively, you can just use your Magic Cape and walk right through it. Make your way to the north end of the room and open the treasure chest on the right to get a small key.


Backtrack down and left a screen to get back to the large open room. Use the cane to create a moving platform, and this time, travel to the northwest corner of the room. Use the small key on the locked door and head up a screen.


The enemy in here can be defeated with a single shot with the fire rod. Alternatively, use your sword and knock its body parts out one at a time. Grab the key and head up a screen.


The enemy Chain Chomps here are quite damaging, and the best way to avoid them is to use the Magic Cape if you have it. Use the Boomerang or the Hookshot to hit the crystal switch while at the lower half of the room. This will lower the blue blocks, so quickly run to the southeast part of the room. Push the lone block to the left, causing a treasure to appear. Hit the crystal switch again and run over to open the treasure to find a small key. Unlock the door and head to the floor below.


Make your way to the southeast part of the room and climb the steps. Walk into the tunnel and it will take you to the northwest corner of the room. Walk through the door to the left.


Take the right of the two tunnels and then head left to the next room. There are a number of enemies found in this room, but the bouncing enemy, known as a Hokkubokku is the one you need to kill. Grab the small key that it drops and then head through the locked door. You’ll have to be quick though, as the eye above will shoot lasers at you.


Take the tunnel and open the treasure chest here to get the Big Key. Take the next tunnel and head back right a screen. Go through the tunnel here to return once again to the southeast part of the room. Go through the tunnel and head back left a screen.


This time take the tunnel that is to your left and then head down a screen. Defeat the enemies and then head down and left a screen. Here you will find a number of eye beams shooting lasers. Carefully run and drop a bomb against the southern wall and then head through the opening to get outside.


Walk to the right, but before going into the cave, use the Magic Mirror to return to the Light World. Here you will find a cave which you previously were unable to reach, so head inside.


Inside you will find four Goriya enemies. Use your sword and arrows to defeat them, and then head up a screen. Here you will find what is the final Piece of Heart in the game. Walk back outside and step into the portal to return to the Dark World. Then re-enter the dungeon from the right side.


Hookshot across the gap and open the large treasure chest to get the dungeon item, the Mirror Shield. Walk up a screen and then head through the locked door above. Step into the tunnel and then head up a screen.


Use bombs to blow up the pathways leading up and to the right. The path to the right just leads to a room filled with rupees. Grab those if you’d like and then take the path northward. Use the Bow or Boomerang to hit the crystal switch, then run over and open the chest to get a small key. Hit the switch again and go through the locked door.


Use the Cane of Somaria on the question mark to create a platform. Once you step onto the moving platform, go to the right and then immediately turn southward. Hold down so you always take the southern pathway at each fork. You will reach a central platform that has a skull. Lift it and step on the floor switch. Be sure that you only step on the floor switch once.


Get back on the moving platform and ride it to the far left part of the room, and then head southward to the southwest corner. You will see the question mark which signifies the end of the pathway. Make a note of the pathway from the question mark and follow it eastward as you travel on the moving platform. Once you see your opening, turn northward and then westward, gliding your way to the doorway at the bottom left portion of the room.


In this next room you can use the Pegasus Boots to quickly dash southward, defeating the lone enemy along the way. Be careful not to fall off the ledge at the end. Continue down to the room below. Once again, travel southward and at the very end of the room, use a bomb to blow open a hole. Step through the door to appear back outside.


Re-enter the dungeon. The whole purpose of this is that now if you use the Magic Mirror, you will appear at this new dungeon entrance. Furthermore, if you die at the upcoming boss, you will appear here instead of the very beginning of the dungeon. From the bottom of the room, take the first path to the left. The Mirror Shield will be able to block the large lasers that are shot your way. Open the treasure chest to get a small key. If you just were outside, you can use the Magic Mirror at this point to quickly get to the south end of the room. Run back up a screen and go through the locked door to the left.


Make your way through this maze, hitting the crystal switches with the Boomerang along the way. Use Magic Powder on the Anti-Fairies to get some extra health and then head down the stairs at the top of the screen.

In this last room, use the Cane of Somaria on the question mark to create a platform. Be sure to lift the nearby pots to fill up your magic and then ride the platform northward. Walk through the locked door to take on the dungeon boss, Trinexx.


Trinexx has three heads, and at the start of the battle, the two smaller elemental heads will attack Link. The red one on the left will shoot fire out towards Link, while the blue head will shoot ice. The blue head in particular is quite the threat, as while it will not harm Link, it will spit out ice that permanently sticks to the ground, making the floor slippery.


Additionally, the large central head of Trinexx will occasionally extend its massive neck out towards Link, doing a considerable amount of damage. You can see this attack coming as Trinexx will start to wag his tail quite rapidly.


Link will need to use the Fire Rod to hit the blue head, stunning it for a period of time. Follow it up with a number of sword strikes until it starts moving again. Repeat this process to defeat the blue head. Link will need to use the Ice Rod to hit the red head, which works in an identical fashion as the other head. Repeat this process until both heads have been defeated.


Trinexx will break out of its body and start to float around the room, moving in an oval pattern. The center boulder of its body will flash, indicating its weak point. Move around the room to avoid his attack, and when you get a chance, slash at his body. Repeat this process a number of times until Trinexx has been defeated.


After Trinexx has been defeated, be sure to grab the Heart Container to increase your total health and then grab the Seventh Crystal to speak with the final maiden.


- Chapter 1 – Zelda’s Rescue
- Chapter 2 – Eastern Palace
- Chapter 3 – Desert Palace
- Chapter 4 – Tower of Hera
- Chapter 5 – Hyrule Castle Tower
- Chapter 6 – Dark Palace
- Chapter 7 – Swamp Palace
- Chapter 8 – Skull Woods
- Chapter 9 – Gargoyle’s Domain
- Chapter 10 – Ice Palace
- Chapter 11 – Misery Mire
- Chapter 12 – Turtle Rock
- Chapter 13 – Ganon’s Tower
