- Chapter 1 – Zelda’s Rescue
- Chapter 2 – Eastern Palace
- Chapter 3 – Desert Palace
- Chapter 4 – Tower of Hera
- Chapter 5 – Hyrule Castle Tower
- Chapter 6 – Dark Palace
- Chapter 7 – Swamp Palace
- Chapter 8 – Skull Woods
- Chapter 9 – Gargoyle’s Domain
- Chapter 10 – Ice Palace
- Chapter 11 – Misery Mire
- Chapter 12 – Turtle Rock
- Chapter 13 – Ganon’s Tower
11.1 Overworld Goodies
After completing the Ice Palace, we can head directly to the next dungeon, Misery Mire. Note: you will need to have already acquired the Ether Medallion to progress. If you haven’t done so, you can find it just west of the Tower of Hera atop of Death Mountain.
Return to the Light World and play the flute, warping over to the 6th warp spot within the Desert. Lift the large rock here and step into the portal to reach the Dark World.


Walk northward and you’ll be just outside of the dungeon. You will see the Ether Medallion symbol on the ground. Stand right on top of it and use the medallion to reveal the dungeon entrance. Step right in to tackle the next dungeon in the Dark World, Misery Mire.


11.2 Misery Mire
Misery Mire is a dungeon that has a number of completely optional rooms and there are a number of ways to progress through the dungeon. This guide will take Link through the quickest way, while avoiding any unnecessary rooms, as well as skipping getting optional items such as the Map and Compass.
In the first room, use the Hookshot to get across the gap and then head down the steps. There are a number of Wizzrobes and Popos in this room, as well as an enemy Beamos. The Wizzrobes will disappear and can only be harmed when they are fully visible. Carefully defeat all the enemies and head up through the door.


In this central chamber, climb down the steps and make your way through the maze to the northeast corner of the room. Climb the steps and head up a screen. Push the lone block to the left and then head up a screen. Continue up another screen and run northward to reach a treasure chest containing a small key.


Backtrack three screens to get to the large central chamber once again. This time make your way to the northwest corner of the room and climb the steps. Walk to the southwest corner and use the small key on the locked door.


Defeat the Blue Bari in this room as it will drop a small key and then use it to head through the locked door to the left. Ignore the floor tiles and head down a screen. Quickly run around the room and climb down the steps to get to the floor below.


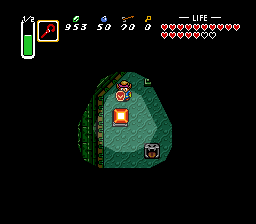
In this room, along with the room below, there are four torches. You’ll first need to push the blocks out of the way, giving you quick access to the torches. Push the top and bottom blocks in, and then push the middle block either up or down, giving you a pathway. With all four blocks pushed out of the way, use the Lamp to light all four torches.


With all four torches lit, walk to the right a screen and the large wall will have moved. Fall down the gap on the right side of the room to get down to the floor below. Open the treasure chest to get the Big Key.


Now that we have the Big Key, it is time to get the dungeon item. Walk left a screen and step into the warp portal. Walk right, down, and right a screen to get back to the main chamber. Climb down the steps to get to the lower floor and make your way back to the southeast corner of the room. From here climb the steps and head right a screen.


Pull out your hookshot and walk right a screen. Use the hookshot on the block across the gap and then quickly run northward. If you aren’t fast enough, the floor will crumble and you’ll have to do it again. At the top of the room, open the big chest to get the Cane of Somaria.


Walk left a screen and if the blue blocks are lowered, head up a screen. If the blocks aren’t lowered, jump off the ledge, climb the steps and head back left a screen to the main chamber. Return to the northeast part of the room, walk up a screen, and then right a screen.


Lift the pot at the top-left to find a small key and then head through the locked door. Jump off the ledge and head left a screen. Climb the steps and use the big key to get through the locked door. Run down the pathway and climb down the steps at the end of the hall.


This room is dark and fireballs will constantly be shot towards Link. Walk to the left side of the room and lift the pot to reveal a floor switch. From here, use the Cane of Somaria to create a block on the switch, opening the nearby door.

Avoid the enemies and continue left a screen. Carefully maneuver around the blade trap and make your way to the left side of the room. Walk upward and you will see a crystal switch across the gap. Make sure it is red and then head through the door at the southwest part of the room.


Use a bomb to blow open a hole at the top of the room and head through. Slash at the crystal switch to turn it blue and then head back down a screen. With the blue blocks lowered, head left through the door.


Run to the top of the room and hit the crystal switch so that it turns red. Climb down the steps to get to the lower floor. Walk across the lowered blocks and open the locked door to take on the dungeon boss, Vitreous.


During the first phase, Vitreous will send out eyeballs towards Link that can be quite damaging. Even with the tempered sword, these eyeballs take six hits to defeat. The alternative way to defeat these small eyeballs is to hit them three times with arrows. It is more difficult to use the arrows, but one benefit is that you can hit the eyes that are next to Vitreous.


Be careful as during this phase, Link is limited to the bottom half of the screen. Whenever Vitreous turns white, he is about to shoot lightening towards Link, so quickly run to either the left or right side of the room.


During this first phase of the battle, if you have the Cane of Byrna, you can use it and just repeatedly slash over and over. Even if you don’t have the Cane, as long as you slash rapidly enough, the eyes shouldn’t give you too much trouble.
After all but the four non-moving eyes have been defeated, Vitreous get up and start bouncing towards you. During this phase it will take 16 slashes with the Tempered Sword to defeat Vitreous. The much more efficient way to defeat this boss is to hit it with 8 arrows. Just stand directly south of Vitreous, aim northward, and repeatedly shoot arrows.


After Vitreous has been defeated, be sure to grab the Heart Container to increase your total health and then grab the Sixth Crystal to speak with the Maiden.


- Chapter 1 – Zelda’s Rescue
- Chapter 2 – Eastern Palace
- Chapter 3 – Desert Palace
- Chapter 4 – Tower of Hera
- Chapter 5 – Hyrule Castle Tower
- Chapter 6 – Dark Palace
- Chapter 7 – Swamp Palace
- Chapter 8 – Skull Woods
- Chapter 9 – Gargoyle’s Domain
- Chapter 10 – Ice Palace
- Chapter 11 – Misery Mire
- Chapter 12 – Turtle Rock
- Chapter 13 – Ganon’s Tower
