- Chapter 1 – Zelda’s Rescue
- Chapter 2 – Eastern Palace
- Chapter 3 – Desert Palace
- Chapter 4 – Tower of Hera
- Chapter 5 – Hyrule Castle Tower
- Chapter 6 – Dark Palace
- Chapter 7 – Swamp Palace
- Chapter 8 – Skull Woods
- Chapter 9 – Gargoyle’s Domain
- Chapter 10 – Ice Palace
- Chapter 11 – Misery Mire
- Chapter 12 – Turtle Rock
- Chapter 13 – Ganon’s Tower
8.1 Overworld Goodies
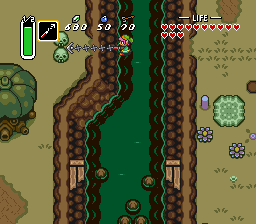
The next dungeon is located at the northwest corner of the Dark World. There are a few different ways to reach this part of the Overworld. Just to the northeast of the Pyramid of Power, there is a broken bridge. With the Hookshot, you can use a rock to reach the north end of the Dark World.

However, if you are doing the dungeons out of order, there is a second way to reach this part of the Overworld without the Hookshot. To do so, make your way to Kakariko Village in the Light World. Walk to the northwest corner of the town and head north until you enter the Lost Woods. Once you enter, immediately turn to the right and then exit the Lost Woods to the south. Walk southward and use the Magic Hammer to hit the stakes. You can then lift the rock to enter the Dark World.


Now that you have both the Hookshot and access to this part of the Dark World, there is one additional Piece of Heart that you can get. Make your way to the cave that leads to Death Mountain. In the Dark World, this cave is in the same place, although it leads somewhere else.


Inside the cave, make your way to the top floor and you’ll see a gap. Use the Hookshot across the gap to latch onto one of the skulls. Just south of the skull, there is a Bumper that is blocking the way. Use the Magic Cape and walk directly through the Bumper. Exit the cave and grab the Piece of Heart.


It’s now time to make our way to the fourth dungeon, Skull Woods. Unlike most dungeons in this game, Skull Woods contains an overworld component.
8.2 Skull Woods
There are three different indoor sections of the Skull Woods. Unlike most dungeons, the vast majority of the dungeon never needs to be visited. Make your way over to where there the 9 bushes are arranged in a 3×3 pattern. From here, head northwest following the pathway. Cut back southward and enter the dungeon at the skull mouth.


Defeat the two Blue Baris that you encounter, as well as the two Gibdos. The Gibdos in particular can be quite difficult to defeat as they have quite a bit of health. One strategy is to simply use Bombos once, and it will defeat all four enemies in the room. Also beware of the Wallmaster that drops from the ceiling. If he catches Link, he’ll take him back to the entrance of the room and the enemies will reappear.
Lift the skull pot that is in the center of the room. Link will need to pull the statue from the right side of the room onto the switch, which opens the door above. Since you’ll have to pull the statue upwards rather than pushing it.


In the next room there is another collection of enemies. Once again, it is easiest to use Bombos to defeat all of them at once. Open the treasure chest for the Big Key. If you want to fill up your magic meter, you can bomb the wall to the right which leads to a pot that contains magic. Afterward, use the Magic Mirror or allow the Wallmaster to catch you, sending you back to the entrance.


Exit this part of the dungeon and head back northward. Make your way to the arrangement of 9 bushes and slash at them. There is a secret entrance underneath the center bush. Drop down to enter the next part of the dungeon.


Lift one of the pots and toss it at the Helmasaur to defeat it. You might want to get rid of the Hardhat Beetle in the room as well, since it can be quite annoying. There is a cracked wall on the left side of the room. Go ahead and use a Bomb to blow it open, and then head left a screen.


There are some large holes in this room, but if Link walks along the right wall and then the south wall, he can avoid them. Walk to the center of the room and pull the lever, causing the wall below to explode.


Defeat the two Mini-Moldorms here and then open the large treasure chest to get the dungeon item, the Fire Rod! Pull out the Hookshot and use it to reach either of the two statues at the south end of the room. Afterwards, exit through the south door.


Once again walk northwest down the pathway and enter the skull mouth as you did to start the dungeon. This time, head through the door to the west and continue left two screens. Lift the pot at the top-left part of the room to grab a small key. Although there is a locked door here, we don’t want to use it here, as it is better used in the next part of the dungeon. Go ahead and exit through the door to the south.


Back outside, walk up the path on the left side and you’ll see a strange looking structure. Pull out the Fire Rod and light up the front of what looks like a nose. This will cause most of it to burn, opening its eyes, and revealing an entrance. Go ahead and enter the final portion of this dungeon.


If you do not have an extra key, you’ll have to head down the stairs on the left and go through a long winding maze to reach a treasure chest with a small key. However, since you acquired one from an earlier part of the dungeon, you can just head north through the locked door.


This room has a number of floor stars. When Link steps on them, the arrangement of the holes on the ground will change. There is also a trio of Baris, as well as a Wallmaster, so be careful. You can cut diagonal corners and carefully walk over the edges of the holes if you’d like, but it is risky. Otherwise, just make your way around the room. Walk to the center of the room, then bottom-left, then top-left, then the four near the top-right, the top-right corner, and then head right a screen.
There are a number of Gibdos in this room, and it is a good idea to get rid of them before progressing. Bombos can defeat them all at once, or you can use the Fire Rod to defeat them with a single shot. There is some extra magic underneath the pots on the right side of the room. In order to progress, Link will need to light the four torches in the room. The bottom three can be lit with the lamp, but you’ll need to use the Fire Rod to light the fourth torch. Once all four are lit, head through the door that opens.


There are a variety of enemies found within this room. You can defeat all of them by using the Bombos medallion, or you can just avoid them. Afterward, slash the wall at the north end of the room to reveal a passage to the next room. There are four more enemies found here, and the Gibdo in particular is holding a small key. Defeat them all, grab the key and head right a screen.


There are two skull pots in this room. One of them contains some magic, so be sure to grab that as you’ll need it for the boss battle. Once you are ready, drop down to take on the dungeon boss, Mothula.


There are a number of ways Link can be harmed during this boss battle. Mothula will shoot our beams of fire in three directions. These can be harmful, with each doing two hearts of damage. There are also the Blade Traps that will move along the floor, with each doing one heart of damage. The ground will constantly change direction, and if Link makes contact with Mothula, he will lose two hearts of damage.


Link can harm Mothula in a variety of ways. The most common method is to use the Fire Rod, which takes 8 hits to defeat Mothula. Alternatively, Link can use his Sword, but it is less powerful and far more risky, as it requires getting rather close to the boss. One surprising way to fight Mothula is to use the Magic Hammer. Four direct hits will defeat the boss.


After defeating Mothula, collect the Heart Container as well as the third Crystal.


- Chapter 1 – Zelda’s Rescue
- Chapter 2 – Eastern Palace
- Chapter 3 – Desert Palace
- Chapter 4 – Tower of Hera
- Chapter 5 – Hyrule Castle Tower
- Chapter 6 – Dark Palace
- Chapter 7 – Swamp Palace
- Chapter 8 – Skull Woods
- Chapter 9 – Gargoyle’s Domain
- Chapter 10 – Ice Palace
- Chapter 11 – Misery Mire
- Chapter 12 – Turtle Rock
- Chapter 13 – Ganon’s Tower
