Gallery:A Link to the Past Items
A gallery for items from A Link to the Past.
Overworld Sprites
Equipment


Items

Bow w/Arrows

Bow w/Silver Arrows

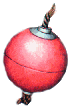
Bomb × 10

Bombs

Bottle Items

Red Potion (Bottled)

Green Potion (Bottled)

Blue Potion (Bottled)

Bee (Bottled)

Fairy (Bottled)
Dungeon Items
Quest Items

1st Crystal-encased Maiden, Dark Palace

2nd Crystal-encased Maiden, Swamp Palace

3rd Crystal-encased Maiden, Skull Woods

4th Crystal-encased Maiden, Thieves' Town

5th Crystal-encased Maiden, Ice Palace

6th Crystal-encased Maiden, Misery Mire

7th Crystal with Zelda, Turtle Rock


Other Items

Green Rupee (1)

Blue Rupee (5)

Red Rupee (20)

Magic Jar (Small)

Magic Jar (Large)


Inventory Sprites
Equipment


Items


Bottle Items


Dungeon Items


Quest Items

Other Items

Item Artwork
Equipment

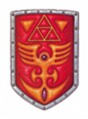
Fighter's Shield (extracted from art for the GBA port)
Fire Shield (Nintendo Player's Guide)


.png)


Items

Bombos Medallion

Ether Medallion (Nintendo Player's Guide)

Ether Medallion

Quake Medallion


Bottle Items

Magic Bottle (empty)


Dungeon Items


Quest Items


Other Items

Crystal Switch (Nintendo Player's Guide)
Super Bomb (Nintendo Player's Guide)


Unused Items
| This section describes cut content, game elements which were removed before the game was released. |

Design for a fourth medallion, published in The Legend of Zelda: Art & Artifacts
