- Chapter 1 – Skyloft
- Chapter 2 – Faron Woods
- Chapter 3 – Skyview Temple
- Chapter 4 – Eldin Volcano
- Chapter 5 – Earth Temple
- Chapter 6 – Lanayru Desert
- Chapter 7 – Lanayru Mining Facility
- Chapter 8 – Isle of Songs
- Chapter 9 – Lake Floria
- Chapter 10 – Ancient Cistern
- Chapter 11 – Lanayru Sand Sea
- Chapter 12 – Sandship
- Chapter 13 – Volcano Summit
- Chapter 14 – Fire Sanctuary
- Chapter 15 – Thunderhead
- Chapter 16 – Song of the Hero
- Chapter 17 – Sky Keep
- Chapter 18 – Final Showdown
15.1 More Optional Quests
With the Fire Sanctuary now behind us, there are several goodies for us to collect, one of which is right here in the Volcano Summit. Run straight ahead to where the wall of fire was earlier. Look to your left and you’ll find some blessed butterflies and some soft soil spots. If you play the harp a Gossip Stone appears and gives you a hint about the nearby soft soil spot. Use the Mogma Mitts to dig underground.
This underground area is very straightforward so make your way over to the other lighted area and resurface. Run on over and collect the fairies as well as the Piece of Heart! Afterwards, run on over to the Bird Statue and return to the Sky.
There are several Goddess Chests that we can now get if you haven’t gotten them earlier. All the recent cubes that correspond to Goddess Chests can be found below.
- Goddess Chest #22 is found at the southwest portion of Bug Rock in Thunderhead. The chest contains a Piece of Heart and you can reach it by dropping down from the top of the island.
- Goddess Chest #23 is found at the top of the Isle of Songs in Thunderhead and it contains a Small Bomb Bag.
- Goddess Chest #24 is found on Beedle Island and it contains a Rupee Medal. You will need to sleep in Beedle’s Air Shop in order to reach this Goddess Chest. Climb the ladder just past the entrance to the shop and jump over to the chest.
- Goddess Chest #25 is found on the small island just below Fun Fun Island and it contains a gold rupee.
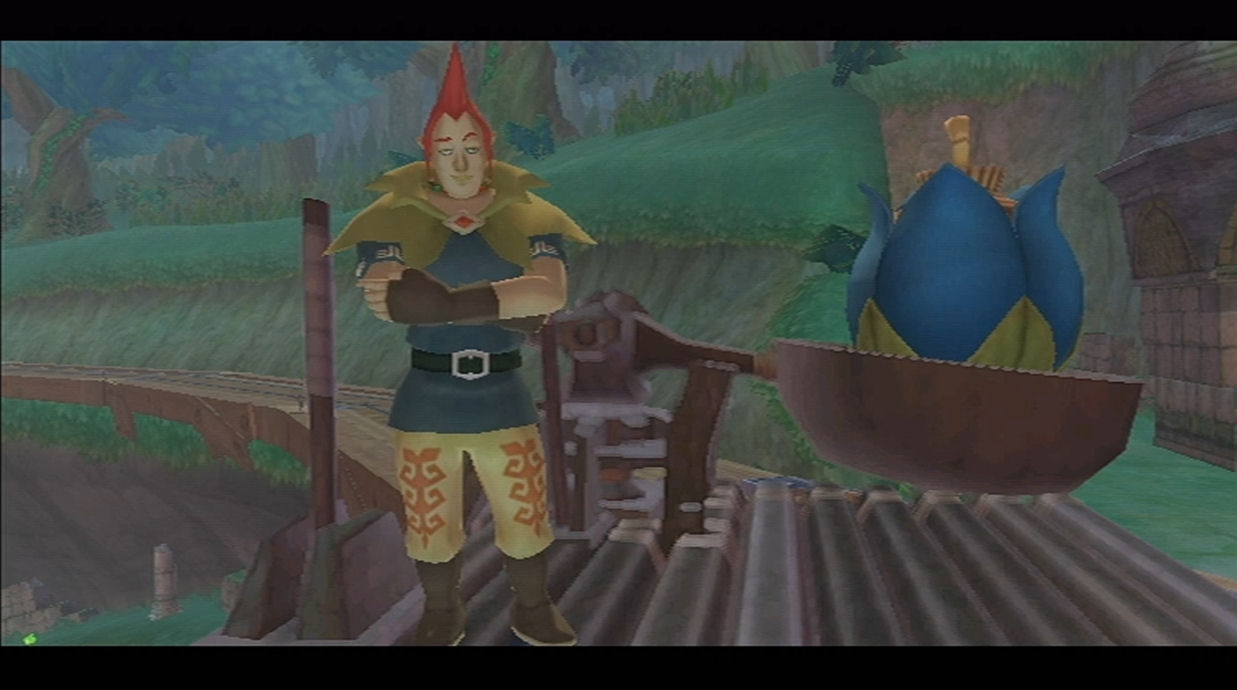
One stop that you can make is back at the Lanayru region. Fly on over and land at the Shipyard. Run on over to where the first mine cart is located and speak with the Goron here. He is running a minigame of sorts in the form of the Rickety Coaster. He will set up two courses, a beginner and an expert course. Basically, you ride along on the mine cart just like before, except you are now timed and there are prizes.
If you can complete the beginner course (Scary!) in less than 30 seconds, you will be rewarded with a silver rupee. (Near-misses earn 50 rupees.) If you can complete the expert course (Heart stopping!) in less than 65 seconds, you will be rewarded with a Piece of Heart! (Near misses earn a Monster Horn or Evil Crystal.) It’s really not too difficult, it just takes the right leaning and it can be a lot of fun. Just keep at it until you’ve won the heart piece. If you keep playing after that, finishing the expert course in under 65 seconds will earn you a Blue Bird Feather or a Golden Skull.
15.2 Sealed Grounds
With the Fire Sanctuary now behind us our next destination is the Sealed Temple. Run on over to the nearby Bird Statue and head off to the Sky. Ride on towards the Faron Region and land within the Sealed Grounds. As soon as you arrive at the Sealed Grounds, you’ll notice this brand new rail that has been built around the circumference of the area. Just ignore this for now and enter the Sealed Temple.
Once inside, speak with the old woman and she tells you to deliver a Skyward Strike to the structure in the center of the room. Just as Link is about to do one the ground starts shaking and the beast from the Sealed Grounds is escaping the seal. Groose will join in on the fight this time around, ‘breaking out his new toy’. Exit the Temple to return to the Sealed Grounds.
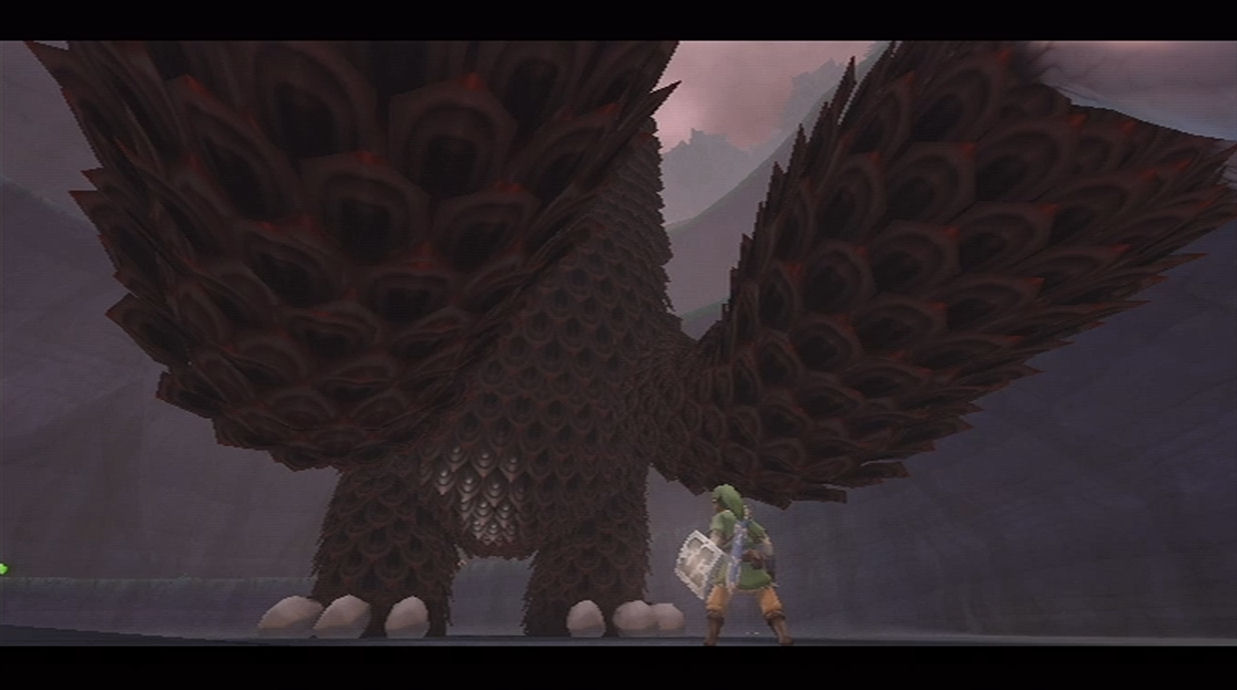
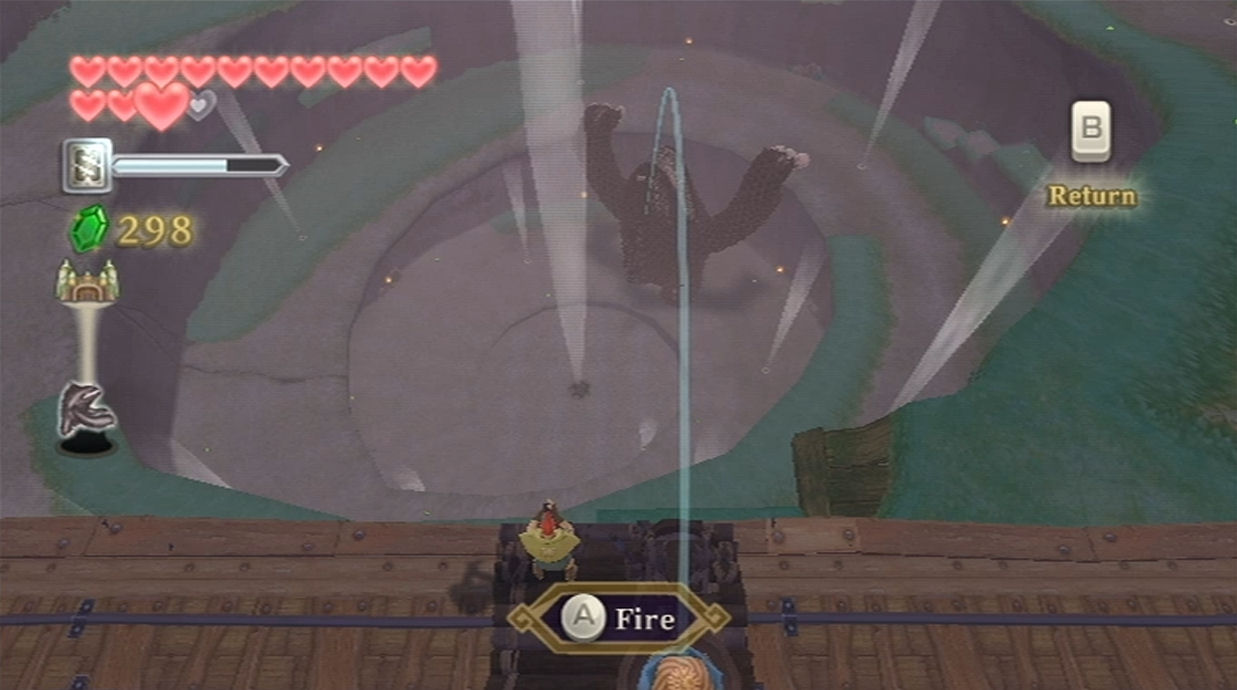
Run outside and Groose will introduce you to his new catapult that he has created. He calls it the Groosenator. The Groosenator can roll across the rails in this area and you can use the catapult to hit things down below. Afterwards, jump down to the ground below and walk over to the Seal. The Imprisoned will escape the seal once again and start to slowly creep up the Sealed Grounds.
The battle is a bit different this time around as The Imprisoned now has the gigantic arms to deal with. The first phase is still rather similar. Slash at its giant toes to cause it to fall to the ground. However, with each step it takes, it gives off a large red electric charge, so it’s quite difficult to get in close. Additionally, now that The Imprisoned has arms, it will try to climb up the sides, so you don’t want to allow that to happen. Once the Groosenator has powered up, call it over and use the catapult to send a bomb flying at The Imprisoned. This will keep him at bay for a short period of time, allowing you to get quality sword slashes in for its toes.
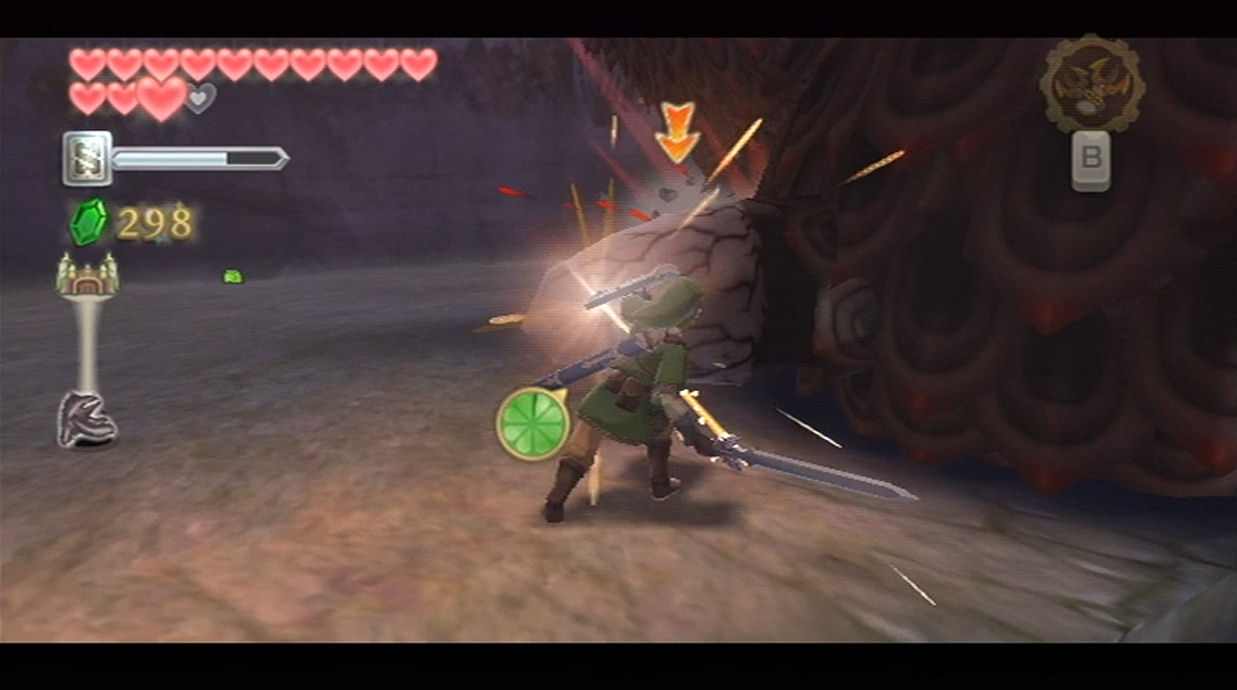
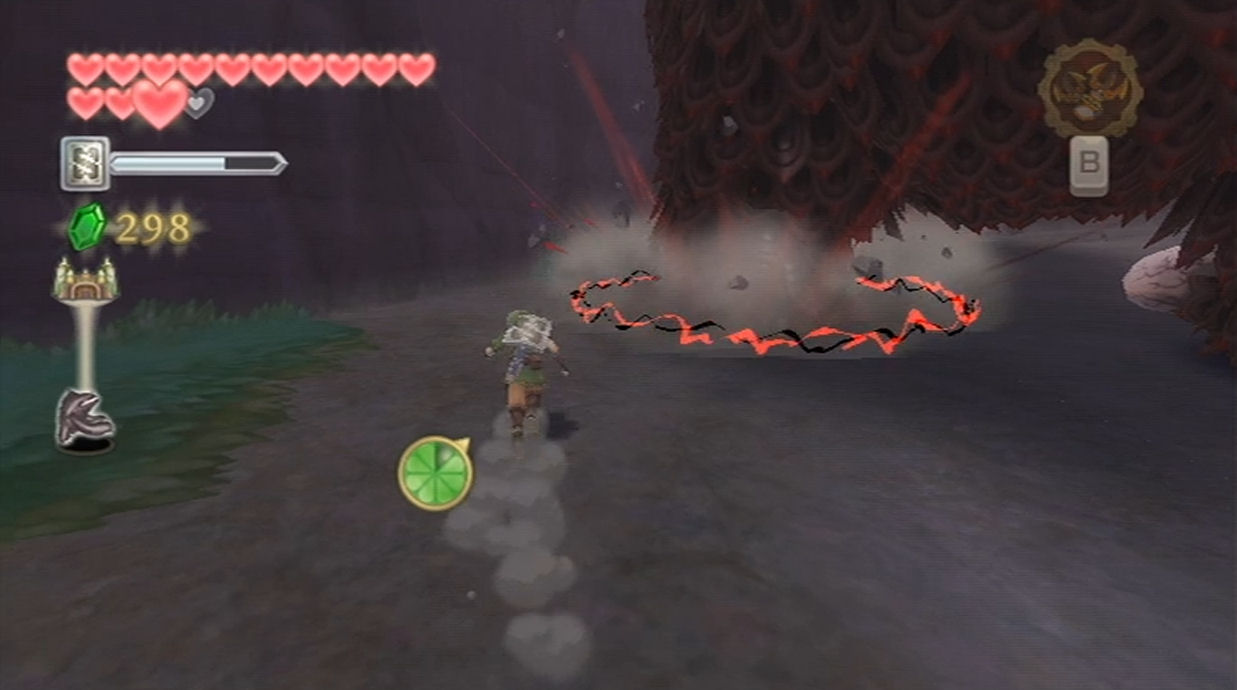
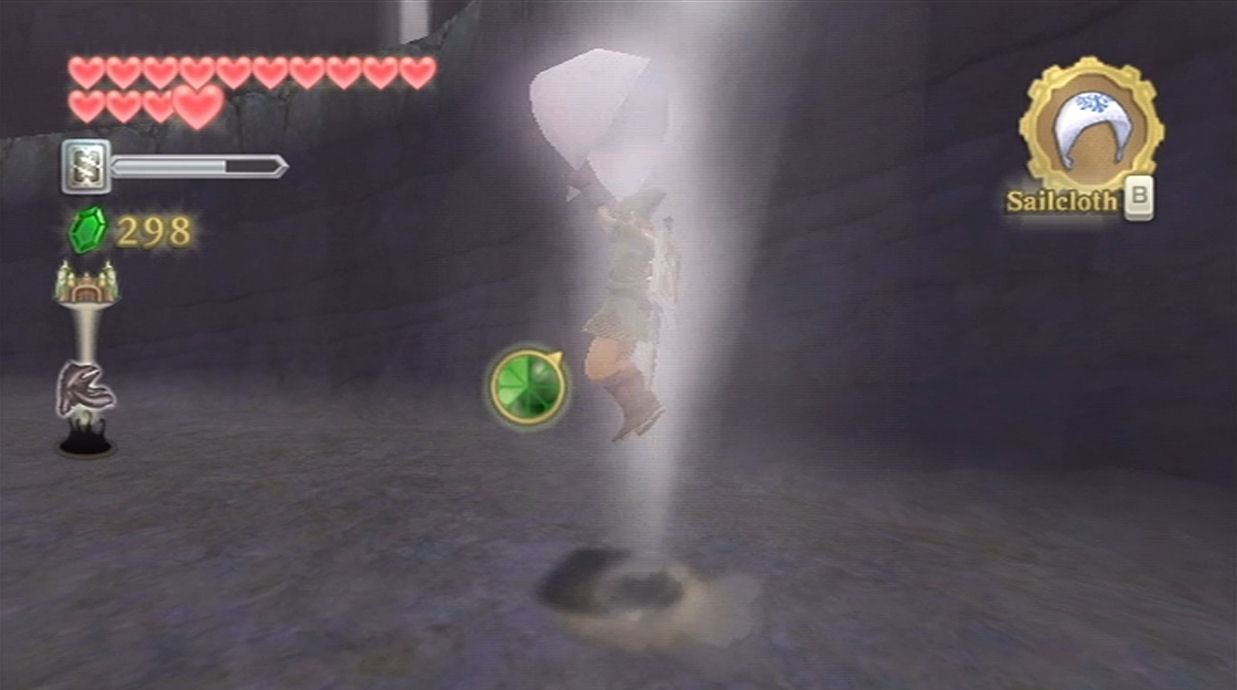
The Groosenator will take a few moments to set up once again, so you’ll be on your own for a few moments. Once it is ready, deliver another bomb attack and finish off the toes, sending The Imprisoned to the ground. You won’t be able to run around The Imprisoned this time since it has those massive arms that take up a lot of room. You’ll have to jump down to the ground level below, run behind it and use an air geyser to get back up. Run on over to the seal on its head and deliver three uppercut sword slashes to knock that seal back in.
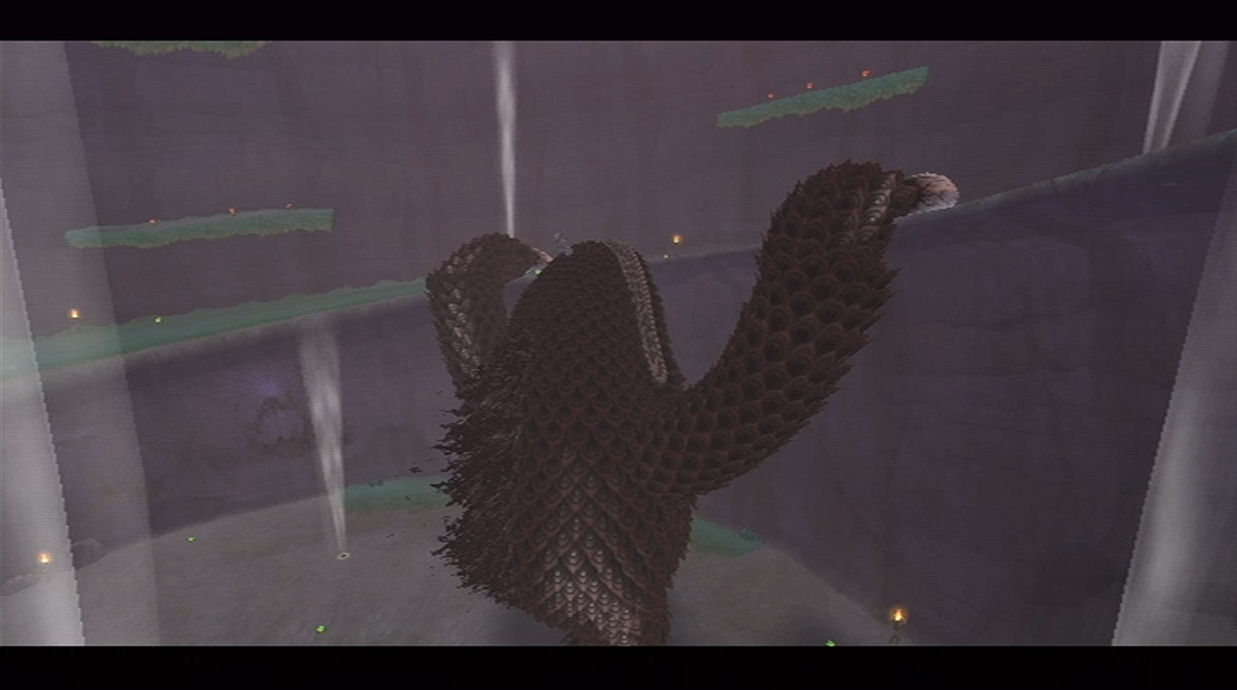
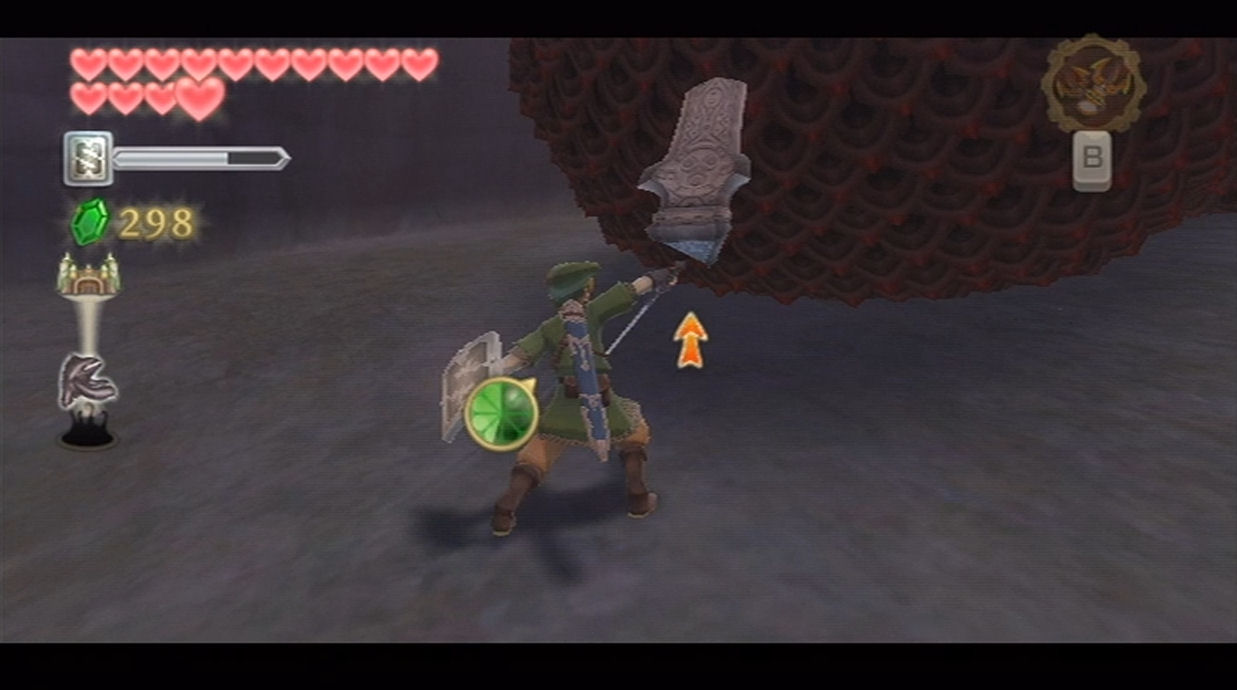
After the second set of three sword slashes to the Seal, The Imprisoned will fall on its stomach and slide its way up a considerable amount of the Sealed Grounds. Follow it up using the wind geysers and repeat the same method once again. After a total of nine strikes to the Seal on its head, The Imprisoned will fall back into the seal at the bottom of the Sealed Grounds. Jump on down and deliver a Skyward Strike. Use your Wiimote and deliver strikes in proper angles to fully seal The Imprisoned once again.
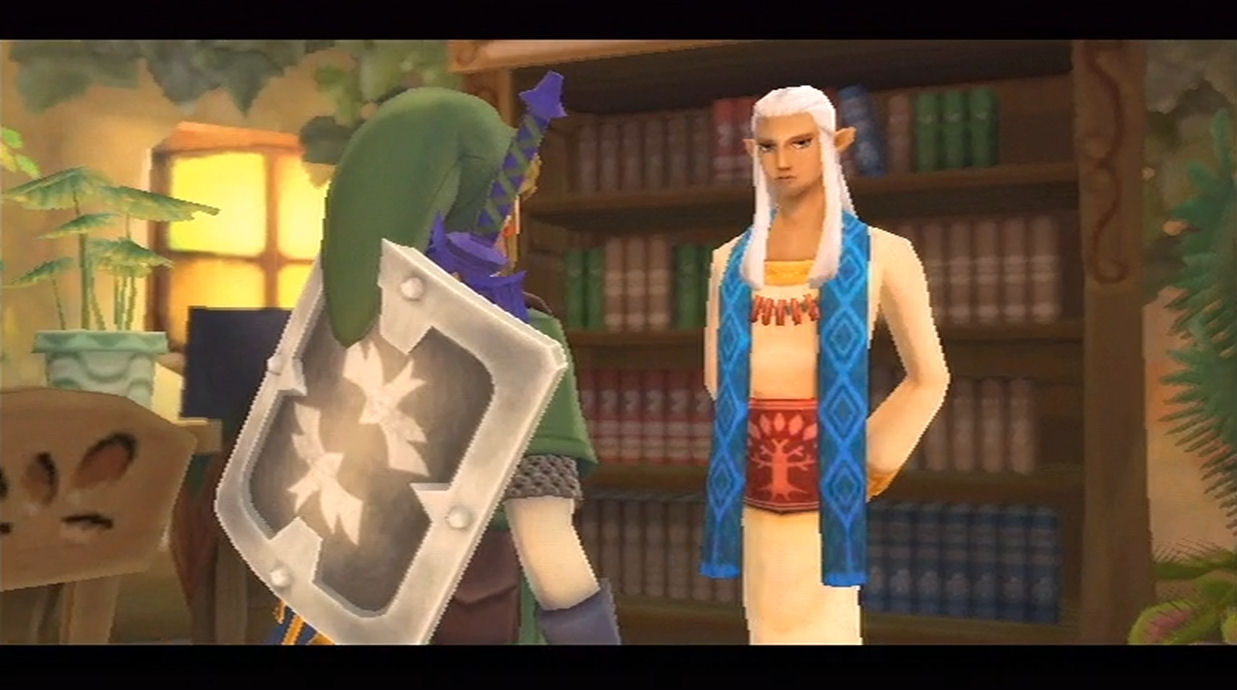
Afterwards head back up to the top of the Sealed Grounds and reenter the Sealed Temple. Speak with the Old Woman and then deliver a Skyward Strike to open the Gate of Time. A lengthy scene will ensue, taking Link back through time and arriving at the Temple of Hylia.
Speak with Impa who can be found here and she’ll give you some backstory about the Goddess Hylia and the evil Demise. Run ahead to the door and you’ll find Zelda waiting for you here. During the lengthy cut-scene Zelda will bless your blade and the Master Sword will achieve its ultimate form.
Speak with Impa and she says that you must find the Triforce. Return through the Gate of Time and speak with the Old Woman found here. Speak to Groose and he’ll give you some information about how a tree could grow in this location over time. Anyway, our search for the Triforce continues in the Sky, so exit the Temple to the east.
You will see Gorko the Goron on this higher ledge staring towards the wall. If you haven’t already, speak to him and he talks about Blessed Butterflies and the special Goddess Walls. Play the harp to make a triforce symbol appear and then speak to Gorko. He’ll ask you to draw a specific symbol on the wall. This might be an arrow, rupee, heart, or bomb. Correctly draw the one he asks for and Gorko will award you with a Piece of Heart!
Afterwards you can run on over to the Bird Statue and return to the Sky. There are some optional quests we can do in the Sky before progressing in the main story. If you’d like to get some extra goodies, continue on to 15.3, or if you want to progress further in the story, jump down to 15.4.
15.3 Quests in Skyloft
Once you have defeated The Imprisoned for the second time, you can complete Sparrot’s Sidequest within Skyloft. However, if you move on to section 15.4 without completing it now, then you won’t be able to complete it until later on in the game. The reward is some extra gratitude crystals so go ahead and do it if you’d like.
Run to the east end of Skyloft and enter Sparrot’s house. You’ll find him sitting at his table quite upset about his situation. With the crystal ball shattered, Sparrot can no longer see into the future. If only he had a new crystal ball to gaze into… Agree to search for a new one for Sparrot and he mentions that the previous one was found in a building atop a mountain peak. Fi will appear and calibrate the dowsing mechanic to search for the crystal ball.
Jump onto your Loftwing and fly toward the Eldin area. Set down just outside the entrance of the Earth Temple. Use your dowsing mechanic and you’ll find that it is attracted to the crystal ball just to the left of the temples entrance. Use the clawshot on the target to reach the crystal ball. Fi will call over Scrapper to lift it up. Afterwards, jump back down and use the bird statue to return to the sky.
Run on over to Sparrot’s house and Scrapper will drop the crystal ball on the table. Sparrot will be very happy that you brought him a crystal ball and tells you to come by the Bazaar to get your fortune told for a special price. Link will then be rewarded with 5 gratitude crystals.
15.4 Great Spirit of the Skies Levias
Return to Skyloft (if you’re not already there) and you can start chatting with the people here. Run on over to the Knight Academy and speak to Gaepora. Unfortunately he does not know much about the Triforce. When you go to leave, however, he mentions Levias, the great Sky Spirit who has guarded the realm for ages. Levias will know about the Triforce and he can be found within Thunderhead. Gaepora mentions that Instructor Owlan will know more about Levias.
Go into the next room and speak with Instructor Owlan. Owlan mentions that Levias is now possessed by a monster. Instructor Owlan will take you outside and will teach you the Spiral Charge. This is a charge attack that Link can perform while he is riding on his Crimson Loftwing. All you have to do is press ‘A’ and you will perform this new attack. In order to master the ability, you have to practice it and Instructor Owlan will set out a practice course for you.

Dive off the platform and call your Loftwing. You have to fly around the sky and break at least 10 of the targets that are in this area within the 120 second time period. Doing so will label you a skilled bird rider and you’ll be able to use this ability at any time.
After successfully completing the game, Instructor Owlan suggests that the owner of the Lumpy Pumpkin might know what to do about Levias. Each year he makes an offering of his pumpkin soup for Levias. Jump off the ledge and call your Loftwing. Fly over to the Lumpy Pumpkin.

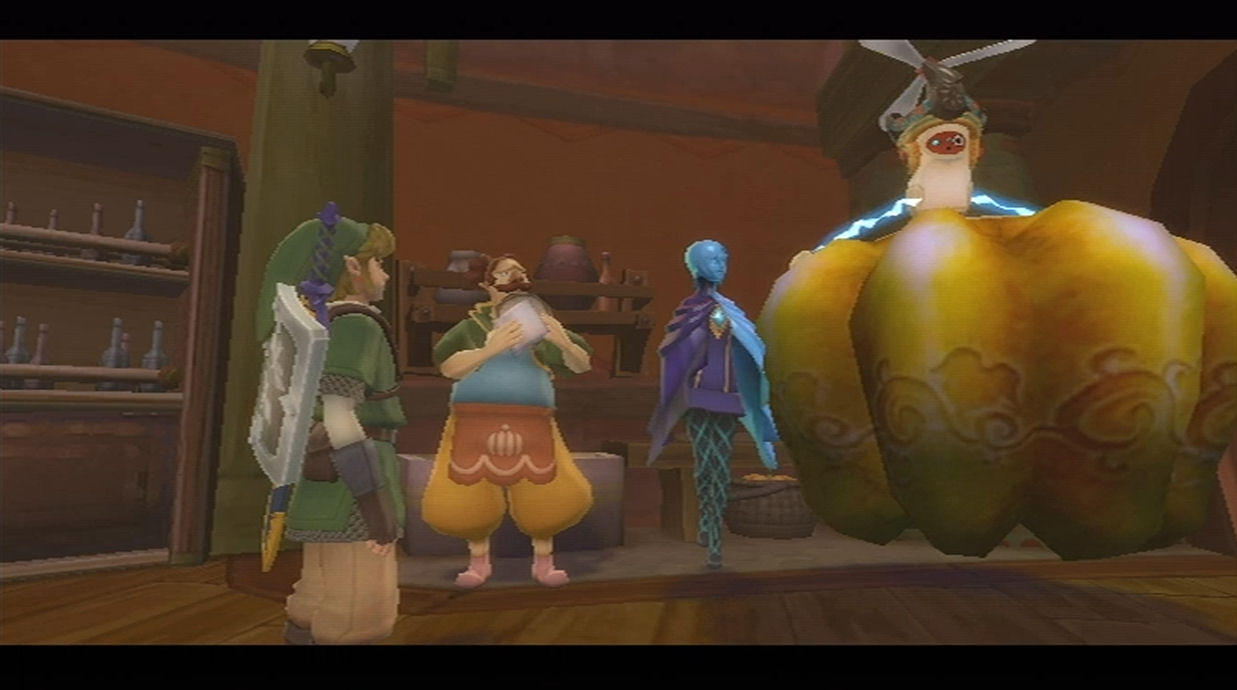
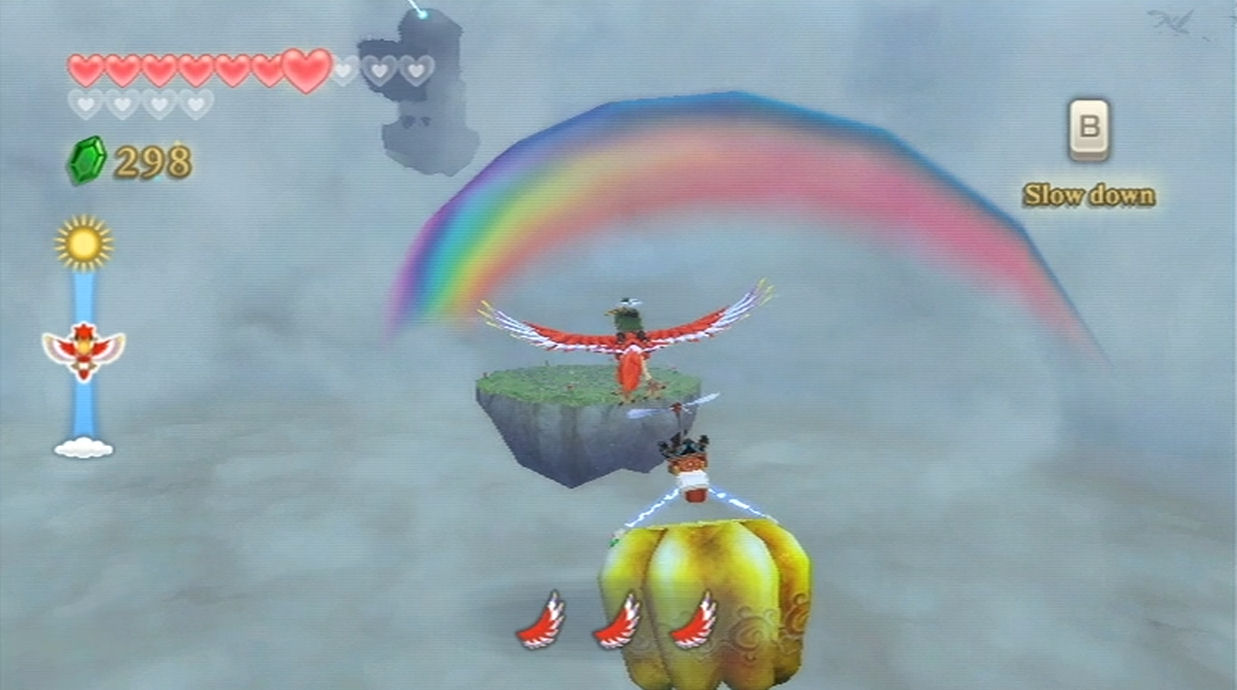
Enter the Lumpy Pumpkin and speak with the owner behind the counter. Once you ask him about Levias he’ll brew up a batch of pumpkin soup. Fi will signal for Scrapper to come join you and lift the giant Pumpkin. The Lumpy Pumpkin owner tells you that the place where he makes the offering is the island with an everlasting rainbow. Leave the Lumpy Pumpkin and dive onto your Loftwing.
Our next stop is in Thunderhead, so fly on over and into the light. Once you arrive, fly over to the rainbow island to the right and land. Scrapper will deliver the Pumpkin, causing Levias to appear. This will begin a boss battle with the Great Spirit of the Skies, Levias.
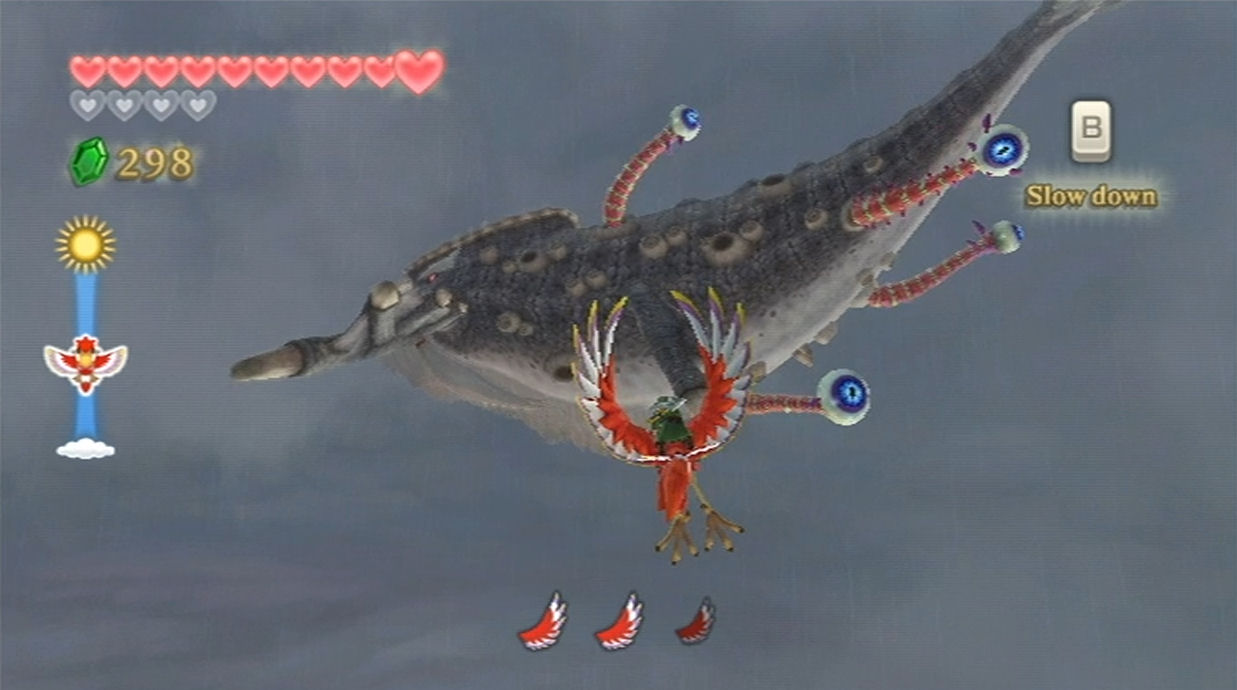
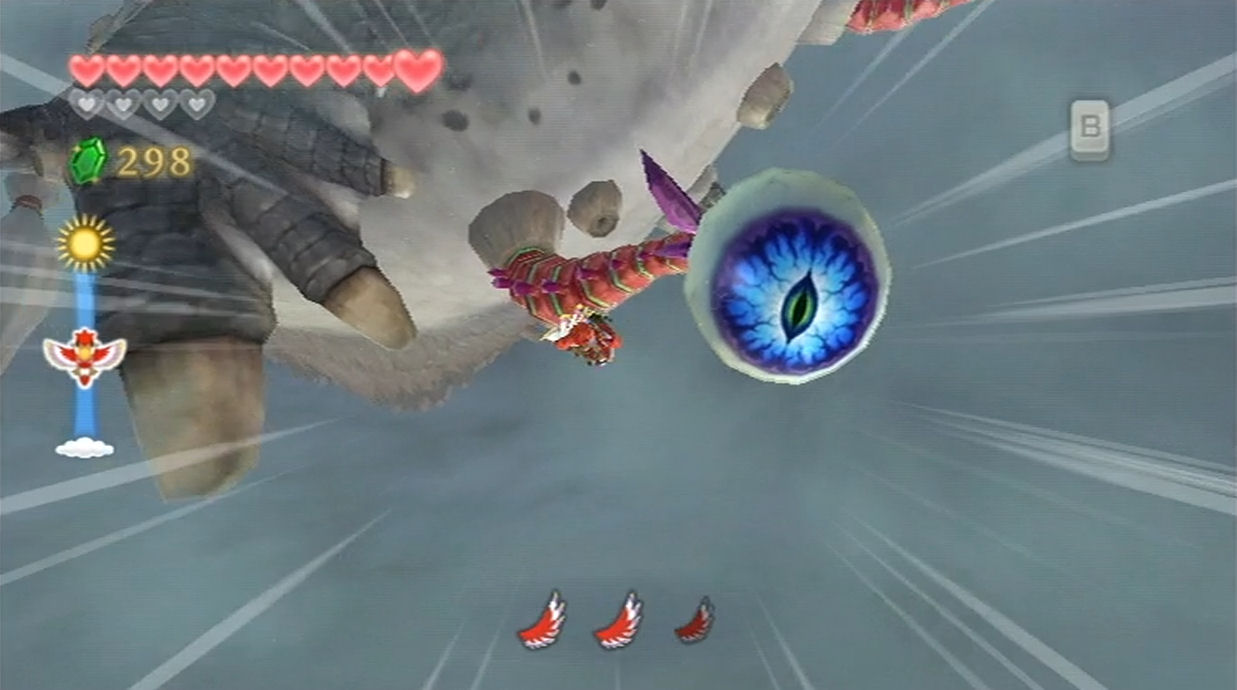
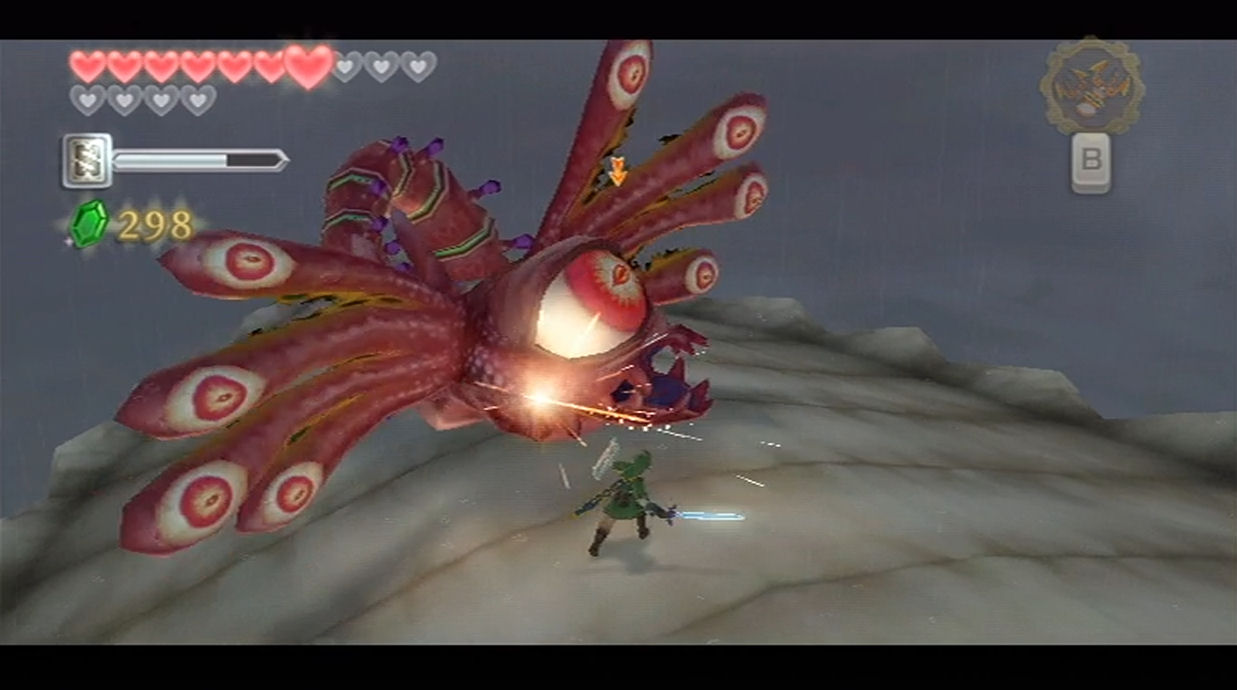
Jump off one of the nearby ledges and summon your Loftwing. Levias has four large tentacles coming out from its body, with each one having a large eye at the end. Fly on over with your Loftwing and when you are close enough perform a Spiral Charge to knock out the eye. Be weary of the other flying enemies in this area and if they come closer to you, perform a Spiral Charge to get rid of them as well.
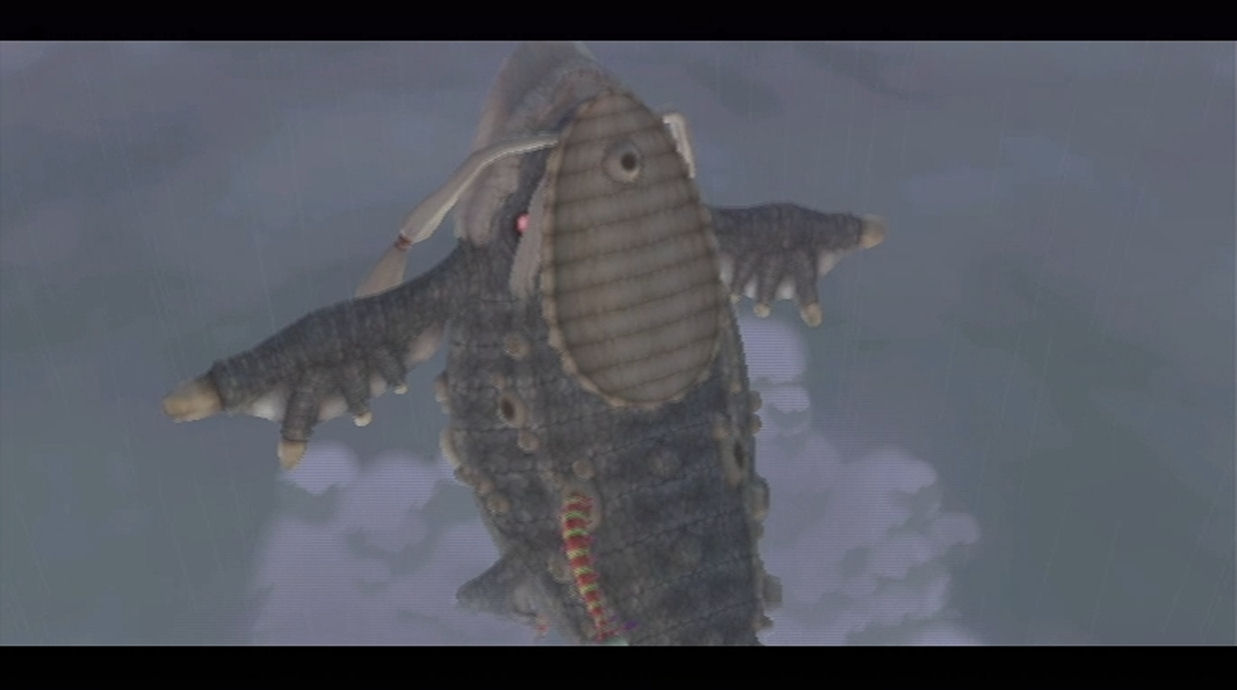
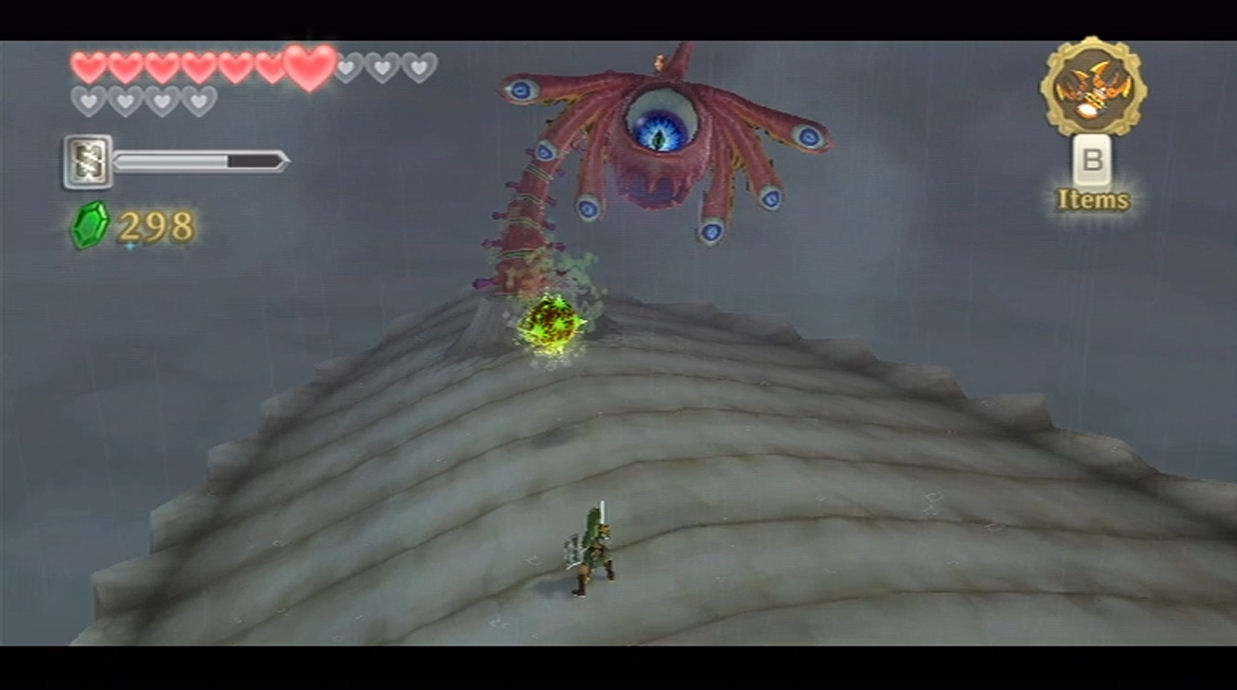
There isn’t much else to the Levias boss battle. Just keep battling and defeat all four of its eyes. Afterwards fly on over and jump off of your loftwing to land on its back. If you miss the landing, just summon your Loftwing once again. Once you land, the boss battle with Levias changes to a new boss battle with another creature.
The battle with the Ocular Parasite Bilocyte will begin. This parasite will shoot out a green blob at you and you will have to swing your sword to knock this blob back at the parasite. Your first goal is to knock the wings off of Bilocyte. To hit the wing on the right, swing your sword from left to right to direct the green blob at that wing. To hit the wing on the left, swing your sword from right to left.
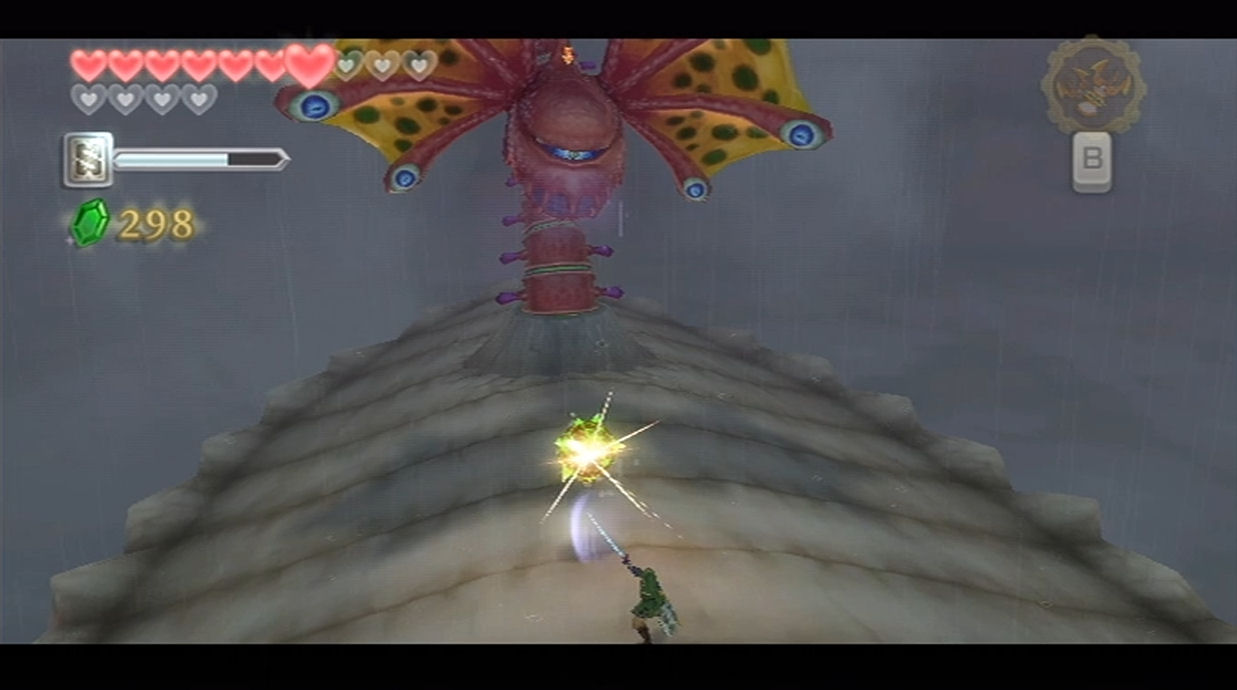
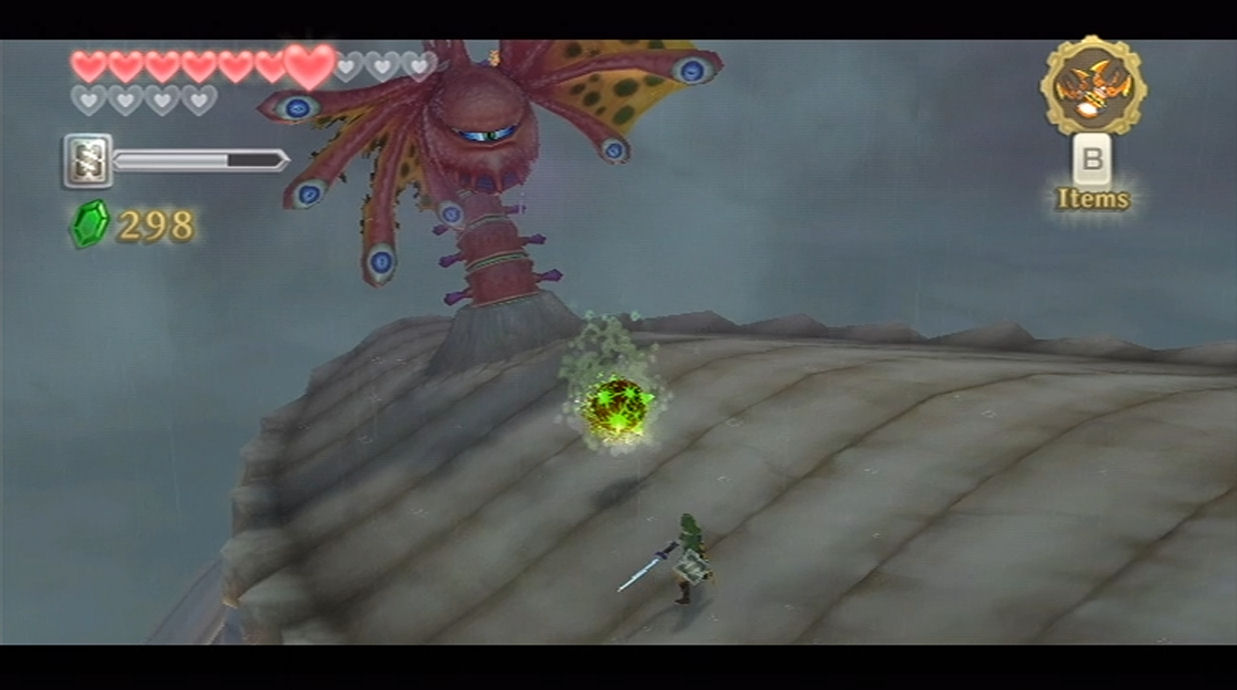
After knocking off its wings, Bilocyte will change its attack pattern. After shooting the blob at you, it will move its head to the left or right, and sometimes even staying directly in the middle. You must deflect the green blob back at Bilocyte, depending on the direction at which it has moved its head. If it doesn’t move its head at all, deliver a vertical sword slash to knock the blob right back at it. The first two times you hit its eye, it will fall forward, allowing you to get some attacks in with your sword. After that only hitting it with the blob will damage it. Keep it up and Bilocyte will be defeated. Yay!
With the parasite destroyed, you’ll see a short clip of Levias returning to normal and the Thunderhead becoming less… thundery. That is one grateful whale! He’s more than willing to help you find the Triforce, but in order to do that, you need to go on a quest to each of the three provinces. Naturally. Once you have completed each area and learned a piece of the Song of the Hero, you need to return to Levias and he’ll teach you the final part of the song. Sounds good, now we know where to go next. As long as the Thunderhead is changed now, perhaps there’s something else we can do here, hmmm?
15.5 Bug Rock
Now that Thunderhead has been cleared of the parasite, our pal Strich can be found on Bug Rock (you’ll have to leave the Thunderhead and re-enter it for him to appear). Go there and talk to him (you don’t have to play his mini-game just yet). Right now this is just a fun place to get some extra treasure and rupees as a reward, but nothing significant.
However, now that we have access to the Bug Rock, we can take care of Beedle’s Sidequest. Enter Beedle’s Air Shop and you’ll see a bubble over his head (which will only appear after you’ve talked to Strich). You can tell he’s not being his own self, so speak to him and he’ll tell you to come talk about it tonight. Sleep in the bed nearby to make it nighttime.
Exit Beedle’s Air Shop and speak to him near his campfire. Beedle has lost his precious Horned Colossus Beetle, along with his cage. Agree to look for it and Beedle will be thankful.
Return to the Air Shop and make it daytime. Jump back on your loftwing and fly into the Thunderhead. Fly over to Bug Rock and speak with Strich. He mentions that he found an insanely rare insect. It is the legendary Horned Colossus Beetle that our pal Beedle is missing. Strich gives Link a chance to win the rare bug by playing his mini-game. Link must collect 10 insects of Strich’s choosing within 3 minutes!
 |
 |
After successfully completing the minigame in three minutes, Strich will reward Link with the Horned Colossus Beetle. Jump back on your Loftwing and fly back to Skyloft. Enter Beedle’s Air Shop and speak with Beedle. He again tells you to return at nighttime, so sleep in the bed.
Run outside and speak with Beedle. Give him back his precious Horned Colossus Beetle and he’ll be delighted. So delighted that the next item you purchase in Beedle’s Air Shop will be at half the price! Link will also be rewarded with 5 gratitude crystals.
Sleep within Beedle’s Air Shop and once you awake, purchase the Piece of Heart found here. Since you just completed Beedle’s sidequest, the piece of heart will be available for 800 rupees instead of 1600.
If you’ve been following along, you should have collected 70 Gratitude Crystals. If not, be sure to check out our Skyward Sword Gratitude Crystals Guide. Run on over to Batreaux to claim your next prize in the form of two Gold Rupees. Unfortunately, there is not much use for rupees from this point forward, but if you want to purchase any loose items at the Bazaar or in Beedle’s Air Shop, this will allow you to do so. You can also visit the Item Check to swap out any Rupee Medals you’re using since they won’t be needed much either.
That’s all we can do for now, so let’s progress in the main quest. See you in the next chapter!
- Chapter 1 – Skyloft
- Chapter 2 – Faron Woods
- Chapter 3 – Skyview Temple
- Chapter 4 – Eldin Volcano
- Chapter 5 – Earth Temple
- Chapter 6 – Lanayru Desert
- Chapter 7 – Lanayru Mining Facility
- Chapter 8 – Isle of Songs
- Chapter 9 – Lake Floria
- Chapter 10 – Ancient Cistern
- Chapter 11 – Lanayru Sand Sea
- Chapter 12 – Sandship
- Chapter 13 – Volcano Summit
- Chapter 14 – Fire Sanctuary
- Chapter 15 – Thunderhead
- Chapter 16 – Song of the Hero
- Chapter 17 – Sky Keep
- Chapter 18 – Final Showdown
