- Chapter 1 – Zelda’s Rescue
- Chapter 2 – Eastern Palace
- Chapter 3 – Desert Palace
- Chapter 4 – Tower of Hera
- Chapter 5 – Hyrule Castle Tower
- Chapter 6 – Dark Palace
- Chapter 7 – Swamp Palace
- Chapter 8 – Skull Woods
- Chapter 9 – Gargoyle’s Domain
- Chapter 10 – Ice Palace
- Chapter 11 – Misery Mire
- Chapter 12 – Turtle Rock
- Chapter 13 – Ganon’s Tower
10.1 Overworld Goodies
With the Titan’s Mitt, Link now has access to both the Ice Palace and Misery Mire, which can be completed in any order. Furthermore, there are plenty of Overworld goodies that Link can now collect.
Exit the Village of Outcasts to the south and walk westward to find a frog-like creature bouncing around. Now that Link has the Titan’s Mitt, he can lift the heavy skulls that are in the way. Speak with frog and he will begin to follow you. Return to the Village of Outcasts and head east a screen.


Use Magic Mirror and the frog will turn into a swordsmith. Enter the house here to reunite the two swordsmiths, then exit the house and reenter it. Speak with the swordsmiths and they’ll offer to temper your sword for just 10 rupees.


Exit the house and head back left a screen. Then walk right a screen and re-enter the house. Speak with the swordsmiths to get back your Tempered Sword. This item will allow Link to deal significantly more damage.


Step back into the portal to return to the Dark World. Walk over to the area where the smith’s house had been in the Light World. Just south of the house there are a number of stakes. Pound all of them with your Magic Hammer and a staircase will appear. Walk down into the cave and grab the Piece of Heart that is found here.


In the Dark World, make your way to where the swordsmiths’ house was and you’ll find a treasure chest that has been left behind. Walk up to it to examine it. Link is unable to open it, but it will it will follow behind Link when he walks around. Link cannot use the Pegasus Shoes during this time, as it will cause the treasure chest to be left behind. Lift the rock and walk west to reach the Village of Outcasts.


Use the Magic Mirror to return to the Light World. If you have the Flute, use it and warp over to location 7 in the Great Swamp. From there walk westward as if you are heading towards the Desert. Speak to the man that is sitting next to the sign post and agree not to tell his secret. He will open the treasure chest for you, giving you the 4th and final Bottle.

Use the Flute and warp over to the 6th location in the Desert. Lift the heavy rock to the right and step into the portal to enter the Dark World.


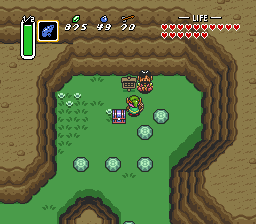
Jump off the ledge and run northward. Enter the pathway at the northwest portion of the swamp to reach a cave. There are a pair of treasure chests here, one containing some rupees and another containing a Piece of Heart.


Back outside in the swamp area, make your way to the northeast corner of the swamp. Stand near the corner and use the Magic Mirror to return to the Light World. Lift the large rock here and enter the cave to find another Piece of Heart. Push the blocks out of the way to reach the Heart Piece.


At this point you are now ready to tackle either the Ice Palace or Misery Mire. The Ice Palace is the next ordered dungeon, and can be found just below on this page. However, Misery Mire is right nearby and can also be accessed. Note, if you are playing the Super Nintendo version of the game, or any subsequent releases of it, getting the item from Misery Mire will make the Ice Palace a bit easier. If you are playing the Game Boy Advance version, there is no advantage to doing Misery Mire first.
10.2 Finding the Dungeon
In the Light World, play the Flute and warp over to the 8th warp location. Jump into the lake and swim towards the center of Lake Hylia. Climb onto the island and lift the heavy rock to find a warp portal leading to the Dark World. Enter the Dark World and step into the next dungeon, the Ice Palace.


10.3 Ice Palace
The first several floors of the Ice Palace are fairly linear and you shouldn’t have much trouble. You will need to have some magic to get through the early portions of this dungeon. In the first room walk to the north end and an enemy Freezor will appear. Use the Fire Rod to melt the enemy and head through to the next room.


The bottom most enemy in this room is holding a small key. Defeat the enemy and head through the locked door to the floor below.
Step on the floor switch in the corner of the room and continue onward to the next room. Push the block and head south a room. You can immediately turn around and head back to the previous screen, but if you’d like, you can use Bombos to quickly defeat the Pengators, allowing you to acquire the Compass.


Back in the block room, push the block northward and head right a screen. Lift the bottom skull and step on the floor switch to open the doors. Walk back to the left a screen.


Step on the floor switch, push the block, and this time head up a screen. Hit the crystal switch to lower the blue blocks. Place a bomb next to the crystal switch and then run to the top of the room. The bomb will blow up, lowering the orange blocks. Toss a bomb onto the cracked floor and dropped down to the floor below.


Walk to the northeast and southwest part of the room and two Stalfos Knights will drop down. Slash at them once with your sword and then place a bomb to blow them up, causing the door to open.


There is a series of Blue Bari and Babasu enemies in this room. The second Blue Bari must be defeated as it contains a small key. Grab it and head through to the west end of the room. Make sure the crystal switch is on orange and then head through the locked door.


Lift the pot at the southwest corner of the room to find the floor switch and then make your way to the right a screen. Ignore the enemies and continue down to the floor below.


There is a series of Pengators in this room. If you have the Bombos or Quake Medallion, just use it once to defeat all of the enemies at once. Trigger the Blade Trap and then quickly run by, going through the door to the left. Run to the left side of the room and climb down the steps.


At the floor below, just fall down the crack on the right side of the room. Walk to the right two screens. The first pot just north of the entrance you came through contains a small key, so be sure to grab it. Then lift the top-right block of the four isolated blocks to find a floor switch. Step on it and head down a screen.


Quickly run by the fire and head left a screen. If you are struggling to get by the Guruguru Bar, you can use the Magic Cape and carefully walk across the ice. Lift the pot and step on the floor switch to create a treasure chest. Open up the chest to get a small key and then head back the staircase.


Quickly run through this room and head through the locked door. Carefully make your way to the north end of the room and head through the door. Hookshot across the gap and head down a screen. Run passed the Blade Traps and head up the staircase.


Hookshot across the gap and head up the staircase at the top-right corner of the room. Use the Hammer to smash the moles and lift the rock to find a small key. Be careful of the rabbit beam, as well as the Stalfos Knights as you make your way to the left side of the room. Pull the tongue of the statue to open the door and head right a screen. If you’d like, there is a floor switch here that creates a treasure chest containing the Dungeon Map.


Climb the steps and lift the pots to reach the treasure chest. Open it up to get the Big Key and then head back down the stairs. Pull the tongue of the statue and head back left a room, and then down the staircase.


Lift the pot and step on the floor switch to create a treasure chest on the left. Use the Hookshot to reach the chest, then open it to get another small key. Quickly dash across to the room to the left and then head down the staircase.


Back in this room, you can use the Fire Rod to defeat the two Freezors, causing a treasure chest with some bombs to appear. Use a bomb to blow a crack in the floor to the left. Fall down the crack to the left to reach the floor below.


Open the large treasure chest to get the dungeon item, the Blue Mail! This will decrease the amount of damage taken by one-half. Push the blocks and head right a screen. Use the Big Key to head through the locked door. Use a small key on the next locked door to get down to the floor below.


NOTE: If you are playing the Super Nintendo version of this game AND you have already acquired the dungeon item from Misery Mire, there is a big shortcut here. You can lift the pot and use the Cane of Somaria to place a block on the floor switch, allowing you to head down a screen and quickly reach the dungeon boss.
Use the small key on the locked door to the right. Hit the crystal switch so that the blue blocks have been lowered. Now return left a screen, up a screen, and then head up the staircase.


With the blue blocks lowered, you can fall off the ledges here if you’d like to reach a secret fairy fountain. Otherwise head back down a screen.


At this point you have to backtrack through several rooms of the dungeon. Go right a screen, down a screen, left a screen, and then back up the stairs.


Run through the door above to get back to this long room. This time, lift the pots on the right side of the dungeon to find a floor switch. Step on it and head through the door to the left. Fall down the hole to get back to the large treasure room and once again head right a screen.


Now that you are back on the left side of the room with the blue blocks lowered, you can push them down to the floor below. Push the lower block to the right and then fall down behind it. Lift the pot and push the block down onto the floor switch. With the door open, head down to the room below.


There is a hole underneath the large block at the bottom-left of the room. Lift the pots, pull the statue, hammer the moles, and lift the large block to reveal the hole. Drop down to take on the dungeon boss, Kholdstare.


Kholdstare will begin the battle encased in a large solid piece of ice. Ice will fall from the ceiling, landing on the floor and then splitting in four directions. Link must use a fire attack in order to defeat this first simple phase. It will take 8 shots with the Fire Rod, or alternatively and more efficiently, a single use of the Bombos Medallion to defeat the first phase of Kholdstare.


During the second phase, Kholdstare will split into three large eyeballs of ice and move around the room. Ice will still continue to fall from the ceiling. It can be difficult to avoid the falling ice, as well as the three eyeballs. During this phase, Link must attack each of the eyeballs, and can do so with a variety of items. The Fire Rod is the must effective item as it will take four direct shots to defeat each eyeball. If Link has the Tempered Sword, it will take six sword slashes to defeat each eye.


Another strategy to defeating Kholdstare is to use the Cane of Byrna. While the actual beam surrounding the cane will not harm Kholdstare, it will allow Link to aggressively attack with his sword, without having to worry about taking any damage.
After Kholdstare has been defeated, be sure to grab the Heart Container to increase your total health and then grab the Crystal to speak with the Maiden.


- Chapter 1 – Zelda’s Rescue
- Chapter 2 – Eastern Palace
- Chapter 3 – Desert Palace
- Chapter 4 – Tower of Hera
- Chapter 5 – Hyrule Castle Tower
- Chapter 6 – Dark Palace
- Chapter 7 – Swamp Palace
- Chapter 8 – Skull Woods
- Chapter 9 – Gargoyle’s Domain
- Chapter 10 – Ice Palace
- Chapter 11 – Misery Mire
- Chapter 12 – Turtle Rock
- Chapter 13 – Ganon’s Tower
