Gallery:Hyrule Warriors Characters: Difference between revisions
mNo edit summary |
No edit summary |
||
| Line 41: | Line 41: | ||
File:Hyrule Warriors Artwork Lana Summoning Gate.png|Lana with the [[Summoning Gate]] | File:Hyrule Warriors Artwork Lana Summoning Gate.png|Lana with the [[Summoning Gate]] | ||
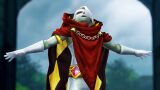
File:HW Lana Guardian of Time Artwork.png|Lana in Guardian of Time outfit | File:HW Lana Guardian of Time Artwork.png|Lana in Guardian of Time outfit | ||
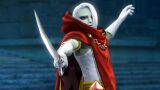
File:Hyrule Warriors Artwork Lana Skull Kid's Clothes.png|Lana in Skull Kid's Clothes | |||
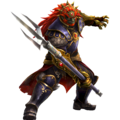
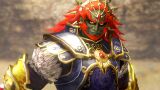
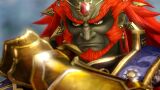
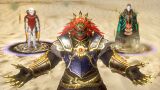
File:Hyrule Warriors Artwork Ganondorf.png|[[Ganon|Ganondorf]] | File:Hyrule Warriors Artwork Ganondorf.png|[[Ganon|Ganondorf]] | ||
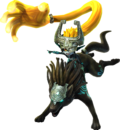
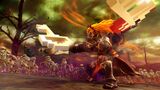
File:Hyrule Warriors Artwork Ganondorf Great Swords.png|Ganondorf with the [[Great Swords]] | File:Hyrule Warriors Artwork Ganondorf Great Swords.png|Ganondorf with the [[Great Swords]] | ||
| Line 48: | Line 49: | ||
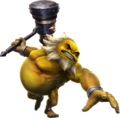
File:Hyrule Warriors Artwork Ruto.png|[[Ruto]] | File:Hyrule Warriors Artwork Ruto.png|[[Ruto]] | ||
File:Hyrule Warriors Artwork Ruto Zora Scale.png|Ruto with the [[Zora Scale (Hyrule Warriors)|Zora Scale]] | File:Hyrule Warriors Artwork Ruto Zora Scale.png|Ruto with the [[Zora Scale (Hyrule Warriors)|Zora Scale]] | ||
File:Ruto (Lulu outfit) - Hyrule Warriors.png | |||
File:Hyrule Warriors Artwork Agitha.png|[[Agitha]] | File:Hyrule Warriors Artwork Agitha.png|[[Agitha]] | ||
File:Hyrule Warriors Artwork Agitha Parasol.png|Agitha with the [[Parasol]] | File:Hyrule Warriors Artwork Agitha Parasol.png|Agitha with the [[Parasol]] | ||
| Line 74: | Line 76: | ||
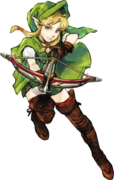
File:Linkle.png|Linkle with [[Crossbows]] | File:Linkle.png|Linkle with [[Crossbows]] | ||
File:Hyrule Warriors Artwork Linkle Boots.png|Linkle with her [[Boots (Hyrule Warriors)|Boots]] weapon | File:Hyrule Warriors Artwork Linkle Boots.png|Linkle with her [[Boots (Hyrule Warriors)|Boots]] weapon | ||
File:Linkle-Concept-Art.png | |||
File:Hyrule Warriors Artwork Skull Kid.png|[[Skull Kid]] | File:Hyrule Warriors Artwork Skull Kid.png|[[Skull Kid]] | ||
File:Hyrule Warriors Artwork Skull Kid Ocarina.png|Skull Kid with [[Ocarina (Hyrule Warriors)|Ocarina]] | File:Hyrule Warriors Artwork Skull Kid Ocarina.png|Skull Kid with [[Ocarina (Hyrule Warriors)|Ocarina]] | ||
| Line 86: | Line 89: | ||
File:HWL-Medli-Artwork-2.png|Medli with [[Rito Harp]] | File:HWL-Medli-Artwork-2.png|Medli with [[Rito Harp]] | ||
File:HW Marin.png|[[Marin]] | File:HW Marin.png|[[Marin]] | ||
File:HW Marin 2.png|Marin | |||
File:HW Marin Bell.png|Marin with [[Bell (Hyrule Warriors)|Bell]] | File:HW Marin Bell.png|Marin with [[Bell (Hyrule Warriors)|Bell]] | ||
File:Marin Hyrule Warriors.png | |||
File:Hyrule Warriors Artwork Toon Zelda.png|[[Toon Zelda]] | File:Hyrule Warriors Artwork Toon Zelda.png|[[Toon Zelda]] | ||
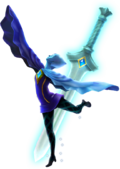
File:Hyrule Warriors Artwork Toon Zelda Phantom Arms.png|Toon Zelda with [[Phantom Arms]] | File:Hyrule Warriors Artwork Toon Zelda Phantom Arms.png|Toon Zelda with [[Phantom Arms]] | ||
| Line 96: | Line 101: | ||
<gallery widths="140" heights="160"> | <gallery widths="140" heights="160"> | ||
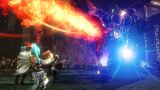
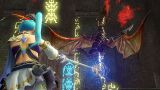
File:Hyrule Warriors Artwork Argorok.png|[[Argorok]] | File:Hyrule Warriors Artwork Argorok.png|[[Argorok (Hyrule Warriors)|Argorok]] | ||
File:Hyrule Warriors Artwork The Imprisoned.png|[[The Imprisoned]] | File:Hyrule Warriors Artwork The Imprisoned.png|[[The Imprisoned (Hyrule Warriors)|The Imprisoned]] | ||
File:Hyrule Warriors Artwork Gohma.png|[[Gohma (Hyrule Warriors)|Gohma]] | File:Hyrule Warriors Artwork Gohma.png|[[Gohma (Hyrule Warriors)|Gohma (Hyrule Warriors)|]] | ||
File:Hyrule Warriors Artwork King Dodongo.png|[[King Dodongo (Hyrule Warriors)|King Dodongo]] | File:Hyrule Warriors Artwork King Dodongo.png|[[King Dodongo (Hyrule Warriors)|King Dodongo (Hyrule Warriors)|]] | ||
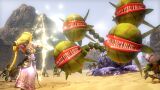
File:Hyrule Warriors Artwork Manhandla.png|[[Manhandla (Hyrule Warriors)|Manhandla]] | File:Hyrule Warriors Artwork Manhandla.png|[[Manhandla (Hyrule Warriors)|Manhandla (Hyrule Warriors)|]] | ||
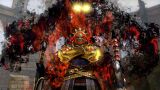
File:Ganon Hyrule Warriors.png|[[Ganon (Hyrule Warriors)|Ganon]] | File:Ganon Hyrule Warriors.png|[[Ganon (Hyrule Warriors)|Ganon]] | ||
File:Helmaroc King - Hyrule Warriors Legends art.png|[[Helmaroc King]] | File:Helmaroc King - Hyrule Warriors Legends art.png|[[Helmaroc King (Hyrule Warriors)|Helmaroc King]] | ||
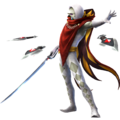
File:HWL-Phantom-Ganon-Artwork.png|[[Phantom Ganon]] | File:HWL-Phantom-Ganon-Artwork.png|[[Phantom Ganon (Hyrule Warriors)|Phantom Ganon]] | ||
</gallery> | </gallery> | ||
==Screenshots== | ==Screenshots== | ||
<gallery widths="160" heights="90"> | <gallery widths="160" heights="90" caption="Link"> | ||
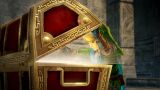
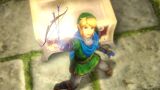
File:Hyrule Warriors Screenshot Link Trainee Triforce.jpg | File:Hyrule Warriors Screenshot Link Trainee Triforce.jpg | ||
File:Hyrule Warriors Screenshot Link Trainee Jump.jpg | File:Hyrule Warriors Screenshot Link Trainee Jump.jpg | ||
| Line 147: | Line 152: | ||
File:Hyrule Warriors Screenshot Link Ocarina of Time Costume Magic Rod.jpg | File:Hyrule Warriors Screenshot Link Ocarina of Time Costume Magic Rod.jpg | ||
File:Hyrule Warriors Screenshot Link Ocarina of Time Costume Magic Rod2.jpg | File:Hyrule Warriors Screenshot Link Ocarina of Time Costume Magic Rod2.jpg | ||
File:Hyrule Warriors Screenshot | File:Hyrule Warriors Screenshot Link 8-Bit Great Fairy.jpg | ||
File:Hyrule Warriors Screenshot Impa | File:Hyrule Warriors Screenshot Link Impa Meet Sheik.jpg | ||
File:Hyrule Warriors Screenshot | File:Hyrule Warriors Screenshot Link Master Sword Pedestal.jpg | ||
File:Hyrule Warriors Screenshot | File:Hyrule Warriors Screenshot Link Master Sword.jpg | ||
File:Hyrule Warriors Screenshot | File:Hyrule Warriors Screenshot Link Power Gloves.jpg | ||
File:Hyrule Warriors Screenshot Impa | File:Hyrule Warriors Screenshot Link Sheik Impa.jpg | ||
File:Hyrule Warriors Screenshot | File:Hyrule Warriors Screenshot Link Sheik Triforce.jpg | ||
File:Hyrule Warriors Screenshot | File:Hyrule Warriors Screenshot Link Sheik.jpg | ||
File:Hyrule Warriors Screenshot | File:Hyrule Warriors Screenshot Bombs Get Link.jpg | ||
File:Hyrule Warriors Screenshot | File:Hyrule Warriors Screenshot Treasure Chest Link.jpg | ||
File:Hyrule Warriors Screenshot | File:Hyrule Warriors Screenshot Bow Aim.jpg | ||
File:Hyrule Warriors Screenshot | File:Hyrule Warriors Screenshot Bow Get.jpg | ||
File:Hyrule Warriors Screenshot | File:Hyrule Warriors Screenshot Bow Powerup.jpg | ||
File: | File:Hwd-1.jpg|From ''Definitive Edition'' | ||
File: | File:Hwd-10.jpg|From ''Definitive Edition'' | ||
File: | File:Hwd-link.jpg|From ''Definitive Edition'' | ||
</gallery> | |||
<gallery widths="160" heights="90" caption="Zelda"> | |||
File:Hyrule Warriors Screenshot Zelda.jpg | File:Hyrule Warriors Screenshot Zelda.jpg | ||
File:Hyrule Warriors Screenshot Zelda Concentrate.jpg | File:Hyrule Warriors Screenshot Zelda Concentrate.jpg | ||
| Line 185: | Line 191: | ||
File:Hyrule Warriors Screenshot Zelda Dominion Rod Owl Statue.jpg | File:Hyrule Warriors Screenshot Zelda Dominion Rod Owl Statue.jpg | ||
File:Hyrule Warriors Screenshot Zelda Dominion Rod Ancient Statue.jpg | File:Hyrule Warriors Screenshot Zelda Dominion Rod Ancient Statue.jpg | ||
File:Hyrule Warriors Screenshot Co-op Zelda Link.jpg | |||
File:Hyrule Warriors Screenshot Zelda Material.jpg | |||
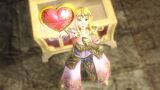
File:Hyrule Warriors Screenshot Heart Container.jpg | |||
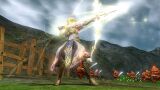
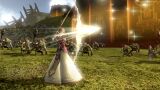
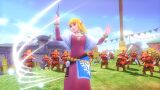
File:Hyrule Warriors Screenshot Zelda Twilight Princess Costume Light Arrow.jpg | File:Hyrule Warriors Screenshot Zelda Twilight Princess Costume Light Arrow.jpg | ||
File:Hyrule Warriors Screenshot Zelda Twilight Princess Costume Light Arrow Shot.jpg | File:Hyrule Warriors Screenshot Zelda Twilight Princess Costume Light Arrow Shot.jpg | ||
| Line 191: | Line 200: | ||
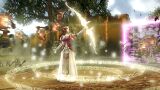
File:Hyrule Warriors Screenshot Zelda Ocarina of Time Costume Magic.jpg | File:Hyrule Warriors Screenshot Zelda Ocarina of Time Costume Magic.jpg | ||
File:Hyrule Warriors Screenshot Zelda Ocarina of Time Costume Rapier.jpg | File:Hyrule Warriors Screenshot Zelda Ocarina of Time Costume Rapier.jpg | ||
File:Hyrule Warriors Screenshot | File:Hwd-zelda.jpg|From ''Definitive Edition'' | ||
File:Hyrule Warriors Screenshot | </gallery> | ||
File:Hyrule Warriors Screenshot | <gallery widths="160" heights="90" caption="Impa"> | ||
File:Hyrule Warriors Screenshot | File:Hyrule Warriors Screenshot Impa.jpg | ||
File:Hyrule Warriors Screenshot | File:Hyrule Warriors Screenshot Impa Giant Blade 1.jpg | ||
File:Hyrule Warriors Screenshot | File:Hyrule Warriors Screenshot Impa Giant Blade 2.jpg | ||
File:Hyrule Warriors Screenshot | File:Hyrule Warriors Screenshot Impa Giant Blade 3.jpg | ||
File:Hyrule Warriors Screenshot | File:Hyrule Warriors Screenshot Impa Giant Blade 4.jpg | ||
File:Hyrule Warriors Screenshot | File:Hyrule Warriors Screenshot Impa Giant Blade 5.jpg | ||
File:Hyrule Warriors Screenshot | File:Hyrule Warriors Screenshot Impa Giant Blade 6.jpg | ||
File:Hyrule Warriors Screenshot | File:Hyrule Warriors Screenshot Impa Giant Blade 7.jpg | ||
File:Hyrule Warriors Screenshot Impa Giant Blade 8.jpg | |||
File:Hyrule Warriors Screenshot Impa Giant Blade 9.jpg | |||
File:Hyrule Warriors Screenshot Impa Giant Blade 10.jpg | |||
File:Hyrule Warriors Screenshot Impa Naginata.jpg | |||
File:Hyrule Warriors Screenshot Impa Naginata Focus Spirit.jpg | |||
File:Hyrule Warriors Screenshot Impa Naginata Dual.jpg | |||
File:Hyrule Warriors Screenshot Impa Naginata Four Copies.jpg | |||
File:Hyrule Warriors Screenshot Impa Naginata Sheikah Eye.jpg | |||
File:Hyrule Warriors Screenshot Impa Naginata Fire.jpg | |||
File:Hyrule Warriors Screenshot Impa Weapon Pouch.jpg | |||
File:Hyrule Warriors Screenshot Impa and Sheik Fairy.jpg | |||
File:Hyrule Warriors Screenshot Impa and Sheik.jpg | |||
File:Hyrule Warriors Screenshot Bombs Powerup.jpg | |||
File:Hyrule Warriors Screenshot Bombs Powerup Throw.jpg | |||
File:Hyrule Warriors Screenshot Bombs Powerup Explode.jpg | |||
File:Hyrule Warriors Screenshot Co-op Impa Link.jpg | |||
File:Hyrule Warriors Screenshot Bombs Get Impa.jpg | |||
File:Hyrule Warriors Screenshot Treasure Chest Impa.jpg | |||
File:Hyrule Warriors Screenshot Item Powerup.jpg | |||
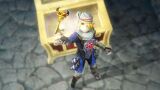
File:Hyrule Warriors Sealed Weapon Get Impa.jpg | |||
</gallery> | |||
<gallery widths="160" heights="90" caption="Shiek"> | |||
File:Hyrule Warriors Screenshot Sheik.jpg | |||
File:Hyrule Warriors Screenshot Sheik Harp.jpg | |||
File:Hyrule Warriors Screenshot Sheik Harp Fire.jpg | |||
File:Hyrule Warriors Screenshot Sheik Harp Water.jpg | |||
File:Hyrule Warriors Screenshot Sheik Throwing Knives.jpg | |||
File:Hyrule Warriors Screenshot Sheik Throwing Knives2.jpg | |||
File:Hyrule Warriors Screenshot Sheik Magical Release.jpg | |||
File:Hyrule Warriors Screenshot Gold Skulltula Sheik Obtain Puzzle Piece.jpg | |||
File:Hyrule Warriors Screenshot Sheik Battle Zelda.jpg | |||
File:Hyrule Warriors Screenshot Sheik Guard Zelda.jpg | |||
File:Hyrule Warriors Screenshot Sheik Holding Fairy.jpg | |||
File:Hyrule Warriors Screenshot Sheik Lens of Truth.jpg | |||
File:Hyrule Warriors Screenshot Boss Key Get Sheik.jpg | |||
File:Hyrule Warriors Screenshot Gold Skulltula Under Boulder.jpg | |||
File:Hyrule Warriors Screenshot Proxi Trapped.jpg | |||
File:Sheik's black DLC Costume.jpg | |||
</gallery> | |||
<gallery widths="160" heights="90" caption="Lana"> | |||
File:Hyrule Warriors Screenshot Lana.jpg | File:Hyrule Warriors Screenshot Lana.jpg | ||
File:Hyrule Warriors Screenshot Lana Midna.jpg | File:Hyrule Warriors Screenshot Lana Midna.jpg | ||
| Line 217: | Line 266: | ||
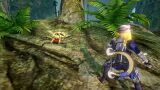
File:Hyrule Warriors Screenshot Lana Spear Deku Leaf.jpg | File:Hyrule Warriors Screenshot Lana Spear Deku Leaf.jpg | ||
File:Hyrule Warriors Screenshot Lana Spear Deku Tree Sprout.jpg | File:Hyrule Warriors Screenshot Lana Spear Deku Tree Sprout.jpg | ||
File:Hyrule Warriors Screenshot Lana Soldier.jpg | |||
File:Hyrule Warriors Screenshot Boomerang Lizalfos Stun.jpg | |||
File:Hyrule Warriors Screenshot Gale Boomerang Lizalfos.jpg | |||
File:Hyrule Warriors Screenshot Boomerang Get Lana.jpg | |||
</gallery> | |||
<gallery widths="160" heights="90" caption="Ganondorf"> | |||
File:Hyrule Warriors Screenshot Ganondorf.jpg | |||
File:Hyrule Warriors Screenshot Ganondorf Keys.jpg | |||
File:Hyrule Warriors Screenshot Ganondorf Demon.jpg | |||
File:Hyrule Warriors Screenshot Ganondorf Gauntlet.jpg | |||
File:Hyrule Warriors Screenshot Ganondorf Ghirahim Zant.jpg | |||
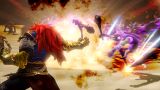
File:Hyrule Warriors Screenshot Ganondorf Great Sword Attack.jpg | |||
File:Hyrule Warriors Screenshot Ganondorf Lightning.jpg | |||
File:Hyrule Warriors Screenshot Ganondorf Magic Attack.jpg | |||
File:Hyrule Warriors Screenshot Ganondorf Stance.jpg | |||
File:Hwd-5.jpg|From ''Definitive Edition'' | |||
</gallery> | |||
<gallery widths="160" heights="90" caption="Darunia"> | |||
File:Hyrule Warriors Screenshot Darunia Hammer.jpg | |||
File:Hyrule Warriors Screenshot Darunia Dancing.jpg | |||
File:Hyrule Warriors Screenshot Darunia Death Mountain.jpg | |||
File:Hyrule Warriors Screenshot Darunia Giant Ball.jpg | |||
File:Hyrule Warriors Screenshot Darunia Hammer Eruption.jpg | |||
File:Hyrule Warriors Screenshot Darunia Hammer Horizontal.jpg | |||
File:Hyrule Warriors Screenshot Darunia Hammer Vertical.jpg | |||
File:Hyrule Warriors Screenshot Darunia Hammer Volcanic Smash.jpg | |||
</gallery> | |||
<gallery widths="160" heights="90" caption="Ruto"> | |||
File:Hyrule Warriors Screenshot Ruto.jpg | |||
File:Hyrule Warriors Screenshot Ruto Zora's Domain.jpg | |||
File:Hyrule Warriors Screenshot Ruto Water Animals.jpg | |||
File:Hyrule Warriors Screenshot Ruto Waves.jpg | |||
File:Hyrule Warriors Screenshot Ruto Water Spikes.jpg | |||
File:Hyrule Warriors Screenshot Ruto Water Vortex.jpg | |||
</gallery> | |||
<gallery widths="160" heights="90" caption="Agitha"> | |||
File:Hyrule Warriors Screenshot Agitha Butterfly.jpg | File:Hyrule Warriors Screenshot Agitha Butterfly.jpg | ||
File:Hyrule Warriors Screenshot Agitha Cornered.jpg | File:Hyrule Warriors Screenshot Agitha Cornered.jpg | ||
| Line 222: | Line 307: | ||
File:Hyrule Warriors Screenshot Agitha Golden Butterfly Swarm.jpg | File:Hyrule Warriors Screenshot Agitha Golden Butterfly Swarm.jpg | ||
File:Hyrule Warriors Screenshot Agitha Giant Stag Beetle.jpg | File:Hyrule Warriors Screenshot Agitha Giant Stag Beetle.jpg | ||
</gallery> | |||
<gallery widths="160" heights="90" caption="Midna"> | |||
File:Hyrule Warriors Screenshot Midna.jpg | |||
File:Hyrule Warriors Screenshot Midna Shackle.jpg | |||
File:Hyrule Warriors Screenshot Midna Sphere.jpg | |||
File:Hyrule Warriors Screenshot Midna Palm.jpg | |||
File:Hyrule Warriors Screenshot Midna Punch.jpg | |||
File:Hyrule Warriors Screenshot Midna Magic Jar.jpg | |||
File:Hyrule Warriors Screenshot Midna Magic.jpg | |||
File:Hyrule Warriors Screenshot Midna Magic Attack.jpg | |||
File:Hyrule Warriors Screenshot Midna Fused Shadows.jpg | |||
File:Hyrule Warriors Screenshot Midna Lana.jpg | |||
File:Hyrule Warriors Screenshot Midna Butterfly.jpg | |||
File:Hyrule Warriors Screenshot Hookshot Aeralfos.jpg | |||
File:Hyrule Warriors Screenshot Hookshot Get.jpg | |||
File:Hyrule Warriors Screenshot Hookshot Target.jpg | |||
File:Hyrule Warriors Screenshot Hookshot Powerup.jpg | |||
File:Hwd-4.jpg|From ''Definitive Edition'' | |||
</gallery> | |||
<gallery widths="160" heights="90" caption="Zant"> | |||
File:Hyrule Warriors Screenshot Zant.jpg | |||
File:Hyrule Warriors Screenshot Zant Midna.jpg | |||
File:Hyrule Warriors Screenshot Zant Giant.jpg | |||
File:Hyrule Warriors Screenshot Zant Scimitars.jpg | |||
File:Hyrule Warriors Screenshot Zant Gorons.jpg | |||
File:Hyrule Warriors Screenshot Zant Mask.jpg | |||
File:Hyrule Warriors Screenshot Zant Sphere.jpg | |||
File:Hyrule Warriors Screenshot Zant Spin.jpg | |||
File:Hyrule Warriors Screenshot Zant Twist.jpg | |||
File:Hyrule Warriors Screenshot Zant Wind.jpg | |||
</gallery> | |||
<gallery widths="160" heights="90" caption="Fi"> | |||
File:Hyrule Warriors Screenshot Fi and Link.jpg | File:Hyrule Warriors Screenshot Fi and Link.jpg | ||
File:Hyrule Warriors Screenshot Fi Dancing.jpg | File:Hyrule Warriors Screenshot Fi Dancing.jpg | ||
| Line 230: | Line 347: | ||
File:Hyrule Warriors Screenshot Fi Sealed Grounds.jpg | File:Hyrule Warriors Screenshot Fi Sealed Grounds.jpg | ||
File:Hyrule Warriors Screenshot Fi Singing.jpg | File:Hyrule Warriors Screenshot Fi Singing.jpg | ||
File:Hyrule Warriors Screenshot | File:Hyrule Warriors Screenshot Fi Level Up.jpg | ||
File:Hyrule Warriors Screenshot | </gallery> | ||
File:Hyrule Warriors Screenshot | <gallery widths="160" heights="90" caption="Ghirahim"> | ||
File:Hyrule Warriors Screenshot | File:Hyrule Warriors Screenshot Ghirahim.jpg | ||
File:Hyrule Warriors Screenshot | File:Hyrule Warriors Screenshot Ghirahim Gate of Souls.jpg | ||
File:Hyrule Warriors Screenshot | File:Hyrule Warriors Screenshot Ghirahim Link.jpg | ||
File:Hyrule Warriors Screenshot | File:Hyrule Warriors Screenshot Ghirahim Magic.jpg | ||
File:Hyrule Warriors Screenshot | File:Hyrule Warriors Screenshot Ghirahim Parry.jpg | ||
File:Hyrule Warriors Screenshot | File:Hyrule Warriors Screenshot Ghirahim Jump.jpg | ||
File:Hyrule Warriors Screenshot | File:Hyrule Warriors Screenshot Ghirahim Dome.jpg | ||
File:Hyrule Warriors Screenshot | File:Hyrule Warriors Screenshot Ghirahim Dual Swords.jpg | ||
File:Hyrule Warriors Screenshot | File:Hyrule Warriors Screenshot Ghirahim Focus 1.jpg | ||
File:Hyrule Warriors Screenshot | File:Hyrule Warriors Screenshot Ghirahim Focus 2.jpg | ||
File:Hyrule Warriors Screenshot Ghirahim Laugh.jpg | |||
File:Hyrule Warriors Screenshot Ghirahim Sword.jpg | |||
File:Hyrule Warriors Screenshot Ghirahim Zant.jpg | |||
</gallery> | |||
<gallery widths="160" heights="90" caption="Cia"> | |||
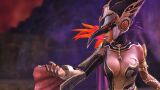
File:Hyrule Warriors Screenshot Cia.jpg | File:Hyrule Warriors Screenshot Cia.jpg | ||
File:Hyrule Warriors Screenshot Cia Profile.jpg | File:Hyrule Warriors Screenshot Cia Profile.jpg | ||
| Line 251: | Line 373: | ||
File:Hyrule Warriors Screenshot Cia Front.jpg | File:Hyrule Warriors Screenshot Cia Front.jpg | ||
File:Hyrule Warriors Screenshot Cia Fire.jpg | File:Hyrule Warriors Screenshot Cia Fire.jpg | ||
File:Hyrule Warriors Screenshot | File:Hyrule Warriors Screenshot Cia Close.jpg | ||
File:Hyrule Warriors Screenshot Cia Command.jpg | |||
File:Hyrule Warriors Screenshot Cia Dark Link.jpg | |||
File:Hyrule Warriors Screenshot Cia Dark Pillars.jpg | |||
File:Hyrule Warriors Screenshot Cia Flail Summon.jpg | |||
File:Hyrule Warriors Screenshot Cia Flail.jpg | |||
File:Hyrule Warriors Screenshot Cia Lana.jpg | |||
File:Hyrule Warriors Screenshot Cia Triforce.jpg | |||
</gallery> | |||
<gallery widths="160" heights="90" caption="Volga"> | |||
File:Hyrule Warriors Screenshot Volga.jpg | File:Hyrule Warriors Screenshot Volga.jpg | ||
File:Hyrule Warriors Screenshot Volga Claw.jpg | File:Hyrule Warriors Screenshot Volga Claw.jpg | ||
File:Hyrule Warriors Screenshot Volga Shout.jpg | File:Hyrule Warriors Screenshot Volga Shout.jpg | ||
File:Hyrule Warriors Screenshot | File:Hyrule Warriors Screenshot Volga Attack.jpg | ||
File:Hyrule Warriors Screenshot | File:Hyrule Warriors Screenshot Volga Defend.jpg | ||
File:Hyrule Warriors Screenshot | File:Hyrule Warriors Screenshot Volga Dragon Staff Transform.jpg | ||
File:Hyrule Warriors Screenshot | File:Hyrule Warriors Screenshot Volga Dragon Staff.jpg | ||
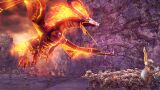
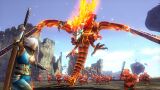
File:Hyrule Warriors Screenshot | File:Hyrule Warriors Screenshot Volga Dragon.jpg | ||
File:Hyrule Warriors Screenshot | </gallery> | ||
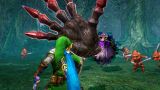
File:Hyrule Warriors Screenshot | <gallery widths="160" heights="90" caption="Wizzro"> | ||
File:Hyrule Warriors Screenshot | File:Hyrule Warriors Screenshot Wizzro.jpg | ||
File:Hyrule Warriors Screenshot | File:Hyrule Warriors Screenshot Wizzro Dark Magic Summon.jpg | ||
File:Hyrule Warriors Screenshot | File:Hyrule Warriors Screenshot Wizzro Dark Magic.jpg | ||
File:Hyrule Warriors Screenshot | File:Hyrule Warriors Screenshot Wizzro Hand.jpg | ||
File:Hyrule Warriors Screenshot Wizzro Link.jpg | |||
File:Hyrule Warriors Screenshot Wizzro Shadow Creatures.jpg | |||
</gallery> | |||
<gallery widths="160" heights="90" caption="Twili Midna"> | |||
File:Hyrule Warriors Screenshot Twili Midna Mirror.jpg | File:Hyrule Warriors Screenshot Twili Midna Mirror.jpg | ||
File:Hyrule Warriors Screenshot Twili Midna Wolf.jpg | File:Hyrule Warriors Screenshot Twili Midna Wolf.jpg | ||
</gallery> | |||
<gallery widths="160" heights="90" caption="Young Link"> | |||
File:Hyrule Warriors Screenshot Young Link Fierce Deity.jpg | |||
File:Hyrule Warriors Screenshot Young Link Spin Attack.jpg | |||
</gallery> | |||
<gallery widths="160" heights="90" caption="Tingle"> | |||
File:Hyrule Warriors Screenshot Tingle Deflating Balloon.jpg | |||
File:Hyrule Warriors Screenshot Tingle Map.jpg | |||
</gallery> | |||
<gallery widths="160" heights="90" caption="Toon Link"> | |||
File:Hwd-3.jpg|From ''Definitive Edition'' | |||
</gallery> | |||
<gallery widths="160" heights="90" caption="Toon Zelda"> | |||
File:Hwd-6.jpg|From ''Definitive Edition'' | |||
</gallery> | |||
<gallery widths="160" heights="90" caption="Ravio"> | |||
File:Hwd-7.jpg|From ''Definitive Edition'' | |||
</gallery> | |||
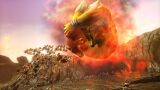
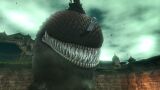
<gallery widths="160" heights="90" caption="King Dodongo"> | |||
File:Hyrule Warriors Screenshot King Dodongo Bombs.jpg | |||
File:Hyrule Warriors Screenshot King Dodongo Defeated.jpg | |||
File:Hyrule Warriors Screenshot King Dodongo Fire.jpg | |||
File:Hyrule Warriors Screenshot King Dodongo Ganondorf Light Ball.jpg | |||
File:Hyrule Warriors Screenshot King Dodongo Ganondorf.jpg | |||
File:Hyrule Warriors Screenshot King Dodongo Roar.jpg | |||
File:Hyrule Warriors Screenshot King Dodongo Roll.jpg | |||
File:Hyrule Warriors Screenshot King Dodongo Smoke.jpg | |||
File:Hyrule Warriors Screenshot King Dodongo Two.jpg | |||
File:Hyrule Warriors Screenshot King Dodongo Weakpoint.jpg | |||
</gallery> | |||
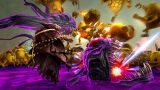
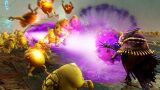
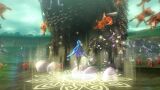
<gallery widths="160" heights="90" caption="Gohma"> | |||
File:Hyrule Warriors Screenshot Gohma Laser.jpg | |||
File:Hyrule Warriors Screenshot Gohma Attacked.jpg | |||
File:Hyrule Warriors Screenshot Gohma Guard.jpg | |||
File:Hyrule Warriors Screenshot Gohma Bow.jpg | |||
</gallery> | |||
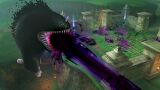
<gallery widths="160" heights="90" caption="Manhandla"> | |||
File:Hyrule Warriors Screenshot Manhandla.jpg | |||
File:Hyrule Warriors Screenshot Manhandla Poison.jpg | |||
File:Hyrule Warriors Screenshot Manhandla Seeds.jpg | |||
File:Hyrule Warriors Screenshot Manhandla Zelda.jpg | |||
</gallery> | |||
<gallery widths="160" heights="90" caption="Argorok"> | |||
File:Hyrule Warriors Screenshot Argorok.jpg | File:Hyrule Warriors Screenshot Argorok.jpg | ||
File:Hyrule Warriors Screenshot Argorok Fire.jpg | File:Hyrule Warriors Screenshot Argorok Fire.jpg | ||
File:Hyrule Warriors Screenshot Argorok Weakpoint.jpg | File:Hyrule Warriors Screenshot Argorok Weakpoint.jpg | ||
</gallery> | |||
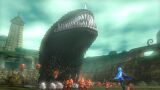
<gallery widths="160" heights="90" caption="The Imprisoned"> | |||
File:Hyrule Warriors Screenshot The Imprisoned.jpg | File:Hyrule Warriors Screenshot The Imprisoned.jpg | ||
File:Hyrule Warriors Screenshot The Imprisoned Attacked.jpg | File:Hyrule Warriors Screenshot The Imprisoned Attacked.jpg | ||
File:Hyrule Warriors Screenshot The Imprisoned Stomp.jpg | File:Hyrule Warriors Screenshot The Imprisoned Stomp.jpg | ||
File:Hyrule Warriors Screenshot | File:Hyrule Warriors Screenshot The Imprisoned Barrage.jpg | ||
File: | File:ZD Imprisoned Beam.png | ||
File: | File:ZD Imprisoned.png | ||
</gallery> | </gallery> | ||
Revision as of 13:47, June 21, 2020
Artwork
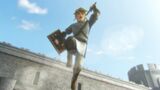
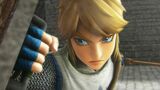
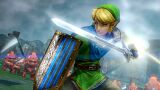
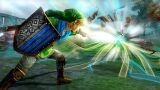
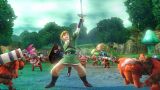
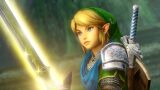
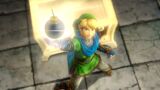
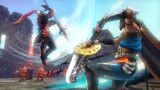
- Link
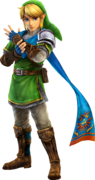
Link in Hero's Clothes
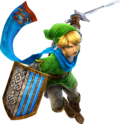
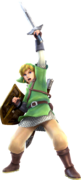
Link with the Hylian Sword
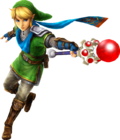
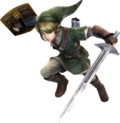
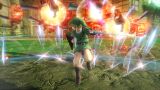
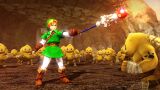
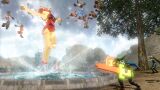
Link with the Magic Rod
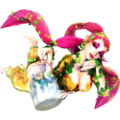
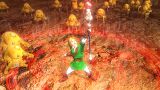
Link with the Great Fairy
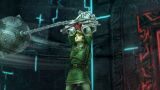
Link with the Gauntlets
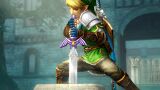
Link with the Master Sword
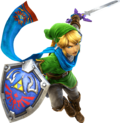
Link with the Master Sword
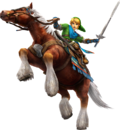
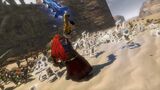
Link with the Horse
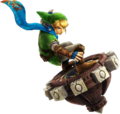
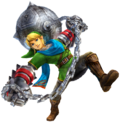
Link with the Spinner

Link in Classic Tunic
Link from Ocarina of Time
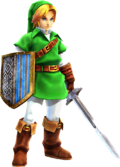
Link from Twilight Princess
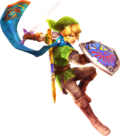
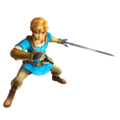
Link from Skyward Sword
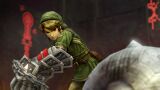
Link as the Postman from Twilight Princess
Link Breath of the Wild costume (Definitive Edition only)


_-_Hyrule_Warriors.png)


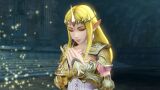
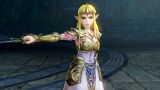
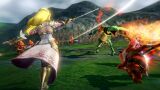
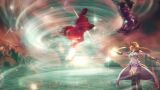
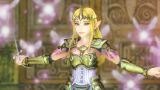
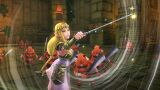
- Zelda
Zelda in her Standard Robes
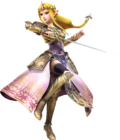
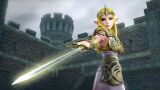
Zelda with the Rapier
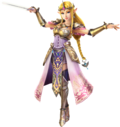
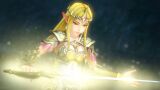
Zelda with the Baton
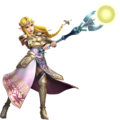
Zelda with the Dominion Rod
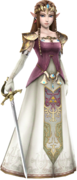
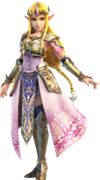
Zelda from Twilight Princess

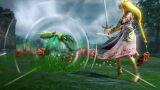
Zelda from Skyward Sword

Zelda from Ocarina of Time

Zelda as Ilia from Twilight Princess
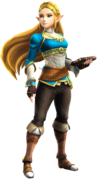
Zelda Breath of the Wild costume (Definitive Edition only)


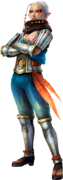
Impa in her Standard Outfit
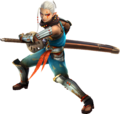
Impa with the Giant Blade
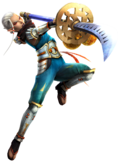
Impa with the Naginata

Impa in her Era of the Hero of Time (Ocarina of Time) outfit
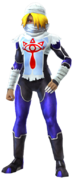
Sheik in their Era of the Hero of Time (Ocarina of Time) Outfit
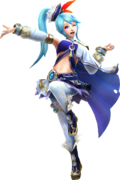
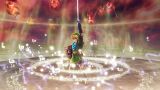
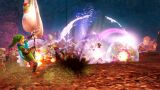
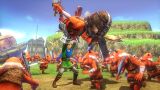
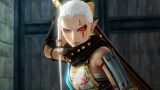
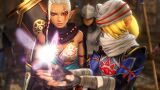
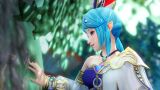
Lana in her Standard Outfit
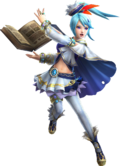
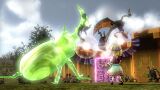
Lana with the Book of Sorcery
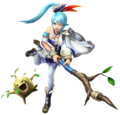
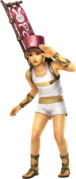
Lana with the Spear
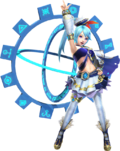
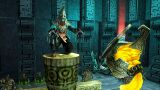
Lana with the Summoning Gate

Lana in Guardian of Time outfit
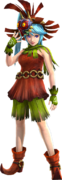
Lana in Skull Kid's Clothes

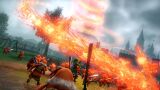
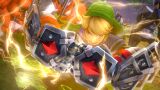
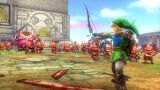
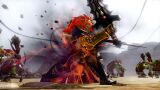
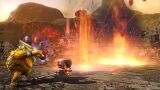
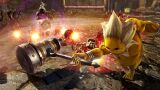
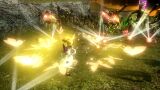
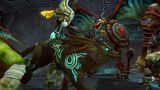
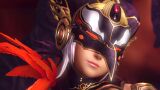
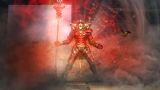
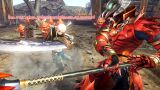
Ganondorf with the Great Swords
Ganondorf with the Trident
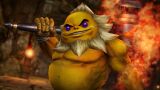
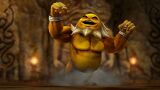
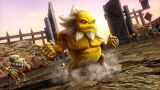
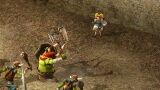
Darunia with the Hammer

Ruto with the Zora Scale
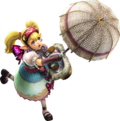
Agitha with the Parasol
Midna with the Shackle

Zant with his Scimitars
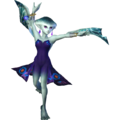
Fi with the Goddess Blade
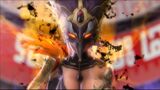
Ghirahim with the Demon Blade
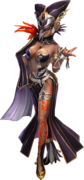
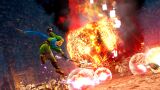
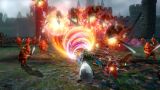
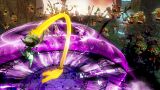
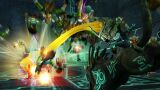
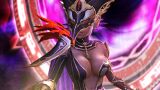
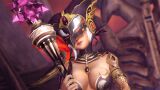
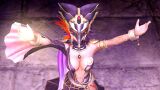
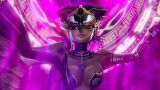
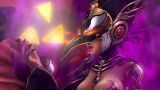
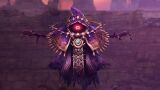
Cia
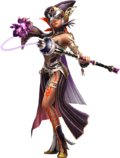
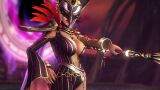
Cia with the Scepter
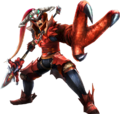
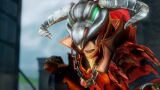
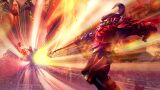
Volga with the Dragon Spear
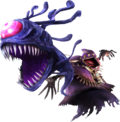
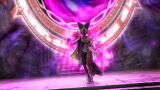
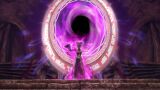
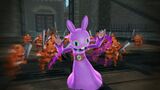
Wizzro with the Ring
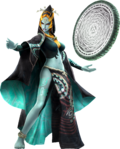
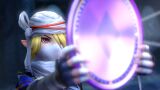
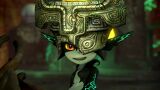
Twili Midna with the Mirror
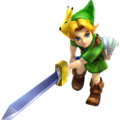
Young Link with the Mask

Tingle with the Balloon
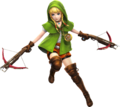
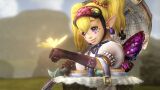
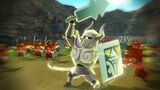
Linkle with Crossbows
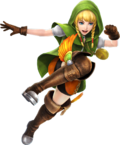
Linkle with her Boots weapon
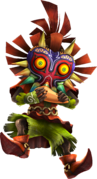
Skull Kid with Ocarina
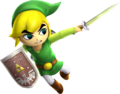
Toon Link with Light Sword
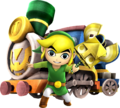
Toon Link with Sand Wand

Tetra with Cutlass
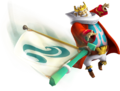
King Daphnes with Sail
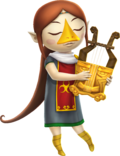
Medli with Rito Harp

Marin
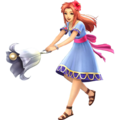
Marin with Bell

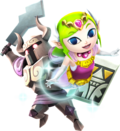
Toon Zelda with Phantom Arms

Ravio with Rental Hammer

Yuga with Picture Frame


_-_Hyrule_Warriors.png)


_-_Hyrule_Warriors.png)


_-_Hyrule_Warriors.png)


Screenshots
- Link


From Definitive Edition

From Definitive Edition
From Definitive Edition


- Zelda


From Definitive Edition


- Impa


- Shiek


- Lana


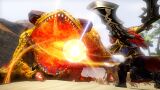
- Ganondorf
From Definitive Edition


- Darunia


- Ruto


- Agitha


- Midna

From Definitive Edition


- Zant


- Fi


- Ghirahim


- Cia


- Volga


- Wizzro


- Twili Midna


- Young Link


- Tingle


- Toon Link
From Definitive Edition

- Toon Zelda
From Definitive Edition

- Ravio
From Definitive Edition

- King Dodongo


- Gohma


- Manhandla


- Argorok
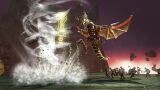


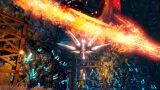
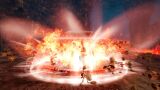
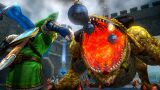
- The Imprisoned


Videos
Link - Hylian Sword
Link - Magic Rod
Link - Gauntlets
Link - Spinner
Link - Horse
(Master Quest Pack)
Link's Costumes
Impa - Giant Blade
Impa - Naginata
Zelda - Rapier
Zelda - Baton
Zelda's Costumes
Lana - Book of Sorcery
Lana - Spear
Agitha - Parasol
Midna - Shackle
Fi - Goddess Blade
Ruto - Zora Scale
Darunia - Hammer
Sheik - Harp
Ganondorf - Great Sword
Ganondorf's Costumes
Zant - Scimitars
Ghirahim - Demon Blade
Cia - Flail
Volga - Lance
Wizzro - Ring
Twili Midna - Mirror
Zelda - Dominion Rod
(Twilight Princess Pack)