Dodongo (The Legend of Zelda): Difference between revisions
mNo edit summary |
No edit summary |
||
| Line 1: | Line 1: | ||
{{Boss | {{Boss | ||
|name = Dodongo | | name = Dodongo | ||
|image = [[File:Dodongo-LoZ-Art.png|200px]]<br>''Official Artwork | | image = [[File:Dodongo-LoZ-Art.png|200px]]<br>''Official Artwork from Game Manual'' | ||
|threat = 2 | | threat = 2 | ||
|attack = {{H}} Contact | | attack = {{H}} Contact | ||
|game = ''[[The Legend of Zelda]]'' | | game = ''[[The Legend of Zelda]]'' | ||
|dungeon = [[Level 2: The Moon]]<br>[[Level 5: The Lizard]]<br>[[Level 7: The Demon]] | | dungeon = [[Level 2: The Moon]]<br>[[Level 5: The Lizard]]<br>[[Level 7: The Demon]] | ||
|weapon = [[Bomb]]s<br>[[Sword]] | | weapon = [[Bomb]]s<br>[[Sword]] | ||
|reward = [[Heart Container]]<br>[[Triforce Shard]] | | reward = [[Heart Container]]<br>[[Triforce Shard]] | ||
}} | }} | ||
{{Old Man|Dodongo}} | {{Float|left|{{Old Man|Dodongo}}}} | ||
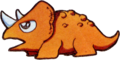
'''Dodongo''' is | The '''Dodongo''' is the second [[boss]] of ''[[The Legend of Zelda]]''. It is first encountered in [[Level 2: The Moon]], where it is the final boss and guardian of the second [[Triforce Shard]]. Later on in the game, a set of three Dodongos appear in [[Level 5: The Lizard]]. Also, two sets of three Dodongos appear in [[Level 7: The Demon]]. The Dodongo looks very similar to a [[Wikipedia:Triceratops|three-horned dinosaur]], which could be its inspiration. There are a total of ten Dodongos found in ''The Legend of Zelda''. | ||
==Level 2: The Moon== | ==Level 2: The Moon== | ||
The Dodongo first appears as the final boss of the second dungeon, Level 2: The Moon. This one appears by itself. Oddly enough, whenever [[Link]] is fighting a Dodongo, it seems to take on no drive to attack Link. It will simply walk around the room, basically minding its own business. It can be killed if Link places a Bomb right in its path, at which time the Dodongo will swallow the Bomb and be damaged. Two explosions will kill the Dodongo, and allow Link to collect the second Triforce Shard. Another way Link can defeat the Dodongo is by putting a bomb right on their backs. If it hits just in the right spot, it will stun them. Once they are stunned, Link can just simply swipe them with his [[Sword]] and it will be gone. | |||
==Level 5: The Lizard== | ==Level 5: The Lizard== | ||
The second appearance of the Dodongo contains a total of three, and they all fight Link at the same time in Level 5: The Lizard. Defeating these Dodongos requires the same strategy as the first battle; line up the Dodongo, place a Bomb, watch it die. The Dodongos gaurd a door that leads to the [[Old Man]] whom will offer Link a Bomb upgrade. These Dodongos can be a real pain, as it takes a total of six bombs to kill them, yet Link at this point in the game can only carry a maximum of eight. This means that if Link misses with three Bombs, he will have to leave, collect some more bombs, and try again. | |||
The second appearance of the Dodongo contains a total of three, and they all fight Link at the same time in Level 5: The Lizard. Defeating these Dodongos requires the same strategy as the first battle; line up the Dodongo, place a Bomb, watch it die. The Dodongos gaurd a door that leads to the [[Old Man]] whom will offer Link a Bomb upgrade. | |||
==Level 7: The Demon== | ==Level 7: The Demon== | ||
The third and final appearance of the Dodongo takes place in Level 7: The Demon. There are a total of six Dodongos in this dungeon, and they all attack and defend the exact same way previous ones did. Link will face them three at a time, like in the fifth dungeon. Similarly to the previous appearance, these Dodongos can be tricky because of Link's limited bomb capacity. However, he should be able to hold up to 12 by now, so the challenge is severely less than before. | |||
The | ==Trivia== | ||
*[[Dodongo (The Legend of Zelda)|Dodongos]] from ''[[The Legend of Zelda]]'' look very similar to the dinosaur called [[Wikipedia:Triceratops|Triceratops]]. | |||
==Gallery== | ==Gallery== | ||
<gallery> | <gallery> | ||
File:Dodongo-LoZ-Art-2.png| | File:Dodongo-LoZ-Art-2.png|Artwork from [[Million Publications The Legend of Zelda Strategy Guide|Million Publications Strategy Guide]] for ''[[The Legend of Zelda]]'' | ||
File:Dodongo-LoZ-Sprite.png| | File:Dodongo-LoZ-Sprite.png|Sprite from ''[[The Legend of Zelda]]'' | ||
</gallery> | </gallery> | ||
{{Cat|The Legend of Zelda Bosses}} | {{Cat|The Legend of Zelda Bosses}} | ||
Revision as of 19:08, January 24, 2013
DODONGO DISLIKES SMOKE |
The Dodongo is the second boss of The Legend of Zelda. It is first encountered in Level 2: The Moon, where it is the final boss and guardian of the second Triforce Shard. Later on in the game, a set of three Dodongos appear in Level 5: The Lizard. Also, two sets of three Dodongos appear in Level 7: The Demon. The Dodongo looks very similar to a three-horned dinosaur, which could be its inspiration. There are a total of ten Dodongos found in The Legend of Zelda.
Level 2: The Moon
The Dodongo first appears as the final boss of the second dungeon, Level 2: The Moon. This one appears by itself. Oddly enough, whenever Link is fighting a Dodongo, it seems to take on no drive to attack Link. It will simply walk around the room, basically minding its own business. It can be killed if Link places a Bomb right in its path, at which time the Dodongo will swallow the Bomb and be damaged. Two explosions will kill the Dodongo, and allow Link to collect the second Triforce Shard. Another way Link can defeat the Dodongo is by putting a bomb right on their backs. If it hits just in the right spot, it will stun them. Once they are stunned, Link can just simply swipe them with his Sword and it will be gone.
Level 5: The Lizard
The second appearance of the Dodongo contains a total of three, and they all fight Link at the same time in Level 5: The Lizard. Defeating these Dodongos requires the same strategy as the first battle; line up the Dodongo, place a Bomb, watch it die. The Dodongos gaurd a door that leads to the Old Man whom will offer Link a Bomb upgrade. These Dodongos can be a real pain, as it takes a total of six bombs to kill them, yet Link at this point in the game can only carry a maximum of eight. This means that if Link misses with three Bombs, he will have to leave, collect some more bombs, and try again.
Level 7: The Demon
The third and final appearance of the Dodongo takes place in Level 7: The Demon. There are a total of six Dodongos in this dungeon, and they all attack and defend the exact same way previous ones did. Link will face them three at a time, like in the fifth dungeon. Similarly to the previous appearance, these Dodongos can be tricky because of Link's limited bomb capacity. However, he should be able to hold up to 12 by now, so the challenge is severely less than before.
Trivia
- Dodongos from The Legend of Zelda look very similar to the dinosaur called Triceratops.
Gallery
Artwork from Million Publications Strategy Guide for The Legend of Zelda

Sprite from The Legend of Zelda
