This chapter covers the Nintendo Switch version of Link’s Awakening. If you are playing the Game Boy Color version, check out the Catfish’s Maw Walkthrough.
- Chapter 1 – Tail Cave
- Chapter 2 – Bottle Grotto
- Chapter 3 – Key Cavern
- Chapter 4 – Angler’s Tunnel
- Chapter 5 – Catfish’s Maw
- Chapter 6 – Face Shrine
- Chapter 7 – Eagle’s Tower
- Chapter 8 – Turtle Rock
- Chapter 9 – The Awakening
5.1 The Friendly Ghost
There is plenty that we can do before making our way to the next dungeon, Catfish’s Maw. Now that we have the flippers we’ll be able to swim in the deep waters of Koholint Island. From just outside Angler’s Tunnel swim to the left a screen and enter the cave nearby.
Speak to the giant fish here known as Manbo. He’ll ask you if you have an Ocarina, so answer yes and he’ll teach you the song known as Manbo’s Mambo. This song serves two purposes. Whenever you use it in the overworld you will be able to warp to any warp location, including the now accessible Manbo’s Pond, located just east of the Mysterious Forest outside of Crazy Tracy’s house. Additionally, if you play the song while inside of a dungeon, you will immediately warp back to the entrance of the dungeon. With our new song in hand, let’s exit the cave.


Just east of the Angler’s Tunnel, there is a cave that Link can swim to. Inside, dive underneath the water to find a Piece of Heart.Optional: Piece of Heart #18


From Angler’s Tunnel, swim to the west along the river and then head south where Link will fall down a small waterfall. Dive underwater right next to the waterfall to find a secret seashell.Optional: Secret Seashell #31

You’ll now be swimming in the moat that surrounds Kanalet Castle. Swim along the path to the west of the castle, heading southward. Make your way to near the front gate of the castle and you’ll find a piece of heart underwater. Dive down to snag it.Optional: Piece of Heart #19

Shortly after completing Angler’s Tunnel you’ll be joined by a friendly ghost who will start to follow Link around. The ghost wants to be taken to his home, which is located at the south-central portion of map, at the west end of Martha’s Bay. If you have explored that area previously, there is a warp portal to Martha’s Bay, so you can quickly get there. If not, the easiest way to reach Martha’s Bay is by traveling south of Mabe Village to the Toronobo Shores, and then head east. The house is located right on the border between Martha’s Bay and the Toronbo Shores.


Once you arrive the ghost will float around the house, thinking of all the memories. He will then ask you to take him to his grave at the cemetery.
After bringing the Ghost back to his house, you’ll find there are a few jars at the bottom-right corner. Lift the jars to reveal a Secret Seashell.Optional: Secret Seashell #32

The ghost wants to return to the cemetery. The fastest way is to pull out the Ocarina and play Manbo’s Mambo. Warp over to Manbo’s Pond, which isn’t too far from the ghost’s grave. Walk left and then down a bit to find the lone gravestone. Lift the rock that is in the way and walk up to the gravestone.

Immediately after you are done with the ghost, the beloved owl will appear and state that you must dive into the water of Martha’s Bay to enter Catfish’s Maw.
5.2 Trading Sequence
If you haven’t picked up the Bow yet, now is a good time to do so. It is available at the shop in Mabe Village for 980 rupees. While not completely required to beat the next dungeon, some of the optional rooms cannot be completed without it.

There are several items in the Link’s Awakening Trading Sequence that we can now collect. If you haven’t already gotten it, you should have the the Hibiscus Flower at this point in the game. We received it by giving the Pineapple to Papahl, the man who was lost up on the Tal Tal Mountain Range.
Return to Animal Village and at the top-right portion, there are two buildings that look rather similar. Enter the building on the left to find a female goat by the name of Christine. Speak to her and she’ll be delighted that you brought her a hibiscus. Agree to do her a favor and she will ask you to take a letter to Mr. Write who lives on the border of the Mysterious Forest. Afterwards she will give you the Goat’s Letter, which serves as the 9th item found within the Link’s Awakening Trading Sequence.
Return to Animal Village and at the top-right portion, there are two buildings that look rather similar. Enter the building on the left to find a female goat by the name of Christine. Speak to her and she’ll be delighted that you brought her a hibiscus. Agree to do her a favor and she will ask you to take a letter to Mr. Write who lives on the border of the Mysterious Forest. Afterwards she will give you the Goat’s Letter, which serves as the 9th item found within the Link’s Awakening Trading Sequence.Trading Sequence Item #9 - Letter


Make your way back to the Mysterious Forest and exit it at the northwest corner. Enter the building here and give the Letter to Mr. Wright. As a thanks for giving him the letter, he will give Link a Broom.Trading Sequence Item #10 - Broom


Return to Mabe Village and speak with Grandma Yahoo, who can be found standing just outside the building, south of BowWow. She thanks you for giving her the Broom and in return will give Link the Fishing Hook that she found. NOTE: If you have completed Catfish’s Maw, or if you’ve done other objectives out of order, Grandma Yahoo will no longer be in Mabe Village. Instead, she has moved over to Animal Village, found at the northeast part of town.Trading Sequence Item #11 - Fishing Hook

While in Mabe Village, pay a visit to the Trendy Game. Since we cleared Angler’s Tunnel, there is now another Secret Seashell that we can snag.Optional: Secret Seashell #33

Return to Animal Village and pay Christine a visit. Since you delivered her Letter to Mr. Wright, she will thank you by giving you a Secret Seashell.Optional: Secret Seashell #34


Exit Animal Village to the west and just to the west there is a ladder allowing you to climb down into the water below. Swim over to the southeast corner of the Bay and then swim underneath the bridge. Jump onto the boat and give the Fishing Hook to the Fisherman. He will use the Fishing Hook and will fish up a Necklace!Trading Sequence Item #12 - Necklace


Make your way to the center of Martha’s Bay and you’ll find that there is a Mermaid swimming around near the north end. Speak with her and give her the Necklace. In exchange she will allow you to snag one of her Scales.Trading Sequence Item #13 - Mermaid Scale


Swim to the south end of Martha’s Bay. There is a narrow passage where the water slips through and in this area, there is a piece of heart. Dive down to grab it.Optional: Piece of Heart #20

Swim to the west end of Martha’s Bay and climb the ladder to get back on the surface. Walk to the south, passed the Telephone Booth and you’ll find a tiny island with a bush. Swim to the island and slash the bush to find a Secret Seashell.Optional: Secret Seashell #35

At the south end of Martha’s Bay, there is a staircase that can be seen, surrounded by bushes. There is a gap of two holes to the left. You can run with the Pegasus Boots, jump in the area, and then slash away with your sword to clear the gap and cut down the bushes. Go down the stairs into a cave and you’ll find some deeper water. If you look closely, you’ll find a heart piece down there. Dive underwater to grab it.Optional: Piece of Heart #21


At the south end of Martha’s Bay, go down the stairs that are surrounded by bushes. Make your way through the cave and exit at the other end. Walk to the west and you’ll find another staircase. Climb down and sprinkle some Magic Powder to light a fire. The Mad Batter will appear and he will ‘curse’ you with the ability to now carry up to 60 bombs. NOTE: If you say no when asked, and if you already have the Bow, you have the option of increasing your arrow capacity instead. Likewise, if you never got the first upgrade from the Mysterious Forest, you can also increase your Magic Powder capacity.Optional: Bomb Upgrade


Just south of the Seashell Mansion, take the underground passage that we originally used to reach the east side of Koholint Island. Now that we have the flippers we can dive down underwater and grab the heart piece that is hidden in this cave.Optional: Piece of Heart #22


Return to the entrance of the third dungeon, Key Cavern. From there swim in the water just northeast to find a small island. Slash the lone bush here to find a Secret Seashell.Optional: Secret Seashell #36

5.3 Catfish's Maw
To enter Catfish’s Maw, make your way to Animal Village and then leave the town to the west. Head up and left to find a staircase that leads into the water of Martha’s Bay. Swim down and left to find Catfish’s Maw. On the left side, there is a rock structure that Link can swim in between. Dive underwater here and make your way through the side-scrolling section. Once you come up from underwater, enter Catfish’s Maw.
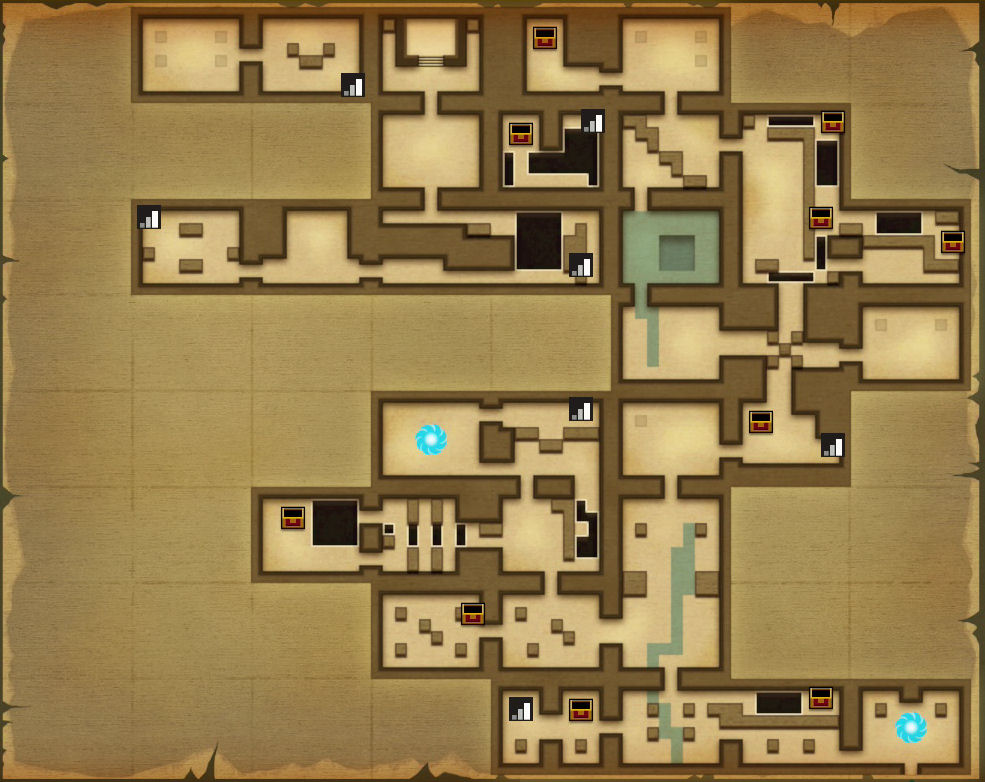
Catfish’s Maw is a bit more difficult than any of the previous dungeons as it is not nearly as linear. There are multiple paths we can take through the dungeon and if you don’t know exactly where to go, you’ll find yourself backtracking through rooms over and over again. It is also a strange dungeon in that it has multiple mini-bosses, although one of them is a completely optional battle. That being said, it isn’t the most difficult of dungeons and shouldn’t give you too much trouble.
From the dungeon entrance, head left a screen and defeat zol and iron mask. Continue left a screen and defeat another iron mask, along with four keese. Go through the door on the left that opens up.


Open the treasure chest found in this room to get the Compass. There are two iron masks in this room, but you don’t need to defeat them yet, so just head down the steps. The two chain platforms here basically work like a teeter totter. When you step on the first one it will go down, but will send the other one up. Carefully use the platforms and jump over to the left. This room is similar except that it has two of these pairs of platforms. Make your way across and climb the steps at the end to resurface.


Use your sword to defeat the four stalfos that are found in this room and then slash away at the various crystals. There are four blocks in this room. You need to push the two blocks on the top row together, forming a square between the four blocks. Once you’ve done so, a small key will drop from the ceiling. Grab the key and then head back down the steps and through the underground area.
Back in the compass room, you’ll have to defeat the two iron masks here to open the door. Do just that and head right a screen. Let’s use the key we just go and go up through the locked door. Avoid the enemies and just head left a screen. You’ll find yourself in a room with two iron masks and several traps around the edges of the room. Defeat the two iron masks and then head left a screen.


There are two more iron masks in this room along with a bubble that is circulating the center of the room. You can lift the jars to free up some space and limit the bubbles reach. Carefully defeat the two iron masks in the room and a treasure chest will appear. Open it up to get the dungeon’s Stone Beak! Be sure to also jump up and grab the bombs that are floating around the room. With the beak in hand, let’s backtrack to the right two screens and then head up.
Defeat the three stalfos that are found in this room and the door above will open up. Before heading up, speak with the owl statue and it gives you some advice about facing the mini-boss ahead. If you cannot destroy it with your sword, then use some bombs instead. With that knowledge in mind, let’s head up a screen to take on one of the dungeon mini-bosses, Master Stalfos.
The Master Stalfos will walk around the room trying to slash at you with its large sword. The master stalfos also wields a giant shield and it will block most of Link’s attacks from below, to the left, and above him. Link will need to attack him from his side, where he doesn’t have his shield out.
Whenever the master stalfos jumps, once he lands he will be vulnerable on his side momentarily. Slash at him and the stalfos will crumble to the ground. At this point you can drop a bomb next to its crumbled body. The stalfos will likely get back on his feet and try to attack you once again. Repeat the same methods until the stalfos has had enough and will flee the room.


Walk to the room to the right and open the treasure chest to find that it is empty. The item that was inside was stolen by the master stalfos, so we’ll have to track him down once again. Walk up a screen and push the block up before heading left a screen.
Immediately head back right a screen and push the center block that has reset. You should now be able to go up a screen. Immediately turn around once again and step on the switch here to open up the door on the right. Push the block and then head right a screen to take on the master stalfos for a second time.


The battle with master stalfos this time is pretty much identical. Use the same strategies that you used the first time and after a few hits, he will have been defeated. Go back left a screen, push the block, and then head up a screen once again.
Defeat the star and shrouded stalfos that are in this room before heading right a screen. There are some enemies here, but there are also some bombs that you can grab. Get the bombs, then head back left a screen and then head up.
Get rid of more enemies and then head to screen to the left. There are three green zols burrowed underground in this room, one of which is on the left side of the blocks. Defeat the two that are nearby and then lift up the leftmost pot that is on the ground. You can push one of the blocks to reach the left side of the room. Once the third zol pops up, defeat it and then head through the door above that opens up.


You will find the master stalfos here for the third time and once again, the battle is pretty much identical. Defeat him and then head left a screen. Open the treasure found here to get the Dungeon Map. We now need to backtrack almost to the entrance of the dungeon. The easiest way to do this is to simply play Manbo’s Mambo to warp to the dungeon entrance.
From the dungeon entrance, make your way left three screens, defeating the enemies in the process. Once again go through the underground passageway found here and resurface in the room with four stalfos. Defeat or ignore them and then head left a screen to take on the master stalfos for the fourth time.


Once again, master stalfos is the same as before, although it seems he has a bit more health this time around. Use a bomb when his bones have crumbled to the ground. After a few bomb explosions, master stalfos will finally be defeated, leaving the dungeon item, the Hookshot. The hookshot works just like it did in A Link to the Past, where it can latch onto items in the distance and pull you towards them. Additionally, it can stun enemies or remove enemy armor.
With the hookshot in hand let’s backtrack right a screen, through the underground passage, and then right two screens. Alternatively you can just play Manbo’s Mambo a second time to warp to the dungeon entrance. Our next stop is the second room in the dungeon, but along the north side of the room. Using the hookshot that we just got, we can latch onto the treasure chest across the gap and open it to get 100 rupees. Hookshot back across and go left a screen and up a screen.


Walk to the left a screen and then up, defeating the iron masks and using the hookshot along the way. Continue to the left another screen and use the hookshot to get across the room. Defeat the two zol that appears and head left through the top portion of the room.
Hookshot over to the treasure chest and open it to get a small key. Defeat the enemies here and then backtrack to the right two screens. You are now at a crossroads as there are multiple things we can do. Catfish’s Maw is one of the strange dungeons in which one of the mini-boss battles is completely optional. From this room, if you use the hookshot on the right side to grab onto the latch and extend a bridge, it will allow you to walk up a screen. From here, if you use the key on the left side of the room, you’ll find yourself in a mini-boss battle with two gohma. Once again, this is completely optional and the only purpose it serves is creating a warp portal so you have easy access to the dungeon boss in case you lose your life.


The two Gohma will walk back and forth and will eventually do one of two things. One, it will start shaking and then quickly run towards Link, trying to harm him. Gohma’s second attack will be when it stops in place, opens up is giant eye, and shoots a fireball towards Link.
Gohma can only be harmed when it opens its giant eye. Once it does so, you can use your hookshot to poke it right in the eye, stunning the boss momentarily. Then run up and slash away with your sword. Alternatively, you can use the Bow and Arrow to shoot the eye, but this is slower and less effective. Once they are both defeated, a warp portal will appear. You could head right a screen along the top portion of the room, but this really just leads to a dead end since we don’t have another small key at the moment. So instead, backtrack right and down a screen to get to the room where we created the bridge with the hookshot.


Whether you decided to fight gohma or not, backtrack down a screen, right, and up to where we first fought master stalfos. Continue right a screen and you’ll see a staircase here. If we head down the staircase at this point in time and go through the underground sequence, we will resurface and nearby we’ll find an owl statue that states, ‘Dive under where torchlight beams do cross’. The rest of the area leads to the same dead end that the stairs by Gohma led to. So, backtrack to the room just to the right of where we first fought Master Stalfos.
From here walk up a screen and push the central block once again before heading left a screen. Defeat or avoid the enemies and head up a screen. Defeat the four water tektites found in this room and look at the walls, where you’ll see four torchlights. If you were to connect the ones on opposite sides with lines, they’ll meet right in the center of the deep water. Just as the owl statue stated, let’s dive underneath.


Make your way through this underwater area, defeating enemy Bloobers along the way. These are another example of Mario enemies found within this title. Resurface on the next screen to find yourself in a new part of the dungeon. Use the hookshot to grab onto the latch and extend a bridge across. Walk over to the treasure chest and open it to get the Nightmare Key. Backtrack through the underwater area.


Once you resurface walk down a screen and right a screen to get back to the room with the block in the center. Push it to the right and head up a screen. Jump over to the bottom-right part of the screen and use the hookshot to get over to the treasure chest. Open it up to get 50 rupees and then head right a screen.
Hookshot across the gap and open the treasure chest to get a small key. Note: If you didn’t use the key near the mini-boss battle with Gohma, then you don’t actually need to get this key. Hookshot back across and head left a screen. Continue up a screen and extend the bridge across to reach the treasure chest. Open it up to get 50 more rupees and hookshot to the block on the left side of the room.


We’ve now gotten everything we need to here in Catfish’s Maw, so it is time to take on the dungeon boss. There are a few ways to reach the boss from here. Either backtrack down a few screens, maneuvering around the room with the block in the center, and go down the staircase here. Alternatively, if you did defeat Gohma, you can play Manbo’s Mambo to return to the entrance and then step into the warp portal to reach Gohma’s room. From there head right a screen and down the steps. Both paths are going to lead you to the same area.
If you took the first path, after the underground sequence, you’ll have to walk right a few screens and you’ll find a staircase. (This staircase leads to Gohma’s lair). Avoid it and use the key on the locked block found here and then head left a screen. Finally, use the Nightmare Key on the locked door and head up to take on the dungeon boss, Slime Eel.


Slime Eel can be an annoying boss. He will make four holes in the walls for his head to pop out. His tail swings around in the big hole in the center of the room. When his head pops out in one of the holes, use your Hookshot on it. Step to the side and hit the part of his body with a glowing orb on it. This takes several hits, so this may take you a few attempts to kill him.


Occasionally a false head will be sent out of one of the holes, which is distinguished by the white pupils instead of the block ones. If Link pulls this one out with the hookshot, he will just slither around the room. It can be rather annoying trying to avoid him when he does this. Just repeatedly use the Hookshot to pull his body out and slash away at the orb. Once he has been defeated read his last words to the tone of some creepy music and collect the Heart Container.


Walk up and collect the fifth Instrument of the Sirens’, the Wind Marimba.


| “…SHRINE… An island secret in the shrine…” |
