- Chapter 1 – Deepwood Shrine
- Chapter 2 – Cave of Flames
- Chapter 3 – Fortress of Winds
- Chapter 4 – Temple of Droplets
- Chapter 5 – Palace of Winds
- Chapter 6 – Dark Hyrule Castle
3.1 Elemental Sanctuary
With the Cave of Flames now behind us, let’s shrink down to minish size and re-enter Melari’s Mine. Run over and speak with Melari to find that the broken sword has been forged as the White Sword. This sword can be infused with the power of the elements to gain power. Melari tells us that our next destination is over at the elemental sanctuary hidden within Hyrule Castle. Afterwards, exit the mine as if you were heading towards the Cave of Flames.


I’d like to make note about Kinstone Fusions from this point forward. Many of the characters throughout Hyrule, including some of the Minish here in Melari’s Mine will fuse Kinstones with you. If you walk up to a character and a bubble appears next to them, this means you can fuse kinstones with them. The Red and Blue kinstone fusions are the same in every single game and they give the same rewards each time. However, the green kinstone fusions for the most part are completely random. You will be able to fuse kinstones with some characters at certain points in the game and the prizes that are rewarded are random. In some cases you can fuse green kinstones multiple times with a single character. I’ll be covering the red and blue kinstone fusions as we progress through the game. The green kinstone fusions will be covered in their entirety in Chapter 6.
Back outside, you can jump off the ledge at the bottom-left part of the screen. Make your way to the right end of this area and then start climbing down the walls to get back to Mt. Crenel’s Base. Continue climbing down and head east to reenter the Trilby Highlands. Walk right across the bridge and make your way to the northeast part of the Trilby Highlands. Walk right a screen to get back to North Hyrule Field.


Use the Cane of Pacci on the hole found here and jump up to the higher platform. Hit the lever to extend the bridge across the gap. Jump down and cross the bridge. Just to the west of the drawbridge leading to Hyrule Castle, you will find a small boulder in your way. Blow up it using a bomb and then head down the staircase here. Go down the steps here and collect Piece of Heart #9 that is waiting for you! Afterwards head back up the steps and get back outside. Go up a screen to enter the Hyrule Castle Garden.


Walk up and enter Hyrule Castle. Climb the steps on the left side of the room and then head down the staircase. Walk up and head through the door straight ahead. Continue northward and enter the Elemental Sanctuary. Run ahead and drop your sword into the pedestal. The white sword will be infused with the two elements. A stone pillar will arise and it gives you a hint of what to do. Charge up your sword on one of the glowing tiles and then walk over to the other tile to make a carbon copy of yourself.
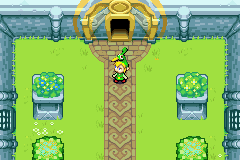

Run to the south end of the room and the door is now closed. There are four flashing tiles and two switches to step on. You need to charge your sword and make a duplicate of Link using the two middle tiles. Step on the switches with both Links and the door will open. Exit the Elemental Sanctuary and make your way back outside of Hyrule Castle.


3.2 Pegasus Boots


Once you are back in the Hyrule Castle Garden, head south to get back to Hyrule Field. You’ll be confronted by Vaati and you learn about the curse Vaati has placed on Ezlo. Afterwards Vaati will unleash some enemy Moblins. Once a moblin spots Link, it will hold its sword out and charge in a straight line. Avoid its attack and use your sword to slash at them. Slash each moblin three times and the barrier around will disappear. This will trigger a cut-scene where we learn about the story between Ezlo and Vaati. Afterwards head west to get back to the Trilby Highlands.
Once you are back in the Trilby Highlands, walk south across the bridge and go down the ladder that we previously went down to get the first bottle. This time we can use the glowing tiles to make a duplicate of Link and push the large block to the left. Keep pushing it and then head up the ladder found here.


This area has a variety of enemies including the new Blue Octoroks. They aren’t any different than the red octoroks we found earlier, except that these ones can be found in watery areas. Use a bomb to blow-up the entrance to the cave and head inside. Open the treasure chest to get a Red Kinstone and then exit the cave.
Make your way around to the east side of the Trilby Highlands and climb the steps heading northward. Push the small boulder into the hole, allowing for quicker navigation to this area. Just to the right of the small boulder you will see two rocks. You can place a bomb in between them to reveal a cave that has some fairies. Afterwards head south and enter the Western Wood.


Ezlo will immediately sense something from the castle’s direction, which triggers a cut-scene showing Vaati taking control of King Daltus. The King then orders his solders to find the Light Force. Defeat the enemies as you head southward. You’ll see a small boulder on the right, so push it so that it falls into the hole. This will allow quick access to South Hyrule Field. Afterwards walk to the northwest portion of this area and head left to reach Castor Wilds.
Once you try walking across the swamp, Ezlo mentions that we are going to need to find a better way to walk faster. We cannot progress any further, but once you’ve tried walking across the swamp, this triggers actions elsewhere in Hyrule. Return to the Western Wood and then make your way back all the way to Hyrule Town, passing through South Hyrule Field.


We want to make our way to the Shoe Shop found near the center of town. It is just left of town square and it has a shoe on top of the building. Once you enter the building, the shop owner falls asleep right on top of his desk. Use the pot at the northwest part of the room to shrink down to Minish Size. Climb on top of table as a Minish and speak to the Minish found here. Turns out they just recently made a pair of Pegasus Boots while Rem was sleeping, but they need Rem to put the finishing touches on them. The Minish mentions that you need to get an item from Syrup’s Hut located back in the Minish Woods. Return to human size and then exit the building.
Walk to the northeast part of town and exit to the right to reach Lon Lon Ranch. If you hadn’t done it earlier already, use some bombs to blow up the boulders that are in your way. Just to the right you will find Malon and Talon outside of their house. It turns out that Talon lost the key and the only Spare Key is inside of the house. Use the tree stump just north of the house to shrink down to Minish size and then enter the house through the small entrance.
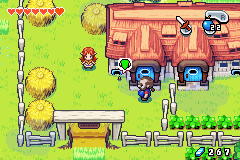

Once you are inside, use the pot to revert back to normal size. Lift up the pots to find the Lon Lon Ranch Spare Key! It doesn’t make much sense, but you cannot just open the door from here. So instead, shrink down in size, go outside, and then use the tree stump to get back to normal size. Afterwards, speak with Talon and he is excited that you have the spare key! Go through Malon and Talon’s house and exit through the other door.
Inside of the ranch, walk to the northwest part of the area and enter the cave. Make a duplicate of Link and push the block northward. Open the treasure chest here to get 50 rupees! Afterwards exit the cave the way you came in.


Walk to the northeast part of this area and you’ll see a sign. Unfortunately we cannot quite reach Syrup’s Hut as water is blocking the path. Continue northwards and make your way over to a boulder that is found here. Push it to the left to make for easier navigation. Afterwards use the Cane of Pacci on the nearby hole to reach the higher ledge. Shrink down in size using the tree stump and then walk across the wooden bridge to the right. Fall down the small hole here and open the treasure chest to get a Red Kinstone piece.


Revert back to size and then jump into the whirlwind found here. Glide straight down to reach the higher platform. Cut through the grass and using a second whirlwind, continuing to travel southward across the pond. Walk to the right a screen to enter Lake Hylia.


There isn’t much to do here in Lake Hylia yet, so just walk southward to get back to the Minish Woods. Walk to the southwest part of this area and you’ll finally be able to collect that heart piece we saw much earlier on in the quest. Walk over and pickup Piece of Heart #10.


Walk to the northeast portion of the Minish Woods and enter the purple-roofed house. Here you will find Syrup the Witch. You can purchase some blue life potion for 60 rupees if you’d like, but we are really here for the mushroom. Lift it up and carry it to Syrup. Purchase the Wake-Up Mushroom for 60 rupees!
Exit Syrup’s hut and head back north to Lake Hylia. This time walk straight west to reach another area of Lon Lon Ranch. Push the small boulder into the hole here, to allow for easier navigation. Furthermore you want to use the whirlwind located here to float across the gap to the left to another whirlwind. Once you are here, jump off the ledge and push the other boulder into the small hole.

You will also find a Goron digging against the wall here. You can speak to him if you’d like, but what you really want to do is fuse kinstones. The particular Goron requires a blue kinstone and you should have a couple of them by now. Once you fuse kinstones with this Goron, this will cause the Goron Merchant to setup shop within the town square.
After speaking with the Goron, walk down a screen to re-enter the Eastern Hills. Walk down the steps and you’ll find a small hole on the right side. Use the Cane of Pacci and launch yourself up to the higher platform. Walk right to re-enter the Minish Woods. Enter the hut here and head down the stairs. Walk ahead and you’ll find a Great Fairy Fountain. The Great Fairy mentions that she needs rupees, so agree to toss in all of your rupees. After agreeing to give all your rupees, the Great Fairy states that she didn’t really need the rupees and you won’t have to pay anything. However, she will reward your generosity with the Big Wallet. This second wallet upgrade will allow you to carry 500 rupees.


Return to the Eastern Hills and on the west side of the area you will find two farmers, Eenie and Meenie. Walk up to Eenie, the one at the northeast portion of the farm and offer to fuse kinstones. Eenie will have a blue kinstone piece, so go ahead and fuse it with him. Successfully doing so will cause the Goron who we just spoke with to gain some strength and he’ll now dig further into the cave. This is the beginning of the Goron Quest, which we will be covering throughout the walkthrough.

Before making our way back to Hyrule Town, there is a quick stop we want to make that is nearby. Return to Lon Lon Ranch and up northward along the left side. Use the Cane of Pacci on the small hole and leap up to the higher platform. Walk up a screen to enter Veil Falls.
In Veil Falls you will encounter a second type of Peahat. These ones will fly around carrying bombs and they will drop them on top of Link when he draws near. You can defeat them by using bombs or by using your gust jar and launching a nearby rock at them, but it is easiest to just avoid these creatures. There are also Blue Leevers found here. These enemies will come up from underground and will spin towards Link before burrowing back underground. Slash at them with your sword.
Climb down the steps on the right side and collect Piece of Heart #11 at the far right of this area. That’s all that we can do here in Veil Falls, so head back to Lon Lon Ranch and from there head back to Hyrule Town.


Once you are back in town you’ll find the Goron Merchant will sell you Kinstones. Furthermore if you cleared off the dust earlier on in your quest, Beetle has come and setup shop, selling Picolyte. You can ignore these shops for now and just enter the shoe shop.
Once you walk inside, stand in front of Rem and press R. Link will pull out the wake-up mushroom and the smell will wake up Rem immediately. Rem will thank you for waking him up and will give you a special pair of Pegasus Boots! Now that we have the Pegasus Boots we can return to Castor Wilds, however, there are some optional goodies we can now get as well. Section 3.3 will cover some optional side quests, so if you want to continue on in the main quest, head on over to Castor Wilds and jump down to section 3.4.
3.3 Hyrule Town
There is plenty to do here in Hyrule Town. We can learn a new sword technique over at Swiftblade’s Dojo. Once you speak with Swiftblade, he notices your new sword and he will teach you the Rock Breaker technique. Basically, this will allow Link to swipe his sword and break rocks instead of having to lift them. This is an incredibly simple technique and it makes you wonder why this wasn’t just included from the start…


Immediately speak with Swiftblade again and he’ll notice that you have the Pegasus Boots. Swiftblade will now teach you the Dash Attack. This works when you have your sword and Pegasus Boots both equipped at the same time. Dash with the Pegasus boots and Link will hold out his sword. Again…you wonder why this wasn’t just included once you get the Pegasus boots…
Next we want to enter the purple building just east of the shop at the east part of Hyrule Town. Once you enter, use the Cane of Pacci to flip over the pot and then use it to shrink down to Minish size. You can speak with the dog if you’d like, but afterwards exit the house at the bottom-left portion of the room.


Just to the right of the purple building is a blue roofed building. Walk directly north of the blue roofed building and you’ll come to some steps. There are actually some small vines just to the right of the steps. Climb those vines and walk around to the backside of the large building on the right. Walk right in between the small colored flowers at the back of this yellow building to enter this secret passage. Resize using the pot and collect Piece of Heart #12!


Our next stop is over at the Bakery just east of town square. It is the red-roofed building and there is a small flower patch entrance while you are in Minish size. You can walk behind the baker on the right side of the room and climb up the small steps. Enter the Minish sized hole on the left side of the room and it will eventually lead to a treasure chest containing 100 rupees! Afterwards, return to the purple roofed building and resize.


If you haven’t already, now is a good time to purchase the Boomerang. It sells for 300 rupees and you should be fairly close to that amount. If you don’t have 300 rupees just yet, you can play the cucco collecting game at the southeast part of Hyrule Town. However, I won’t be covering that in full until after we get another item.


You probably have noticed the Postman running around town like crazy. What you want to do is get in his way so that he is stuck. He’ll eventually jump over you, but what you want to do is try and fuse kinstones with him. Fuse blue kinstones with him and it will cause Marcy to appear over at the post office.
Walk over to the Post Office at the northwest part of town and you can speak with Marcy. She is selling the Swordsman Newsletter. Each issue will cost you 200 rupees and they contain some valuable information from Swiftblade. However, if you are following this guide, you likely won’t need this information. Furthermore, we have a Swordsman Newsletter Guide here at the site that has the transcripts. Each time you purchase one in the game, you can exit the post office and reenter it to see it on the shelf.
In the next few parts of this section, we will be fusing red kinstones with many of the citizens of Hyrule Town. Red kinstones are not nearly as common as their blue and green counterparts, so you might run out. If you’d like to, you can grind away in Hyrule Field to get some, but they are very rare. You can also purchase bread from the Wheaton and Pita Bakery and you’ll occasionally get a kinstone, but this isn’t the best method. You can purchase red kinstones from the Goron Merchant, but it will cost you a hefty 300 rupees a piece. You can also purchase White Picolyte from Beedle, which makes kinstones appear more often when cutting down grass or bushes. This is a good method, but Picolyte is expensive, doesn’t last very long, and you’ll get significantly more blue and green kinstones. The best way to get a couple of red kinstones is to play the cucco game at the southeast part of Hyrule Town as you’ll get red kinstones as rewards for the 7th, 8th, and 9th level of the game. Alternatively, you can skip these quests and come back later after you naturally get kinstones in upcoming caves and dungeons.


While your wallet might not be full at the moment, we can get the largest sized wallet at this point in the quest. This involves fusing kinstones with Mayor Hagen. Mayor Hagen is located at the northeast portion of town, just east of the large bell near the center of town. Enter the house and fuse red kinstone pieces with Mayor Hagen. Afterwards. exit the building to the right. You can climb down the steps to find a treasure chest containing a Red Kinstone.


After fusing kinstones with Mayor Hagen, a small pond of water will dry up in Lon Lon Ranch, revealing a staircase. Exit Hyrule Town to the east and make your was down the dried up staircase. Open up the treasure chest here to get the final Wallet Upgrade, which now allows you to hold up to 999 rupees!


While we are in Lon Lon Ranch, there is another goody that we can get. If you look at the north end of this area, near the cows, you’ll see a glowing tree. Use your Pegasus Boots to dash into the tree, causing all the leaves to fall, leaving just a tree stump. Shrink down in size and then walk to the right. There is a small passage to the north that only Minish Link can walk through.


There are two new enemies found in this area. You will encounter a large Moldworm, which can be defeated with a number of sword slashes. You’ll also find a blue variation of the Pesto enemies we fought earlier. These ones will have rocks that they’ll try to drop on top of Link. Defeat the enemies if you’d like and then run northward to pickup Piece of Heart #13! Afterwards revert to normal size and head back to Hyrule Town.
One of the new stores that is now open in Hyrule Town is the Wheaton and Pita bakery. We previously entered the bakery as a Minish, but now you can enter as a human and purchase various treats. They are all priced differently, but it doesn’t seem to matter which ones you purchase. Each of them will occasionally have kinstone pieces buried within the food…which is extremely disturbing the more you think about it. Nevertheless, you can purchase some Brioche for 20 rupees and it’s a good way to collect some blue and red kinstone pieces.


Our next stop is over at Mama’s Cafe, located just north of Swiftblade’s Dojo. Once you are inside, walk to the north end of the room and push the large shelf to the left, revealing a Minish size staircase. Then use the Cane of Pacci on the pot at the bottom-right portion of the room to flip it over and then shrink down to Minish size. Climb the small steps and head through the hole to reach the rafters. Speak with the Minish if you’d like and exit through the door at the right.


Walk across the bridge and enter the rafters of the shop. You’ll encounter some mulldozers here including some new Blue Mulldozers. These ones are identical to their red counterparts except their attack pattern is even more erratic. Open the treasure chest found here to get 10 Mysterious Shells. Climb down the staircase and you’ll appear behind the store owner Stockwell.


Stockwell can hear you from behind but he cannot see you in Minish Size. Use the pot to revert back to human size and speak with Stockwell. Pickup the bottle here, but Stockwell says that the Food is reserved for his dog Fifi. Stockwell makes you a deal that if you feed Fifi, then we can keep the bottle. We’ll cover this quest in just a bit, but for now, just shrink down in size and head back to Mama’s Café.
Exit Mama’s Café through the small hole at the bottom-left portion of the room and then walk over to Swiftblade’s Dojo. Climb the small steps here and you can fuse kinstone pieces with the Cucco Chick. Fuse red kinstones and a small pond in the Hyrule Castle Garden will drain, revealing a staircase. Note: This is the lone red kinstone fusion that is random. There is a chance that this Cucco Chick will want to fuse green kinstones or perhaps not fuse kinstones at all. The drained water in the Castle Garden is not reachable yet, but we will cover this at a later point in time.


Cross over the bridge to the left, using the very narrow passage. Walk northward and speak with the Dog that was previously blocking the path. Once you talk with the dog, it will move around allowing you to reach this area as a human. Just south of the dog, follow the flowery path leading into the back of the house found here. Resize using the pot and then exit the building.


If you’d like to you can walk over to Carlov’s Figurine Shop at the southwest part of Hyrule Town. It is here you can trade in your Mysterious Shells in order to get figurines of the various characters, enemies, and scenes that are in the game. For some of the enemies and characters, you won’t be able to get their figurine until you’ve actually encountered them in the game. The end goal of the figurines leads you to get a Piece of Heart, as well as some other secret goodies. At this stage, I’d suggest trading in 1 shell at a time, to get at least a good 25-30 or so figurines. You can trade until your odds are about 50%, but after that, you are better off waiting until you encounter more characters and enemies, since more figurines will become obtainable.


Our next spot is just north of the dog and inside of the yellow house. You can fuse red kinstones with the Stranger here, and this will create a strange ball just near Link’s house. Exit Hyrule Town and run over to the strange glowing ball near Link’s house. Step into the ball and you’ll be taken to an area that we have not been to yet. If you look at your map, you’ll find yourself at the northeast corner of the map.


Once you arrive in this house, open the two treasure chests to get some green kinstones. Go down a screen and climb the steps to reach the next floor. Walk up to the next room and open the treasure chest to get a green kinstone. You will see old Gregal sick in bed and a Ghost seems to be surrounding him. Use the gust jar to suck in the ghost. You’ll have to move left and right to keep him from getting away. Once you have captured him, Gregal immediately starts to look and feel better. Speak with Gregal again and he’ll reward you with 100 Mysterious Shells! There is more to this sidequest, but this is all we can do for now, so return to the previous floor and warp back to South Hyrule Field.


Our next stop is back at Link’s House. Enter the house and go to the next room to speak with Smith. Fuse red kinstones with him and a golden treasure chest will appear in the Eastern Hills. Walk over to the Eastern Hills and open the golden treasure chest to get another Empty Bottle!


It’s now time to get the next empty bottle. Remember the bottle of dog food we got from Stockwell? Well, let’s go and deliver that food to his dog in Lake Hylia. Make your way to Lon Lon Ranch and head through Malon and Talon’s house. Walk to the east end of the range and then go right a screen to enter Lake Hylia.
We cannot access much of Lake Hylia just yet, but you can cross the bridge to the north and enter the red building. Stand next to the dog bowl and press R to pour the dog food out of the bottle. The dog will start eating and you will be able to keep the third bottle in the game!


Our next stop is over at the Hyrule Castle Garden as there are two heart pieces that we can collect. Ever since we saw that cutscene when we entered the Western Woods, the guards on the right side of the Castle Garden have moved. Walk on over to the northeast portion of the garden and you’ll either find some steps, or you’ll find a pond. This pond will dry up after fusing red kinstones with a random citizen of Hyrule. This is the only random red kinstone fusion, and I often times get it by fusing with the baby cucco on top of Swiftblade’s Dojo. If you have completed this fusion, walk down the steps and collect Piece of Heart #14.


Also within the Hyrule Castle Garden, you’ll find a bunch of bushes at the southeast corner. Slash away at these bush to reveal a ladder. Climb down the ladder and head up to find yourself in a dark dojo. Since the room is dark, we cannot learn the secret skill from Grimblade, but what we can do is collect Piece of Heart #15 that is waiting at the left side of the dojo.

Our final set of sidequests takes place all the way at Mt. Crenel. Travel through the Trilby Highlands and enter the Mt. Crenel Base. Once you arrive climb up the wall at the east end of Mt. Crenel’s Base and continue climbing up the walls found here. You’ll eventually reach a cave that has some glowing floor tiles. Stand on the top-right tile and charge up your sword. Walk off the files and step on the top-left tile to make a replica of Link. Carefully walk to the north end of the room and step on the switch. Walk northward and enter Grayblade’s Dojo.


Right when you enter the Dojo, walk over and pick up Piece of Heart #16 that is waiting for you! You should also open up the two treasure chests as each one contains 50 rupees!


Grayblade will teach you the Roll Attack. In order to perform this technique you must roll using the R button and before you complete your roll, slash with your sword to perform the roll attack. This technique is pretty cool, but honestly isn’t one that I used often throughout the game.
Our next destination is back over at Melari’s Mine. You can use the shortcut that is just south of the Cave of Flames. Use the Cane of Pacci on the hole and jump up to the higher ledge. Enter Melari’s Mine and you’ll find Melari at the southwestern most room of the Mine. Fuse red kinstones with him and this will cause a gigantic beanstalk to appear at the northwestern part of Mt. Crenel.


Getting to this beanstalk is a bit annoying. The easiest way is to jump down and then scale Crenel Wall at the west end of the mountain. Once you reach the beanstalk, go ahead and climb up it. Here you will find 160 rupees, along with Piece of Heart #17!


Make your way down Mt. Crenel and get back to the Trilby Highlands. We want to make our way to the south portion of this area and enter the tree hut at the southwest part of the Trilby Highlands. Inside you will find Percy and you can fuse red kinstone pieces with him. Doing so will lift up a tree limb in the Western Wood. Afterwards exit the hut and head south to the Western Wood.


Now that the tree limb is up, you can visit Percy’s house, but we cannot progress with that quest just yet. In fact, we’ve completed virtually all of the side quests we can do at this point, so finally, head west and re-enter Castor Wilds.
3.4 Castor Wilds
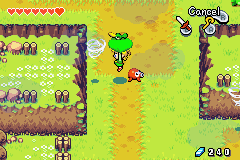
Now that we have the Pegasus Boots, we can dash across the swampy area. Use the Boots and dash west and then south to reach a ground level where you can stand. You will bump into a new enemy known as a Rope. This snake like creature will run towards you if it spots you moving, but luckily they can be defeated quite easily with a couple sword slashes.


Walk to the northwest and you’ll find a cave that you can enter. Enter the cave and head down the staircase found here. Defeat the ropes and then enter the door on the left side of the room. The treasure chest in this room will disappear and an enemy Darknut will appear. This large creature will quickly move towards you and try to slash away with its massive sword. There are several ways to defeat a darknut. You can use your sword and shield, constantly block with your shield, and frequently slashing your sword to occasional connect with some sword slashes. Alternatively you can use bombs to stun a darknut, allowing you to get a free sword slash in. The best method is to use the Pegasus Boots and perform a dash attack to run right through the darknut. You might land a hit, but you can quickly turn around and slash at the darknut. All in all, four hits will be needed to defeat the darknut.


After defeating the darknut, open the treasure chest to get a special Golden Kinstone. Golden kinstones are particular stones that are required to progress through the main quest. In particular there are three different golden kinstones found right here in Castor Wilds that we will need to collect. After getting this first golden kinstone, go ahead and exit the cave.
Just to the left of the cave, climb-up the small vine seen here. Walk northeast across the wooden platform and climb down the vine found here. From here you can access a cave at the north end of Castor Wilds. Inside you will find a business scrub who will sell you arrows, but we don’t quite have a bow yet. You can fuse blue kinstones with this business scrub and it will cause a tree in the Minish Woods to reveal a secret entrance. This particular tree just leads to another business scrub that sells you kinstone pieces for 200 rupees. Not really a useful kinstone reward in my opinion.
Walk to the northwest part of Castor Wilds and use the Pegasus Boots to dash across the swamp. Avoid the spikes that are in the swamp and then use the tree stump to shrink down to Minish size.


As a Minish, walk over to the left and walk through the hole in the log. Walk into the water and step on the lilypad. Use the gust jar while on the lilypad to make your way across the water. Maneuver around the obstacles and once you reach the land, walk northward and drop into the hole found here. Defeat the five blue mulldozers that are found in this small room and then open the treasure chest that appears to get the Bow!


Once you get the bow, backtrack through the water area and resize at the tree stump. Your bow comes with 30 arrows and you can use it to shoot at enemies. Certain enemies here in Castor Wilds can only be defeated when using the bow. Dash back across the swamp and Ezlo will point out that the eye statue nearby has an even glower to it. Pull out your bow and shoot an arrow at its eye to active the statue. This enemy is known as an Eyegore and it will jump towards you. Shoot three more arrows at its eye to defeat the statue.


Once the eyegore statue has been defeated, climb up the vine that is behind it. Jump into the whirlwind and float towards the southwest. Drop down to the land area and then make your way southward to a grave. Slash at the bushes and push the gravestone upwards to enter it.


You’ll find yourself in another swordsman’s Dojo, but first walk over and pickup Piece of Heart #18! The swordsman here is Swiftblade the First, but unfortunately we are not quite prepared to learn the special ability that he can teach us. We will return here when we have seven Tiger Scrolls. Go ahead and exit the grave.
Use the Pegasus boots and dash across the swamp east of the gravestone. Once you reach land, push the small boulder northward into the hole, allowing for easier access within Castor Wilds. Walk over to the south end of this area and examine another Wind Crest. We still cannot do anything with these yet, but they will become useful in just a bit.


Near the Wind Crest, use the bow and arrow to defeat the eyegore statue. Climb the vines and make your way over to the whirlwind on the next platform. Jump into the whirlwind and float to the southwest, landing near a cave. Go ahead and enter the cave and you’ll find a treasure chest. Open it up to find the Second Golden Kinstone! Exit the cave and push the small boulder to the left, allowing for quicker access to the rest of the area.


Our next destination is over at the northeast corner of Castor Wilds. Walk northward to get back to the center of Castor Wilds and climb the vines to get onto the higher platform. Walk across a series of wooden platform to make your way over to the northeast corner of the map. Use the bow to defeat the eyegore statue found here. Then use the Pegasus Boots to dash across the swamp and make your way over to the cave at the north end of this area. Go inside to collect the final Golden Kinstone Piece. Exit the cave and just to the south you will find a small boulder that you can push into a hole, allowing for easier navigation.


There is still one more goodie for us to get here in Castor Wilds. Climb back onto the higher platform using the vines and make your way across all of the wooden platforms, heading to the southwest portion of the map. Defeat the eyegore statue here and then walk over to the treasure chest on the next platform. Open it up to find a Blue Kinstone.


Jump off the ledge below and then use the Pegasus Boots to dash to the southwest corner of Castor Wilds. There are three large statues in this area and if you walk up to them you will be able to fuse kinstones with each of them. Fuse the proper golden kinstone with each of the three statues and the massive boulder at the corner of the screen will crumble to pieces. Walk southward to enter the Wind Ruins.


3.5 Wind Ruins
Once you enter the Wind Ruins, be careful of the Red Leevers that appears from underground. Climb the steps and you’ll see a bombable wall at the northeast part of this area. Use a bomb and enter it to find a treasure chest containing a blue kinstone.


Continue walking along the path and you’ll run into an Armos. Touch the armos and it will activate, at which you can defeat it with four sword slashes. Continue along the path and shrink down using the tree stump. Fall down the small crack in the ground and open the treasure chest to get a red kinstone. Afterwards, walk up the steps to get inside of the deactivated armos statue. Slash the lever inside to light the fire and activate the armos statue.
Resize using the tree stump and defeat the armos that is in the way. Continue to the right a screen and then up the ladder. You’ll notice there some small vines along the walls that you can climb up. We’ll be using these in just a moment. Defeat the tektites and climb up the next ladder ahead. Defeat the enemies and continue to the right a screen. Defeat the ropes in this area and then use the tree stump to shrink down in size.


Once you are small backtrack to the left a screen and then use the small vines to head back down a screen. There are three vines here, but we want to head down the one in the center. Do so and then enter the small Minish size cave found here. There are a number of red pestos in this cave, but the pathway is rather linear. Defeat the enemies and collect Piece of Heart #19! Afterwards, backtrack out of this cave and return to the tree stump.


Once we are back by the tree stump, navigate the area and enter the deactivated armos statue. Activate the armos statue and then return to the tree stump to resize. Now you can defeat the armos statue and push the small boulder into the hole, making for quicker access through the area. Continue along the path and head down a screen.
There are four armos statues in a row here. Once you walk towards the one at the far left, it will quickly move and block the pathway. Defeat the other three armos statues and the rocks will disappear, allowing you to open the two treasure chests. Do so to collect some mysterious shells and rupees. Afterwards walk over to the tree stump and shrink down to Minish size.


Once you resize, the armos statue will revert to its original positioning. Climb the steps and hit the lever to deactivate the armos statue. Then return to the tree stump and resize. Continue along the pathway and defeat the ropes and spiny beetles that are hiding underneath the rocks. Once all the enemies are defeated, the rocks that are in your way will disappear, allowing you to head north a screen.


Finally, climb the steps and enter the cavern here to find yourself in the third dungeon, the Fortress of Winds.
3.6 Fortress of Winds
In the first room within the Fortress of Winds, there are four doors that you can initially enter. For now walk all the way to the left end of the room and head through the door. Slash at the skulls to get some hearts and then head up the staircase. You will encounter some Blue Stalfos here. These skeleton enemies will jump and try to land on top of Link. Two swords slashes will defeat them, but you can also have some fun with them using the gust jar or the cane of pacci. Walk up a screen, avoiding the it in the center of the room.


Watch out for the flying skulls at the right end of the room. Pull out your bow and arrow and shoot the eye switch that is against the wall on the left to open the door. Walk left a screen and you’ll encounter four stalfos. Defeat them and then head down a screen.
There are some rupees in this room, but there are two Rupee Likes that are hiding underneath them. There is also a Spark that will move around the room. You can use the boomerang to defeat a spark in one hit and they will always leave behind a fairy. Make your way through this area and climb the ladder.


Defeat the spiny chuchu that is found here and then head up a screen. Step onto the moving platform that moves up and down. From there, step over to the other moving platform that moves left to right. Shoot the two eyes switches along the northern wall to open the door. Walk up a screen and you’ll find two deactivated eyegore statues. Use the flashing title on the far left and make a copy of Link using the third title, and from there step on the switches to activate the eyegore statues. Defeat the statues and open the treasure chest that appears to get the Compass. Go back down a screen to get back to the moving platforms.


Make your way to the moving platform on the right side of the screen. Hit the two eye switches with arrows and then continue to the right. Break the skulls in this room and duplicate Link vertically to push the large block to the right. Push the other block to the left one space. Now return to the flashing tiles and this time duplicate Link horizontally. Push the initially block all the way up to the northeast part of the room. Pull the bar and a small key will fall down the hole to the left. Fall down right behind and pickup the small key. Walk back down a screen to get to the starting screen of the dungeon.


Now that we have a small key, we want to head to through the door that is directly north from the entrance of the dungeon. Just walk forward and head up the stairs. You’ll immediately encounter four blue stalfos, as well as two eyegore statues on the sides. Defeat the enemies if you’d like and look to the center of the room to find a large treasure chest. Climb the steps and open the treasure chest to get the Dungeon Map! At the north end of the room use the small key that we got to open up the door on the left side. The left side is the faster route, but you could do things in a different order if you’d like.


Wait for the moving platform and then step onto it. Avoid the blocks that are in your way as the platforms moves northward. Walk to the left a screen and be careful of the Wallmaster that will fall from the ceiling. If it grabs Link, he will be taken back to the beginning of the dungeon. Use the bow to shoot arrows at the two eye switches, causing the bridge to be extended. Walk across and head left a screen.


Try heading down a screen and a massive Darknut will appear. This darknut is red, but the battle is identical to the black darknut that we fought back in Castor Wilds. You can use various methods to defeat the darknut and afterwards a blue portal will appear. Walk down a screen and run counterclockwise around the room. Avoid the green spikes and step on the switch to open the door. Continue avoiding the spikes and then head down a screen.


Walk right a screen and you’ll find two suspicious skulls against the wall. Place a bomb in between them to blow open a hole heading to the room above. Once inside, go ahead and open the treasure chest to get the dungeon item, the Mole Mitts. The Mole Mitts can dig up the nearby rocks, allowing you to reach the golden treasure chest. Open it up to get 100 rupees and then exit the room. Walk right a screen and jump off the ledge. Walk back down the staircase in the center of the room and then head down a screen to get back to the first room in the dungeon.


Use the Mole Mitts in this first room and dig all the way to the right to find 50 rupees! Afterwards dig all the way to the far left of the room and you’ll find a new door and a treasure chest. Open the treasure chest to get a Blue Kinstone and then head up to the next room. The door will close behind you and you’ll encounter two Green wizzrobes. These enemies will disappear and then reappear, shooting a beam in a straight line towards you. There are also energy beams coming from the four torches in this room. Defeat the green wizzrobes with two sword slashes and the Torches will stop attacking. Open the treasure chest to get 80 mysterious shells and then head back to the previous room.


Now that we have the Mole Mitts, there are a few treasure chests that we can get to in areas we previously visited. Go through the door, second from the left in this entry room once again. Climb the steps, head up a screen, left a screen, and down a screen to reach a digging area. Dig to the north-east corner of this area and you will find a treasure chest containing a Red Kinstone. Climb the steps and you’ll reach another digging area. Dig over to the switch and step on it to cause a golden treasure chest to appear. Open it up to find another Red Kinstone. Afterwards, backtrack all the way back to the entrance room of the dungeon.


We now want to head northward using the door that is second from the right. Continue up the steps to reach the next floor. Defeat the spark as well as the two stalfos that can be found on each side of the room. Pull the lever on the right side of the room to create a treasure chest. Both of the treasure chests found in this room contain Blue Kinstones. Pull the bar on the left and head down a screen.


Defeat the spiny beetle and then dig your way over to the golden treasure chest. Open it up to get another Red Kinstone and then head up the ladder. There are more sparks, a spiny beetle, and a treasure chest. Open the treasure chest to get a Red Kinstone and then head up a screen.


Walk to the left and watch out for the flying skulls. Defeat the activated armos statue and use the two outside floor tiles to duplicate yourself. Walk through the passage and step on the two switches to open up the door. Walk up a screen and shrink down to Minish size.


Walk back over to the armos statue and walk inside to activate it. Use the nearby rock to resize, push the block out of the way and then defeat the armos statue. Pull the bar and once again a small key drops to the ground. WAIT! Before falling down, shrink down in size using the rock and fall down the hole in the ground as a Minish.


As a Minish you cannot quite pickup the key, but you can head through the small hole on the right. Resize using the rock and pickup Piece of Heart #20. The block at the bottom-left part of this room can be pushed down. Do just that and return to the entrance room of the dungeon. Go back up to the next room and collect the small key that dropped from the floor above. With the key in hand, return to the entrance room.


Walk up through the door at the middle of this room and then continue up the stairs. This time use the small key we have to open up the north on the right of the room and then head up a screen. Pull the bar back and a bridge will extend. You have to quickly dash or roll across the bridge as it will disappear in a few moments. Climb the steps and head right a screen.


In this room you will find three giant Floormasters. These giant hands resemble the wallmaster we fought earlier, but these ones just stay on the floor. Defeat all three of them with four sword slashes a piece, and a shrinking rock will appear. Ignore it for now and head right a screen.


Walk down to the bottom of the screen and you’ll see some rolling spikes. You want to make your way over to the right side of the screen. You can either position yourself between the rolling spikes, or just use the small holes in the ground, allowing the spikes to roll over you. On the right side of the room, pull the two statues so that they are covering the blocks at the top-left and bottom-right switches.


At the north end of the room, defeat the ropes and you’ll find some flashing tiles. Use the top-right and bottom-left statues to duplicate Link. Carefully walk down, maneuvering Link so that the duplicate Link doesn’t run through the blocks. With your duplicate, step on the two remaining switches and a small key will appear. Pick it up and then use it on the door at the southwest part of the room. However, we now want to backtrack to the previous room where we fought the floormasters.
Use the rock in the middle of the room to shrink down to Minish size and then head right a screen. Go through the small hole and head southward. You’ll have to stand in between the rolling spikes and make your way over to the door at the southwest part of the room. Walk down a screen and then left a screen.


Walk up through the small minish-sized hole and resize using the rock. Step on the switch to cause a key to appear. Dig your way through the rocks and avoid the sparks that are in this room. Get the small key and then shrink back down to Minish size. Walk back down through the small hole.


Jump off the ledge and use the rock to revert back to human size. Defeat the floormasters and head right a screen. Continue down a screen to reach another digging area. Here you will find some Mini-Moldorm creatures. These quick moving worm-like creatures can be defeat with a couple of sword slashes. Dig your way to the ladder and climb up it.


Walk up a screen and defeat the blue stalfos. Use the key and continue up to the next room. Fall down the hole on the right side and open the treasure chest to get the Big Key. Push the block to the left and then head left a screen. Continue left another screen and jump off the ledge. Walk to the south end of this room and head through the door.
In this digging area, dig over to the statue and pull it onto the switch. Open the treasure chest that appeared to get a Blue Kinstone and then climb the ladder. Continue up a screen and push the top-right block to the right, creating a red warp portal. Use the boss key and head through the door.


Use the boomerang to defeat the sparks to fill up your hearts. Otherwise just slash at the skulls to replenish your arrows and hearts. Once you are ready, walk up a screen to take on the dungeon boss, Mazaal.
Mazaal consists of a big head and two giant hands. Throughout the battle, Mazaal will attack you in several ways. One of the hands might make a fist and will try to pound you three times. You can easily run or roll out of the way to avoid this attack. One of the hands might also move in a sweeping manner, trying to grab Link in the process. This is also quite easy to avoid by just staying away from the horizontal path of the hand. Mazaal might also pound the floor with both hands, causing a number of small beetles to drop from the ceiling.


Each of the hands of Mazaal have small pink eyes on them. Use an arrow to hit the pink eye, causing the hand to drop to the floor. Run over and slash at the pink eye four times, causing the hand to deactivate for a period of time. Repeat the same process to knock both hands to the floor and Mazaal’s head will also drop down. Quickly run to one of the rocks at the corner of the room and shrink down to Minish size. Walk into the small hole of Mazaal’s head. Inside you will see an eyeball that you can slash away with your sword. Hit it several times until it explodes and a pincer carries you back outside of the bosses head.


Resize using one of the rocks and the battle will continue. During this phase, Mazaal gains an additional attack of trying to pound Link with his fists consecutively. Even with two fists coming at you, this isn’t too hard to avoid. Once again hit the pink eyes on the hands, and then slash at them with your sword. Enter Mazaal once again as a Minish, but this time you’ll have to use the mole mitts to dig through. Find the eye inside of Mazaal’s head and slash away until the pincer carries you out.
During the third phase, Mazaal gains another attack, this time shooting a lazar out of its eye in a circular fashion. Luckily it doesn’t have much range and isn’t too hard to avoid. Repeat the same process of knocking down both of the hands, and then entering Mazaal’s head. Once again slash at the eye and this time Mazaal will be defeated.


After defeating Mazaal collect the Heart Container that is left behind. Unfortunately there is no element for you to collect. Walk up the steps and read the stone tablet in the distance. It appears that the Tribe of Winds left for the heavens. Pickup the Ocarina of Wind that appears and finally we will be able to use those Wind Crests as a form of quick transportation. You will then be warped to just outside of the Fortress of Winds.


