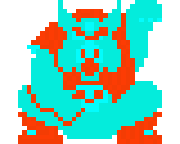
The Legend of Zelda Bosses
This is a list of bosses found in The Legend of Zelda.
Aquamentus
- Main article: Aquamentus (The Legend of Zelda)
Aquamentus is the first boss Link encounters in The Legend of Zelda. Aquamentus guards the Triforce Shard in the first and seventh dungeon, Level 1: The Eagle and Level 7: The Demon. Link can use a multitude of items to harm Aquamentus such as the Sword, Bombs, Bow and Arrow, and the Magical Rod. The most powerful items against Aquamentus are the Magical Sword and Bombs.
Dodongo
- Main article: Dodongo (The Legend of Zelda)
The Dodongo is a boss that Link encounters in Level 2: The Moon, guarding the second Triforce Shard. Like most bosses in The Legend of Zelda, the Dodongo returns as the Mini-Boss of Level 5: The Lizard and Level 7: The Demon. Like most Dodongos in the series, Link can use bombs to defeat the Triceratops-liked enemy by placing the bomb in its path, eating the bomb. Once it has eaten two bombs, it will be defeated.
Manhandla
- Main article: Manhandla (The Legend of Zelda)
Manhandla is the third guardian of the Triforce Shard that is encountered in Level 3: The Manji. It later appears as the mini-boss of Level 4: The Snake and Level 8: The Lion. Like its successor, while dodging the fireballs from Manhandla, Link should attack its claws with either bombs or his sword, bombs being more powerful. Once the four claws have been destroyed, Link can attack the core by using bombs or his sword.
Gleeok
- Main article: Gleeok (The Legend of Zelda)
Gleeok is the fourth boss featured in The Legend of Zelda. It is first fought in Level 4: The Snake, and is a multi-headed dragon. In The Snake, Gleeok has two heads, and can be defeated by attacking the heads with either a sword or the Magical Rod. Once all the heads have been destroyed, Gleeok will be defeated. Gleeok later appears in Level 6: The Dragon and Level 8: The Lion as the mini-boss, where it has three and four heads, respectively.
Digdogger
- Main article: Digdogger (The Legend of Zelda)
Digdogger is the guardian of the fifth Triforce Shard in The Legend of Zelda. It is the final boss of Level 5: The Lizard, and later appears as the mini-boss of Level 7: The Demon. Once Link finds Digdogger, he cannot yet harm it. First, he must play the Recorder, which will cause Digdogger to shrink into two mini-Digdoggers. These guys can be attacked with basically any item; Sword, Bomb, Bow, or the Magical Rod. Later versions of Digdoggers will split into three or four mini-Digdoggers, instead of two.
Gohma
- Main article: Gohma (The Legend of Zelda)
Gohma makes its debut in The Legend of Zelda. This crab-like creature is the final boss of Level 6: The Dragon, and also appears as the mini-boss of Level 8: The Lion. It can be defeated by shooting an Arrow into its eye, which is sometimes closed. When it is closed, it is wise to avoid its fireballs while waiting for the eye to open. Once it does, shoot it. One hit will kill it for the red variety, and three hits for the blue variety.
Ganon
- Main article: Ganon (The Legend of Zelda)
Ganon is the final Boss and main antagonist of The Legend of Zelda. He is fought at the end of Level 9: Death Mountain, and is easily the hardest boss in the game. Ganon is invisible the entire fight, and thus the only way for Link to harm him is to randomly attack the air. Once Ganon has been hit, he will appear momentarily, and then disappear again. After three hits with the Magical Sword, Ganon will again be visible, but this time will be brown. One shot from the Silver Arrow will kill Ganon for good.


