Arbiter's Grounds: Difference between revisions
mNo edit summary |
|||
| (80 intermediate revisions by 13 users not shown) | |||
| Line 1: | Line 1: | ||
{{ | {{Infobox|dungeon | ||
| image = [[File:Arbiter's_ground.jpg|400px]] | |||
| caption = | |||
| | | game = ''[[The Legend of Zelda: Twilight Princess|Twilight Princess]]'' | ||
|image = [[File:Arbiter's_ground.jpg]] | | location = [[Gerudo Desert]] | ||
|game = ''[[The Legend of Zelda: Twilight Princess|Twilight Princess]]'' | | item = [[Spinner]]<br/>[[Piece of Heart]] ×2 | ||
|miniboss = [[Death Sword]] | | enemies = {{Hide|[[Big Poe]]<br/>[[Blade Trap]]<br/>[[Bubble]]<br/>[[Fire Bubble]]<br/>[[Ghoul Rat]]<br/>[[Moldorm]]<br/>[[Rat]]<br/>[[ReDead]]<br/>[[Poison Mite]]<br/>[[Stalfos]]<br/>[[Stalkin]]<br/>[[Staltroop]]}} | ||
|boss = [[Stallord|Twilit Fossil: Stallord]] | | miniboss = [[Death Sword]] | ||
|reward = [[Heart Container]]<br> | | boss = [[Stallord|Twilit Fossil: Stallord]] | ||
| reward = [[Heart Container]]<br/>Access to the [[Mirror Chamber]] | |||
| walkthrough = [[zd:twilight-princess-walkthrough/arbiters-grounds|Text Walkthrough (HD)]] | |||
[[zd:twilight-princess-walkthrough/arbiters-grounds-wii|Text Walkthrough (Wii)]] | |||
[https://www.youtube.com/watch?v=fUqidbcL0zY Video Walkthrough (First Two Poes)] | |||
[https://www.youtube.com/watch?v=EB-0qI6hp_4 Video Walkthrough (Third Poe)] | |||
[https://www.youtube.com/watch?v=znwI2PSDpEQ Video Walkthrough (Fourth Poe)] | |||
[https://www.youtube.com/watch?v=uTImzlU3KPw Video Walkthrough (Death Sword)] | |||
[https://www.youtube.com/watch?v=muyrnHM_vvs Video Walkthrough (Stallord)] | |||
[https://www.youtube.com/watch?v=b0nC5alkcrU Video Walkthrough (Mirror of Twilight)] | |||
}} | }} | ||
{{ZD|[[zd:twilight-princess-walkthrough/arbiters-grounds|''Twilight Princess'' Walkthrough<br/>Chapter 13: Arbiter's Grounds]]}} | |||
'''Arbiter's Grounds''' is the fourth [[dungeon]] in ''[[The Legend of Zelda: Twilight Princess|Twilight Princess]]''. The grounds act as prison, set to house the most dangerous and worst criminals within [[Hyrule]]. At the top of the grounds lies the [[Mirror Chamber]], which is watched over by the [[Ancient Sages]] and is the place where the worst criminals where sent to be executed. The dungeon itself is largely derelict and has been taken over by evil spirits and is roamed by the undead. | |||
== | ==Story== | ||
[[Link (Twilight Princess)|Link]] and [[Midna]] go to the Arbiter's Grounds in search of the only connection to the [[Twilight Realm]], the [[Mirror of Twilight]]. Arbiter's Grounds is located at the furthest north point of the [[Gerudo Desert]]. Link is told by [[Auru]] that Arbiter's Grounds was home to the worst criminals the land of Hyrule had ever seen.{{Ref|TP|2772|[[Auru]]}} He talks of a mirror that was used to send the criminals that were sentenced to death directly to the underworld.{{Ref|TP|2773|Auru}} Link and Midna make the connection to the Mirror of Twilight,{{Ref|TP|1652|Midna}} and decide to go there to search for it. | |||
When Link first enters the dungeon, giant [[Big Poe|Poes]] steal the light from the four torches, reminiscent of the [[Forest Temple (Ocarina of Time)|Forest Temple]] of ''[[The Legend of Zelda: Ocarina of Time|Ocarina of Time]]''. Before Link can go any further into the dungeon, he must explore all of the side rooms looking for the Poes to take back the light they stole from the torches. After learning the [[Poe Scent]], it becomes much easier for [[Wolf Link]] to search, as the scent guides the young hero directly to each Poe. After killing all of the Poes, he soon engages in a battle with the [[Mini-Boss]] of the dungeon, the [[Death Sword]]. After defeating it, Link is rewarded with the [[Spinner]]. In this dungeon, Spinner tracks are common, allowing Link to reach places otherwise unaccessable. Link uses the Spinner to reach the boss, [[Stallord]]. It is a fossil, which [[Zant]] brings back to life with his sword. Link must use the spinner to kill Stallord, and he does. Link and Midna enter the Mirror Chamber, where they predict the Mirror of Twilight lies. After Link uses the Spinner to raise the mirror from underground, they only find a quarter of the mirror. They are told by the [[Ancient Sages]] that the mirror has been broken into four pieces.{{Ref|TP|1706|Ancient Sages}} They tell Link the locations of the pieces{{Ref|TP|1721|Ancient Sages}}{{Ref|TP|1722|Ancient Sages}}{{Ref|TP|1723|Ancient Sages}} and tell him that he can repair the Mirror{{Ref|TP|1724|Ancient Sages}} and defeat Zant, and [[Ganon]]dorf. | |||
==Enemies== | |||
Here are all the enemies that Link will encounter as he travels through Arbiter's Grounds. | |||
== | <gallery widths=80 heights=80 caption="Enemies in Arbiter's Grounds" perrow=12> | ||
File:TP-Big-Poe.png|link=Big Poe|[[Big Poe]] | |||
File:Bladetrap.jpg|link=Blade Trap|[[Blade Trap]] | |||
File:Bubble (TP).png|link=Bubble|[[Bubble]] | |||
File:FireBubble.png|link=Fire Bubble|[[Fire Bubble]] | |||
File:Ghoulratr.jpg|link=Ghoul Rat|[[Ghoul Rat]] | |||
File:Moldorm.jpg|link=Moldorm|[[Moldorm]] | |||
File:Rat.jpg|link=Rat|[[Rat]] | |||
File:Redead.jpg|link=ReDead|[[ReDead]] | |||
File:Scarab.png|link=Poison Mite|[[Poison Mite]] | |||
File:Stalfos Artwork (Twilight Princess).png|link=Stalfos|[[Stalfos]] | |||
File:Stalkin.png|link=Stalkin|[[Stalkin]] | |||
File:Staltroop.png|link=Staltroop|[[Staltroop]] | |||
</gallery> | |||
==Death Sword== | |||
{{Main|Death Sword}} | |||
[[File:TP Death Sword.png|150px|right]] | |||
The Mini-Boss of Arbiter's Grounds is known as the Death Sword. It is a demonic looking figure that wields a gigantic sword. In the first phase of the battle against the Death Sword, it appears invisible to Link. The only way Link is able to see it is by becoming Wolf Link and using his senses. In the second phase of the battle, it is visible without Link's senses. During the battle, the Death Sword floats around mid air making it impossible for Link to inflict damage on him with his newly acquired [[Master Sword]]. However, Link can knock the demonic spirit down by using his [[Hero's Bow]]. Once the Death Sword is grounded, Link can attack it unmercifully. After a decent amount of hits, the Death Sword is defeated, and after a bunch of yelling in agony, the Death Sword transforms into multiple black bats. All of these pitch black bats will fly away through an apparent hole in the ceiling. Now that the Death Sword has been defeated, the door leading to the [[Treasure Chest|chest]] that contains the Spinner opens. | |||
== Twilit Fossil: Stallord == | ==Twilit Fossil: Stallord== | ||
[[File: | {{Main|Stallord}} | ||
The [[Boss]] of Arbiter's Grounds is known as | [[File:Stallord Large.png|180px|left]] | ||
The [[Boss]] of Arbiter's Grounds is known as the Twilit Fossil: Stallord. It is a skeleton of a giant beast that is predicted to have died long ago. Upon entrance to the area where the giant fossil lies, Link spots Stallord half submerged in sand, seemingly dead. If he walks up to Stallord, Zant appears on top of its forehead. The King of Shadows says that he is surprised to see Link alive,{{Ref|TP|6967|Zant}} and then tells Link this shall be the last time he sees him alive.{{Ref|TP|6969|Zant}} Zant then summons a giant sword, which appears to originate from the Twilight Realm, and uses it to stab Stallord right in the forehead. After he leaves, Stallord seemingly wakes up, thus initiating the boss fight. Link then proceeds to defeat Stallord in both phases of the battle. His reward for doing so is a [[Heart Container]] and entrance to the Mirror Chamber, where the Mirror of Twilight lies. | |||
{{Clear}} | |||
==Dungeon Items== | |||
Throughout Link's travels through the Arbiter's Grounds, he has the opportunity to collect certain Dungeon Items that will greatly assist him. They are the [[Dungeon Map]], the [[Compass]], the [[Big Key]], and the [[Small Key]]s. | |||
== Dungeon | ===Dungeon Map=== | ||
{{Main|Dungeon Map}} | |||
[[File:Dungeon Map - TPHD icon.png|90px|left]] | |||
The Dungeon Map is found in the main room of the dungeon, the room with the four torches. The first time Link enters this room, he can get it. After killing the first Poe, Link finally gets the freedom to look around. The Dungeon Map is located to the right of the four torches, across a sandpit. Link traverses the sand and opens the chest, which contains the Dungeon Map. | |||
{{Clear}} | |||
===Compass=== | |||
{{Main|Compass}} | |||
[[File:Compass - TPHD icon.png|90px|left]] | |||
The Compass is found in chest by Link as he searches for the third [[Poe Soul]]. It allows Link to see the location of every Treasure Chest that lies in the dungeon. It also shows Link the location of the Boss. | |||
{{Clear}} | |||
===Big Key=== | |||
{{Main|Big Key}} | |||
[[File:Big Key - TPHD icon.png|90px|left]] | |||
The Big Key is found in the room that lies right in front of the room with the four torches. Link is unable to get it from here because it lies across a pit of bottomless sand. He must instead travel around the dungeon in order to get to the other side. The Big Key allows Link the ability to open the door that leads to the Boss. | |||
{{Clear}} | |||
===Small Keys=== | |||
{{Main|Small Key}} | |||
Throughout the Arbiter's Grounds Link must collect five different Small Keys that will open five different locked doors. They are all found in Treasure Chests throughout the dungeon. | |||
==Treasure Chests== | |||
There are nineteen different Treasure Chests located in the Arbiter's Grounds. These chests are found in every corner of the dungeon. All of them contain useful items that helps the young hero in some way. The items Link can find in these chests include [[Rupee]]s, Dungeon Items, [[Piece of Heart|Pieces of Heart]], Equipment, and Regular Items. | |||
=== | ===Rupees=== | ||
In total, there are five chests in the Arbiter's Grounds that contain any amount of Rupees. Two of those five chests contain a [[Rupee|Yellow Rupee]], which is ten Rupees. The other three contain [[Rupee|Red Rupee]]s, which are worth 20 Rupees. In total, Link can collect 80 Rupees. | |||
===Dungeon Items=== | |||
All four Dungeon Items are found in a Treasure Chest. The Dungeon Map is, the Compass is, the Big Key is, and all five Small Keys are as well. | |||
=== | ===Pieces of Heart=== | ||
{{Main|Twilight Princess Heart Pieces}} | |||
There are two Pieces of Heart that can be found in the Arbiter's Grounds. The first one (#27) requires the [[Clawshot]] to reach in Gran Ceremonial Hallway, in the western side next to the main stairs. and the second one (#28) requires the Spinner to reach in the Spunner's Paradise Chamber. | |||
===Equipment=== | |||
There is but a single Treasure Chest in the Arbiter's Grounds that contains any sort of equipment. It contains the Dungeon Item of the Arbiter's Grounds, the Spinner. It is found in a small room directly behind the room where Link fights the Mini-Boss of the dungeon, the Death Sword. | |||
=== | ===Regular Items=== | ||
The final three Treasure Chests in the Arbiter's Grounds contact Regular Items. More specifically they all contain [[Bomb]]s. Two contain five Bombs, and the final one contains ten Bombs. They are found in the room where Link fights his first [[Stalfos]]. They are used as a hint to tell Link he must blow up the Stalfos after shattering it. | |||
==Other Appearances== | |||
===''Link's Crossbow Training''=== | |||
{{Non-Canon|section}} | |||
Stage 5–1, [[Underground Target Practice]], takes place in the Arbiter's Grounds. | |||
However, while Stage 1-3 is named [[Arbiter's Grounds: Ranger]] after the dungeon, it takes place in the nearby [[Bulblin Fortress]] with the Arbiter's Grounds itself only as a backdrop. | |||
===''Breath of the Wild''=== | |||
{{Main|Arbiter's Grounds (Breath of the Wild)}} | |||
Arbiter's Grounds is a location in ''[[The Legend of Zelda: Breath of the Wild|Breath of the Wild]]''. It is a part of the [[Gerudo Desert (Breath of the Wild)|Gerudo Desert]] guarded by a [[Molduga]]. | |||
== | ==Gallery== | ||
<gallery> | |||
File:Arbiter's Grounds Upper Section.jpg|Upper Section of the grounds | |||
</gallery> | |||
{{References}} | |||
{{clear}} | |||
{{Listbox|Twilight Princess Dungeons}} | |||
{{Cat|Twilight Princess Dungeons}} | |||
{{Cat|Twilight Princess Locations}} | {{Cat|Twilight Princess Locations}} | ||
{{ | {{cat|Link's Crossbow Training Locations}} | ||
Latest revision as of 18:28, February 11, 2024

Games | ||
Location | ||
Boss | ||
Mini-bosses | ||
Enemies | ||
Items | ||
Rewards | Heart Container | |
| Guides | ||
|---|---|---|
Walkthrough | ||
In-depth guide:
Twilight Princess Walkthrough Chapter 13: Arbiter's Grounds |
Arbiter's Grounds is the fourth dungeon in Twilight Princess. The grounds act as prison, set to house the most dangerous and worst criminals within Hyrule. At the top of the grounds lies the Mirror Chamber, which is watched over by the Ancient Sages and is the place where the worst criminals where sent to be executed. The dungeon itself is largely derelict and has been taken over by evil spirits and is roamed by the undead.
Story
Link and Midna go to the Arbiter's Grounds in search of the only connection to the Twilight Realm, the Mirror of Twilight. Arbiter's Grounds is located at the furthest north point of the Gerudo Desert. Link is told by Auru that Arbiter's Grounds was home to the worst criminals the land of Hyrule had ever seen.[1] He talks of a mirror that was used to send the criminals that were sentenced to death directly to the underworld.[2] Link and Midna make the connection to the Mirror of Twilight,[3] and decide to go there to search for it.
When Link first enters the dungeon, giant Poes steal the light from the four torches, reminiscent of the Forest Temple of Ocarina of Time. Before Link can go any further into the dungeon, he must explore all of the side rooms looking for the Poes to take back the light they stole from the torches. After learning the Poe Scent, it becomes much easier for Wolf Link to search, as the scent guides the young hero directly to each Poe. After killing all of the Poes, he soon engages in a battle with the Mini-Boss of the dungeon, the Death Sword. After defeating it, Link is rewarded with the Spinner. In this dungeon, Spinner tracks are common, allowing Link to reach places otherwise unaccessable. Link uses the Spinner to reach the boss, Stallord. It is a fossil, which Zant brings back to life with his sword. Link must use the spinner to kill Stallord, and he does. Link and Midna enter the Mirror Chamber, where they predict the Mirror of Twilight lies. After Link uses the Spinner to raise the mirror from underground, they only find a quarter of the mirror. They are told by the Ancient Sages that the mirror has been broken into four pieces.[4] They tell Link the locations of the pieces[5][6][7] and tell him that he can repair the Mirror[8] and defeat Zant, and Ganondorf.
Enemies
Here are all the enemies that Link will encounter as he travels through Arbiter's Grounds.
- Enemies in Arbiter's Grounds


Death Sword
- Main article: Death Sword

The Mini-Boss of Arbiter's Grounds is known as the Death Sword. It is a demonic looking figure that wields a gigantic sword. In the first phase of the battle against the Death Sword, it appears invisible to Link. The only way Link is able to see it is by becoming Wolf Link and using his senses. In the second phase of the battle, it is visible without Link's senses. During the battle, the Death Sword floats around mid air making it impossible for Link to inflict damage on him with his newly acquired Master Sword. However, Link can knock the demonic spirit down by using his Hero's Bow. Once the Death Sword is grounded, Link can attack it unmercifully. After a decent amount of hits, the Death Sword is defeated, and after a bunch of yelling in agony, the Death Sword transforms into multiple black bats. All of these pitch black bats will fly away through an apparent hole in the ceiling. Now that the Death Sword has been defeated, the door leading to the chest that contains the Spinner opens.
Twilit Fossil: Stallord
- Main article: Stallord

The Boss of Arbiter's Grounds is known as the Twilit Fossil: Stallord. It is a skeleton of a giant beast that is predicted to have died long ago. Upon entrance to the area where the giant fossil lies, Link spots Stallord half submerged in sand, seemingly dead. If he walks up to Stallord, Zant appears on top of its forehead. The King of Shadows says that he is surprised to see Link alive,[9] and then tells Link this shall be the last time he sees him alive.[10] Zant then summons a giant sword, which appears to originate from the Twilight Realm, and uses it to stab Stallord right in the forehead. After he leaves, Stallord seemingly wakes up, thus initiating the boss fight. Link then proceeds to defeat Stallord in both phases of the battle. His reward for doing so is a Heart Container and entrance to the Mirror Chamber, where the Mirror of Twilight lies.
Dungeon Items
Throughout Link's travels through the Arbiter's Grounds, he has the opportunity to collect certain Dungeon Items that will greatly assist him. They are the Dungeon Map, the Compass, the Big Key, and the Small Keys.
Dungeon Map
- Main article: Dungeon Map
The Dungeon Map is found in the main room of the dungeon, the room with the four torches. The first time Link enters this room, he can get it. After killing the first Poe, Link finally gets the freedom to look around. The Dungeon Map is located to the right of the four torches, across a sandpit. Link traverses the sand and opens the chest, which contains the Dungeon Map.
Compass
- Main article: Compass
The Compass is found in chest by Link as he searches for the third Poe Soul. It allows Link to see the location of every Treasure Chest that lies in the dungeon. It also shows Link the location of the Boss.
Big Key
- Main article: Big Key
The Big Key is found in the room that lies right in front of the room with the four torches. Link is unable to get it from here because it lies across a pit of bottomless sand. He must instead travel around the dungeon in order to get to the other side. The Big Key allows Link the ability to open the door that leads to the Boss.
Small Keys
- Main article: Small Key
Throughout the Arbiter's Grounds Link must collect five different Small Keys that will open five different locked doors. They are all found in Treasure Chests throughout the dungeon.
Treasure Chests
There are nineteen different Treasure Chests located in the Arbiter's Grounds. These chests are found in every corner of the dungeon. All of them contain useful items that helps the young hero in some way. The items Link can find in these chests include Rupees, Dungeon Items, Pieces of Heart, Equipment, and Regular Items.
Rupees
In total, there are five chests in the Arbiter's Grounds that contain any amount of Rupees. Two of those five chests contain a Yellow Rupee, which is ten Rupees. The other three contain Red Rupees, which are worth 20 Rupees. In total, Link can collect 80 Rupees.
Dungeon Items
All four Dungeon Items are found in a Treasure Chest. The Dungeon Map is, the Compass is, the Big Key is, and all five Small Keys are as well.
Pieces of Heart
- Main article: Twilight Princess Heart Pieces
There are two Pieces of Heart that can be found in the Arbiter's Grounds. The first one (#27) requires the Clawshot to reach in Gran Ceremonial Hallway, in the western side next to the main stairs. and the second one (#28) requires the Spinner to reach in the Spunner's Paradise Chamber.
Equipment
There is but a single Treasure Chest in the Arbiter's Grounds that contains any sort of equipment. It contains the Dungeon Item of the Arbiter's Grounds, the Spinner. It is found in a small room directly behind the room where Link fights the Mini-Boss of the dungeon, the Death Sword.
Regular Items
The final three Treasure Chests in the Arbiter's Grounds contact Regular Items. More specifically they all contain Bombs. Two contain five Bombs, and the final one contains ten Bombs. They are found in the room where Link fights his first Stalfos. They are used as a hint to tell Link he must blow up the Stalfos after shattering it.
Other Appearances
Link's Crossbow Training
| This section describes a subject that is or may be outside the core Zelda canon. |
Stage 5–1, Underground Target Practice, takes place in the Arbiter's Grounds.
However, while Stage 1-3 is named Arbiter's Grounds: Ranger after the dungeon, it takes place in the nearby Bulblin Fortress with the Arbiter's Grounds itself only as a backdrop.
Breath of the Wild
- Main article: Arbiter's Grounds (Breath of the Wild)
Arbiter's Grounds is a location in Breath of the Wild. It is a part of the Gerudo Desert guarded by a Molduga.
Gallery
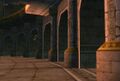
Upper Section of the grounds

References
- ↑ "The Gerudo Desert once held a prison built to hold the worst criminals this land has ever known..." — Auru, Twilight Princess.
- ↑ "The criminals who were sentenced to death were sent directly to the underworld by a cursed mirror that was kept in the prison..." — Auru, Twilight Princess.
- ↑ "A cursed mirror that sends people to another realm... That sounds like the Mirror of Twilight." — Midna, Twilight Princess.
- ↑ "You seek it...but the Mirror of Twilight has been fragmented by mighty magic." — Ancient Sages, Twilight Princess.
- ↑ "One is in the snowy mountain heights..." — Ancient Sages, Twilight Princess.
- ↑ "One is in an ancient grove..." — Ancient Sages, Twilight Princess.
- ↑ "And one is in the heavens..." — Ancient Sages, Twilight Princess.
- ↑ "You who have been sent by the goddesses... You should be able to gather the three pieces..." — Ancient Sages, Twilight Princess.
- ↑ "You still live... How astonishing. No wonder some call you "hero."" — Zant, Twilight Princess.
- ↑ "For I fear this is the last time I will see you alive!" — Zant, Twilight Princess.