Gallery:A Link Between Worlds Characters: Difference between revisions
Jump to navigation
Jump to search
Want an adless experience? Log in or Create an account.
mNo edit summary |
mNo edit summary |
||
| Line 36: | Line 36: | ||
{{Gallery/Box|file=Customer.png|link=Customer|caption=[[Customer]]}} | {{Gallery/Box|file=Customer.png|link=Customer|caption=[[Customer]]}} | ||
{{Gallery/Box|file=Dampe-A-Link-Between-Worlds.png|link=Dampé|caption=[[Dampé]]}} | {{Gallery/Box|file=Dampe-A-Link-Between-Worlds.png|link=Dampé|caption=[[Dampé]]}} | ||
{{Gallery/Box|file=|link=Flute Boy (A Link Between Worlds)|caption=[[Flute Boy (A Link Between Worlds)|Flute Boy]]}} | {{Gallery/Box|file=No Image.png|link=Flute Boy (A Link Between Worlds)|caption=[[Flute Boy (A Link Between Worlds)|Flute Boy]]}} | ||
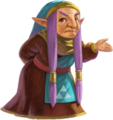
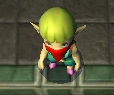
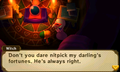
{{Gallery/Box|file=|link=Fortune Teller|caption=[[Fortune Teller|Fortune-Teller]]}} | {{Gallery/Box|file=No Image.png|link=Fortune Teller|caption=[[Fortune Teller|Fortune-Teller]]}} | ||
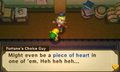
{{Gallery/Box|file=|link=Fortune's Choice Guy (Hyrule)|caption=[[Fortune's Choice Guy (Hyrule)|Fortune's Choice Guy]]}} | {{Gallery/Box|file=No Image.png|link=Fortune's Choice Guy (Hyrule)|caption=[[Fortune's Choice Guy (Hyrule)|Fortune's Choice Guy]]}} | ||
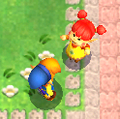
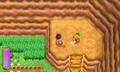
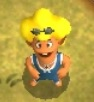
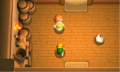
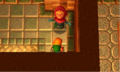
{{Gallery/Box|file=Link and Girl - ALBW.png|link=Girl|caption=[[Girl]]}} | {{Gallery/Box|file=Link and Girl - ALBW.png|link=Girl|caption=[[Girl]]}} | ||
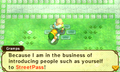
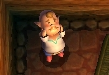
{{Gallery/Box|file=Gramps shilling StreetPass - ALBW.png|link=Gramps|caption=[[Gramps]]}} | {{Gallery/Box|file=Gramps shilling StreetPass - ALBW.png|link=Gramps|caption=[[Gramps]]}} | ||
{{Gallery/Box|file=|link=Great Fairy|caption=[[Great Fairy]]}} | {{Gallery/Box|file=No Image.png|link=Great Fairy|caption=[[Great Fairy]]}} | ||
{{Gallery/Box|file=Hint-Ghost-Artwork.png|link=Hint Ghost|caption=[[Hint Ghost]]}} | {{Gallery/Box|file=Hint-Ghost-Artwork.png|link=Hint Ghost|caption=[[Hint Ghost]]}} | ||
{{Gallery/Box|file=The_housekeeper_2015-11-19_18-50.png|link=Housekeeper|caption=[[Housekeeper]]}} | {{Gallery/Box|file=The_housekeeper_2015-11-19_18-50.png|link=Housekeeper|caption=[[Housekeeper]]}} | ||
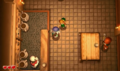
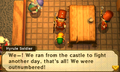
{{Gallery/Box|file=Hyrule Soldiers ran away - ALBW.png|link=Hyrule Soldiers|caption=[[Hyrule Soldiers]]}} | {{Gallery/Box|file=Hyrule Soldiers ran away - ALBW.png|link=Hyrule Soldiers|caption=[[Hyrule Soldiers]]}} | ||
{{Gallery/Box|file=Kakariko Village Item Seller.png|link=Item Seller (Hyrule)|caption=[[Item Seller (Hyrule)|Item Seller]]}} | {{Gallery/Box|file=Kakariko Village Item Seller.png|link=Item Seller (Hyrule)|caption=[[Item Seller (Hyrule)|Item Seller]]}} | ||
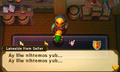
{{Gallery/Box|file=|link=Lakeside Item Seller (Hyrule)|caption=[[Lakeside Item Seller (Hyrule)|Lakeside Item Seller]]}} | {{Gallery/Box|file=No Image.png|link=Lakeside Item Seller (Hyrule)|caption=[[Lakeside Item Seller (Hyrule)|Lakeside Item Seller]]}} | ||
{{Gallery/Box|file=Maiamai.png|link=Maiamai|caption=[[Maiamai]]s}} | {{Gallery/Box|file=Maiamai.png|link=Maiamai|caption=[[Maiamai]]s}} | ||
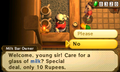
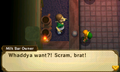
{{Gallery/Box|file=Milk Bar Owner - Hyrule ALBW.png|link=Milk Bar Owner (Hyrule)|caption=[[Milk Bar Owner (Hyrule)|Milk Bar Owner]]}} | {{Gallery/Box|file=Milk Bar Owner - Hyrule ALBW.png|link=Milk Bar Owner (Hyrule)|caption=[[Milk Bar Owner (Hyrule)|Milk Bar Owner]]}} | ||
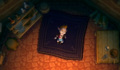
{{Gallery/Box|file=MotherMaiamai.jpeg|link=Mother Maiamai|caption=[[Mother Maiamai]]}} | {{Gallery/Box|file=MotherMaiamai.jpeg|link=Mother Maiamai|caption=[[Mother Maiamai]]}} | ||
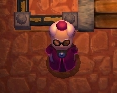
{{Gallery/Box|file=Official.png|link=Official|caption=[[Official]]}} | {{Gallery/Box|file=Official.png|link=Official|caption=[[Official]]}} | ||
{{Gallery/Box|file=|link=Papa|caption=[[Papa]]}} | {{Gallery/Box|file=No Image.png|link=Papa|caption=[[Papa]]}} | ||
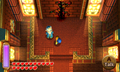
{{Gallery/Box|file=Priest.png|link=Priest|caption=[[Priest]]}} | {{Gallery/Box|file=Priest.png|link=Priest|caption=[[Priest]]}} | ||
{{Gallery/Box|file=ABLW-HP-14a.png|link=Racing Bros|caption=[[Younger Racing Bro]]}} | {{Gallery/Box|file=ABLW-HP-14a.png|link=Racing Bros|caption=[[Younger Racing Bro]]}} | ||
{{Gallery/Box|file=ABLW-HP-14b.png|link=Racing Bros|caption=[[Older Racing Bro]]}} | {{Gallery/Box|file=ABLW-HP-14b.png|link=Racing Bros|caption=[[Older Racing Bro]]}} | ||
{{Gallery/Box|file=|link=Rumor Guy|caption=[[Rumor Guy]]}} | {{Gallery/Box|file=No Image.png|link=Rumor Guy|caption=[[Rumor Guy]]}} | ||
{{Gallery/Box|file=Runaway Item Seller.png|link=Runaway Item Seller|caption=[[Runaway Item Seller]]}} | {{Gallery/Box|file=Runaway Item Seller.png|link=Runaway Item Seller|caption=[[Runaway Item Seller]]}} | ||
{{Gallery/Box|file=|link=Rupee Rush Gal|caption=[[Rupee Rush Gal]]}} | {{Gallery/Box|file=No Image.png|link=Rupee Rush Gal|caption=[[Rupee Rush Gal]]}} | ||
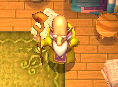
{{Gallery/Box|file=Sahasrahla.png|link=Sahasrahla (A Link Between Worlds)|caption=[[Sahasrahla (A Link Between Worlds)|Sahasrahla]]}} | {{Gallery/Box|file=Sahasrahla.png|link=Sahasrahla (A Link Between Worlds)|caption=[[Sahasrahla (A Link Between Worlds)|Sahasrahla]]}} | ||
{{Gallery/Box|file=Shady Guy - Hyrule ALBW.png|link=Shady Guy|caption=[[Shady Guy]]}} | {{Gallery/Box|file=Shady Guy - Hyrule ALBW.png|link=Shady Guy|caption=[[Shady Guy]]}} | ||
| Line 63: | Line 63: | ||
{{Gallery/Box|file=ABLW-HP-15b.png|link=Stylish Woman|caption=[[Stylish Woman]]}} | {{Gallery/Box|file=ABLW-HP-15b.png|link=Stylish Woman|caption=[[Stylish Woman]]}} | ||
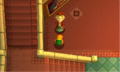
{{Gallery/Box|file=Swimmer.png|link=Swimmer|caption=[[Swimmer]]}} | {{Gallery/Box|file=Swimmer.png|link=Swimmer|caption=[[Swimmer]]}} | ||
{{Gallery/Box|file=|link=Treasure Hunter|caption=[[Treasure Hunter]]}} | {{Gallery/Box|file=No Image.png|link=Treasure Hunter|caption=[[Treasure Hunter]]}} | ||
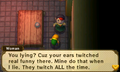
{{Gallery/Box|file=Witchs-House.png|link=Witch (Hyrule)|caption=[[Witch (Hyrule)|Witch]]}} | {{Gallery/Box|file=Witchs-House.png|link=Witch (Hyrule)|caption=[[Witch (Hyrule)|Witch]]}} | ||
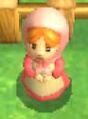
{{Gallery/Box|file=Woman-Hyrule.png|link=Woman (Hyrule)|caption=[[Woman (Hyrule)|Woman]]}} | {{Gallery/Box|file=Woman-Hyrule.png|link=Woman (Hyrule)|caption=[[Woman (Hyrule)|Woman]]}} | ||
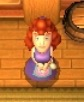
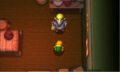
{{Gallery/Box|file=Young-Woman-Hyrule.png|link=Young Woman (Hyrule)|caption=[[Young Woman (Hyrule)|Young Woman]]}} | {{Gallery/Box|file=Young-Woman-Hyrule.png|link=Young Woman (Hyrule)|caption=[[Young Woman (Hyrule)|Young Woman]]}} | ||
{{Gallery/Box|file=|link=Zora Underlings|caption=[[Zora Underlings]]}} | {{Gallery/Box|file=No Image.png|link=Zora Underlings|caption=[[Zora Underlings]]}} | ||
{{Gallery/Bottom}}</center> | {{Gallery/Bottom}}</center> | ||
| Line 79: | Line 79: | ||
{{Gallery/Box|file=Bomb-Shop-Man.png|link=Bomb-Shop Man|caption=[[Bomb-Shop Man]]}} | {{Gallery/Box|file=Bomb-Shop-Man.png|link=Bomb-Shop Man|caption=[[Bomb-Shop Man]]}} | ||
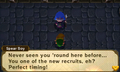
{{Gallery/Box|file=Lorule Captain.png|link=Captain (Lorule)|caption=[[Captain (Lorule)|Captain]]}} | {{Gallery/Box|file=Lorule Captain.png|link=Captain (Lorule)|caption=[[Captain (Lorule)|Captain]]}} | ||
{{Gallery/Box|file=|link=Cowardly Hinox|caption=[[Cowardly Hinox]]}} | {{Gallery/Box|file=No Image.png|link=Cowardly Hinox|caption=[[Cowardly Hinox]]}} | ||
{{Gallery/Box|file=CraftsmanLorule.png|link=Craftsman (Lorule)|caption=[[Craftsman (Lorule)|Craftsman]]}} | {{Gallery/Box|file=CraftsmanLorule.png|link=Craftsman (Lorule)|caption=[[Craftsman (Lorule)|Craftsman]]}} | ||
{{Gallery/Box|file=|link=Dampé?|caption=[[Dampé?]]}} | {{Gallery/Box|file=No Image.png|link=Dampé?|caption=[[Dampé?]]}} | ||
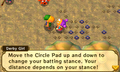
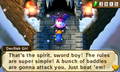
{{Gallery/Box|file=Derby Boy - Lorule ALBW.png|link=Derby Boy|caption=[[Derby Boy]]}} | {{Gallery/Box|file=Derby Boy - Lorule ALBW.png|link=Derby Boy|caption=[[Derby Boy]]}} | ||
{{Gallery/Box|file=Derby Girl - Lorule ALBW.png|link=Derby Girl|caption=[[Derby Girl]]}} | {{Gallery/Box|file=Derby Girl - Lorule ALBW.png|link=Derby Girl|caption=[[Derby Girl]]}} | ||
| Line 87: | Line 87: | ||
{{Gallery/Box|file=Dungeon Bro 1.png|link=Dungeon Bros|caption=[[Dungeon Bros|Younger Dungeon Bro]]}} | {{Gallery/Box|file=Dungeon Bro 1.png|link=Dungeon Bros|caption=[[Dungeon Bros|Younger Dungeon Bro]]}} | ||
{{Gallery/Box|file=Older-Dungeon-Bro.png|link=Dungeon Bros|caption=[[Dungeon Bros|Older Dungeon Bro]]}} | {{Gallery/Box|file=Older-Dungeon-Bro.png|link=Dungeon Bros|caption=[[Dungeon Bros|Older Dungeon Bro]]}} | ||
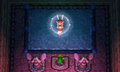
{{Gallery/Box|file=|link=Fortune-Teller (Lorule)|caption=[[Fortune-Teller (Lorule)|Fortune-Teller]]}} | {{Gallery/Box|file=No Image.png|link=Fortune-Teller (Lorule)|caption=[[Fortune-Teller (Lorule)|Fortune-Teller]]}} | ||
{{Gallery/Box|file=Fortune Choice Guy - Lorule ALBW.png|link=Fortune's Choice Guy (Lorule)|caption=[[Fortune's Choice Guy (Lorule)|Fortune's Choice Guy]]}} | {{Gallery/Box|file=Fortune Choice Guy - Lorule ALBW.png|link=Fortune's Choice Guy (Lorule)|caption=[[Fortune's Choice Guy (Lorule)|Fortune's Choice Guy]]}} | ||
{{Gallery/Box|file=|link=Great Fairy|caption=[[Great Fairy]]}} | {{Gallery/Box|file=No Image.png|link=Great Fairy|caption=[[Great Fairy]]}} | ||
{{Gallery/Box|file=Great Rupee Fairy - Lorule ALBW.png|link=Great Rupee Fairy|caption=[[Great Rupee Fairy]]}} | {{Gallery/Box|file=Great Rupee Fairy - Lorule ALBW.png|link=Great Rupee Fairy|caption=[[Great Rupee Fairy]]}} | ||
{{Gallery/Box|file=Hint-Ghost-Artwork.png|link=Hint Ghost|caption=[[Hint Ghost]]}} | {{Gallery/Box|file=Hint-Ghost-Artwork.png|link=Hint Ghost|caption=[[Hint Ghost]]}} | ||
{{Gallery/Box|file=Item Seller Thieves Town - Lorule ALBW.png|link=Item Seller (Lorule)|caption=[[Item Seller (Lorule)|Item Seller]]}} | {{Gallery/Box|file=Item Seller Thieves Town - Lorule ALBW.png|link=Item Seller (Lorule)|caption=[[Item Seller (Lorule)|Item Seller]]}} | ||
{{Gallery/Box|file=Lakeside Item Seller - Lorule ALBW.png|link=Lakeside Item Seller (Lorule)|caption=[[Lakeside Item Seller (Lorule)|Lakeside Item Seller]]}} | {{Gallery/Box|file=Lakeside Item Seller - Lorule ALBW.png|link=Lakeside Item Seller (Lorule)|caption=[[Lakeside Item Seller (Lorule)|Lakeside Item Seller]]}} | ||
{{Gallery/Box|file=|link=Mama Turtle|caption=[[Mama Turtle]]}} | {{Gallery/Box|file=No Image.png|link=Mama Turtle|caption=[[Mama Turtle]]}} | ||
{{Gallery/Box|file=Masked Elder.png|link=Masked Elder|caption=[[Masked Elder]]}} | {{Gallery/Box|file=Masked Elder.png|link=Masked Elder|caption=[[Masked Elder]]}} | ||
{{Gallery/Box|file=Male MaskedFollower.png|link=Masked Follower (Male)|caption=[[Masked Follower (Male)|Masked Follower]]}} | {{Gallery/Box|file=Male MaskedFollower.png|link=Masked Follower (Male)|caption=[[Masked Follower (Male)|Masked Follower]]}} | ||
| Line 103: | Line 103: | ||
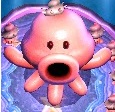
{{Gallery/Box|file=Octo - Lorule ALBW.png|link=Octo|caption=[[Octo]]}} | {{Gallery/Box|file=Octo - Lorule ALBW.png|link=Octo|caption=[[Octo]]}} | ||
{{Gallery/Box|file=Philosopher.png|link=Philosopher|caption=[[Philosopher]]}} | {{Gallery/Box|file=Philosopher.png|link=Philosopher|caption=[[Philosopher]]}} | ||
{{Gallery/Box|file=|link=Rupee Rush Guy|caption=[[Rupee Rush Guy]]}} | {{Gallery/Box|file=No Image.png|link=Rupee Rush Guy|caption=[[Rupee Rush Guy]]}} | ||
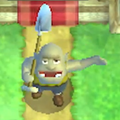
{{Gallery/Box|file=Spear Boy - Lorule ALBW.png|link=Spear Boy|caption=[[Spear Boy]]}} | {{Gallery/Box|file=Spear Boy - Lorule ALBW.png|link=Spear Boy|caption=[[Spear Boy]]}} | ||
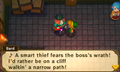
{{Gallery/Box|file=Thife girl.png|link=Thief Girl|caption=[[Thief Girl]]}} | {{Gallery/Box|file=Thife girl.png|link=Thief Girl|caption=[[Thief Girl]]}} | ||
{{Gallery/Box|file=Treasure-Hunter-Lorule.png|link=Treasure Hunter (Lorule)|caption=[[Treasure Hunter (Lorule)|Treasure Hunter]]}} | {{Gallery/Box|file=Treasure-Hunter-Lorule.png|link=Treasure Hunter (Lorule)|caption=[[Treasure Hunter (Lorule)|Treasure Hunter]]}} | ||
{{Gallery/Box|file=|link=Turtle Child|caption=[[Turtle Child]]ren}} | {{Gallery/Box|file=No Image.png|link=Turtle Child|caption=[[Turtle Child]]ren}} | ||
{{Gallery/Box|file=Veteran-Thief.png|link=Veteran Thief|caption=[[Veteran Thief]]}} | {{Gallery/Box|file=Veteran-Thief.png|link=Veteran Thief|caption=[[Veteran Thief]]}} | ||
{{Gallery/Box|file=Witch Lorule - ALBW.png|link=Witch (Lorule)|caption=[[Witch (Lorule)|Witch]]}} | {{Gallery/Box|file=Witch Lorule - ALBW.png|link=Witch (Lorule)|caption=[[Witch (Lorule)|Witch]]}} | ||