Gallery:A Link Between Worlds Characters: Difference between revisions
Jump to navigation
Jump to search
Want an adless experience? Log in or Create an account.
m (→Hyrule: Changed Flute Boy's link) |
m (Updated images and changed/added a few) |
||
| Line 24: | Line 24: | ||
{{Gallery/Box|file=|link=Bard (Hyrule)|caption=[[Bard (Hyrule)|Bard]]}} | {{Gallery/Box|file=|link=Bard (Hyrule)|caption=[[Bard (Hyrule)|Bard]]}} | ||
{{Gallery/Box|file=|link=Bee Guy|caption=[[Bee Guy]]}} | {{Gallery/Box|file=|link=Bee Guy|caption=[[Bee Guy]]}} | ||
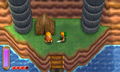
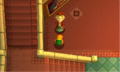
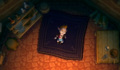
{{Gallery/Box|file=|link=Bird Lover|caption=[[Bird Lover]]}} | {{Gallery/Box|file=Under-the-Bridge-ALBW.png|link=Bird Lover|caption=[[Bird Lover]]}} | ||
{{Gallery/Box|file=Blacksmith-Artwork.png|link=Blacksmith (Hyrule)|caption=[[Blacksmith (Hyrule)|Blacksmith]]}} | {{Gallery/Box|file=Blacksmith-Artwork.png|link=Blacksmith (Hyrule)|caption=[[Blacksmith (Hyrule)|Blacksmith]]}} | ||
{{Gallery/Box|file=|link=Blacksmith's Wife (Hyrule)|caption=[[Blacksmith's Wife (Hyrule)|Blacksmith's Wife]]}} | {{Gallery/Box|file=|link=Blacksmith's Wife (Hyrule)|caption=[[Blacksmith's Wife (Hyrule)|Blacksmith's Wife]]}} | ||
| Line 36: | Line 36: | ||
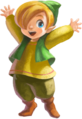
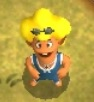
{{Gallery/Box|file=|link=Flute Boy (A Link Between Worlds)|caption=[[Flute Boy (A Link Between Worlds)|Flute Boy]]}} | {{Gallery/Box|file=|link=Flute Boy (A Link Between Worlds)|caption=[[Flute Boy (A Link Between Worlds)|Flute Boy]]}} | ||
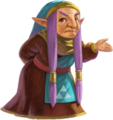
{{Gallery/Box|file=|link=Fortune Teller|caption=[[Fortune Teller|Fortune-Teller]]}} | {{Gallery/Box|file=|link=Fortune Teller|caption=[[Fortune Teller|Fortune-Teller]]}} | ||
{{Gallery/Box|file=|link=Fortune's Choice Guy|caption=[[Fortune's Choice Guy]]}} | {{Gallery/Box|file=|link=Fortune's Choice Guy (Hyrule)|caption=[[Fortune's Choice Guy (Hyrule)|Fortune's Choice Guy]]}} | ||
{{Gallery/Box|file=|link=Girl|caption=[[Girl]]}} | {{Gallery/Box|file=|link=Girl|caption=[[Girl]]}} | ||
{{Gallery/Box|file=|link=Gramps|caption=[[Gramps]]}} | {{Gallery/Box|file=|link=Gramps|caption=[[Gramps]]}} | ||
{{Gallery/Box|file=|link=Great Fairy|caption=[[Great Fairy]]}} | {{Gallery/Box|file=|link=Great Fairy|caption=[[Great Fairy]]}} | ||
{{Gallery/Box|file=|link=Hint Ghost|caption=[[Hint Ghost]]}} | {{Gallery/Box|file=Hint-Ghost-Artwork.png|link=Hint Ghost|caption=[[Hint Ghost]]}} | ||
{{Gallery/Box|file=|link=Housekeeper|caption=[[Housekeeper]]}} | {{Gallery/Box|file=|link=Housekeeper|caption=[[Housekeeper]]}} | ||
{{Gallery/Box|file=|link=Hyrule Soldiers|caption=[[Hyrule Soldiers]]}} | {{Gallery/Box|file=|link=Hyrule Soldiers|caption=[[Hyrule Soldiers]]}} | ||
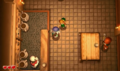
{{Gallery/Box|file=Kakariko Village Item Seller.png|link=Item Seller (Hyrule)|caption=[[Item Seller (Hyrule)|Item Seller]]}} | {{Gallery/Box|file=Kakariko Village Item Seller.png|link=Item Seller (Hyrule)|caption=[[Item Seller (Hyrule)|Item Seller]]}} | ||
{{Gallery/Box|file=|link=Lakeside Item Seller (Hyrule)|caption=[[Lakeside Item Seller (Hyrule)|Lakeside Item Seller]]}} | {{Gallery/Box|file=|link=Lakeside Item Seller (Hyrule)|caption=[[Lakeside Item Seller (Hyrule)|Lakeside Item Seller]]}} | ||
{{Gallery/Box|file=|link=Maiamai|caption=[[Maiamai]]s}} | |||
{{Gallery/Box|file=|link=Milk Bar Owner|caption=[[Milk Bar Owner]]}} | {{Gallery/Box|file=|link=Milk Bar Owner|caption=[[Milk Bar Owner]]}} | ||
{{Gallery/Box|file=MotherMaiamai.jpeg|link=Mother Maiamai|caption=[[Mother Maiamai]]}} | {{Gallery/Box|file=MotherMaiamai.jpeg|link=Mother Maiamai|caption=[[Mother Maiamai]]}} | ||
| Line 58: | Line 59: | ||
{{Gallery/Box|file=|link=Shady Guy|caption=[[Shady Guy]]}} | {{Gallery/Box|file=|link=Shady Guy|caption=[[Shady Guy]]}} | ||
{{Gallery/Box|file=|link=Street Merchant|caption=[[Street Merchant]]}} | {{Gallery/Box|file=|link=Street Merchant|caption=[[Street Merchant]]}} | ||
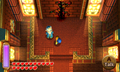
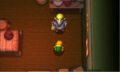
{{Gallery/Box|file=|link=Stylish Woman|caption=[[Stylish Woman]]}} | {{Gallery/Box|file=ABLW-HP-15b.png|link=Stylish Woman|caption=[[Stylish Woman]]}} | ||
{{Gallery/Box|file=Swimmer.png|link=Swimmer|caption=[[Swimmer]]}} | {{Gallery/Box|file=Swimmer.png|link=Swimmer|caption=[[Swimmer]]}} | ||
{{Gallery/Box|file=|link=Treasure Hunter|caption=[[Treasure Hunter]]}} | {{Gallery/Box|file=|link=Treasure Hunter|caption=[[Treasure Hunter]]}} | ||
{{Gallery/Box|file=Witchs-House.png|link=Witch (Hyrule)|caption=[[Witch (Hyrule)|Witch]]}} | {{Gallery/Box|file=Witchs-House.png|link=Witch (Hyrule)|caption=[[Witch (Hyrule)|Witch]]}} | ||
{{Gallery/Box|file=|link=Woman (Hyrule)|caption=[[Woman (Hyrule)|Woman]]}} | {{Gallery/Box|file=Woman-Hyrule.png|link=Woman (Hyrule)|caption=[[Woman (Hyrule)|Woman]]}} | ||
{{Gallery/Box|file=|link=Young Woman (Hyrule)|caption=[[Young Woman (Hyrule)|Young Woman]]}} | {{Gallery/Box|file=|link=Young Woman (Hyrule)|caption=[[Young Woman (Hyrule)|Young Woman]]}} | ||
{{Gallery/Box|file=|link=Zora Underlings|caption=[[Zora Underlings]]}} | {{Gallery/Box|file=|link=Zora Underlings|caption=[[Zora Underlings]]}} | ||
| Line 88: | Line 89: | ||
{{Gallery/Box|file=|link=Great Fairy|caption=[[Great Fairy]]}} | {{Gallery/Box|file=|link=Great Fairy|caption=[[Great Fairy]]}} | ||
{{Gallery/Box|file=|link=Great Rupee Fairy|caption=[[Great Rupee Fairy]]}} | {{Gallery/Box|file=|link=Great Rupee Fairy|caption=[[Great Rupee Fairy]]}} | ||
{{Gallery/Box|file=|link=Hint Ghost|caption=[[Hint Ghost]]}} | {{Gallery/Box|file=Hint-Ghost-Artwork.png|link=Hint Ghost|caption=[[Hint Ghost]]}} | ||
{{Gallery/Box|file=|link=Item Seller (Lorule)|caption=[[Item Seller (Lorule)|Item Seller]]}} | {{Gallery/Box|file=|link=Item Seller (Lorule)|caption=[[Item Seller (Lorule)|Item Seller]]}} | ||
{{Gallery/Box|file=|link=Lakeside Item Seller (Lorule)|caption=[[Lakeside Item Seller (Lorule)|Lakeside Item Seller]]}} | {{Gallery/Box|file=|link=Lakeside Item Seller (Lorule)|caption=[[Lakeside Item Seller (Lorule)|Lakeside Item Seller]]}} | ||
{{Gallery/Box|file=|link=Mama Turtle|caption=[[Mama Turtle]]}} | {{Gallery/Box|file=|link=Mama Turtle|caption=[[Mama Turtle]]}} | ||
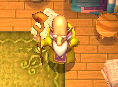
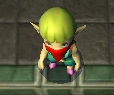
{{Gallery/Box|file=|link=Masked Elder|caption=[[Masked Elder]]}} | {{Gallery/Box|file=Masked Elder.png|link=Masked Elder|caption=[[Masked Elder]]}} | ||
{{Gallery/Box|file=|link=Masked Follower (Male)|caption=[[Masked Follower (Male)|Masked Follower]]}} | {{Gallery/Box|file=Male MaskedFollower.png|link=Masked Follower (Male)|caption=[[Masked Follower (Male)|Masked Follower]]}} | ||
{{Gallery/Box|file=|link=Masked Follower (Female)|caption=[[Masked Follower (Female)|Masked Follower]]}} | {{Gallery/Box|file=Female Masked Follower.png|link=Masked Follower (Female)|caption=[[Masked Follower (Female)|Masked Follower]]}} | ||
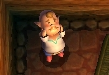
{{Gallery/Box|file=|link=Masked Granny|caption=[[Masked Granny]]}} | {{Gallery/Box|file=Masked Granny.png|link=Masked Granny|caption=[[Masked Granny]]}} | ||
{{Gallery/Box|file=|link=Milk Bar Owner (Lorule)|caption=[[Milk Bar Owner (Lorule)|Milk Bar Owner]]}} | {{Gallery/Box|file=|link=Milk Bar Owner (Lorule)|caption=[[Milk Bar Owner (Lorule)|Milk Bar Owner]]}} | ||
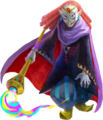
{{Gallery/Box|file=Mysterious Man.png|link=Mysterious Man|caption=[[Mysterious Man]]}} | {{Gallery/Box|file=Mysterious Man.png|link=Mysterious Man|caption=[[Mysterious Man]]}} | ||
| Line 107: | Line 108: | ||
{{Gallery/Box|file=Veteran-Thief.png|link=Veteran Thief|caption=[[Veteran Thief]]}} | {{Gallery/Box|file=Veteran-Thief.png|link=Veteran Thief|caption=[[Veteran Thief]]}} | ||
{{Gallery/Box|file=|link=Witch (Lorule)|caption=[[Witch (Lorule)|Witch]]}} | {{Gallery/Box|file=|link=Witch (Lorule)|caption=[[Witch (Lorule)|Witch]]}} | ||
{{Gallery/Box|file=|link=Woman (Lorule)|caption=[[Woman (Lorule)|Woman]]}} | |||
{{Gallery/Box|file=Young-Woman-Lorule.png|link=Young Woman (Lorule)|caption=[[Young Woman (Lorule)|Young Woman]]}} | {{Gallery/Box|file=Young-Woman-Lorule.png|link=Young Woman (Lorule)|caption=[[Young Woman (Lorule)|Young Woman]]}} | ||
{{Gallery/Bottom}}</center> | {{Gallery/Bottom}}</center> | ||
{{Galleries}} | {{Galleries}} | ||